Guide to Rutted Moor (Updated version 1_35)
-
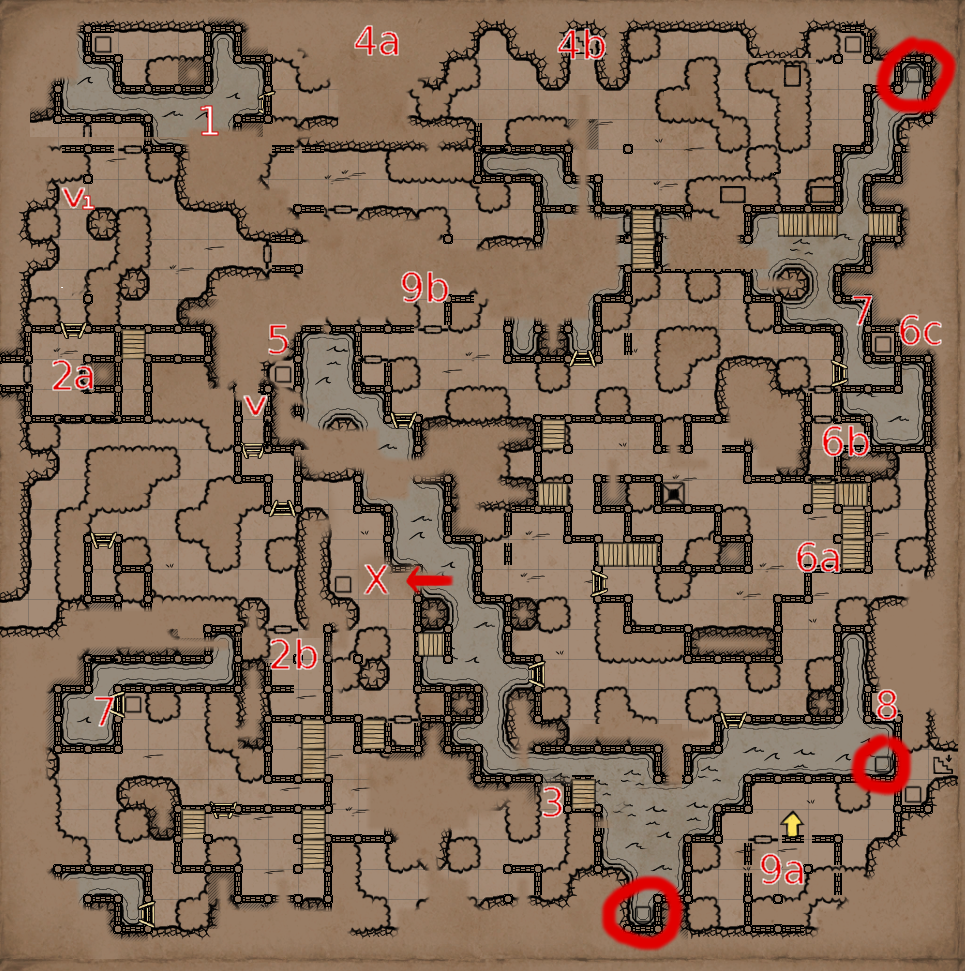
Underwater platform – do as the sign NE dictates and ponder for a while to spawn a magic bridge/teleport. V - Removes the teleporter near V1.
-
Ornate key dropped by the Dolmen at 2a), can be used for the locked door at 2b). The lever SSW of 2b) opens passage to the Dunes. A keylock just SE of 2b) opens a teleport to the southern isle (accessed by crossing the river near X).
-
Use the rusty lever multiple times to lower the bridge next to it. The one east of 9b) gets stuck in place after repairing the bridge to the north of it.
-
Tunnel through the Grotto leading from a) to b). Below, find the timed backdoor teleporter in the water (west) that appears after opening the impassable door.
-
Visit the circles (underwater platforms), then return to step on the plate at 5). The "X" will no longer teleport projectiles back towards you and allow crossing the river once the pressure plate on the other side.
-
Use the levers at 6a), 6b) and the pressure plate at 6c) in order to open the entrance at 6b).
-
In the NE, use the dark bolt spell or the dark wand to "bring the dark" by snuffing out the forest lantern that got lit by the pressure platform. In the SW, you need to lower the spear barrier first.
-
Pressure plate opening the ruins at 9a). The lever nearby lowers a bridge to the main land.
-
Defeat the crab at 9a) to open the sealed ruins in the center at 9b). Use another ornate key to escape, the snake holds the graveyard key, granting access to another optional area.
A word of warning: The laboratory west of 7) can be quite challenging for an inexperienced party and you will get trapped and have to fight through. Make sure you do a hard save before entering this dungeon.
Bunkerknacker