If you've ever rigged a model for Petroglyph's Alamo games either by using a vanilla skeleton or a custom one, you've probably encountered this insane issue:

Knowing that without any skin modifier the mesh looks correct I could narrow the issue down to a rigging problem.
First thing I decided to do, was to check whether Alamo recognises all of my bones. The way to do so is to enable Show bones and Show bone names. Once visible I was able to confirm that all of the bones are indeed there, but the geometry assigned to some of bones is being pushed into abyss. Another step was to check whether the shader applied recognises the bones. Luckily enough Petroglyph devs included a good "debugging tool" in the details tab:
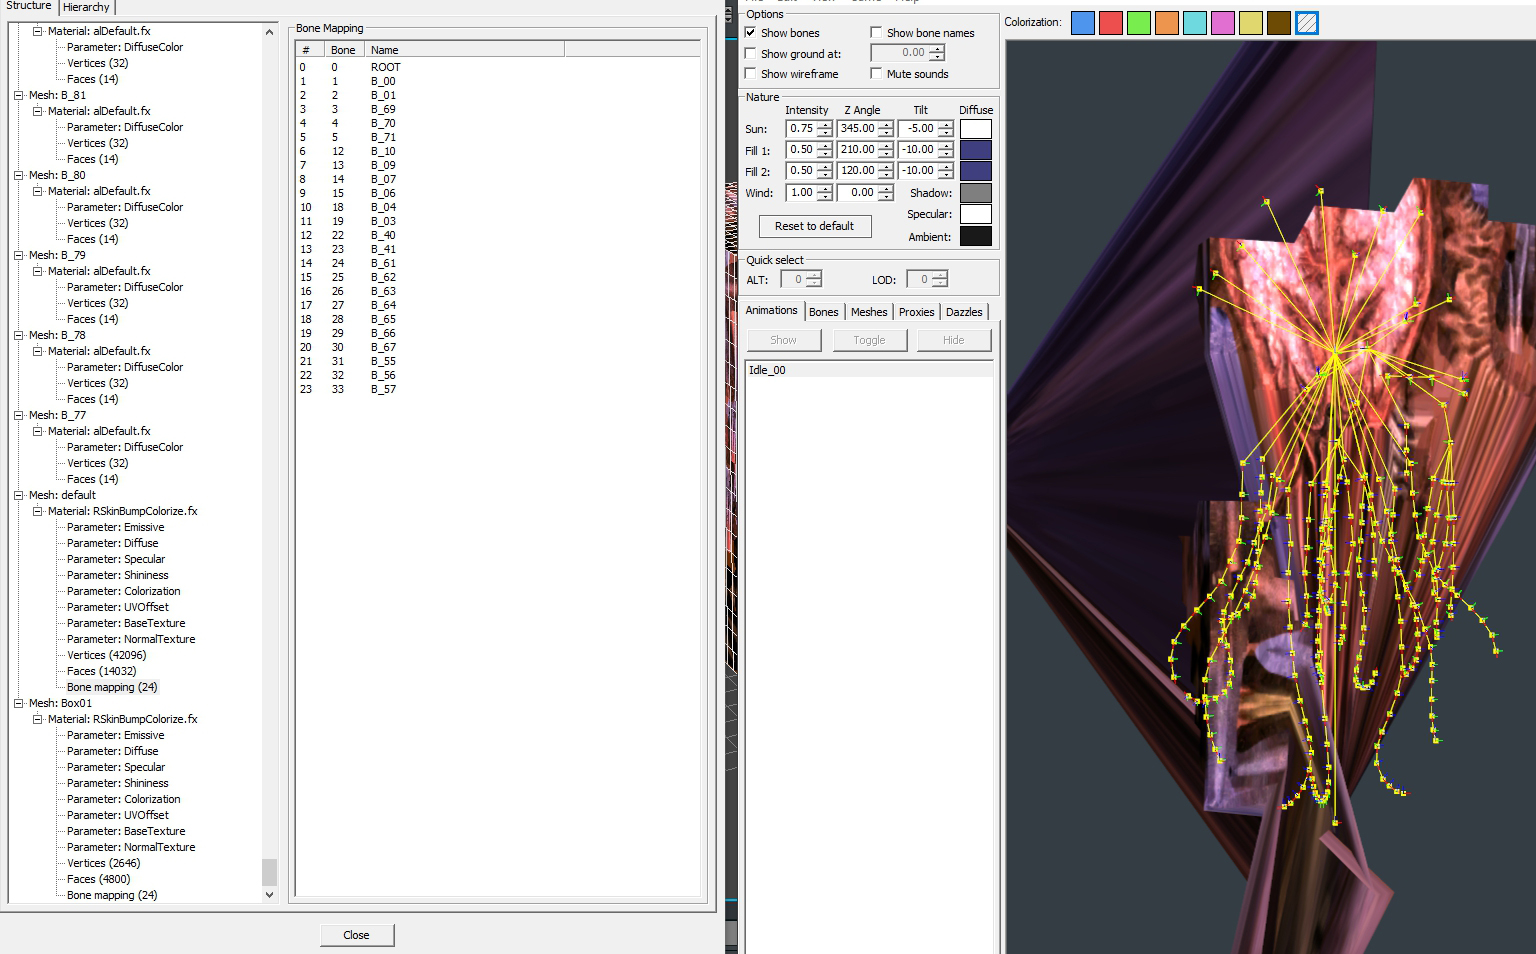
And that's where I found out the root of the problem. The standard RSkinBumpColorize acknowledges only 24 bones, despite all of them being imported in. So the next step was to look into the shader and see what's happening there. You will these files in your 3ds Max 8 folder in the Maps/fx directory. Once opened using a notepad we can spot a couple of crucial things:
In order to optimise and simplify things all of the "RSkin_xxx" include a reference to another shader which includes general information. We will get to that in a second. Looking at the file we can see another problem (that at least I wasn't aware of). Each vertex can only be affected by one bone. That usually works perfectly on mechanical rigs, but with organic objects it can look a bit rough. However, we need to understand that we are dealing with an RTS game developed in 2005.
Having experience with modding Total war games that are using a game engine that is 8 years older, the amount of bones per vertex only doubled, so we can only assume that this an optimisation factor.
Let's take a look at the AlamoEngineSkinnig shader:
And there it is: A maximum of 24 bones. Whether this code is hardcoded or can be changed is outside of my skill and interest. I have to deal with the fact that my model has over 100 bones that have more than one bones per vertex.
The influence limit could be resolved by using more bones to achieve smoother movement and avoid visual artefacts when bending bones. However, there is a limit to that: 24.
So sacrifices needed to be made. The 1bone/vertex is not such a big deal after all and the exporter figures it out so I didn't have to manually redo my entire skin modifier.
Now the question is: How do I take my one mesh model with 160 bones and make it work with Alamo. The simple answer is to split it, but I wanted to make sure that there is no other alternative. I had a look into the vanilla files for an animated model that would likely contain more than 24 bones: Rancor!
As you can see the model has more than 24 bones (organic land models are the best example, since they are often symmetrical so the number of bones naturally doubles) and so there 3 meshes using the RskinbumpColorize shader.
Knowing that even the devs had to split their models into multiple meshes to solve this problem, I could go ahead and do the same.
This is where the analytical part of this tutorial ends and fixing starts.
At this point I assume we have a model that has a finished skin modifier, but has more than 24 bones. I also assume you have intermediate knowledge of 3ds max 8. So these are the following steps:
1.) Duplicate your skinned mesh
2.) Convert it to editable poly/mesh
3.) Split it into multiple meshes (This step requires a bit of planning ahead as you need to visualise the bones' influence)
4.) Correct vertex normals that have been altered when splitting (More on how to do so below)
5.) Apply Skin Wrap (One mesh after another, NOT at once)
6.) Fix any issues caused by step 5 and double check that bone influence on mesh's edges is matching its neighbour mesh. (best way to do so is to create a single anim key that would go a bit extreme)
7.) Create Shadow meshes (you can actually just duplicate the split mesh with finished skin modifier and go to Edit Poly modifier, extrude and collapse the edge and then jump back to the skin and you will be fine)
8.) Done
How to do step 4.) ? Each vertex has its own normal, binormal and tangent. Normal is pretty much the only one interesting to us and is supposed to be perpendicular to its vertex.
Stuff like "smoothing groups" (which is a 3dsMax specific feature) change this vertex normal by averaging based on its neighbour vertices. So if you ever encounter a situation where you have a smoothing group assigned to a surface but it still looks faceted, it's because its normal have been explicitly altered and need to be reset.
In older version of 3dsMax (like max 8 or 9) vertex normals are recalculated after a mesh is split:

This results in incorrect shading and it will be obvious even after you apply a textured material to it.
To fix this issue we need to Average those normals back together. Select all of split meshes and add Edit Normals modifier.

I recommend turning on Ignore backfacing since you will most likely do a selection by dragging. Once selected, keep an eye on how many normals you have selected at the bottom of the tab, then press Selected in the Average tab. Default normals should be cyan colour and averaged ones will be green.
If you trying to solve the faceted issue, select all normals and press Unify. If that doesn't resolve your problem try Reset.
This concludes my analysis and solution of this - probably rare - issue. Stay tuned for next episode "Killing the Blue Channel: Fixing Alamo engine - texturing edition"
Enpremi, A community member
PS: Yammosk will be released soon.