Welcome to the first episode of my future Guide to FPSC.
Those of you who know me for some time and where active in the german board might remember my tutorial collection from 2008/09. I just dug it up and discovered that it had around 50 pages. Thats quiet a lot but it is all in german...and I was a bit cocky as I wrote it so I figured all the dirty jokes are slightly annoying for the reader
This is the renaissance of this series and it will be written in english. Here is the disclaimer:
Disclaimer:
2. English is not my native language
3. Length and Quality of my tutorials may vary
"
Difficulty Level:
ROOKIE
(List of difficultys: )
Beginner : Lets get started
Rookie : Warming up
Intermediate: Medium difficulty
Hard: Needs some knowledge
Pro: Needs a lot of knowledge and experience
Experimental: Haven't figured the whole thing out myself yet
Introduction What is Lightmapping?
Lightmapping is the process of rendering static lights in your level (feel free to correct me if I'm wrong). Here on the forums, we use it as a term to describe the way of you placing your lights in your level.
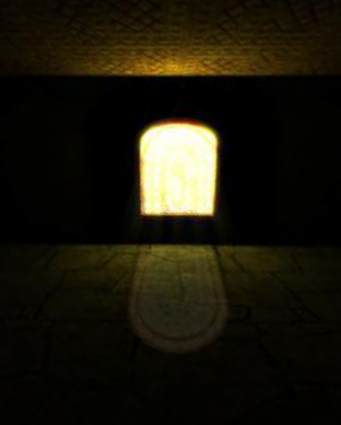
For concerts,movies and theatershows, it is a wellpayed job to do the lightning as it is extremly important. I've recently watched a film where a woman got pregnant, everyone was so happy and all the scenes where lit in fuzzy warm colors. Then it turned out that the baby won't survive and suddenly everything was lit in cold, blueish colors. Who doesn't know the effect of ubercolorful clublights and cocktails on...no scratch that: The feel of humming cold fluorescent lights in a hospital at night. The gritty blue green feel of it? Or the surreal feel of a room lit by sunlight shining through grunged up yellow industrial windows? You know exactly what I am talking about? Then WHY are you placing a plain boring white light in your hospital floor?? ARGH!
Part 1 Placing the lightsources Indoorarchitect
It is important to place the lights on a somewhat believable place. If you have really no idea where to put it, just look around in the places where you usually are. Your workplace/school/home/trainstation/supermarket etc. ...or images on the net....or movies. A lot of inspiration everywhere.
Remember to look at the texture of your segment first.
A few hints to get you going:
*Fluorescent Lights and large lights are usually on the ceiling and rarely on the wall
*In Scifi Levels, feel free to hide small colorfull lightsources
wherever it fits
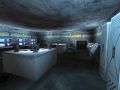
*Offices and most modern buildings are well lit.
*A normal, clean building has no weatherd down yellow lights
*For the realist: Never place a light on or near a waterpipe.
*For the realist: In underground structures, you can have cables that link to your light.
Part 2 Lightmapping lets do it
A weak lightsource in a small and dark room lights up a lot of space. The same lightsource is a lot weaker if there is another, more dominant lightsource close...keep that in mind.
A single candle in an underground bunker can light up an entire room
I write this down because I've seen a lot of dark hallways where everything that gets lit up by the big fluorescent light is the light itself. This simply looks bad.
If you are working on a horror game: Dark rooms where the player doesn't see where he is going are not scary, they are just annyoing.
Important:
Every player has different screensettings. A scene that is lit on one can be pitchblack on another. I learned this the hard way having a lot of people not seeing anything in my games like Euthanasia or Thanatophobia that are perfectly lit on my and one of my friends system. Well...it happens.
This is why it would be best to make the levels a lot brighter than necessary. I'll do this in the future levels of relict and in shavra aswell.
***************
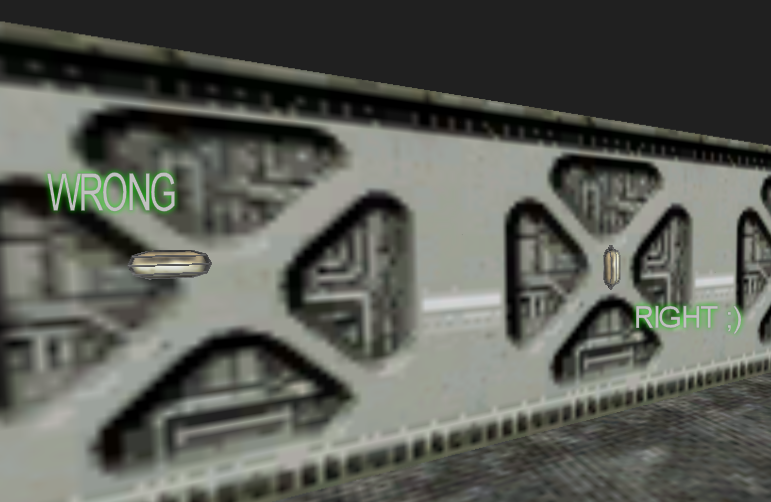
Lets place the light. Dont place it too close to the source!!
Nevermind the door, that is an entirely different story
It does not matter what color the lightbulb entitie in the editor has.
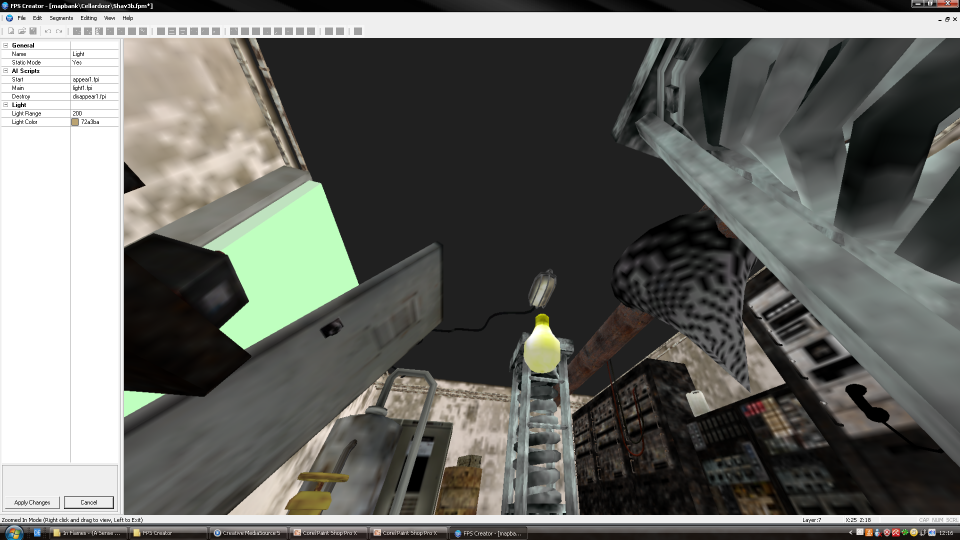
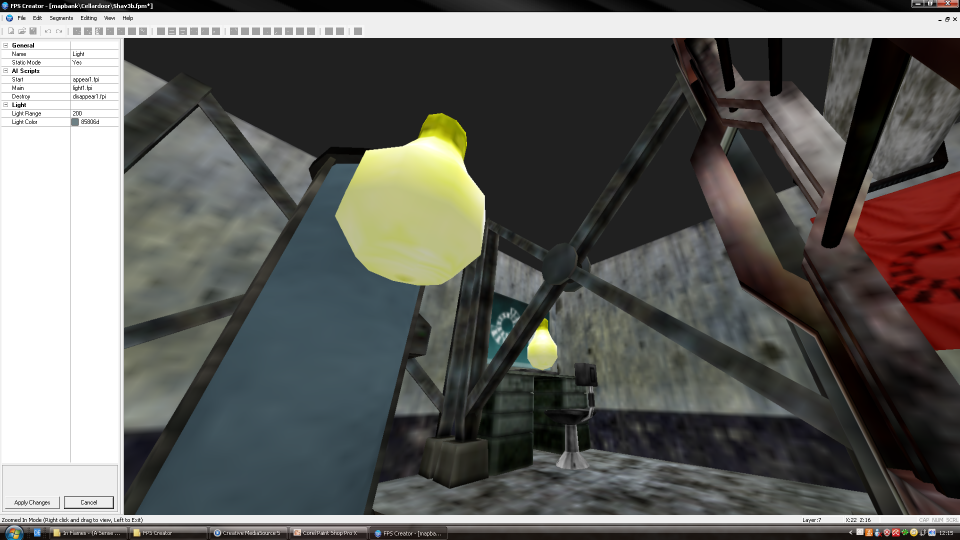
Now that we placed the lights lets see how the settings where made.
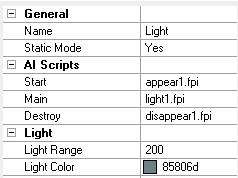
This is the setting box for the light.
You can copy the hexcodes if you really feel like you need to.
What are Hexcodes? I'll explain that later
It has a light range of 200.. please keep in mind that the darker your light is, the further your range can be without overlighting your scene
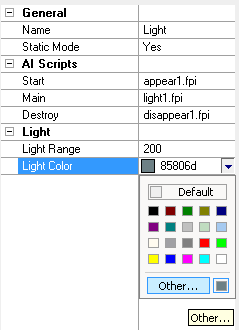
lets pick this You can select it by clicking on the right, next to the hexcode. Ignore those colors that are there...never use plain red, plain yellow or plain white lights.
Click on "other"

You'll get this box.
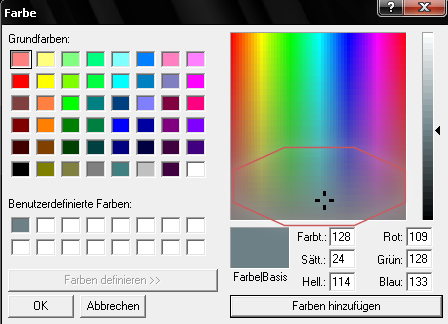
I circled the colors I use for my grungy games These are natural tones that fit my textures best. You can find your own style by experimenting a little Feel free to use really subtile lightcolors.
Oh, Like I wrote before, never use plain white light. Especially not when you use Bloom Effects. Go into a greyish or even another color.
Lightintensity:
Yeah, Some cute little toddlers complain about no lightintensity option.
It is that bar that is circled on this image
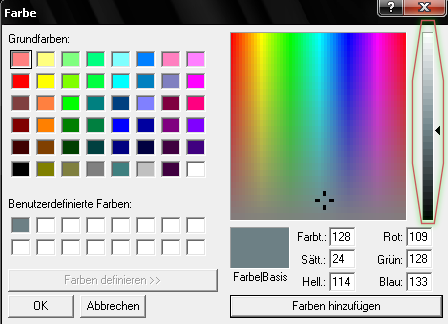
The darker the color, the less intense your light is. It works, trust me ![]()
Thats about it. You can now use the same lightmapping magic as I do. I hope I won't regret revealing my easy little tricks ![]()
Hexcodes:
...are the little codes that you can see in the setting box. I recall some people writing me about it in MSN. You don't need it. Really, its useless...unless you want to use the exact same color for the exact same light in your game over and over again. There are some small programs on the net that read hexcodes from images. In case you want to use only colors that exist in the eyes of your girlfriend in your favorite photo of her...that would not be...creepy at all....what?!
Addendum:
This is an idea I had 2008. I forgot about it and dug it up today. Sorry for the horrible image quality.
It shows the use of Overlays for fake light and shadow effects.
A bit like a poor version of rolfys baked shadow technique:
Just an idea...maybe someone wants to work with it
Okay, I hope you people enjoyed it so far and are not too disappointed because it was so easy =D No multiple lightsources, no mods, no directional lights, no blackmagic...just this.
To get the same results as I do, you need to adjust your setup ini.
High End
lightmapmaxsize=-1
lightmapboost=4
lightmaptexsize=512
lightmapquality=400"
lightmapmaxsize=-1
lightmapboost=4
lightmaptexsize=512
lightmapquality=256"
Recommended
lightmapmaxsize=-1
lightmapboost=4
lightmaptexsize=256
lightmapquality=32"
lightmapmaxsize=-1
lightmapboost=4
lightmaptexsize=256
lightmapquality=16"
Less strong systems
lightmapatten=32
lightmapmaxsize=-1
lightmapboost=4
lightmaptexsize=128
lightmapquality=16"
lightmapatten=32
lightmapmaxsize=-1
lightmapboost=4
lightmaptexsize=128
lightmapquality=8"
-Serygala

thanks
Nice of you to put this up :) I'm not a game-creator myself, but it's still probably helpful for people unable to light up their own mods ;D "Hello Game-creators! Look at your game, now back to mine! Now back at your game, now back to mine! Sadly, it's not mine. But if you stop using burnt-out flares and look up my FPSCreator Lightmapping tutorial it can look like mine!" x3