In this tutorial i will explain the process of creating a screen overlay in Photoshop, importing it into the game and enabling it in-game.
Screen overlays are images overlaid on the players vision, they are rarely used in Half-life but tend to be more common in mods. Screen overlays are used to enhance the players immersion in the game or even to overlay important information
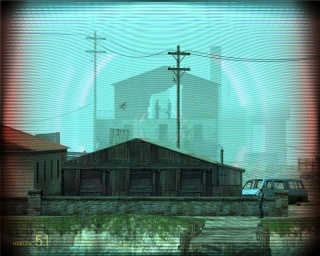
This example image shows the effect 'combine_binocoverlay' being applied to the player's vision. In this tutorial we will create a black outline around the screen to give a much darker look to the environment.
You will need:
- Photoshop [Any Version]
- VTFedit
- Good knowledge of Photoshop and Hammer
In this tutorial we will be creating an black border around the edges of the screen thus giving the map a much darker look.
Before:

After:

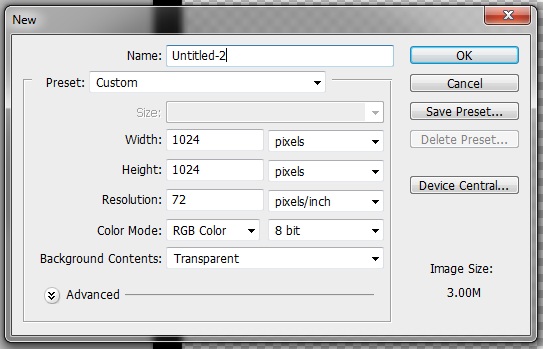
Step 1, Firstly, open Photoshop and create a new image with the dimensions 1024x1024, ensure that the background is set to transparent.
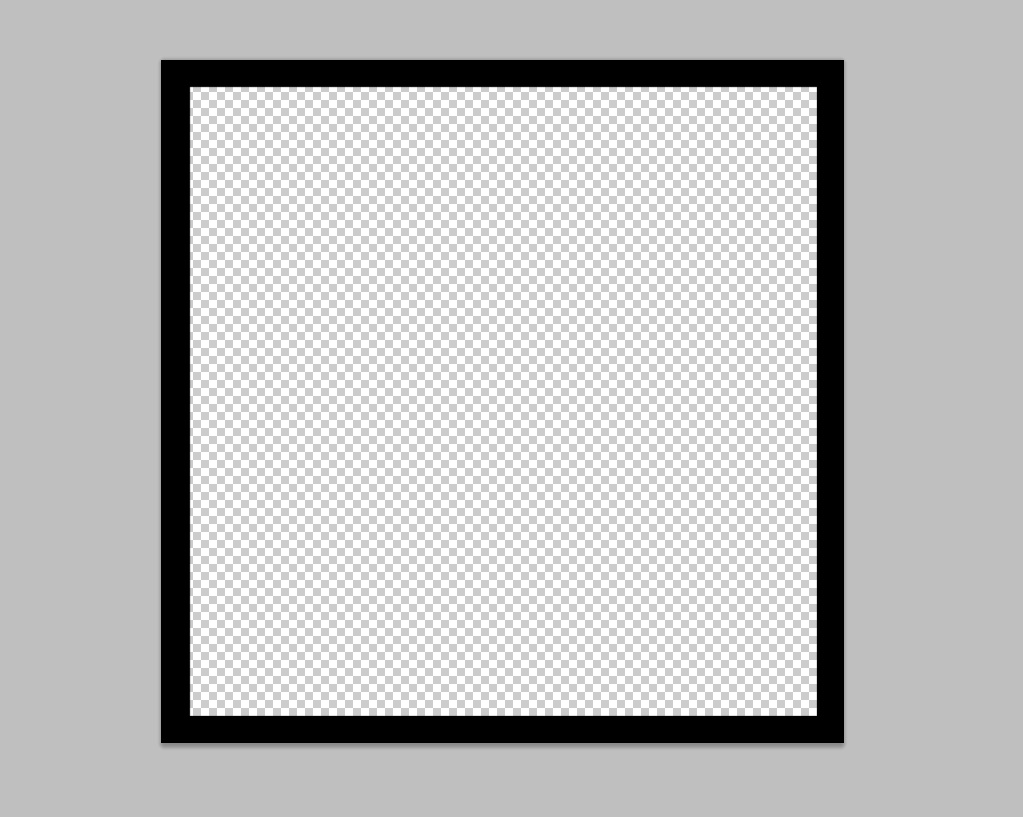
Step 2, With a square brush set to 40px, draw a black border around the edges of the canvas. If square brushes aren't available a broad round brush will also work.
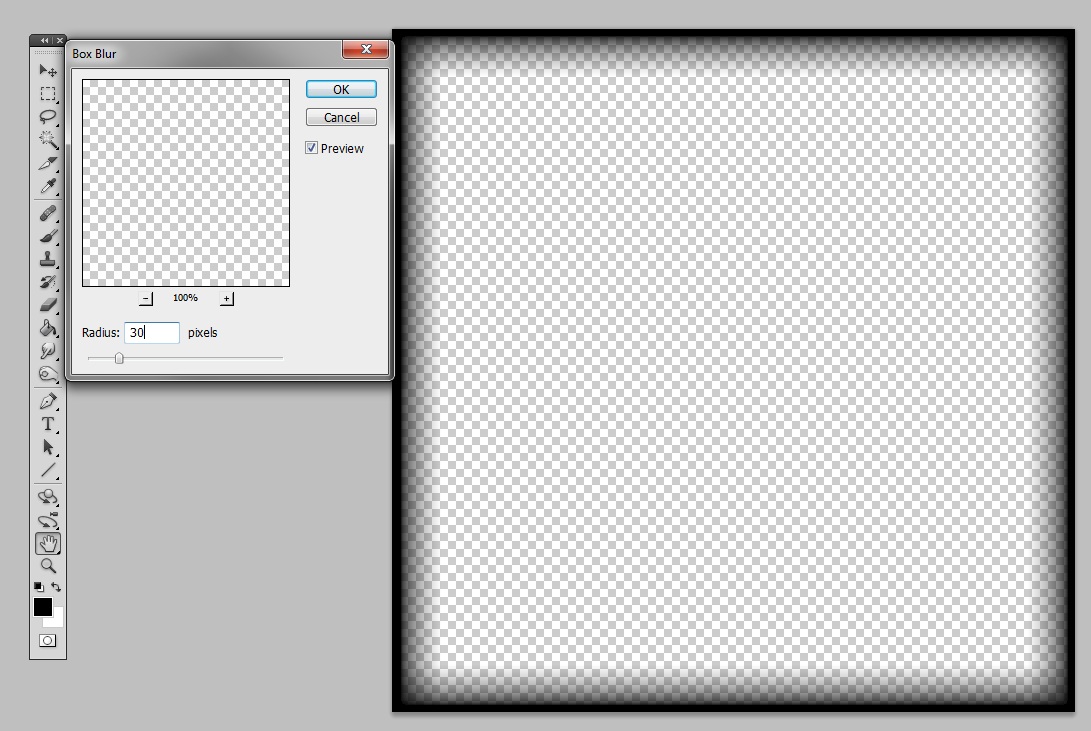
Step 3, Now to blur out the lines, this is done by going to Filter>blur>box blur. Set the value to about 30px and you should get an effect like this.
Step 4, To make it a bit broader you can duplicate the layer by right-clicking the layer and then selecting 'duplicate' you can also do this by selecting the layer and pressing Ctrl + J
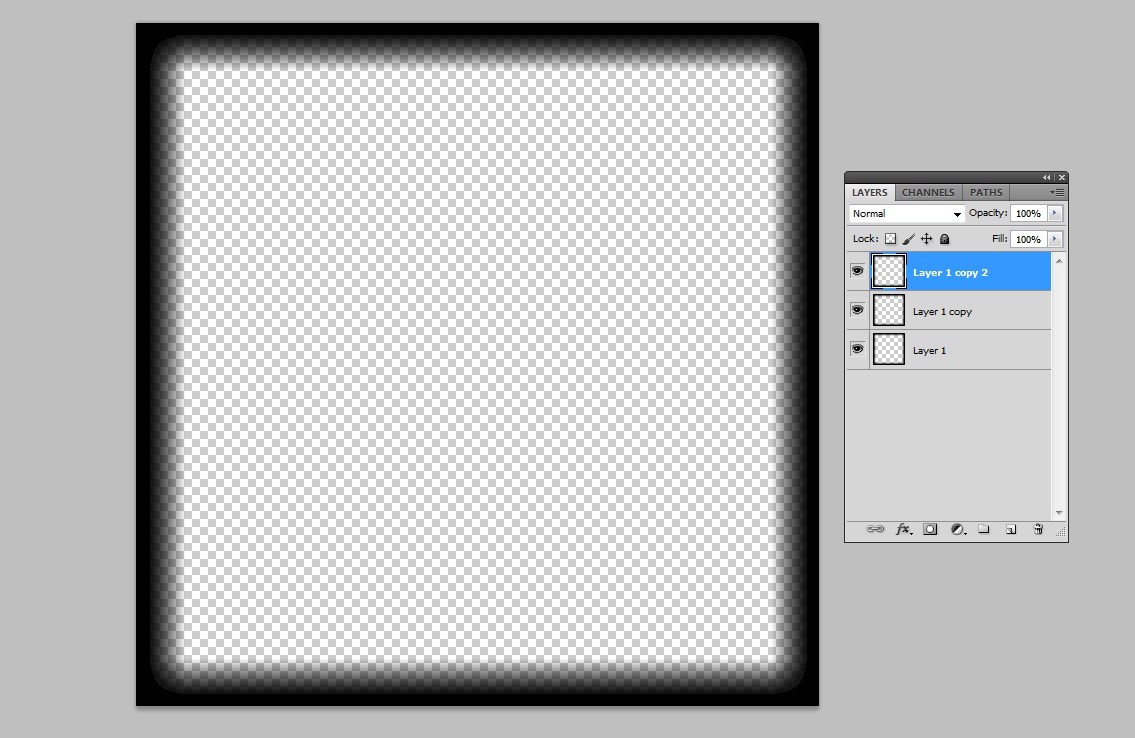
Step 5, How that we have our image we must now save it as a .png file, it is very important to save it as a .png file as this file type preserves transparency, for the purpose of this tutorial I will call it 'border.png', Ensure that the .png has interlacing disabled.
Step 6, Start VTFedit and open the .png file we just created, this can be dome by going to File > Import. You can leave all the settings as they are but you must uncheck the box marked 'resize' Your VTF should look like the image below.
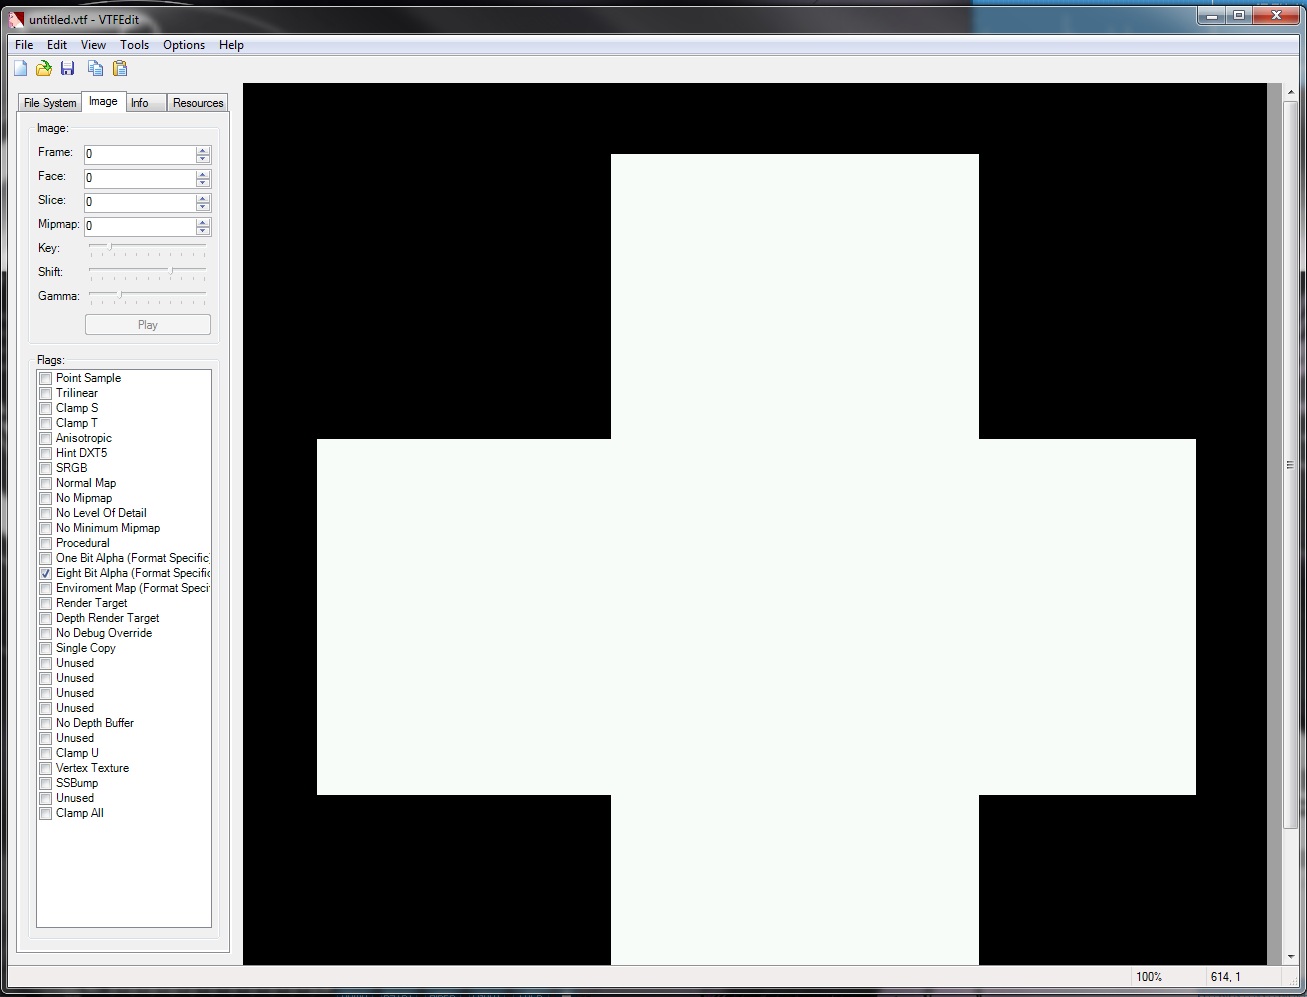
Step 7, Now we save the file as a .vtf file, do this by going to File > save as... ensure that call it the same name as your original .png file. In this case it will be 'border.vtf'
Step 8, We now must create the .vmt file, Open notepad and type the following;
{
"$basetexture" "effects\border.vtf"
"$surfaceprop" "glass"
"$translucent" "1"
"%keywords" "custom"
"$alpha" 0.8
}
ensure that the file path and file name are correct. If you have been following this tutorial exactly
there is no need to change any information. Now save this file as 'border.vmt' ensure that "all files" is selected under file type.
Step 9, Now that we have all the necessary files, we now need to move them over to the HL2 directory, because for this example I am using HL2 episode 2, the file i need to put them in is "C:\program files\steam\steamapps\&#xus;ername%\halflife2 episode 2\ep2\materials\effects" If you are running a x64 operating system then "program files" will be "program files (x86)".
Step 10, Now it is time to load up hammer, open hammer and in your map create an env_screenoverlay.
Step 11, We must give the entity a name, For this example I will call it 'screenover', In 'Overlay Name 1' insert the name of the image we've just created with the .vmt extension, if you have been following this tutorial exactly this will be "effects/border.vmt", now set how long the overlay should be shown for (in seconds).
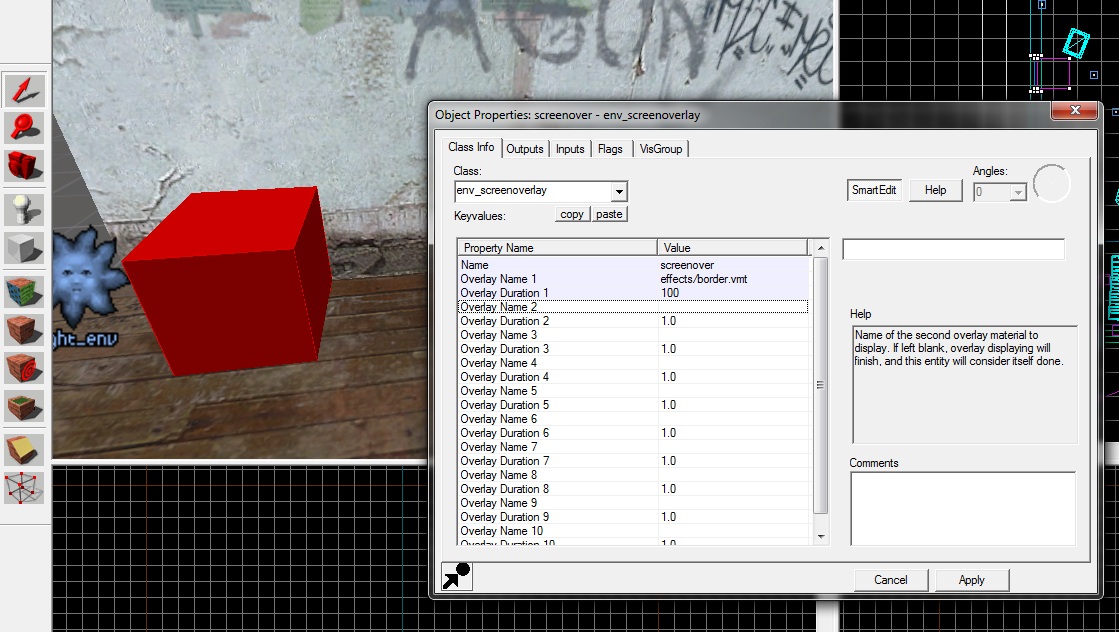
Step 12, Screen overlays do not automatically activate, therefore we have to trigger it manually, we can do this by a button or by a logic_auto/logic_relay. The output command required for the env_screen overlay to begin is "Start Overlays"


The problem with this is it'll stretch the texture in pretty much every resolution and won't looks proper, better to make a shader or code in a vgui hud element.
Thankfully with the texture that's created in the tutorial, the image is pretty uniform across the horizontal and vertical axis therefore the amount of stretching will appear very minimal
Nice tutorial, thanks!
You may fix the little typo @Step 5: How -> Now :)
Thanks for pointing that out :)
This comment is currently awaiting admin approval, join now to view.