By Madiba127
Introduction
This is a Tutorial on how to add custom textures to the C&C3 Worldbuilder, please follow this tutorial carefully as if you miss a step it will not work. Images Have been included and links to programs that are required have also been included at the end of this tutorial.
Setup For Worldbuilder
First Download These Snow Textures Moddb.com and extract to the install directory of C&C3
(Click For Larger Image)
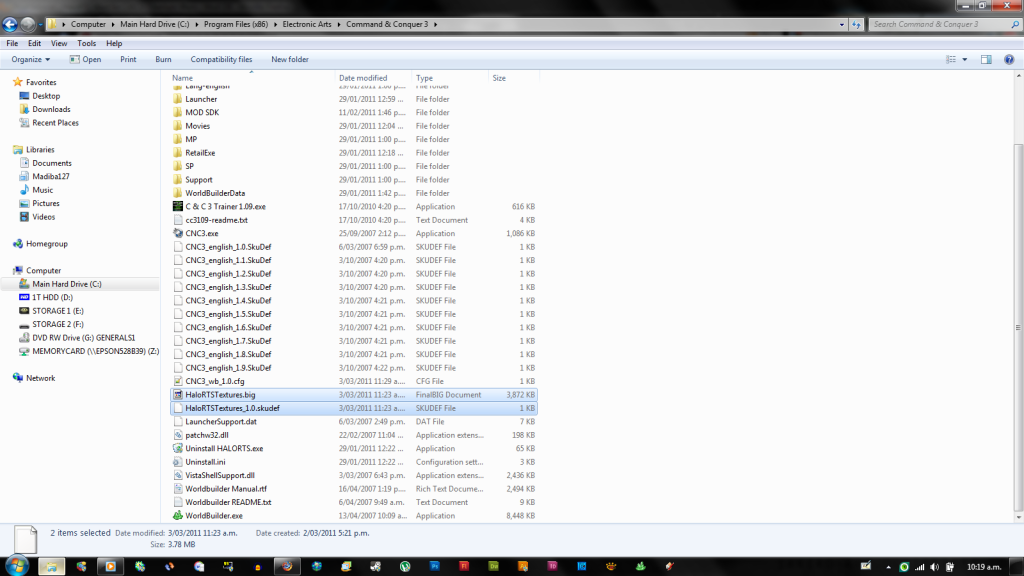
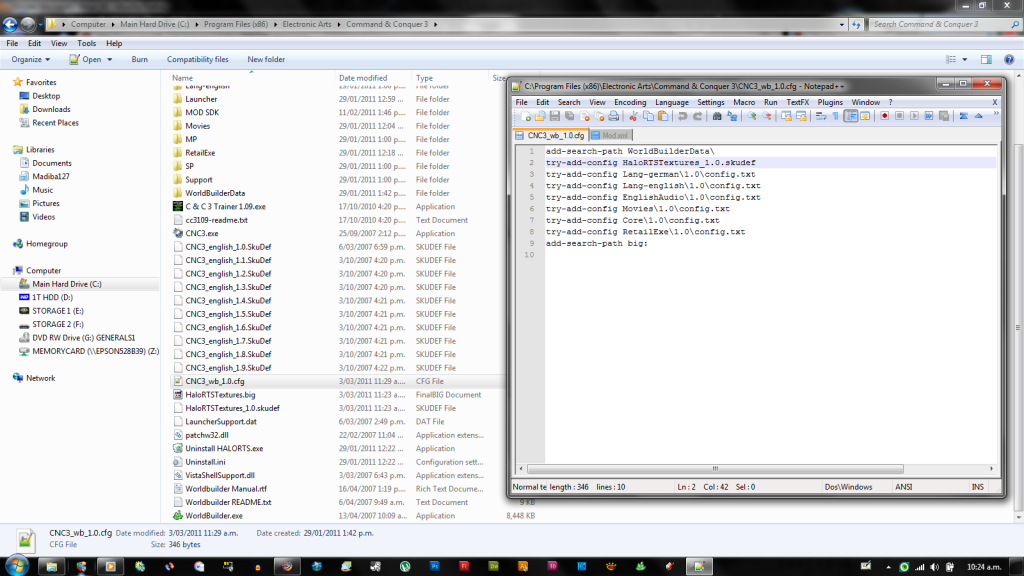
Now that you have extracted to the install directory you have to tell worldbuilder to open the .big file to do this open, I would suggest using notepad++ to open the config file
Add this Line on the top as shown in the image
Opening In the Worldbuilder
Now that you have saved the config file you are now ready to test to see if it has worked
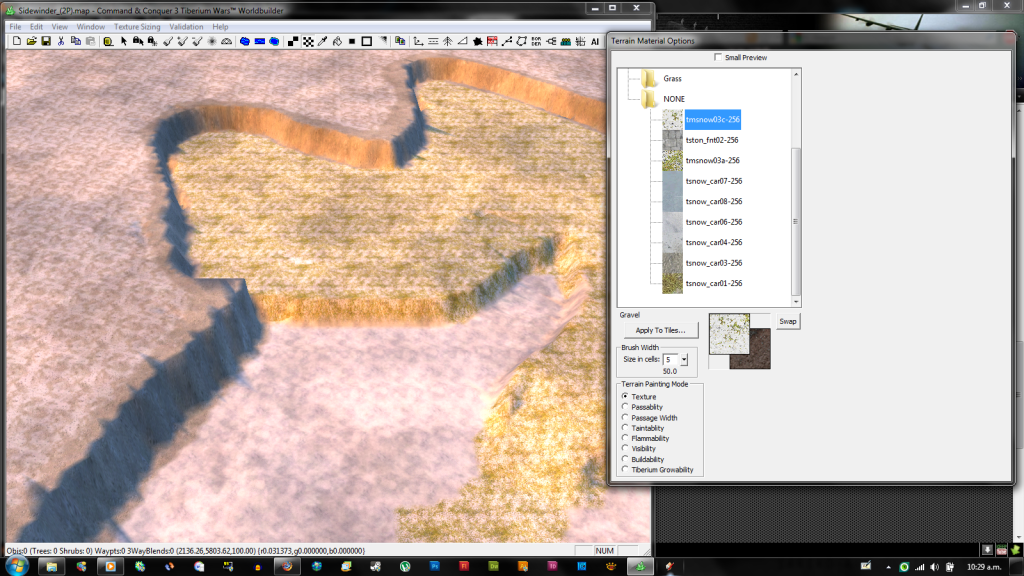
to do this open up the worldbuilder and go to the texture button
You Should Now see a folder called NONE this is where any new textures you have added will appear
(Click For Larger Image)
That is all is required to place textures in the worldbuilder but to test your maps you will need to start the game with a mod line
"C:\Program Files (x86)\Electronic Arts\Command & Conquer 3\CNC3.exe" -modConfig "C:\Program Files (x86)\Electronic Arts\Command & Conquer 3\HaloRTSTextures_1.0.skudef"
You will need to change this to match your system
This will allow you to test your map in the game, but the map will not be able to be used in multiplayer unless the other player/s have the same texture mod
Adding Your Own textures
If you want to add your own textures you will need to have them in the .tga format
For Your Convenience i have included the uncompiled snow textures
(Download No Longer Works)
The Folder is split into two folders art & Data
Art = This is where your textures will go
Data = This is where you will put the .ini file
The .ini file is simple to edit just add this line for every new texture you add DO NOT EDIT THE FIRST PART
Terrain tsnow_car01
Texture = tsnow_car01.tga
Class = Type HALORTS
End
Now you can save and compile in a .big editor like FInialBIG but remember to leave the folders in the same order then just replace the other file
Most Times you will not need to worry about this Just the first part of this tutorial
LINKS
Notepad++ = Notepad-plus-plus.org
Links To Images = S701.photobucket.com
Snow Textures (compiled) = Moddb.com


Very good writing and explanation!. I'm surprised!. This will help many people... Congratulations! :D
Stunning.. I will be trying this right now. erm it works..
about this lava request looks very plausible now however im unable to get the uncompiled tga file.
though of course it still leaves me with needing either decompiled paveRedzone01-256 to paveredzone04 or the tga's from TCS or BFME2.
Sorry for this, but where do you put the mod line?
Thanks for this! The link to the uncompiled snow textures doesn´t work anymore
that was due to me closing down the site that hosted the file, but just uncompile the big file
ok! it would have been nice to take a look at them as an example.
I've got a texture in .tga that I wanna add. So I put it in a folder named Art? And I also create a folder called Data with an .ini file? Then compile? What do I need to put in the .ini file? You have written "DO NOT EDIT THE FIRST PART" So where do I get the first part if I wanna start from scratch?
Ok, I found this tutorial which seams pretty good. The only thing I don't get is how to create a normal map.
I have a texture from Quake 2 that I wan't to use in the WB just to learn how to add textures.
The texture I have in mind is in .tga format. But if I understand correctly I also need to create a version of it as normal map?
And here's the tutorial I was talking about:
Derelictstudios.net
They aren't compiled, just open the big file with any big reader.
Looking into adding new Folders to identify MOD specific Textures, anyone know how to add these folders?
I tried the MOD.STR file, and either I wrote it wrong, or it has to be a different STR file elsewhere...