Hey and hello!
It's time for an update again. Today there is a little tutorial for a change. For the MiniRPG project, I was looking for a way to have as free a hand as possible in the design and integration of effects and, in the best case, without the use of particles. The MiniRPG project is being developed with the Unity Engine, but I think the tutorial should also rely on the Unreal Engine.
Let's go.
Spritesheets form the basis of the creation. Spritesheets are a collection of frames of the same size that are all packed together onto one picture. The idea is then to simply scroll through all the pictures in order to hear the effective effect. So that this also works in the engine, I built a shader that can animate these spritesheets. (Comes further below)
To find the spritesheets I found two double ways.
On the one hand there is this program called Pixel FX Designer on itch.io. You can find it here.
And if Blender was for you, there is an add-on that helps you with rendering and creating the spritesheets directly in Blender.
Both program consists of being heard. Pixel FX Designer Nord has the full range and tools to improve universal functions according to your ideas after some training period.
With the Blender add-on you have all the freedom, tools and workflows you know from Blender and can put together the first ones according to your own and then render them directly on a SpriteSheet. AWESOME !!!
I will spare myself the explanation of how the two programs work personally.
So this is where your finished spritesheets look like. Unfortunately, we can still do little in the engine with it.
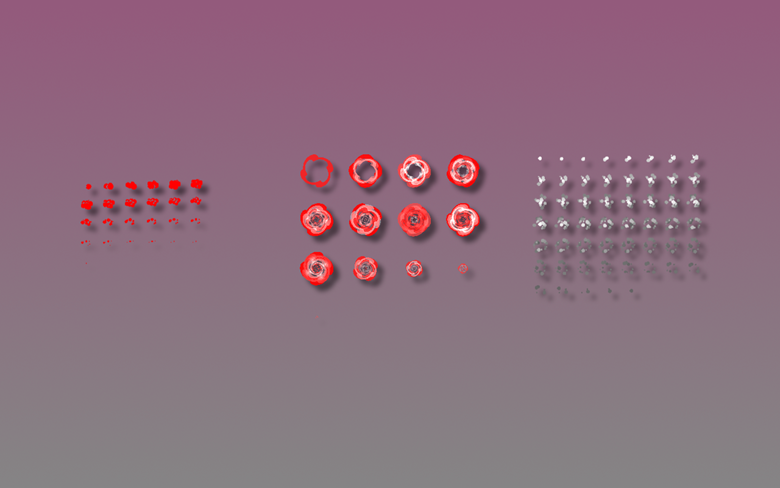
That's why a shader needs them. This shader must be dragged onto the rows and lines of the spritesheet and then scroll through these first cells to hear an animation.
For the shader, I heard the Unity internal ShaderGraph. But as I said above, the shader can also be easily recreated in Unreal or AmplifyShader Creator.
This is what the graph looks like. Let's go through the whole thing once
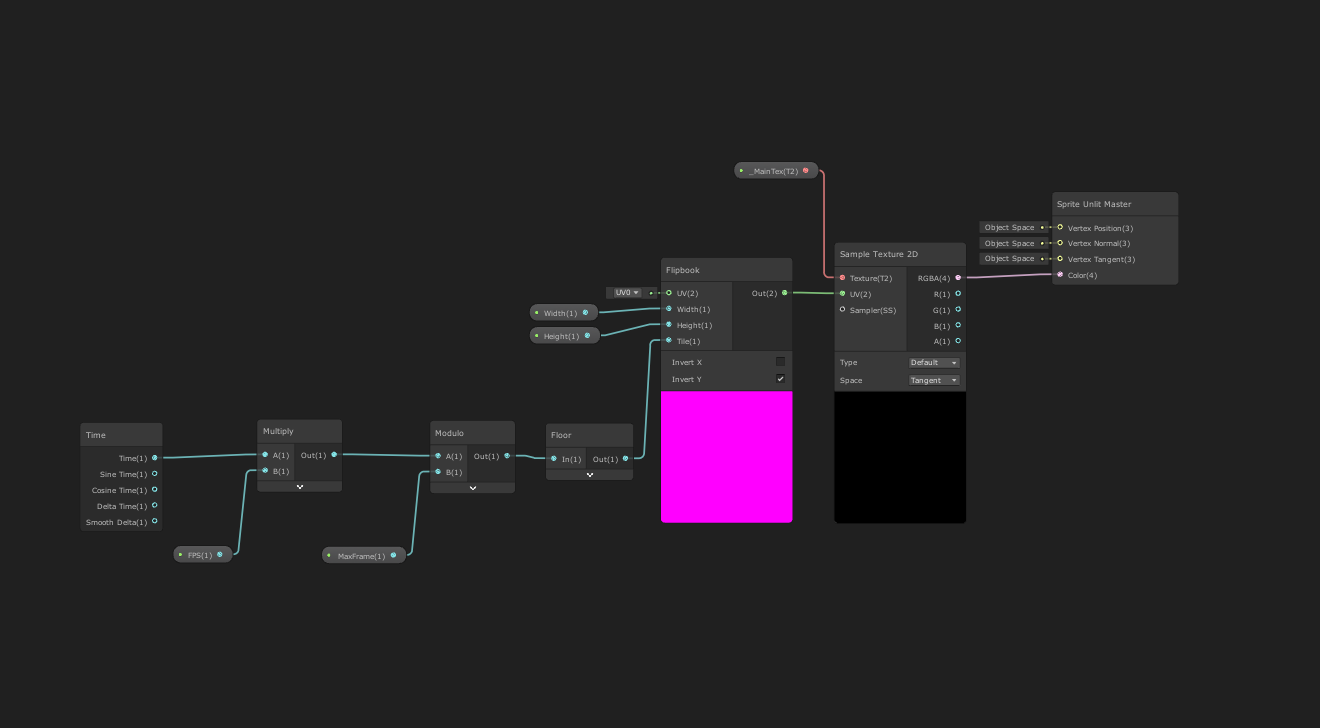
* This node can be used to create a texture animation function commonly used for particle effects and sprites by allocating time to the input tile and outputting it to the UV input slot of a texture sampler. *
Bingo - exactly what we need.
Now we just have to change the shader so that it should not fade smoothly back and forth between the same frames, but rather display one frame after the other. The Modulo Node helps us with this
* Returns the remainder of the division of input A by input B *
Let us now use the time multiplied by the frames per second of our animation and divide this in modulo by the maximum frames we want to see and at the end hear the result through a Floor Node
* Returns the largest integer value or the largest integer that is less than or equal to the value of the input In *.
Now we can conveniently set the width and height variables of our shaders and the height and width of our spritesheets and have MAGIC .. have a shader that scrolls neatly through the old frames.
At the end I use the shader in an extra material that I then pack onto a quad mesh.
Voilà - our effect is ready. The spritesheets can now be used in your game.
So that was our little tech talk for today. We read our week week again
Until then - stay healthy
David // LotsOfStuff