
This blog is intended to be a brief overview of a few techniques for generating heightmap terrain in your games. It will follow the format of thfieldr tecfield blogs, so there's gonna be lots of pictures! This blog will not be telling you the general workings of planet rendering. Instead it will focus solely on heightmap terrain generation, assuming that you have a working understanding of procedural noise techniques. If you don't, read over the gas giant blog, as it will explain how noise works.
Also, I should tell you that this may not be the best way to generate terrain in your game. Using only procedural noise can create features that are fairly mundane if you don't use varied enough functions, and the more functions you use, the slower it gets.
If you have no clue how to go about doing any of this, and want to learn C++/OpenGL, you can use my tutorial series.
Step 1: Base Terrain Patches
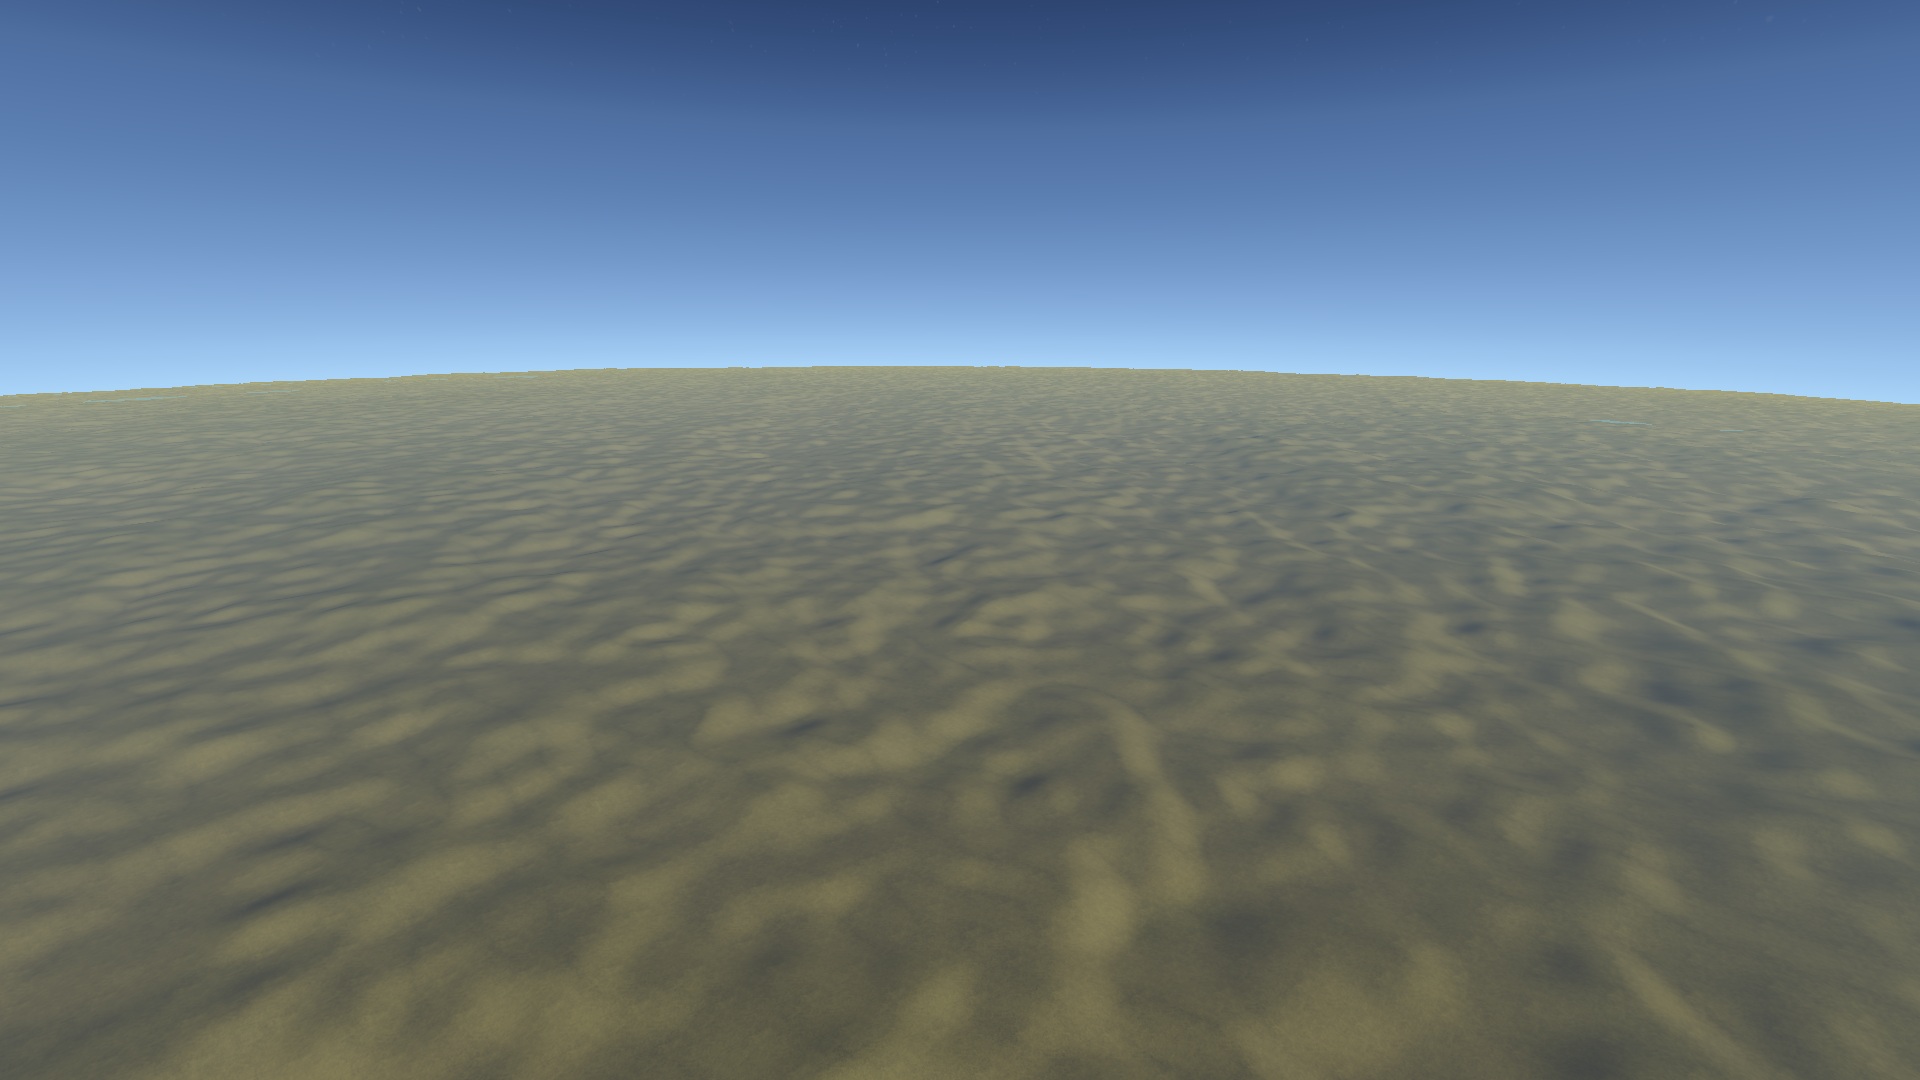
The first thing we need is a planet. An easy way to make a planet is to use a giant cube where each side of the cube is a separate quadtree of terrain patches. To turn the cube spherical, you normalize the vertex positions and then multiply by the radius + height at that vertex. Instead, you could just use a flat plane of terrain. Do whatever you want.
From close up, you should have something like this:
Notice that the vertices become more dense closer to the camera. This is the quadtree LOD in action. Each patch can subdivide into 4 smaller patches if they are close enough.
Step 2: Terrain Specification File
In order to describe our terrain, we need some kind of file format that allows us to specify a series of noise functions. In SoA, we have chosen to use YAML files, since it allows us to define nested functions with ease. I am not going to go into the specifics of parsing the file here, and you can even choose to hardcode your terrain if you want. In our file, there is a "baseHeight" field that contains the terrain specification. "Base" is a starting height rendering meters, and"funcs" is an array of terrain functions. Let's look at a basic terrain function.
baseHeight:
  base: 100
  funcs:
    # Large detail
       - octaves: 8
          persistence: 0.8
          frequency: 0.003
          low: -2000.0
          high: 3000.0
Because we didn't specify a noise type, it will use the default type "noise", which is regular fractal noise. The output of the function will be scaled between "low" and "high".
float noise(vec3 position, int octaves, float frequency, float persistence) {
  float total = 0.0;
  float maxAmplitude = 0.0;
  float amplitude = 1.0;
  for (int i = 0; i < octaves; i++) {
    total += snoise(position * frequency) * amplitude;
    frequency *= 2.0;
    maxAmplitude += amplitude;
    amplitude *= persistence;
  }
  return total / maxAmplitude;
}
If you don't know what snoise is, check the gas giant blog. There is also some built in noise in GLM, or you can use the ever popular libnoise.
To apply this to our heightmap terrain, we simply run the noise function on each vertex and displace the vertex away from the center of the world based on the height. You don't need to do this every frame, only when generating a new patch. If a patch subdivides into 4 smaller patches, you will need to run it on each of the child patches. Lets see what the above terrain function looks like:
For the rendering I am using diffuse and specular lighting with Sean O'Neil's accurate atmospheric scattering, and I am generating normal maps on the GPU for extra quality, but that is beyond the scope of this tutorial.
Step 3: Terrain Coloring
The above image is cool and all, but there's no color variation! It's just brown everywhere. Luckily, we can use noise to change the color of the terrain! What we need is a color map. Take a look at this one:
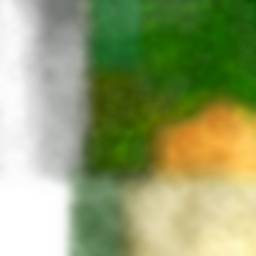
In this image, temperature increases along the X axis, and humidity increases along the Y axis. Notice the lush green color at the top right, where temperature and humidity are at maximum, indicating jungle. We can apply this color map to our terrain based on the temperature and humidity at each pixel in the fragment shader. But how do we calculate those parameters?
We can specify two more fields in our terrain file. "temperature", and "humidity", and use noise functions as before. We will pass in the generated temperature and humidity to our shader as normalized bytes, so 0 is minimum temperature, and 255 is maximum.
temperature:
  base: 172.0
  funcs:
    - octaves: 6
       persistence: 0.9
       frequency: 0.0006
       low: -64.0
       high: 64.0
humidity:
  base: 128.0
  funcs:
     - octaves: 6
       persistence: 0.9
       frequency: 0.0008
       low: -128.0
       high: 128.0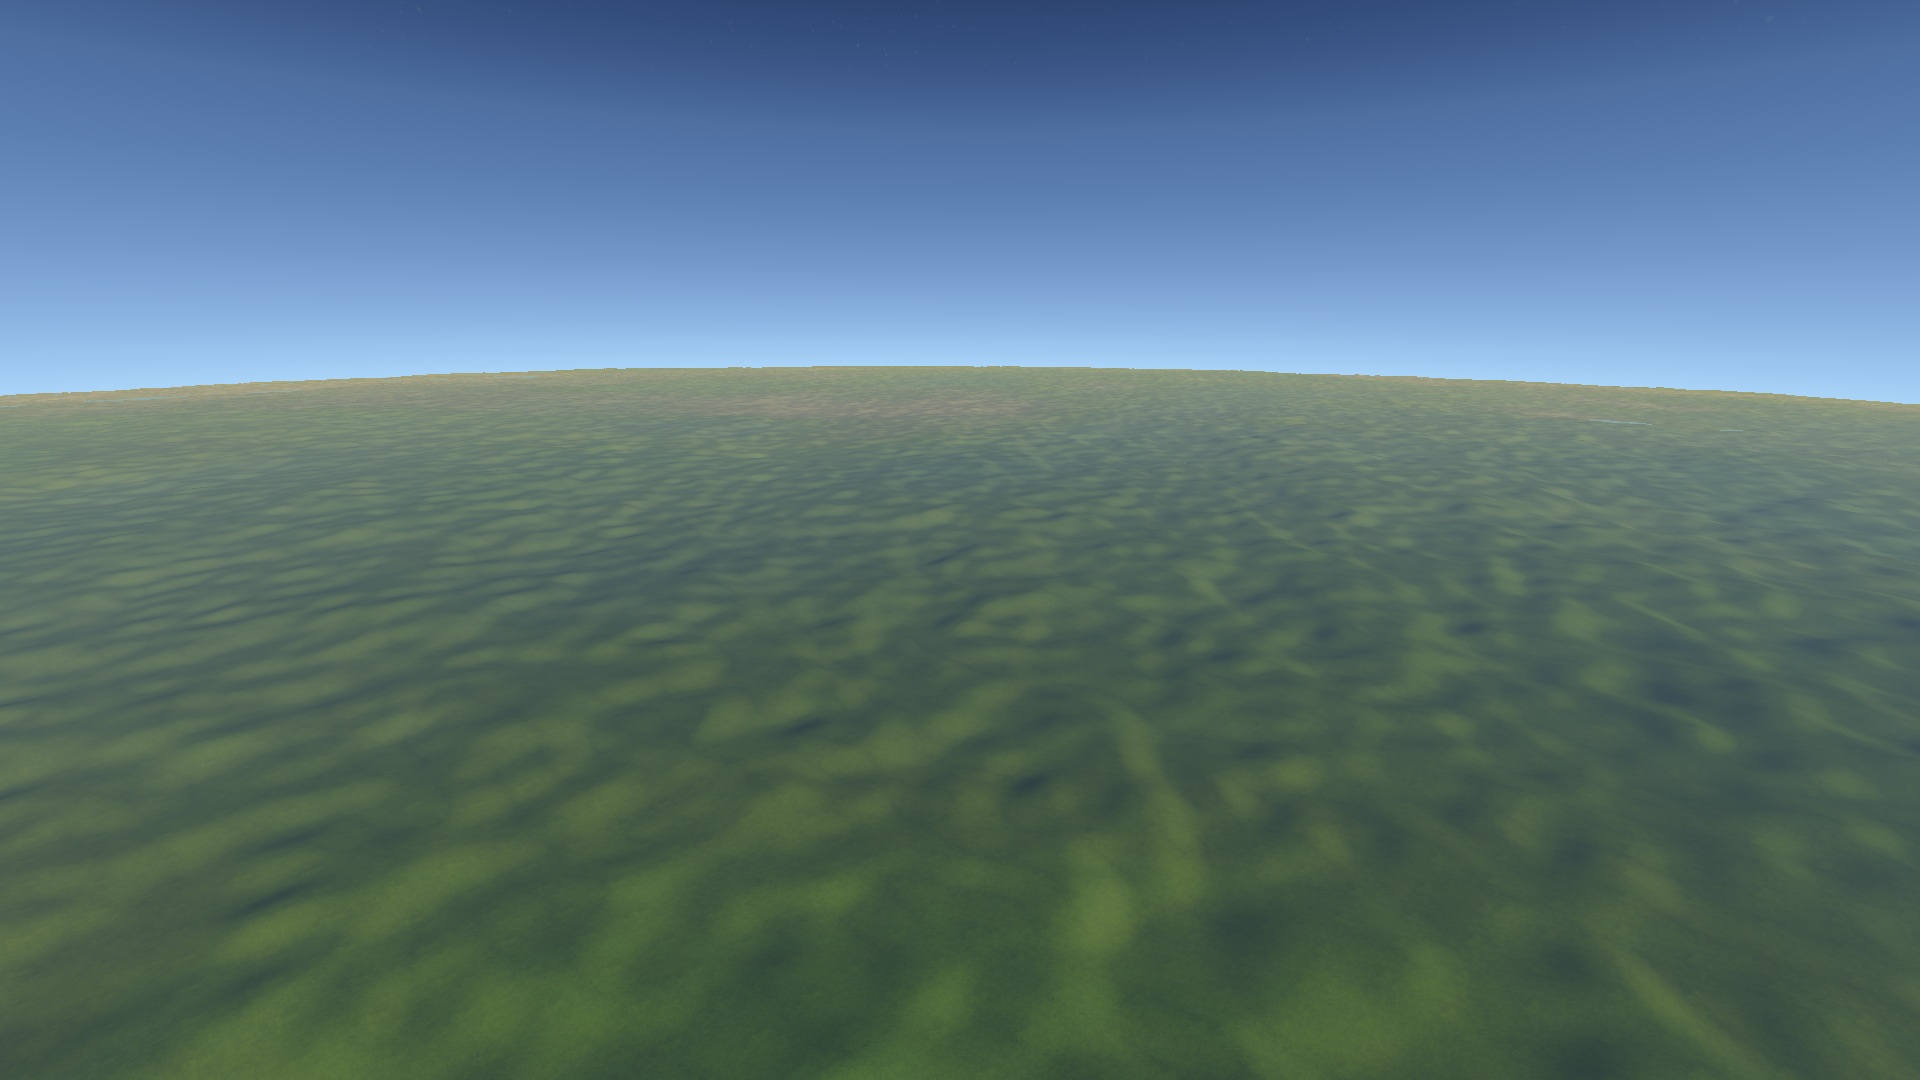
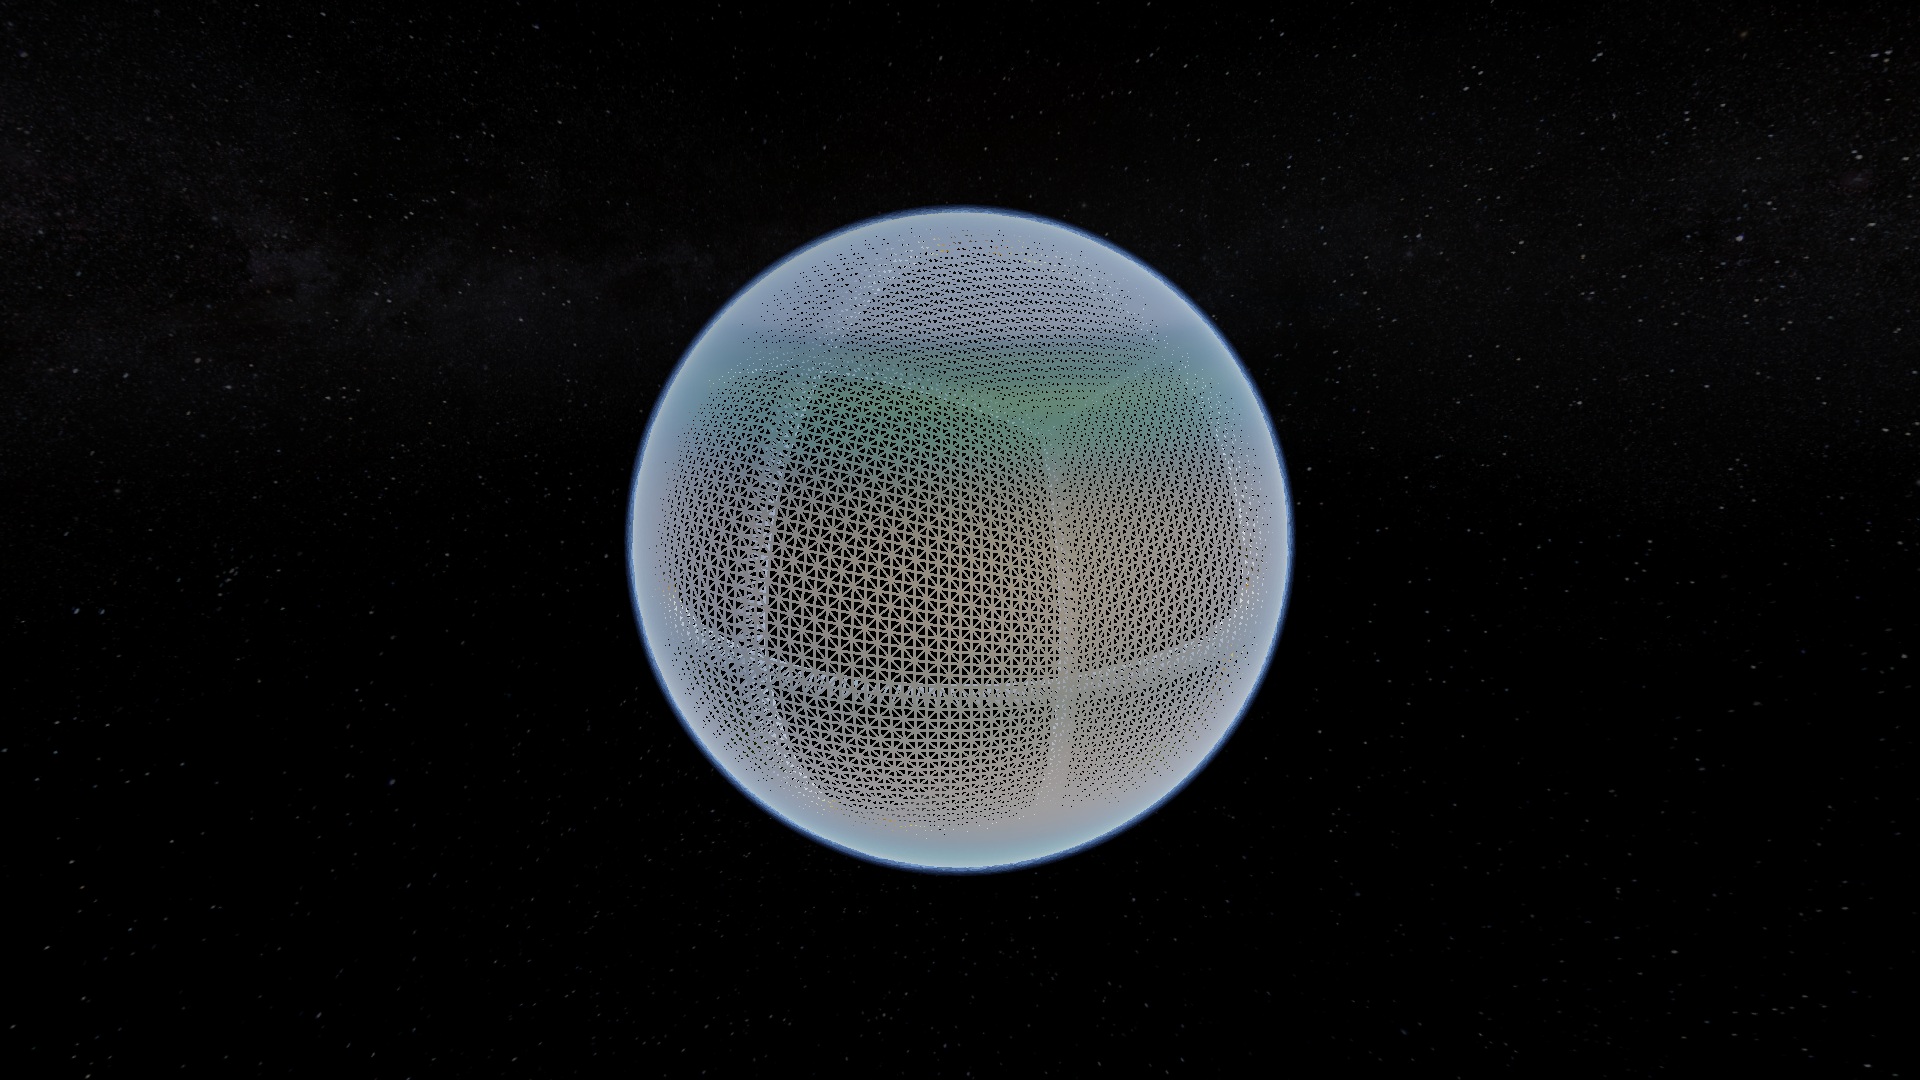
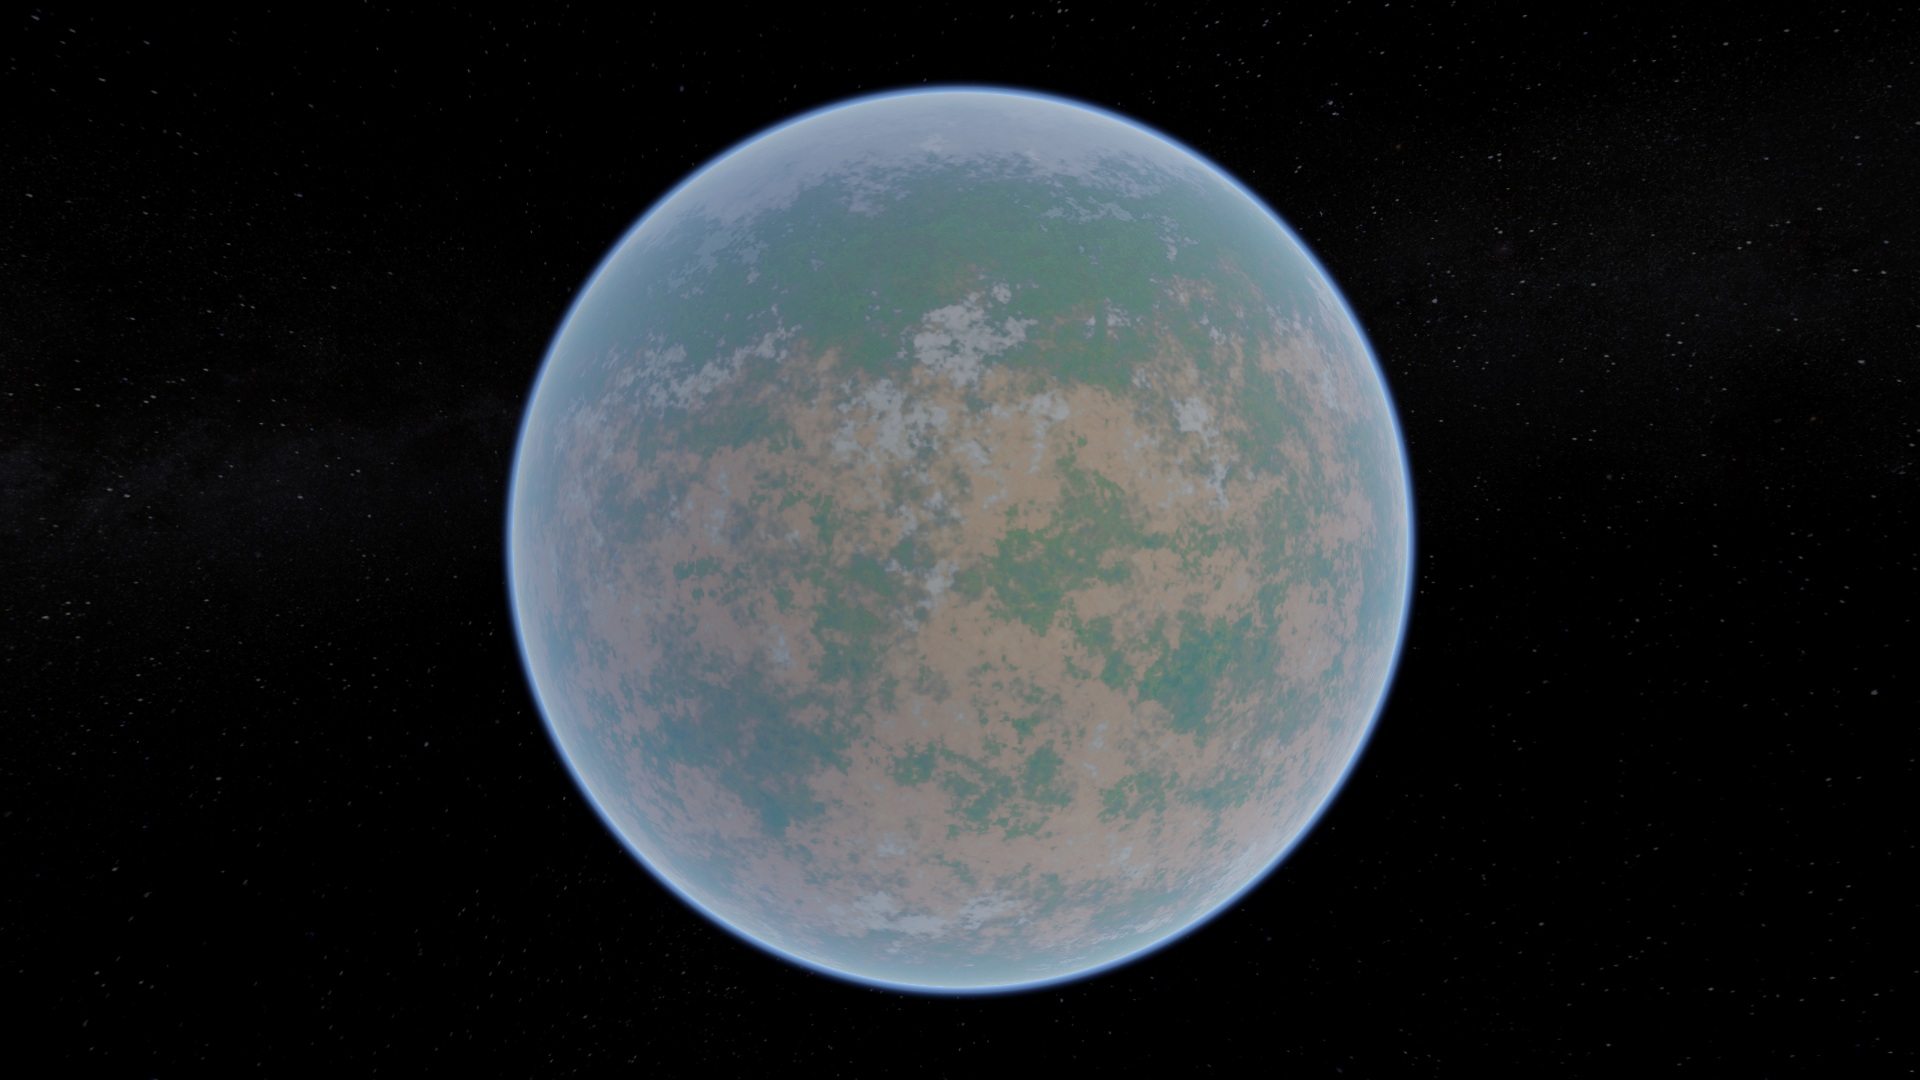
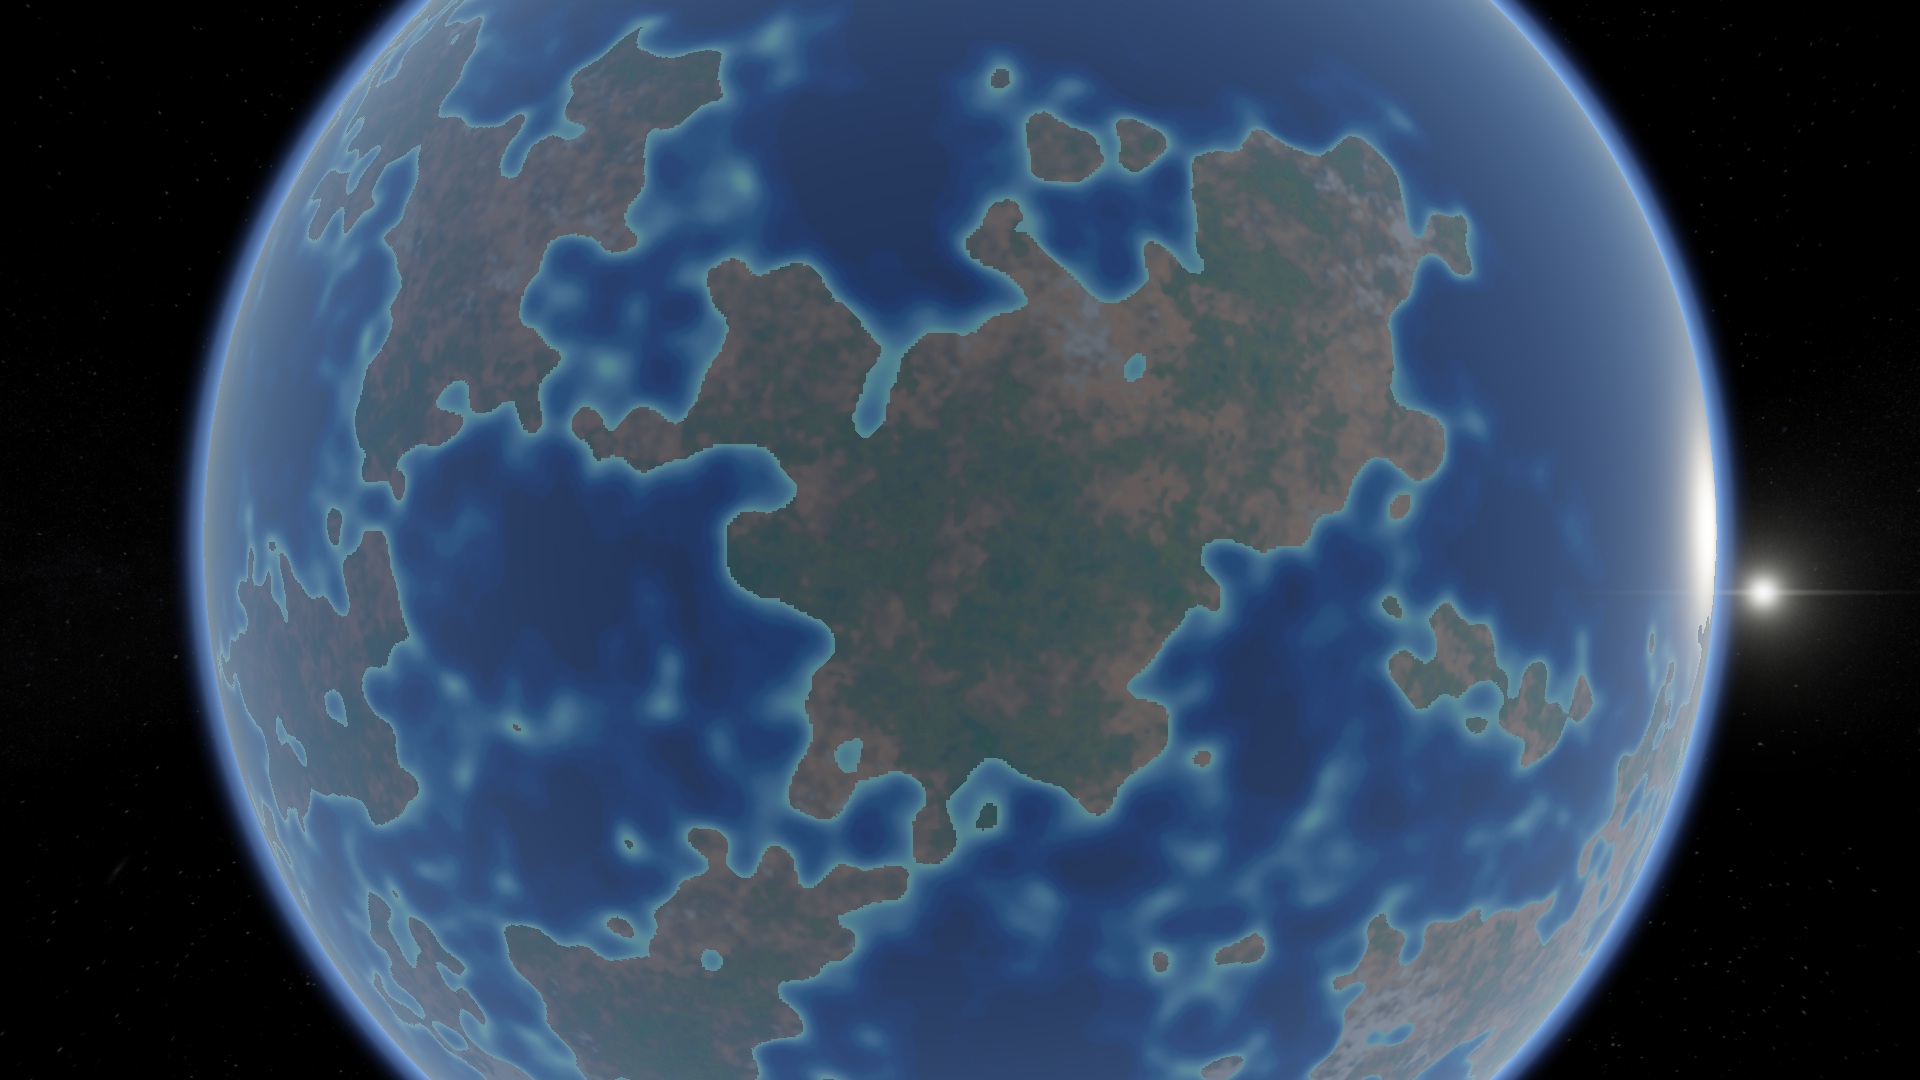
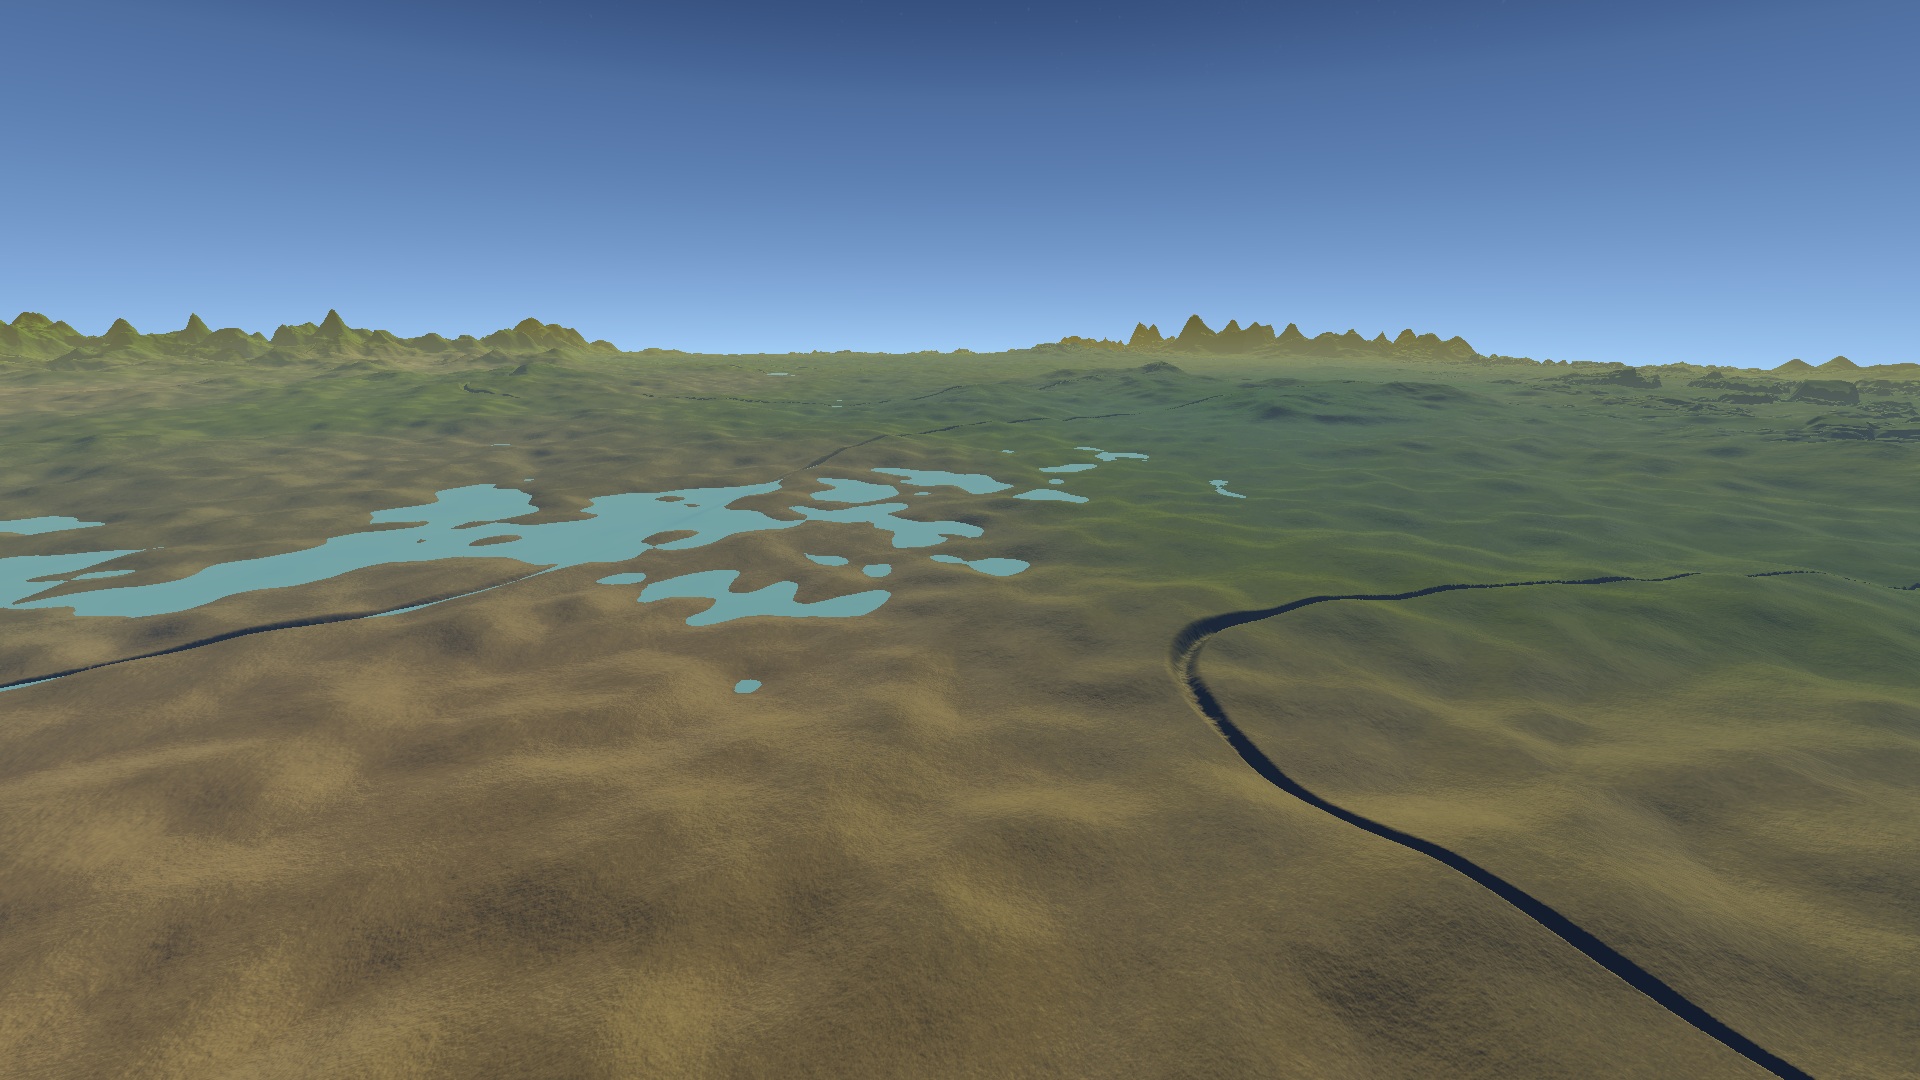
You can see that further away from the camera, there are patches of more arid terrain. We can also decrease temperature and humidity the closer you get to the poles if we are using a spherical planet. Here is what that looks like from space:
Step 4: Mountains
Let's add something more interesting. A good noise function for mountains is ridged fractal noise. Same as the default noise function except for the line:
total += ((1.0 - abs(snoise(position * frequency))) * 2.0 - 1.0) * amplitude;Let's add a mountain function.
# Mountains
- type: noise_ridged
   octaves: 11
   persistence: 0.5
   frequency: 0.03
   low: 0.0
   high: 7500.0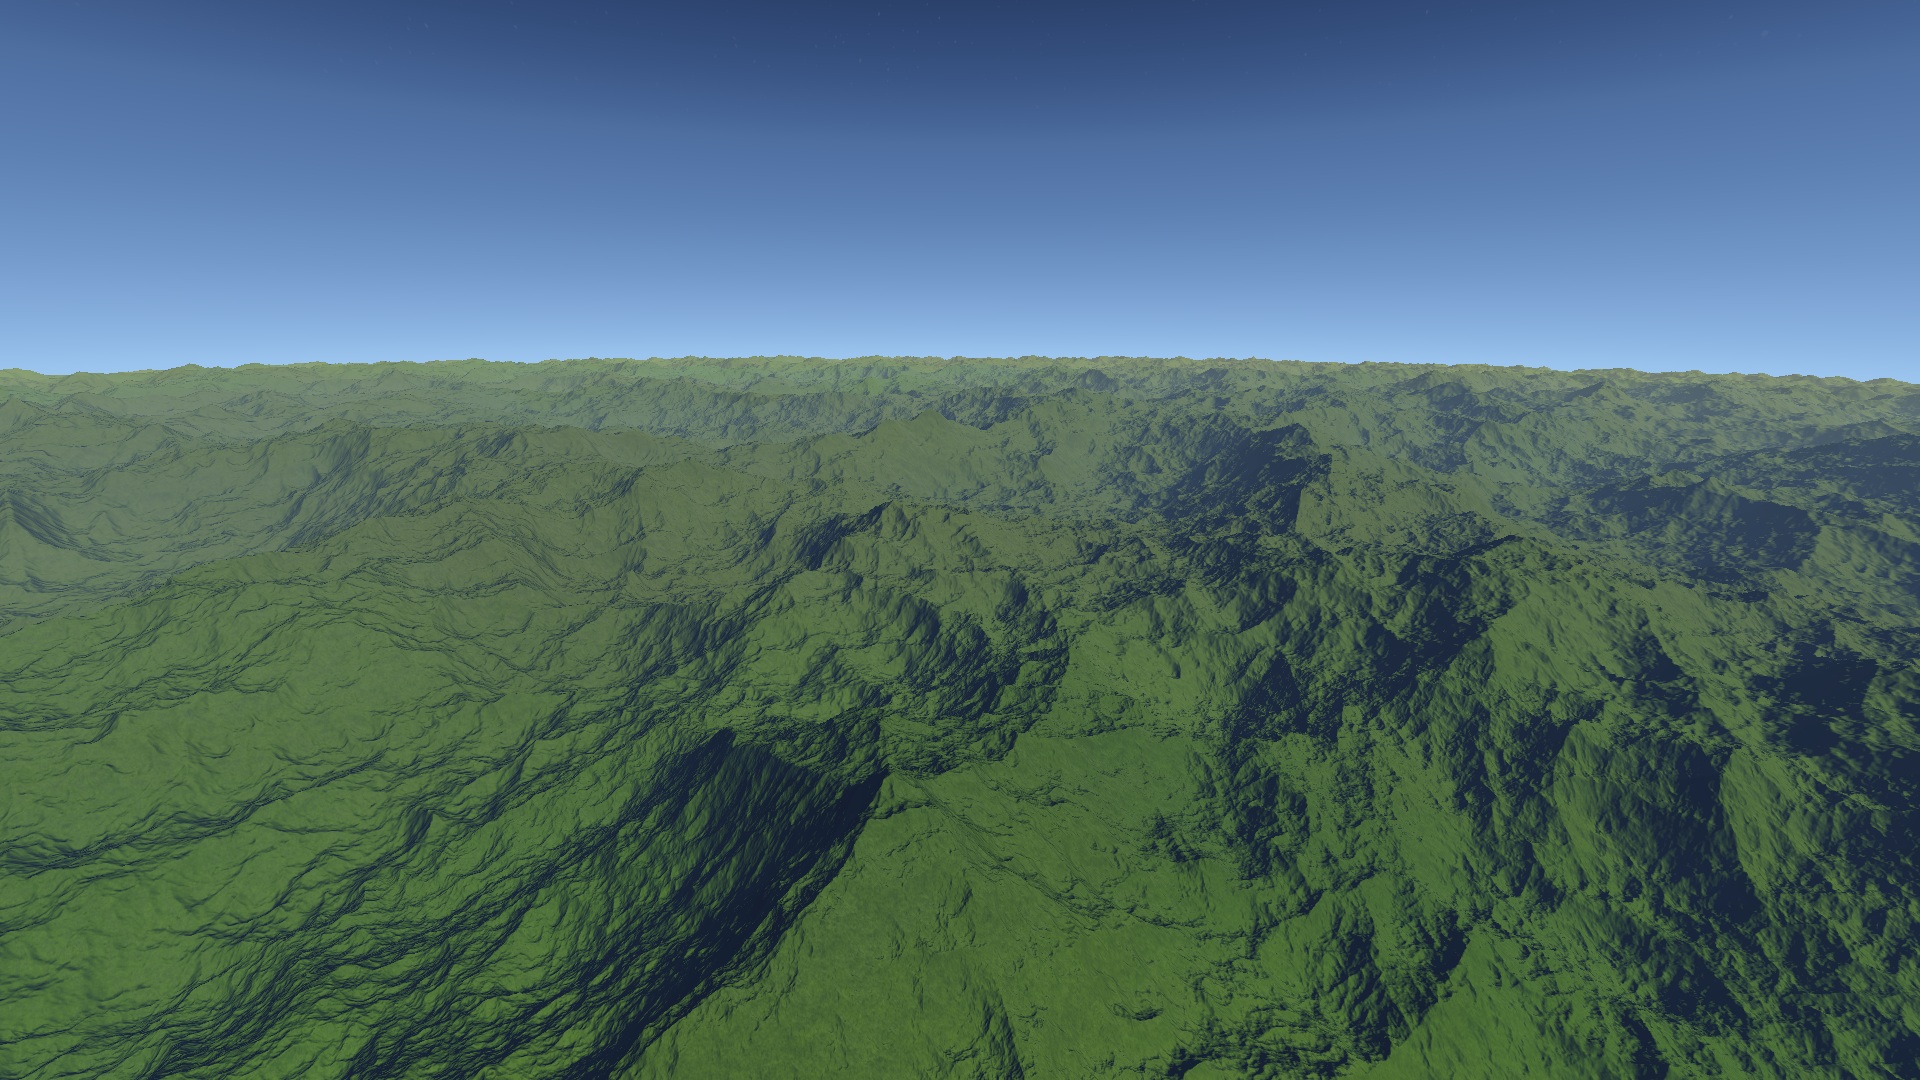
That looks pretty cool! However, those mountains are uniformly distributed over the entire world. We only want the mountains to be present on parts of the world.
A good way to fix this is to use another low frequency noise function that is scaled between 0 and 1. If we multiply the output of that noise function with our mountain function, then mountains will exists where it is 1, but not where it is 0.
# Mountains
- type: noise
   op: mul
   octaves: 7
   persistence: 0.7
   frequency: 0.002
   low: -13.0
   high: 13.0
   clamp: [0.0, 1.0]
   children:
     - type: noise_ridged
        octaves: 11
        persistence: 0.5
        frequency: 0.03
        low: 0.0
        high: 7500.0
Notice that weve added a few things here. We moved the mountain function to be a child of our new function. "op: mul" will multiply the output of the function with its direct children, and the "clamp" will clamp the output between 0 and 1. Now lets see what it looks like:
Well, it's sort of doing what we want, but the transition is awful! We want the transition to be nice and smooth, like an x^3 graph!
So lets introduce a new noise type, noise_cubed. Its the same as default noise, except the final result is cubed before it is scaled between low and high. If we replace "noise" with "noise_cubed" we get the following:
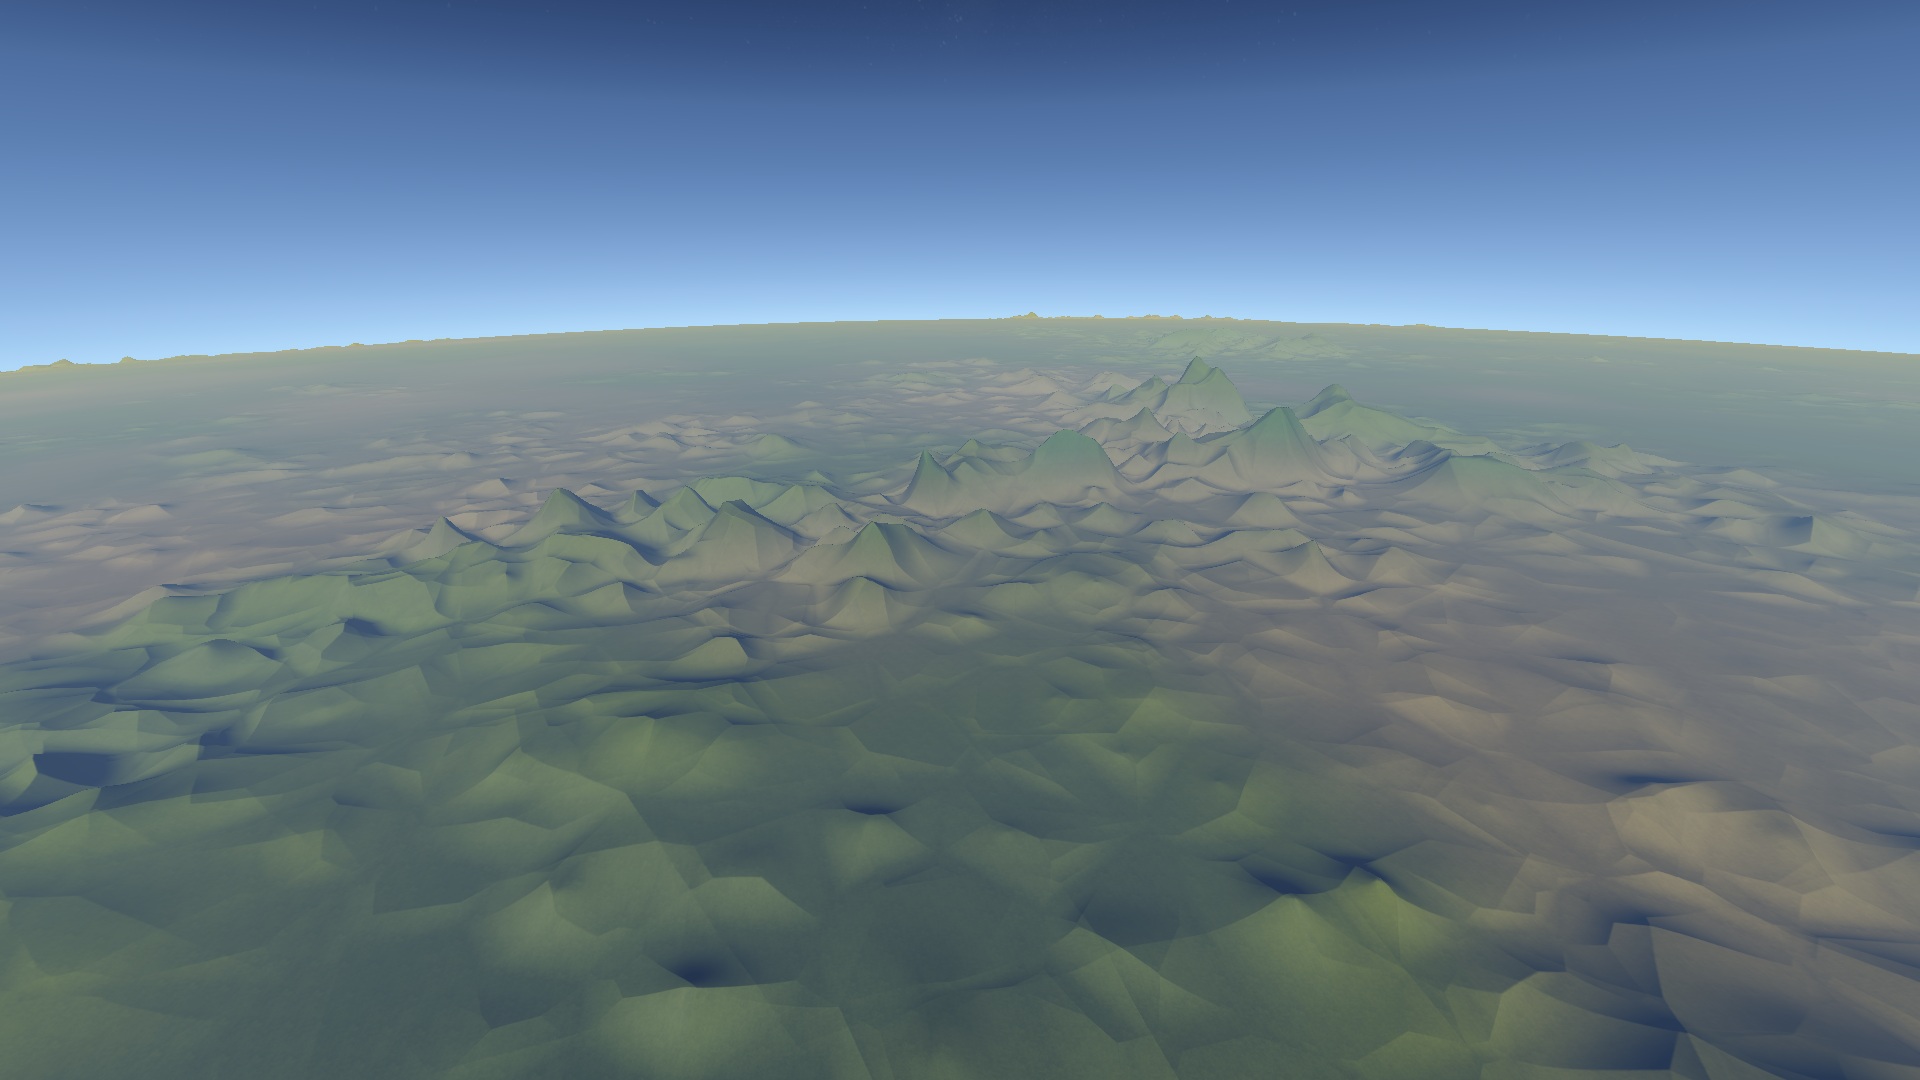
Thats MUCH better. You will notice water on the right side of the image. When terrain is below 0, I simly add a layer of polygons to represent water, and render them with a different shader.
Step 5: Peaks
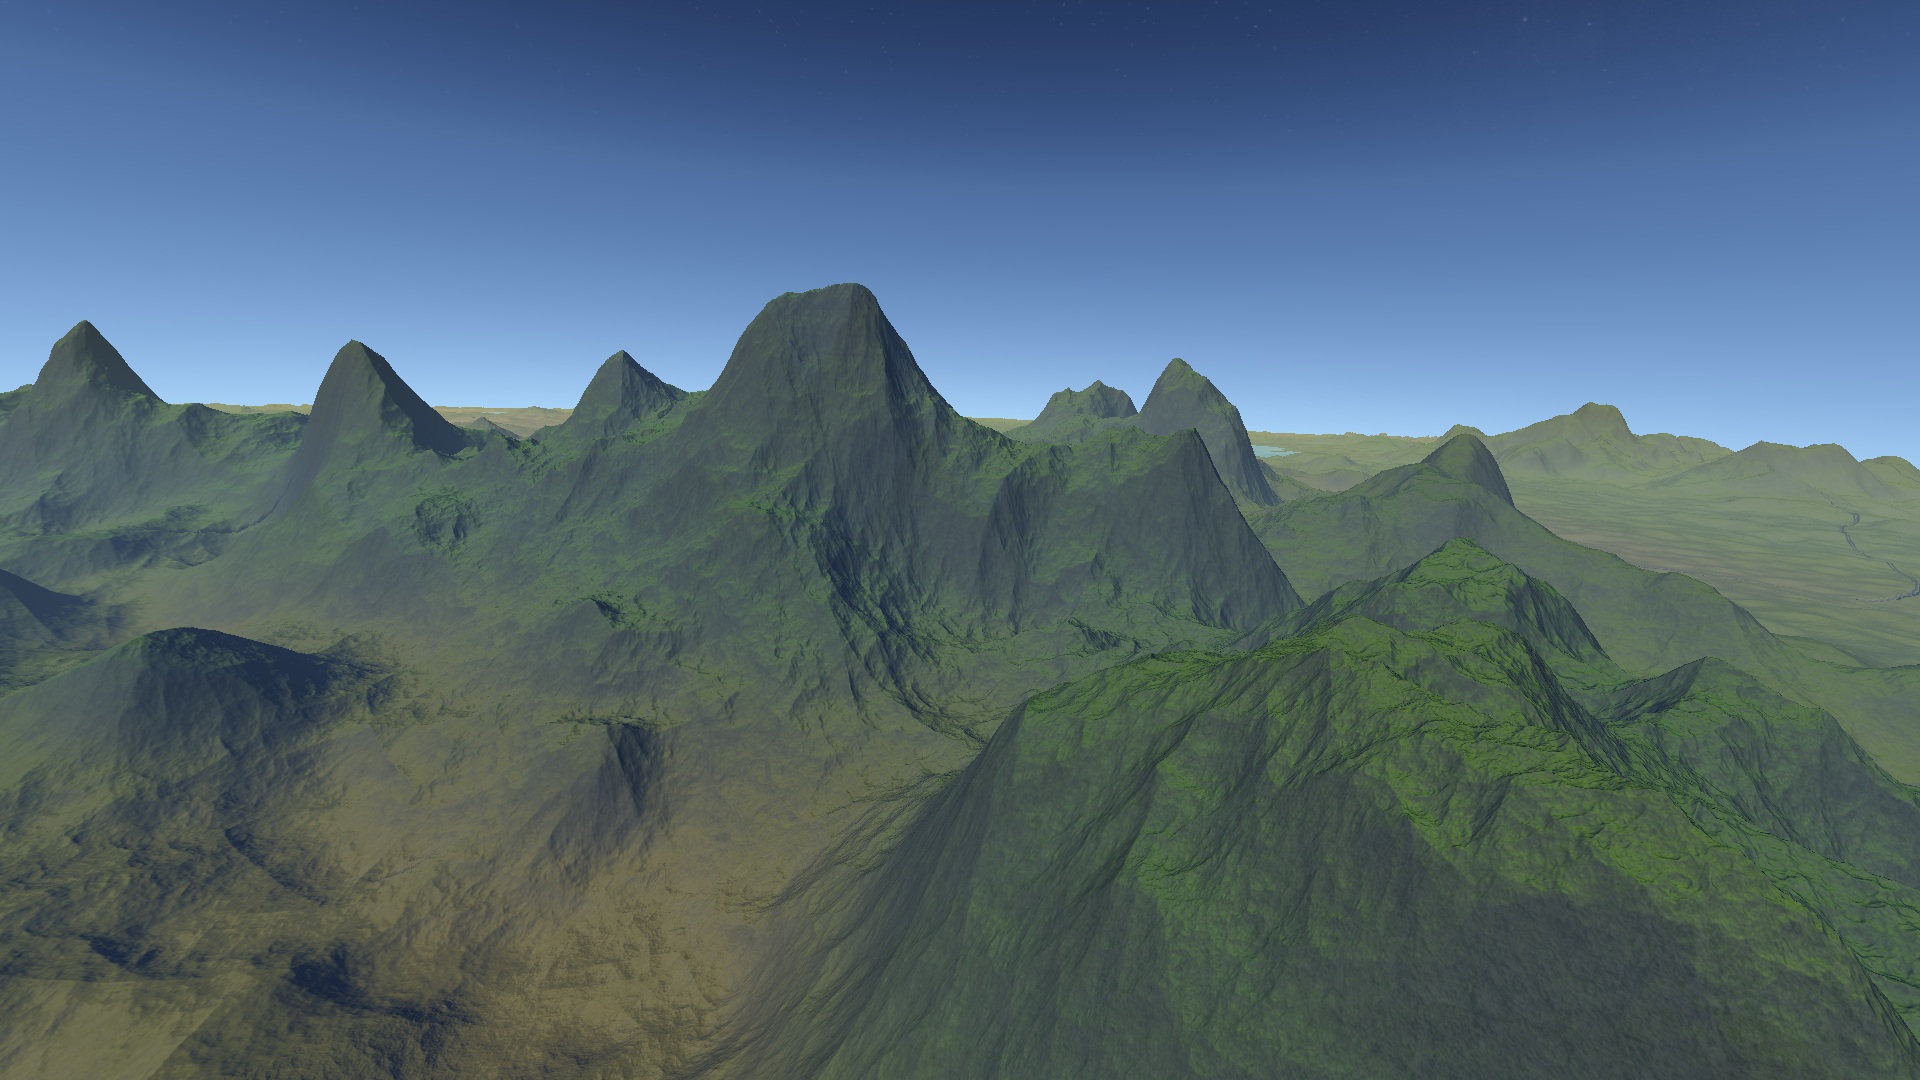
It would be nice if our mountains looked a bit more mountainy, like this:
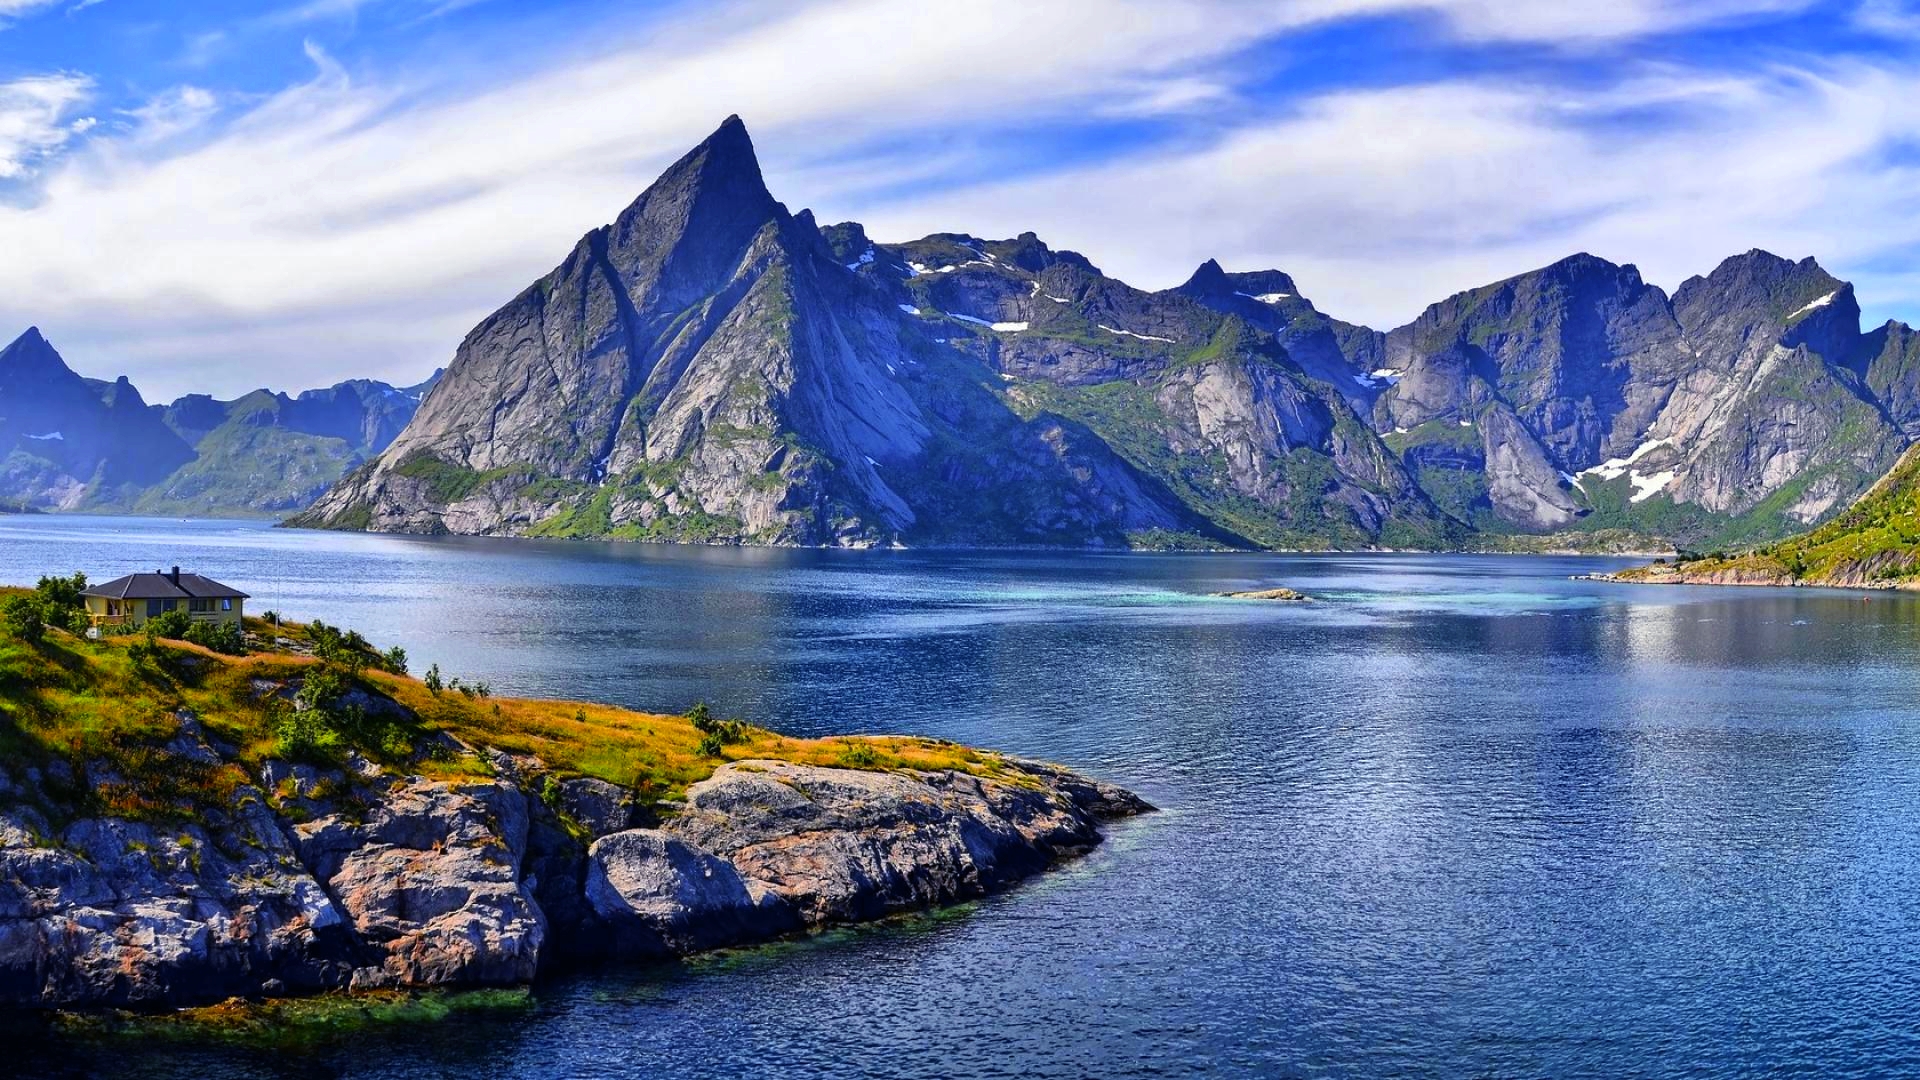
You can notice irregularities that aren't quite present in our image. We might be able to achieve that with just ridged noise and a lot of tweaking, but theres another type of noise that works well for this. Cellular!
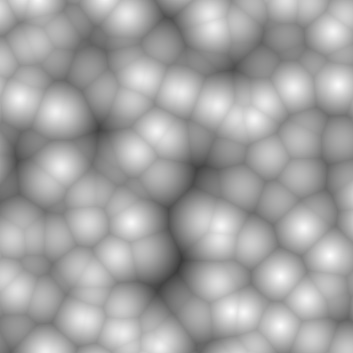
Cellular noise essentially generates a voronoi diagram. Here's some source code that implements cellular noise, and the corresponding paper.
Lets replace our ridged noise function with 1 octave of cellular noise.
- type: noise_cellular
   octaves: 1
   persistence: 0.6
   frequency: 0.05
   low: -25000.0
   high: 25000.0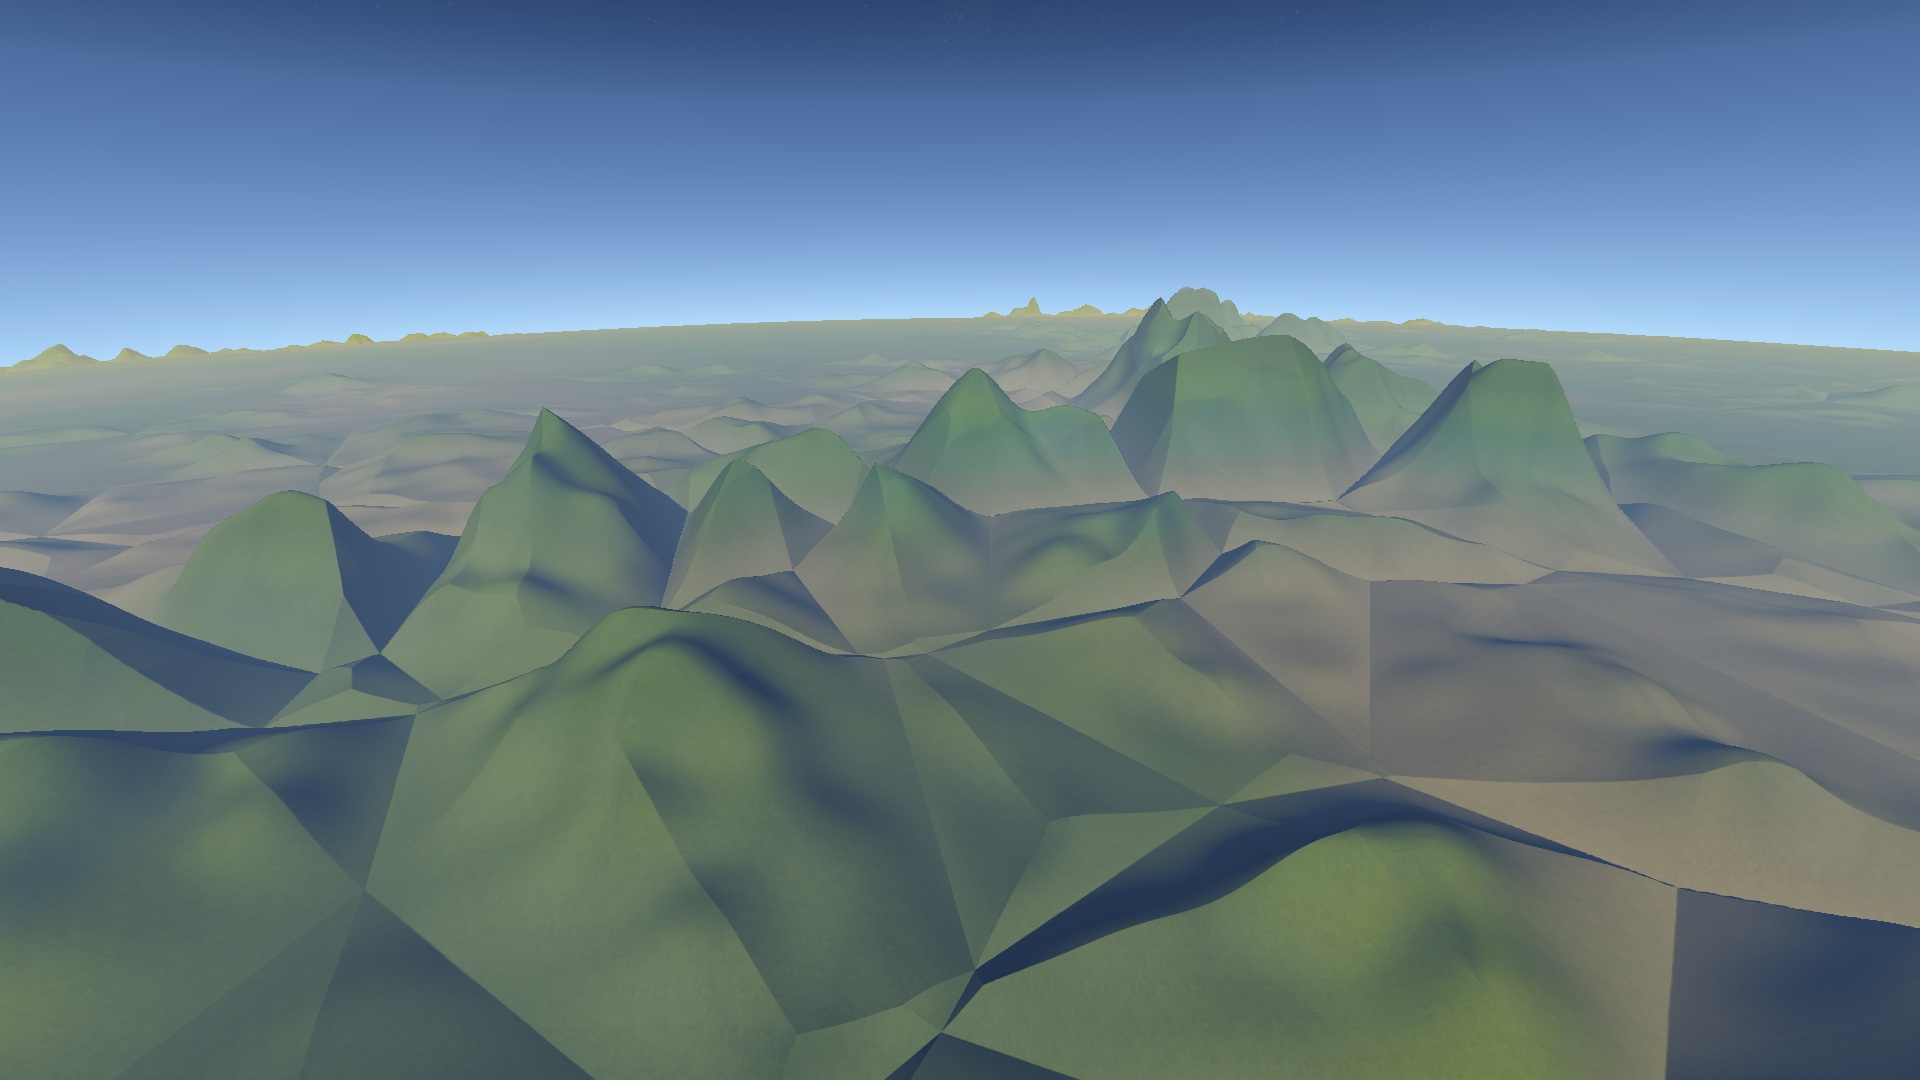
That is a nice shape! However it would be nice if it was a bit smoother near the bottom. Lets try a new noise type, noise_cellular_squared. Unlike noise_squared, the noise is squared before it is added to the total. My cellular squared code looks like this:
float cellularSquared(vec3 position, int octaves, float frequency, float persistence) {
  float total = 0.0;
  float maxAmplitude = 0.0;
  float amplitude = 1.0;
  float tmp;
  for (int i = 0; i < octaves; i++) {
    vec2 ff = cellular(position * frequency);
    tmp = ff.y - ff.x;
    total += tmp * tmp * amplitude;
    frequency *= 2.0;
    maxAmplitude += amplitude;
    amplitude *= persistence;
  }
return total / maxAmplitude;
}
Lets boost it to three octaves and use cellular_squared.
Mmm thats nice... Lets mix it with ridged noise now.
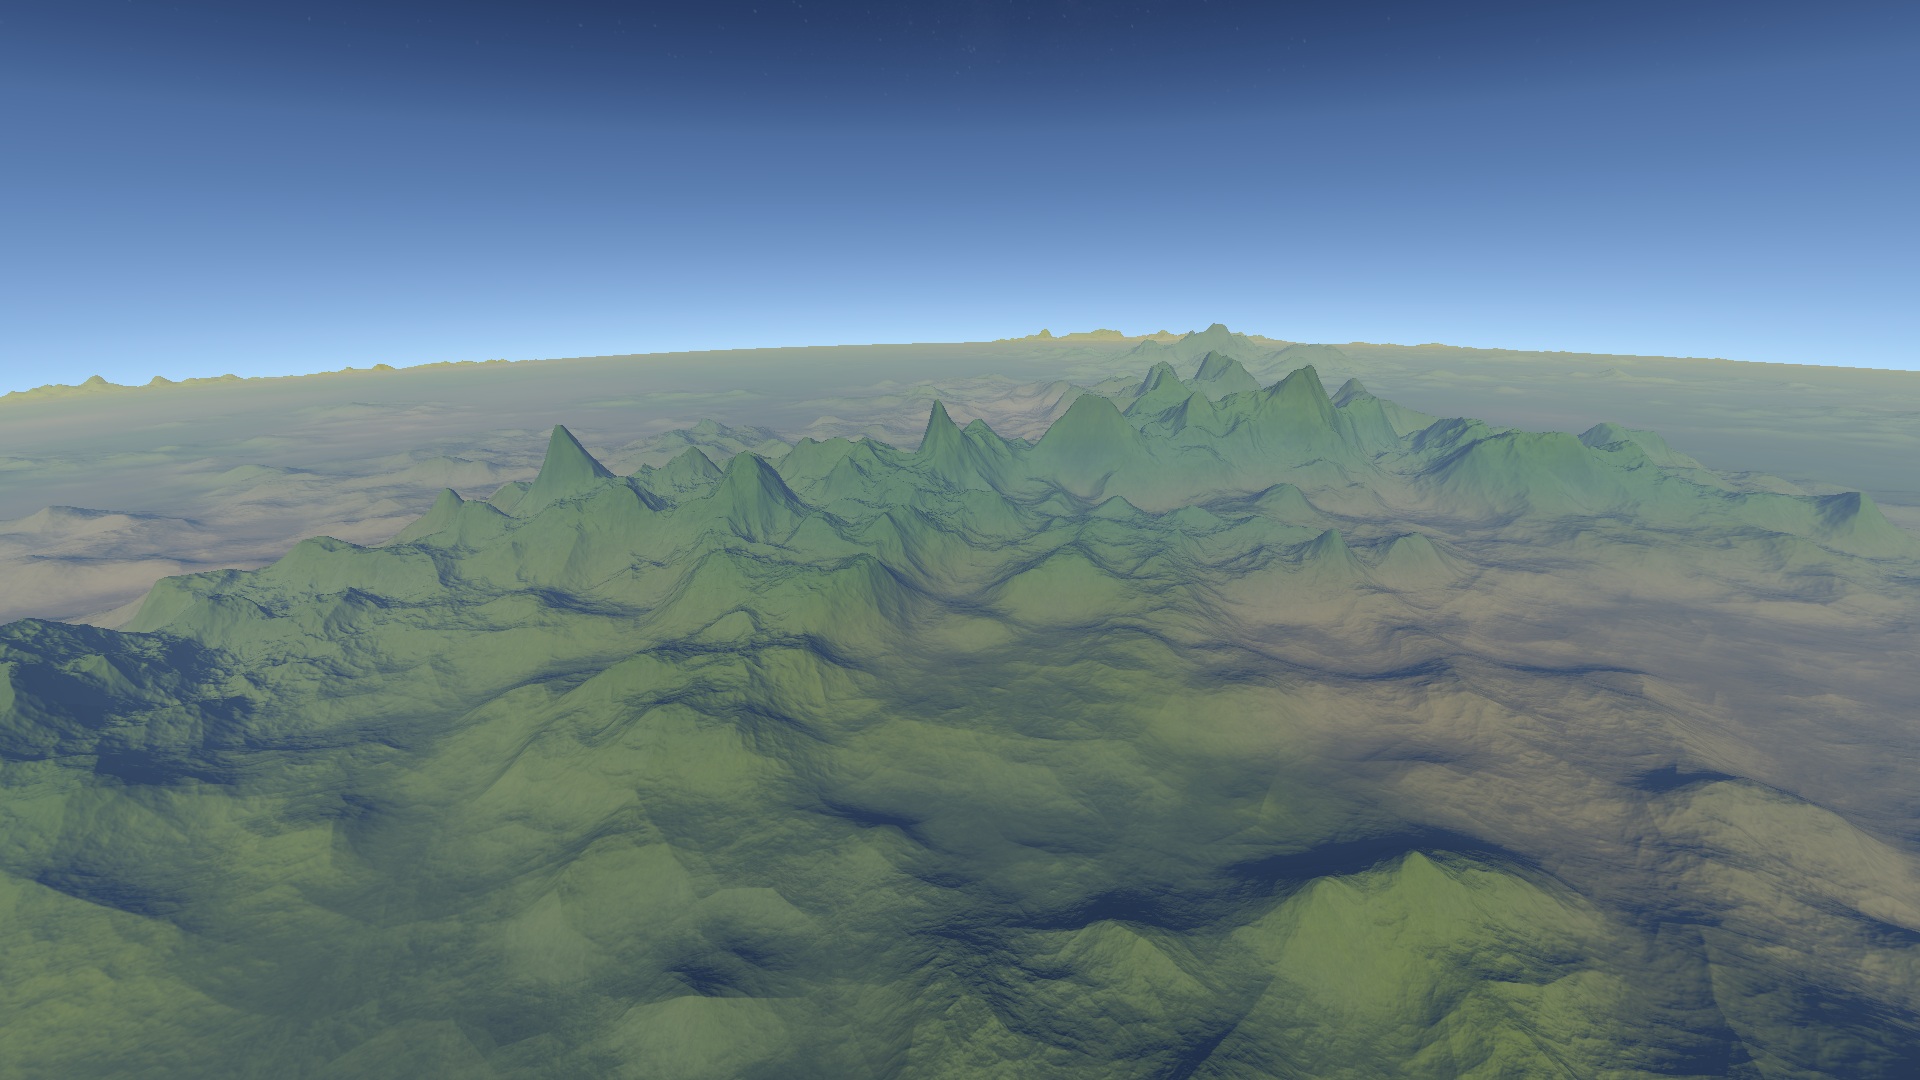
Other than the lack of texturing, it looks a lot like the reference image of the Rocky Mountains! I'm sure you guys can do better, I didn't want to spend all day tweaking this.
Step 6: Details
We should add in some detail noise functions to break up the terrain a bit more. After adding in some more noise, our terrain specification looks like this (If you are never going to walk around on the terrain, you could omit tiny detail):
float cellularSquared(vec3 position, int octaves, float frequency, float persistence) {
  float total = 0.0;
  float maxAmplitude = 0.0;
  float amplitude = 1.0;
  float tmp;
  for (int i = 0; i < octaves; i++) {
    vec2 ff = cellular(position * frequency);
    tmp = ff.y - ff.x;
    total += tmp * tmp * amplitude;
    frequency *= 2.0;
    maxAmplitude += amplitude;
    amplitude *= persistence;
  }
return total / maxAmplitude;
}
Step 7: Plateaus
Let's use our nested function capability to add some plateaus. In order to get a flat top, we need to use our handy clamp function. Let's make two sizes of plateau and blend them together.
# Plateaus
- type: noise_cubed
   op: mul
   octaves: 6
   persistence: 0.6
   frequency: 0.003
   low: -25.0
   high: 25.0
   clamp: [0.0, 1.0]
   children:
     # Tall plateaus
     - type: noise
        octaves: 5
        persistence: 0.55
        frequency: 0.08
        low: -13000.0
        high: 8000.0
        clamp: [0.0, 1500.0]
      # Short plateaus
      - type: noise
        octaves: 5
        persistence: 0.6
        frequency: 0.1
        low: -7000.0
        high: 5000.0
        clamp: [0.0, 750.0]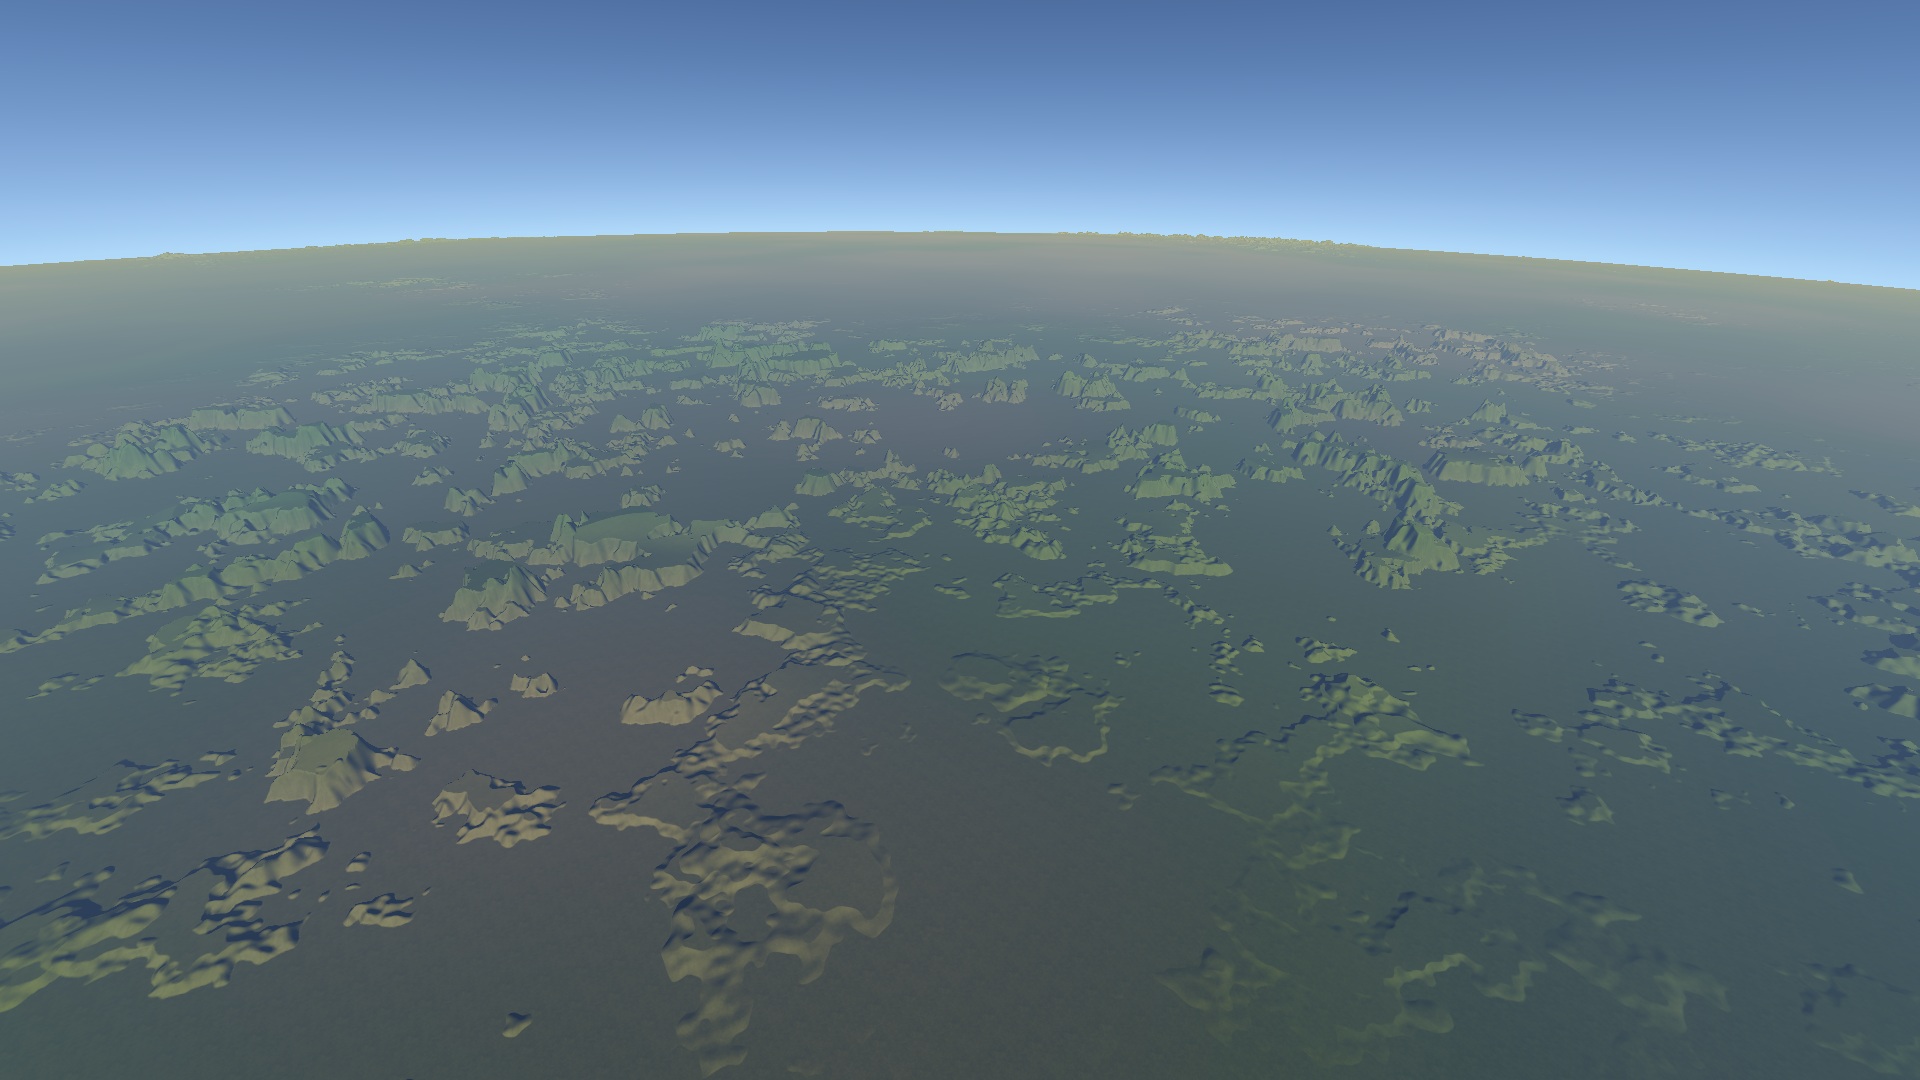
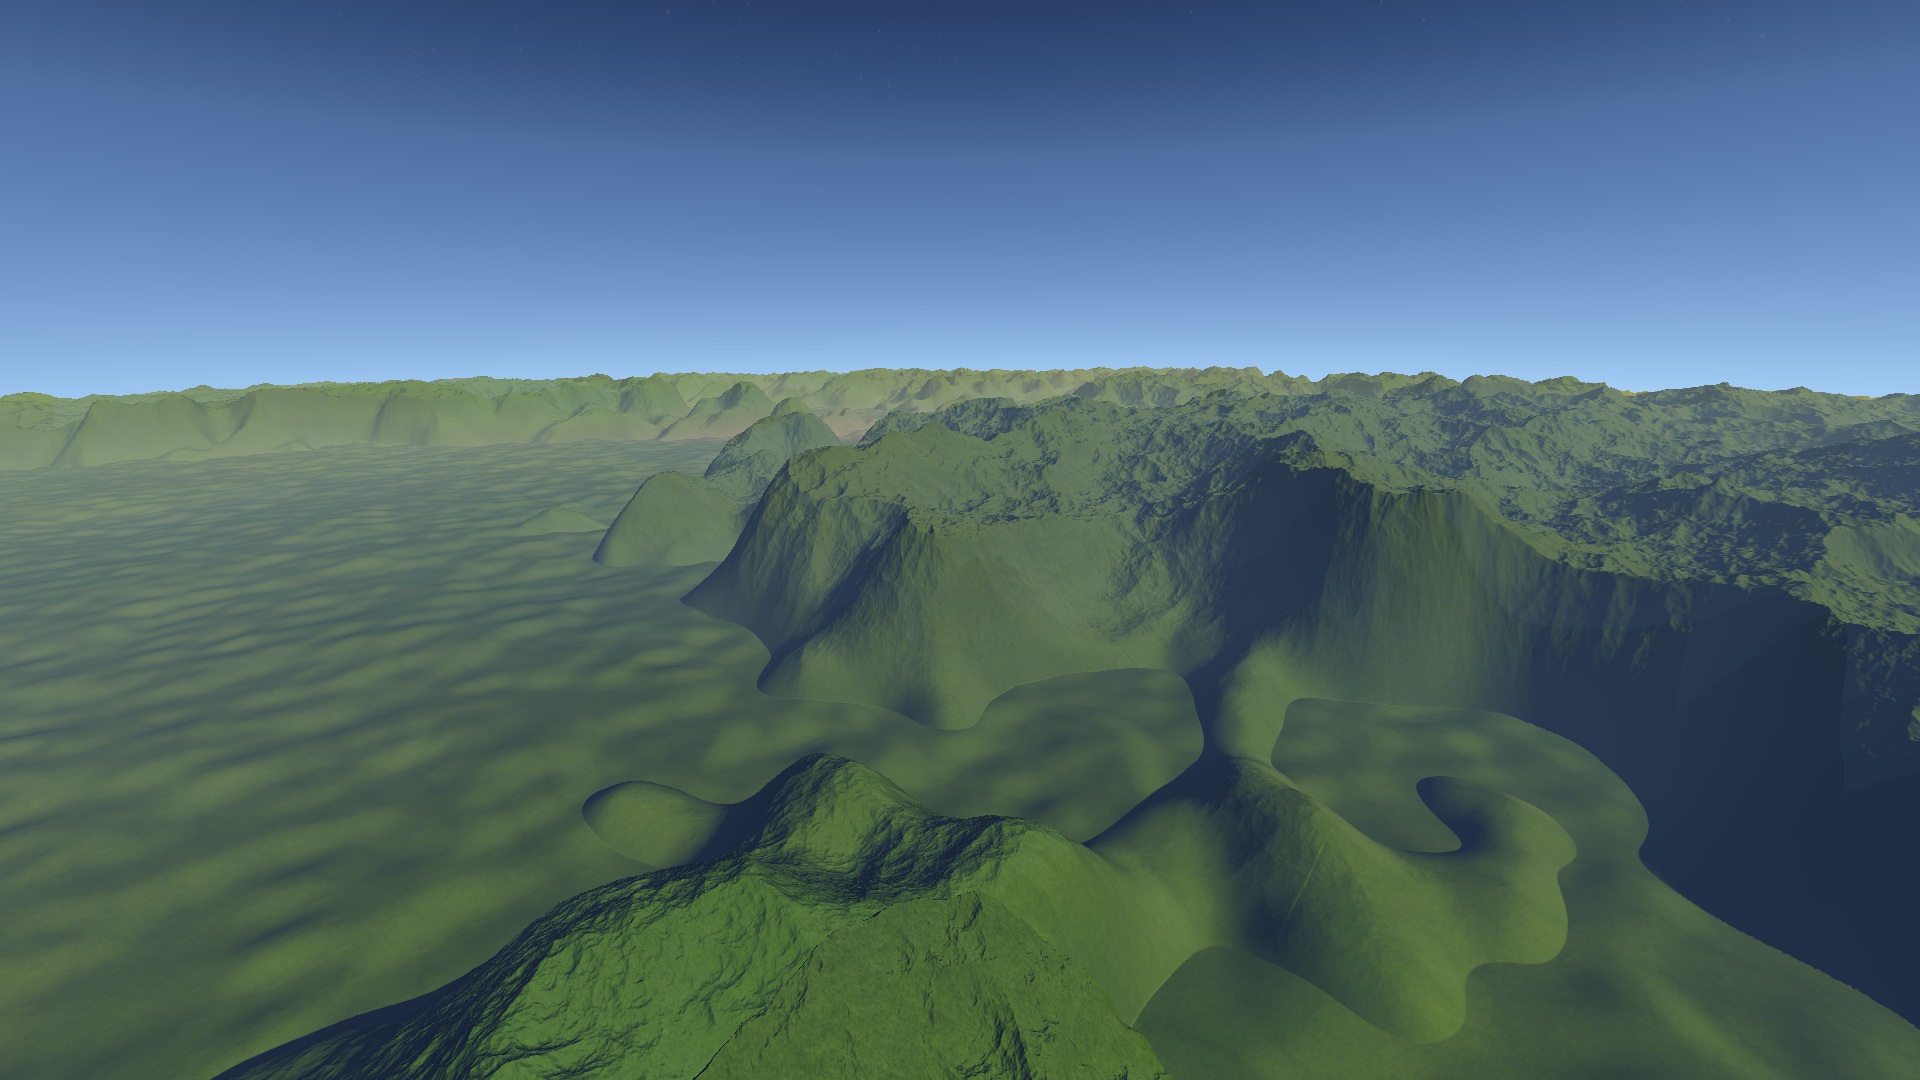
Seems to form some decent plateaus! If it had better texturing it would look worlds better. Don't hate too much.
Step 8: Oceans
Oceans are incredibly easy. Just a regular thresholded noise function.
# Oceans
- type: noise
   op: mul
   octaves: 6
   persistence: 0.75
   frequency: 0.00015
   low: -5.0
   high: 7.0
   clamp: [0.0, 1.0]
   children:
     - type: noise
        op: sub
        octaves: 6
        persistence: 0.9
        frequency: 0.002
        low: 10000.0
        high: 20000.0
Here they are by themselves.
Seems pretty blobby, but thats ok. Once we mix in the rest of the terrain functions, it won't look that way.
Step 9: Rivers and Ravines
Rivers are tough to do with noise alone. Ideally you would do a separate pass after noise generation to place rivers, but sometimes fake rivers can suite your needs as well. If we create a ravine noise function, it will naturally form rivers when it reduces the height level below 0. First we need to figure out a general shape for rivers. Lets use ridged noise as a threshold, and clamp the bejesus out of it.
# Rivers
- type: noise_ridged
   op: mul
   octaves: 1
   persistence: 0.1
   frequency: 0.015
   low: -35.0
   high: 1.1
   clamp: [0.0, 1.0]
   children:
   - type: noise
      op: sub
      octaves: 3
      persistence: 0.6
      frequency: 0.05
      low: 600.0
      high: 700.0
Notice that the op for the child is sub, meaning it will subtract from the height.
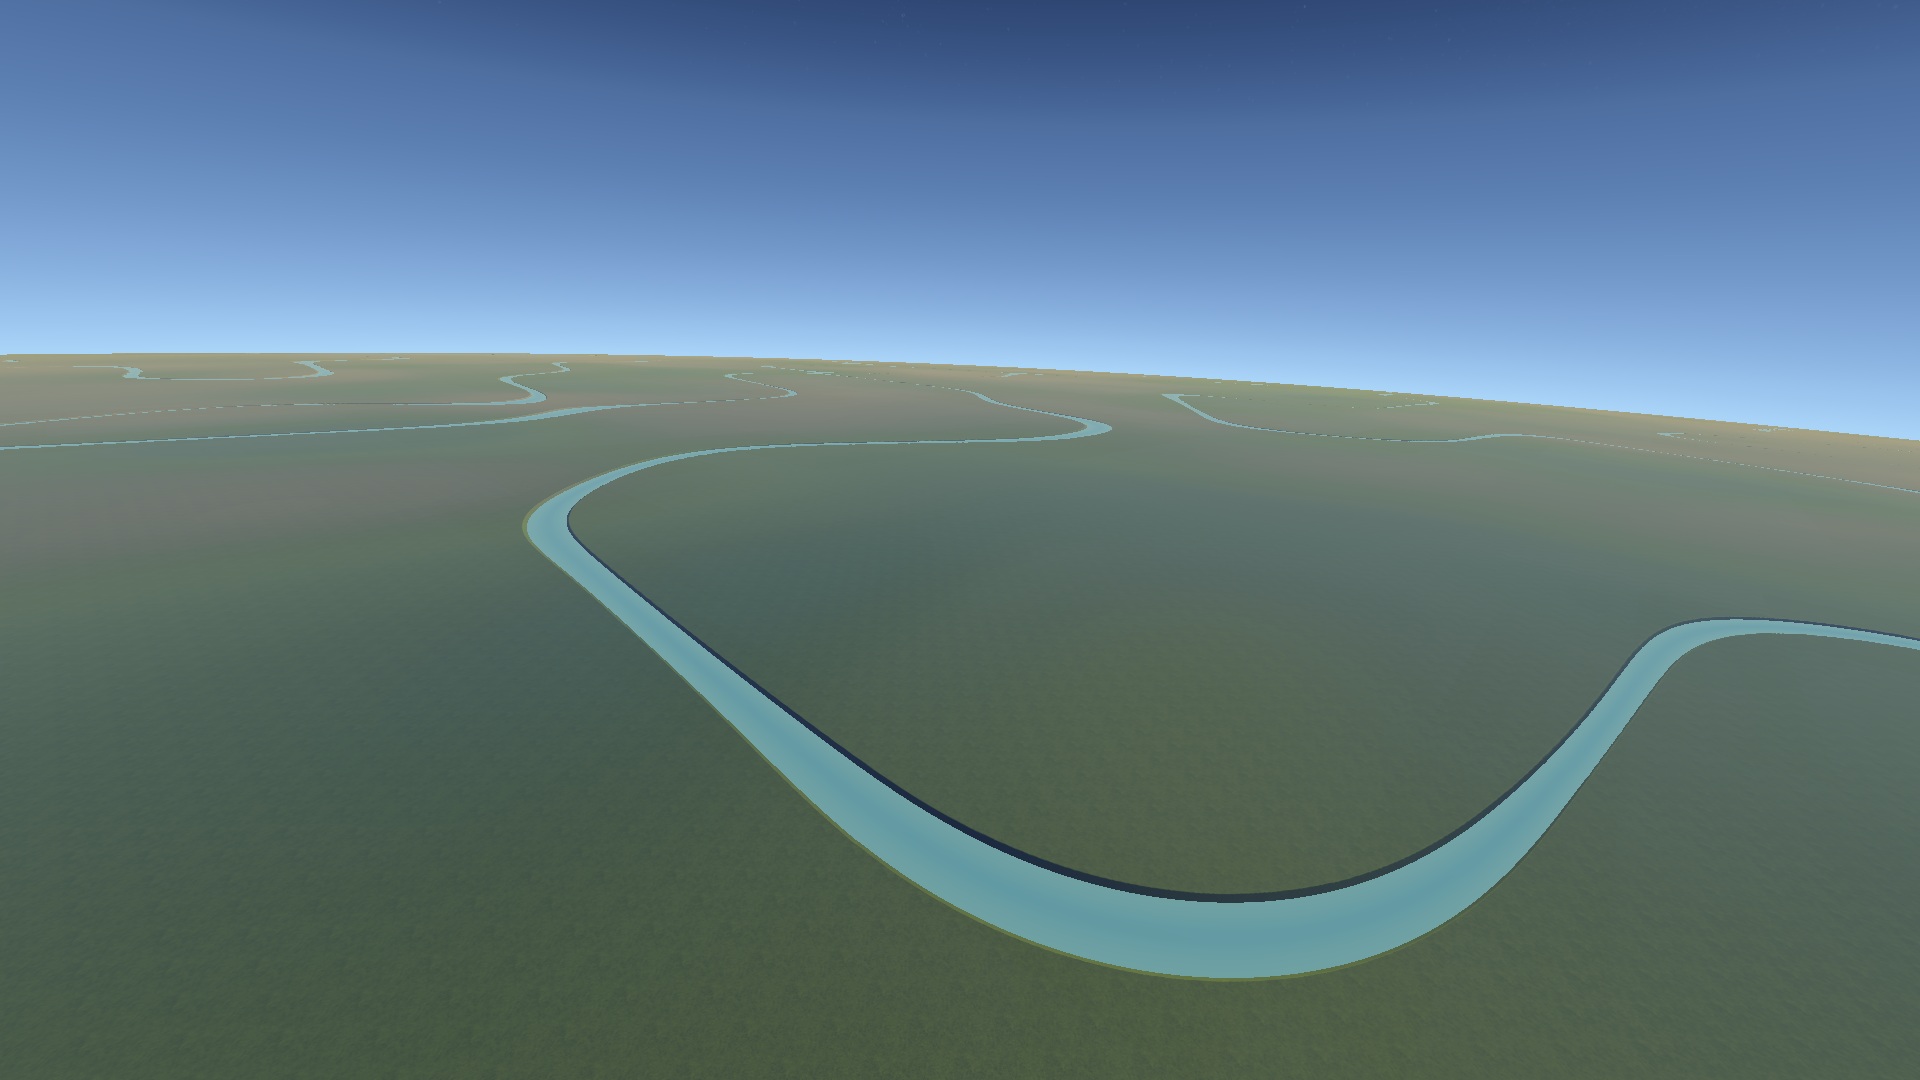
That vaguely resembles a river... Though it would be nice if we could get rid of that ugly steep drop off. Let's see if we can do better.
# Rivers
- type: noise_ridged
   octaves: 1
   persistence: 0.1
   frequency: 0.015
   low: -55.0
   high: 1.05
   clamp: [0.0, 1.0]
   children:
   - type: squared
      op: mul
      children:
       - type: noise
          op: sub
          octaves: 8
          persistence: 0.6
          frequency: 0.1
          low: -150.0
          high: 800.0
          clamp: [0.0, 1000.0]
Notice that I added another stage, of type "squared". This is a special stage that takes the value of the previous stage, squares it, the passes it through. Thus eliminating the ugly sharp edge. We got rid of the op on noise_ridged because squared doesn't use op.
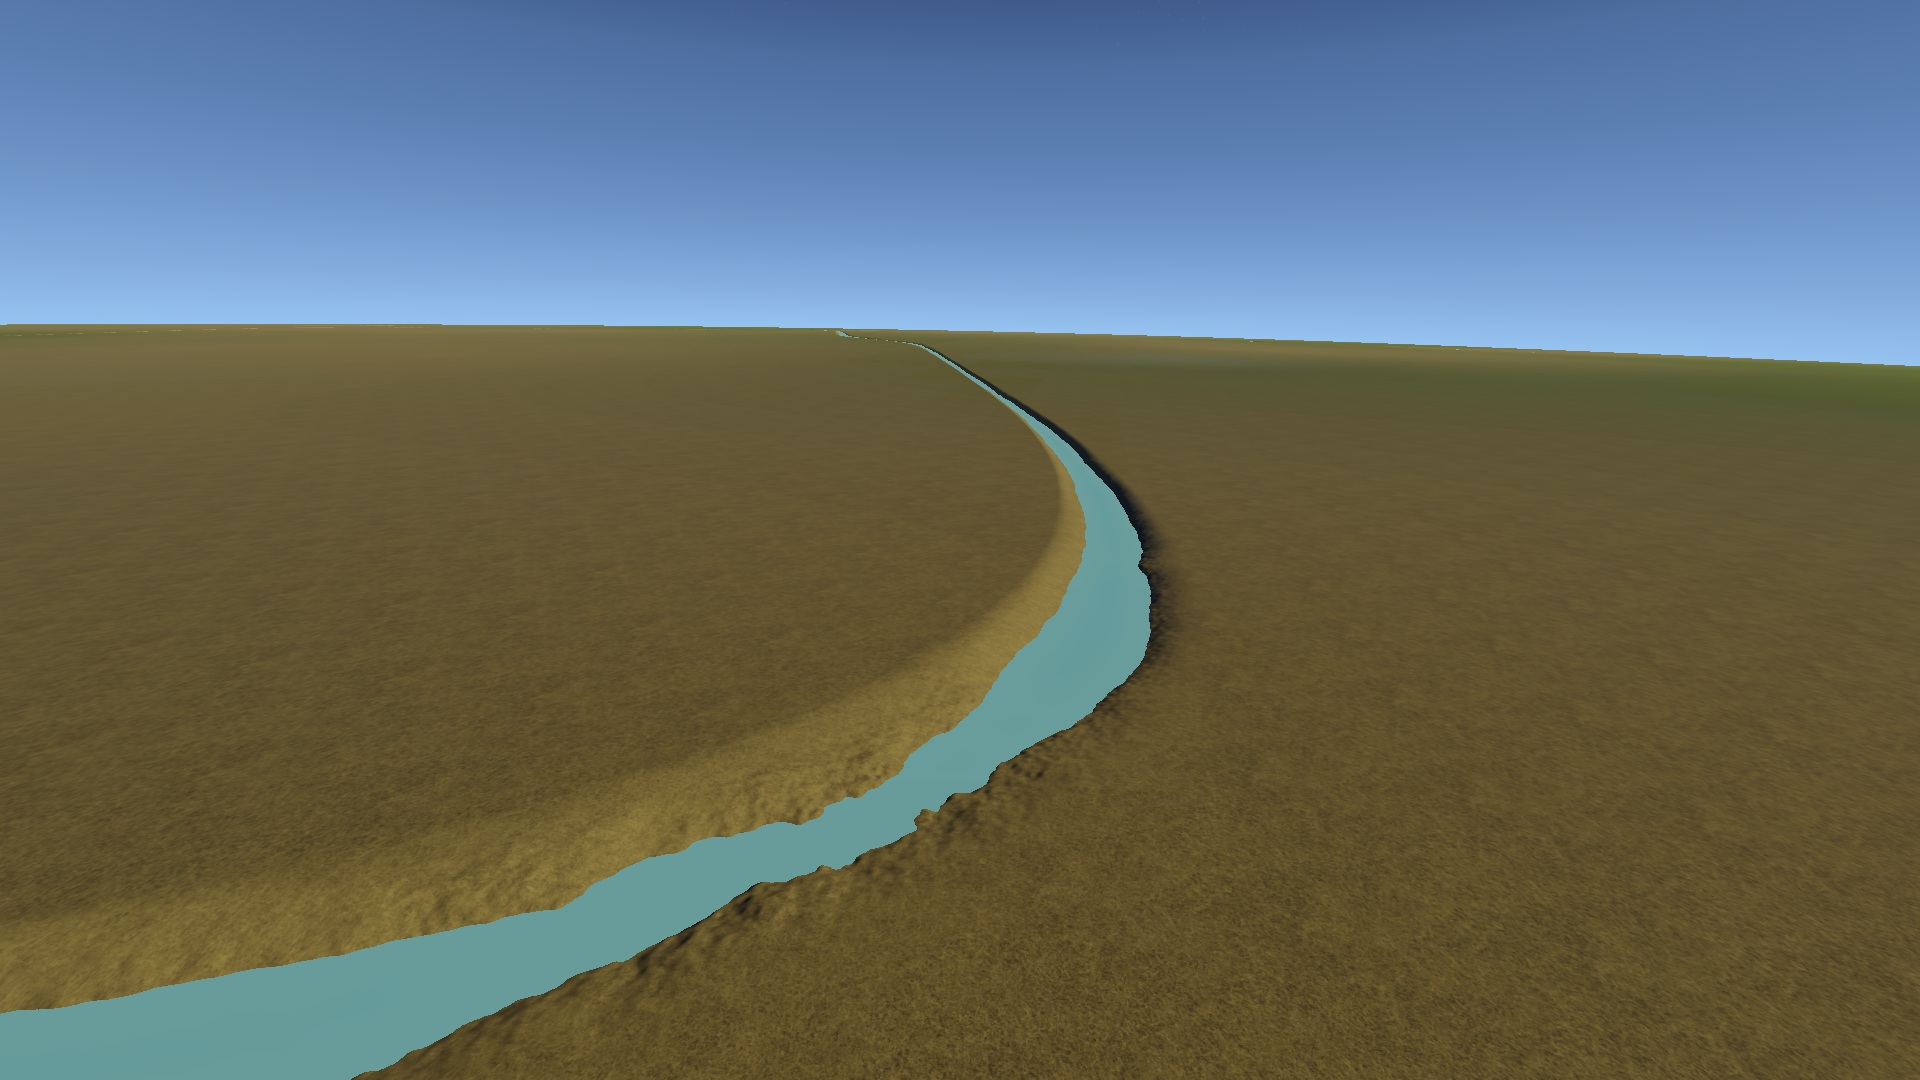
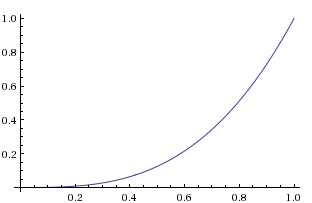
It looks pretty good! Well... compared to how it was, at least. However, there's a problem here. The bottom of the river/ravine is a sharp point. Lets invert a "river" by changing sub to add.
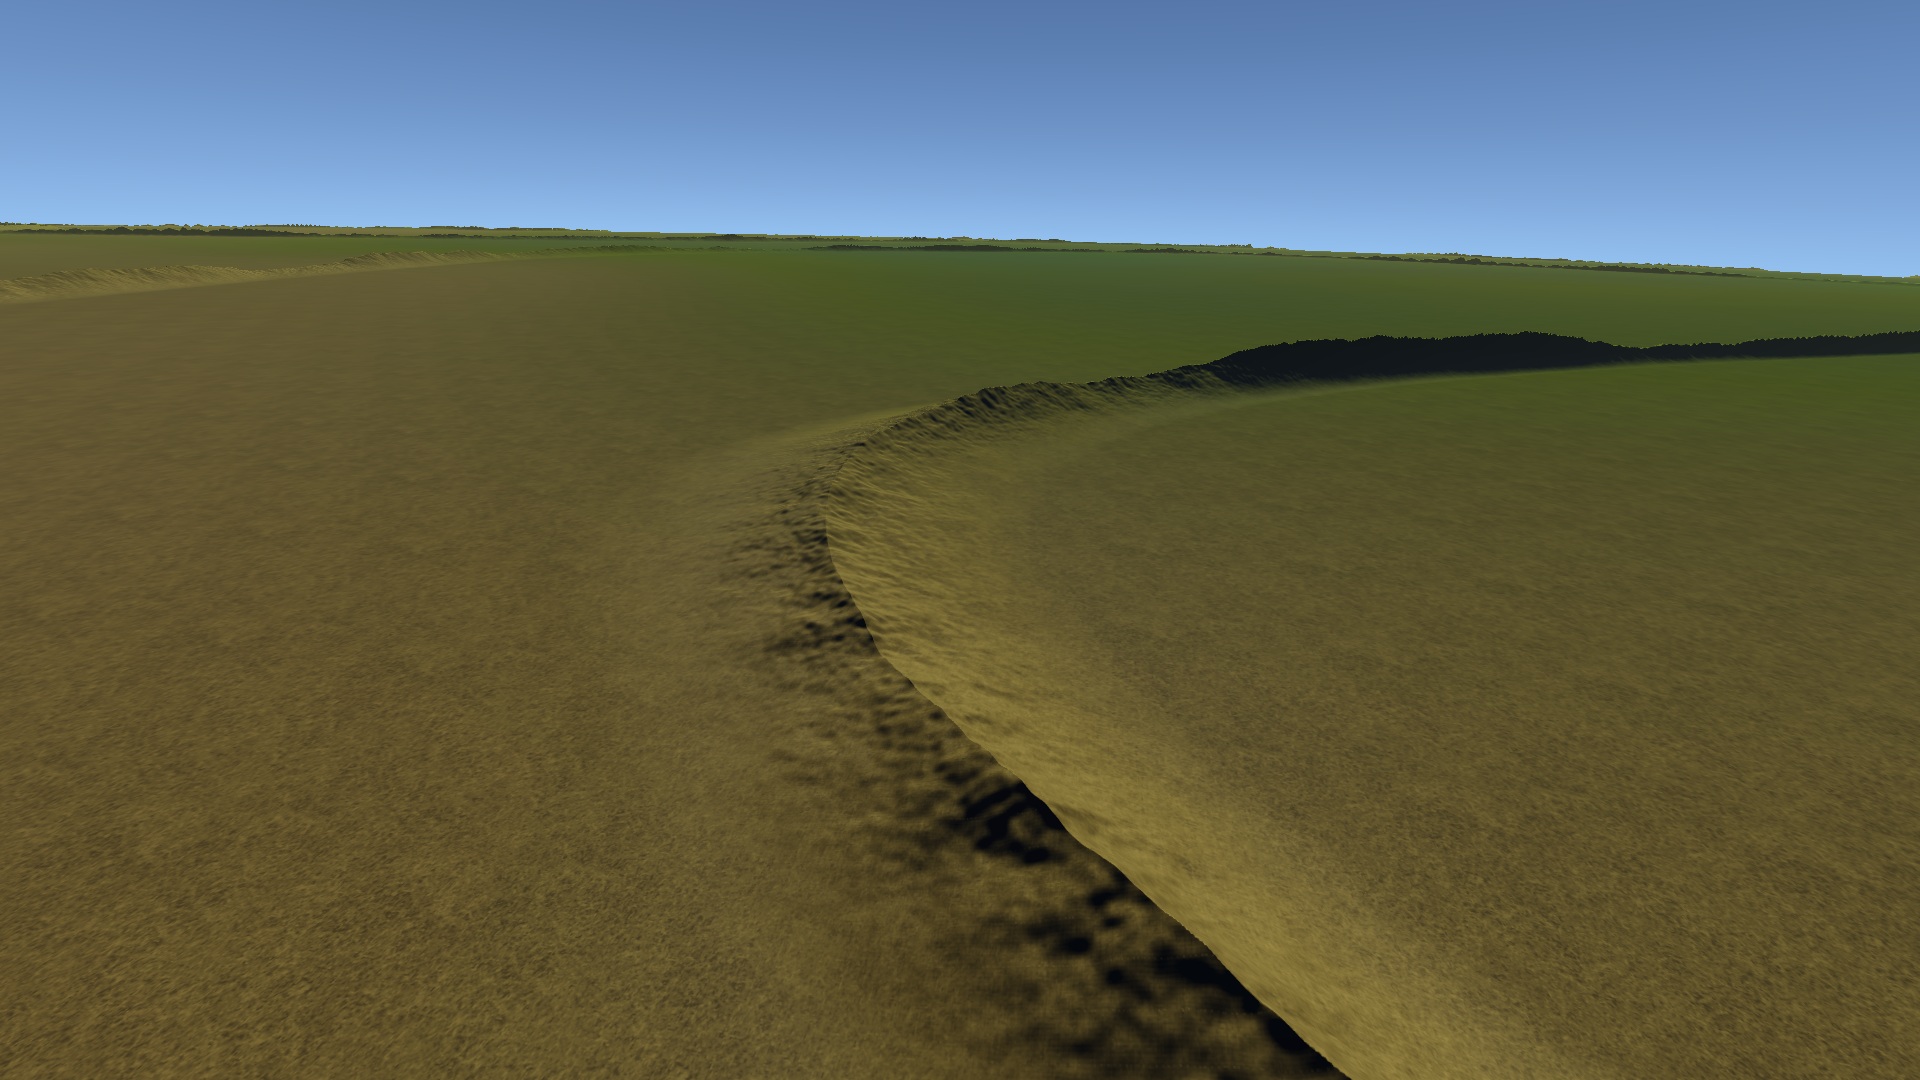
Thats not good... the problem is, our function looks like this:
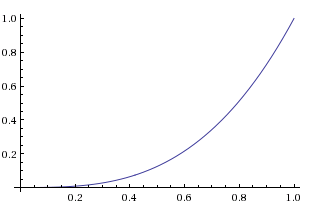
When it needs to look like this:
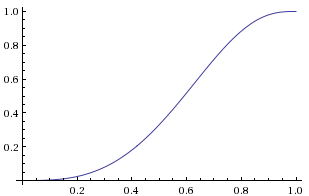
I love wolfram alpha...
Hold on to your hats, here it comes!
# Rivers
- type: noise_ridged
   octaves: 1
   persistence: 0.1
   frequency: 0.015
   low: -185.0
   high: 1.0
   clamp: [0.0, 1.0]
   children:
      # Smooth it
      - type: cubed
        op: sub
        children:
           # Flip it
           - type: constant
              low: 1.0
              children:
                 # Smooth the other side
                 - type: cubed
                    op: sub
                    children:
                       # Flip it back
                       - type: constant
                          low: 1.0
                          op: mul
                          children:
                              # Finally, height
                              - type: noise
                                 op: add
                                 octaves: 8
                                 persistence: 0.6
                                 frequency: 0.1
                                 low: -200.0
                                 high: 800.0
                                 clamp: [0.0, 1000.0]
Just look at that nesting! Also notice that I switched to using cubed instead of squared, and made the "low" for the first stage way lower to make rivers smaller. Due to the way ridged noise scales, you will always have noise at "high", so lowering the "low" just reduces the river width, at least with the way I implemented it. I added comments to show you what each step does, but this is essentially turning our:
into:
The "constant" type treats "low" as a constant, and applies the previous stages output to the constant using the previous stages "op". Lets look at our river/ravine now:
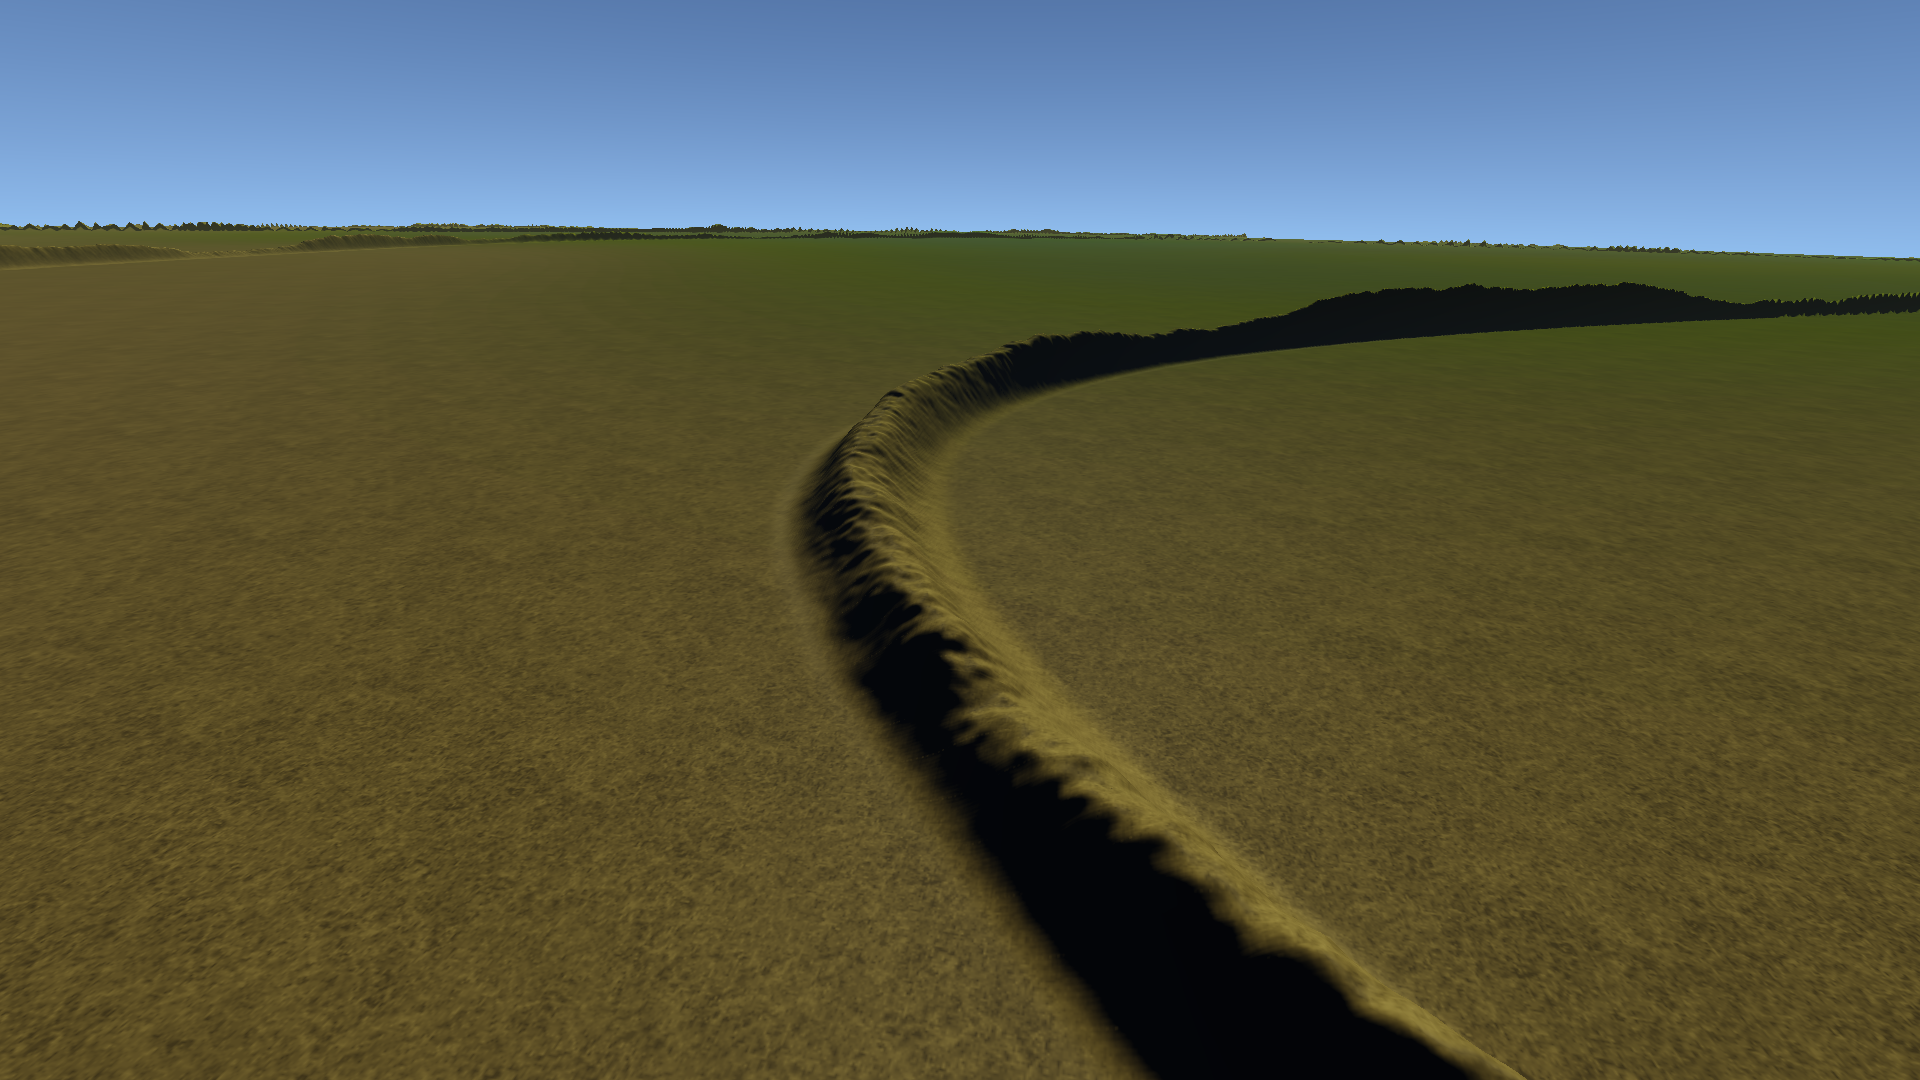
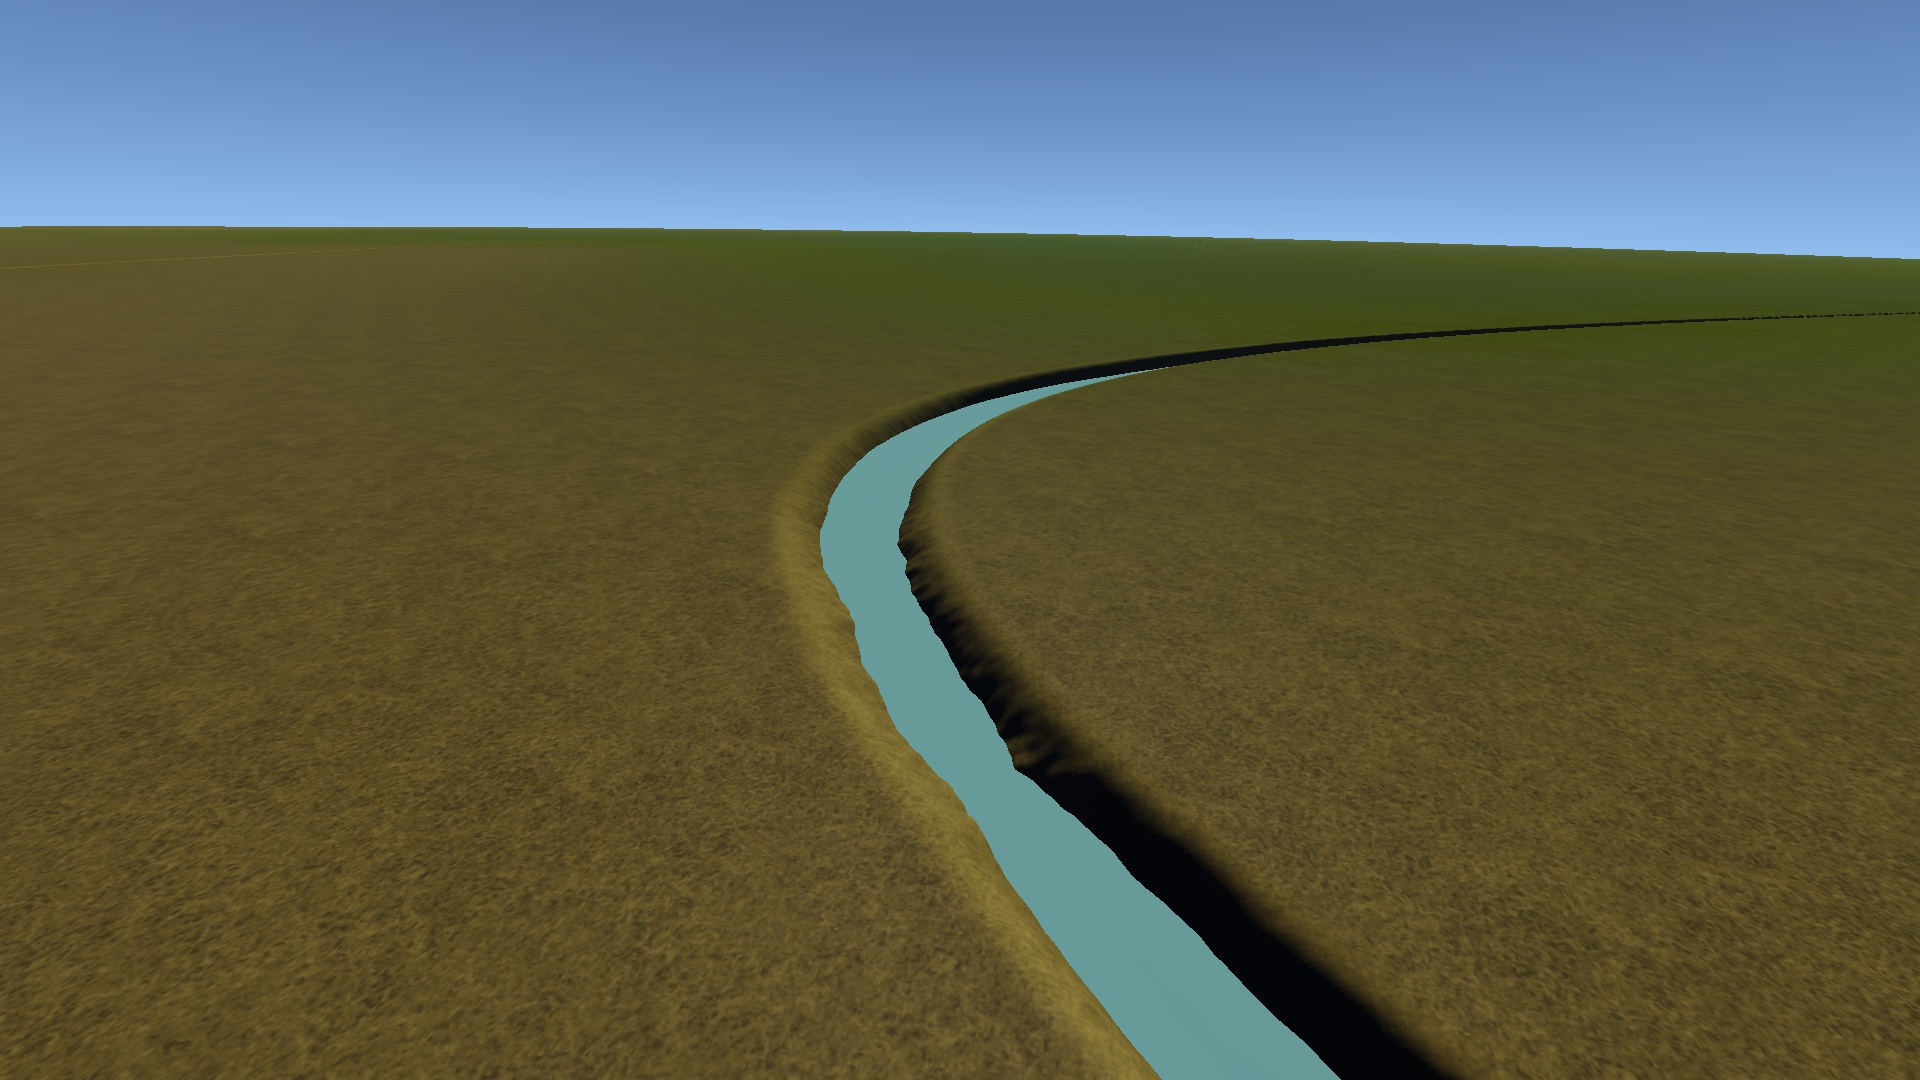
They are still pretty damn ugly, but whatever. You get the idea.
Step 10: Combine everything.
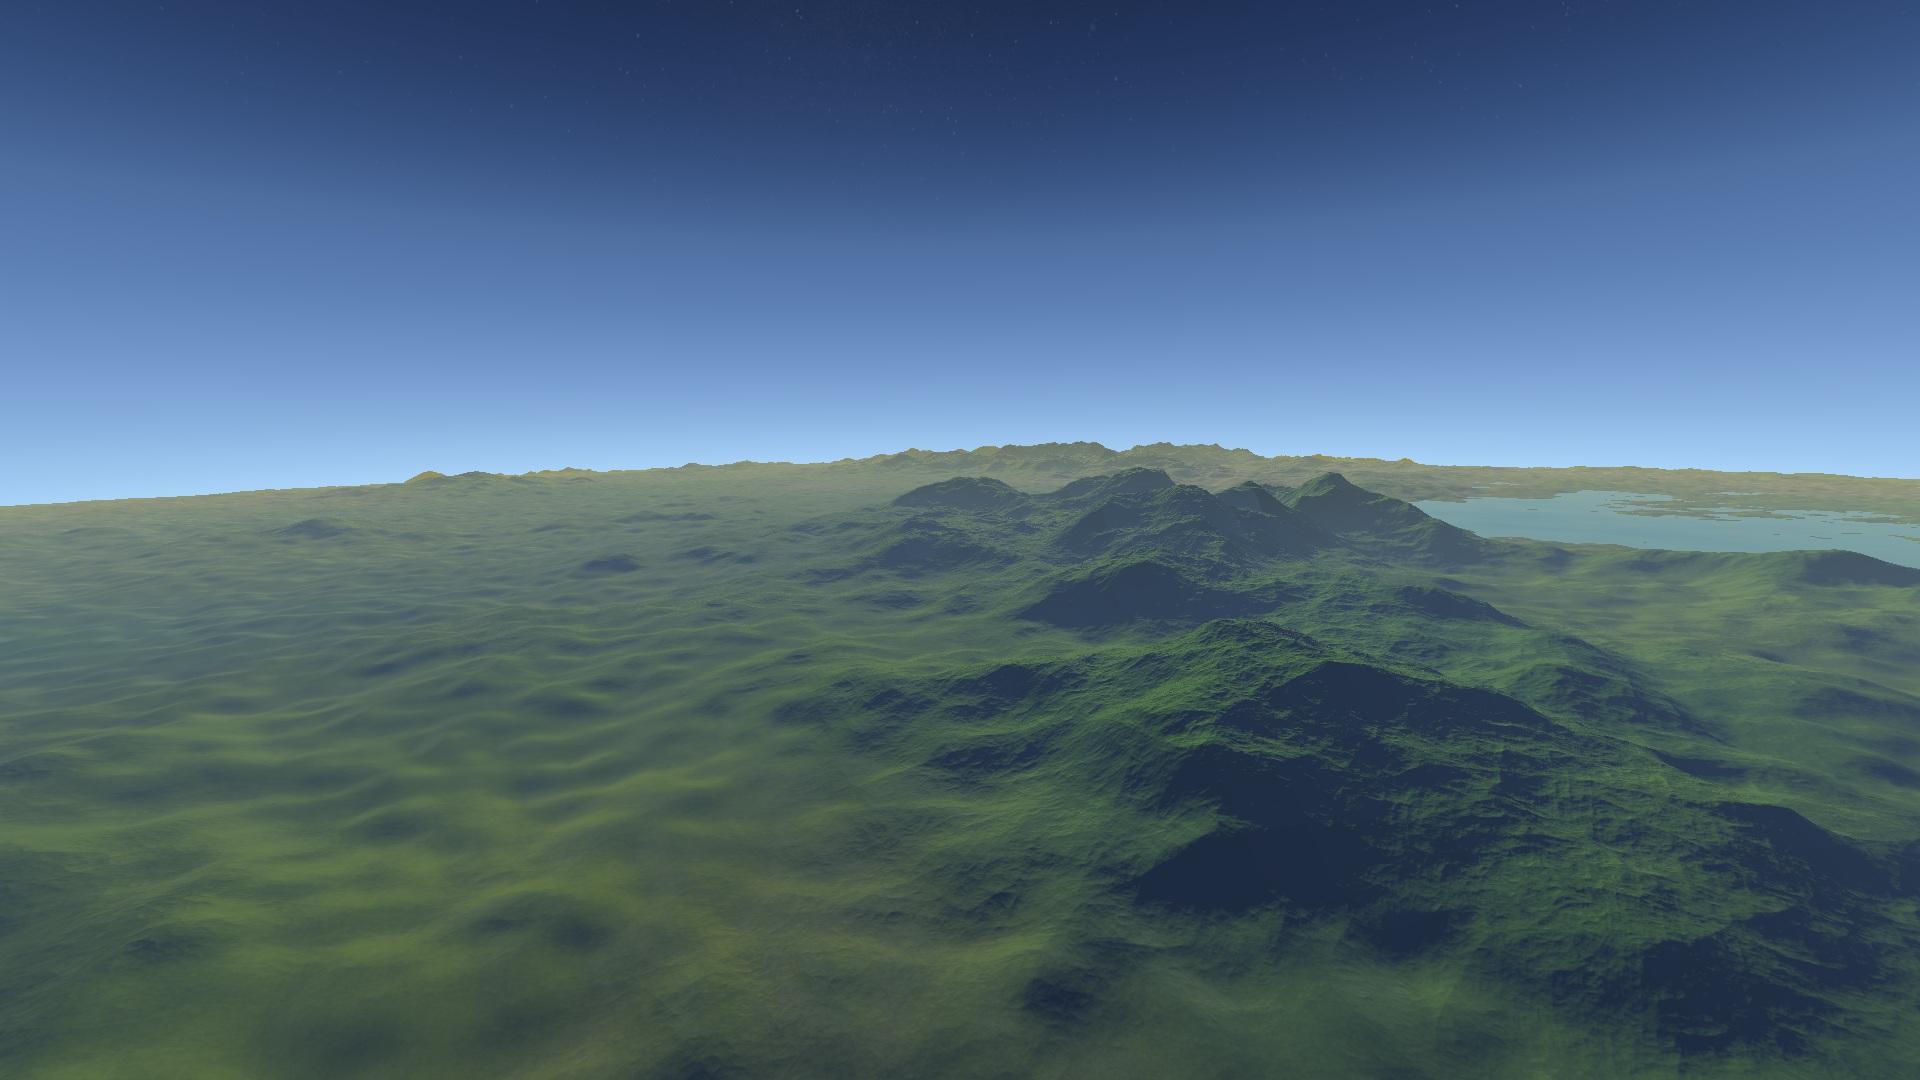
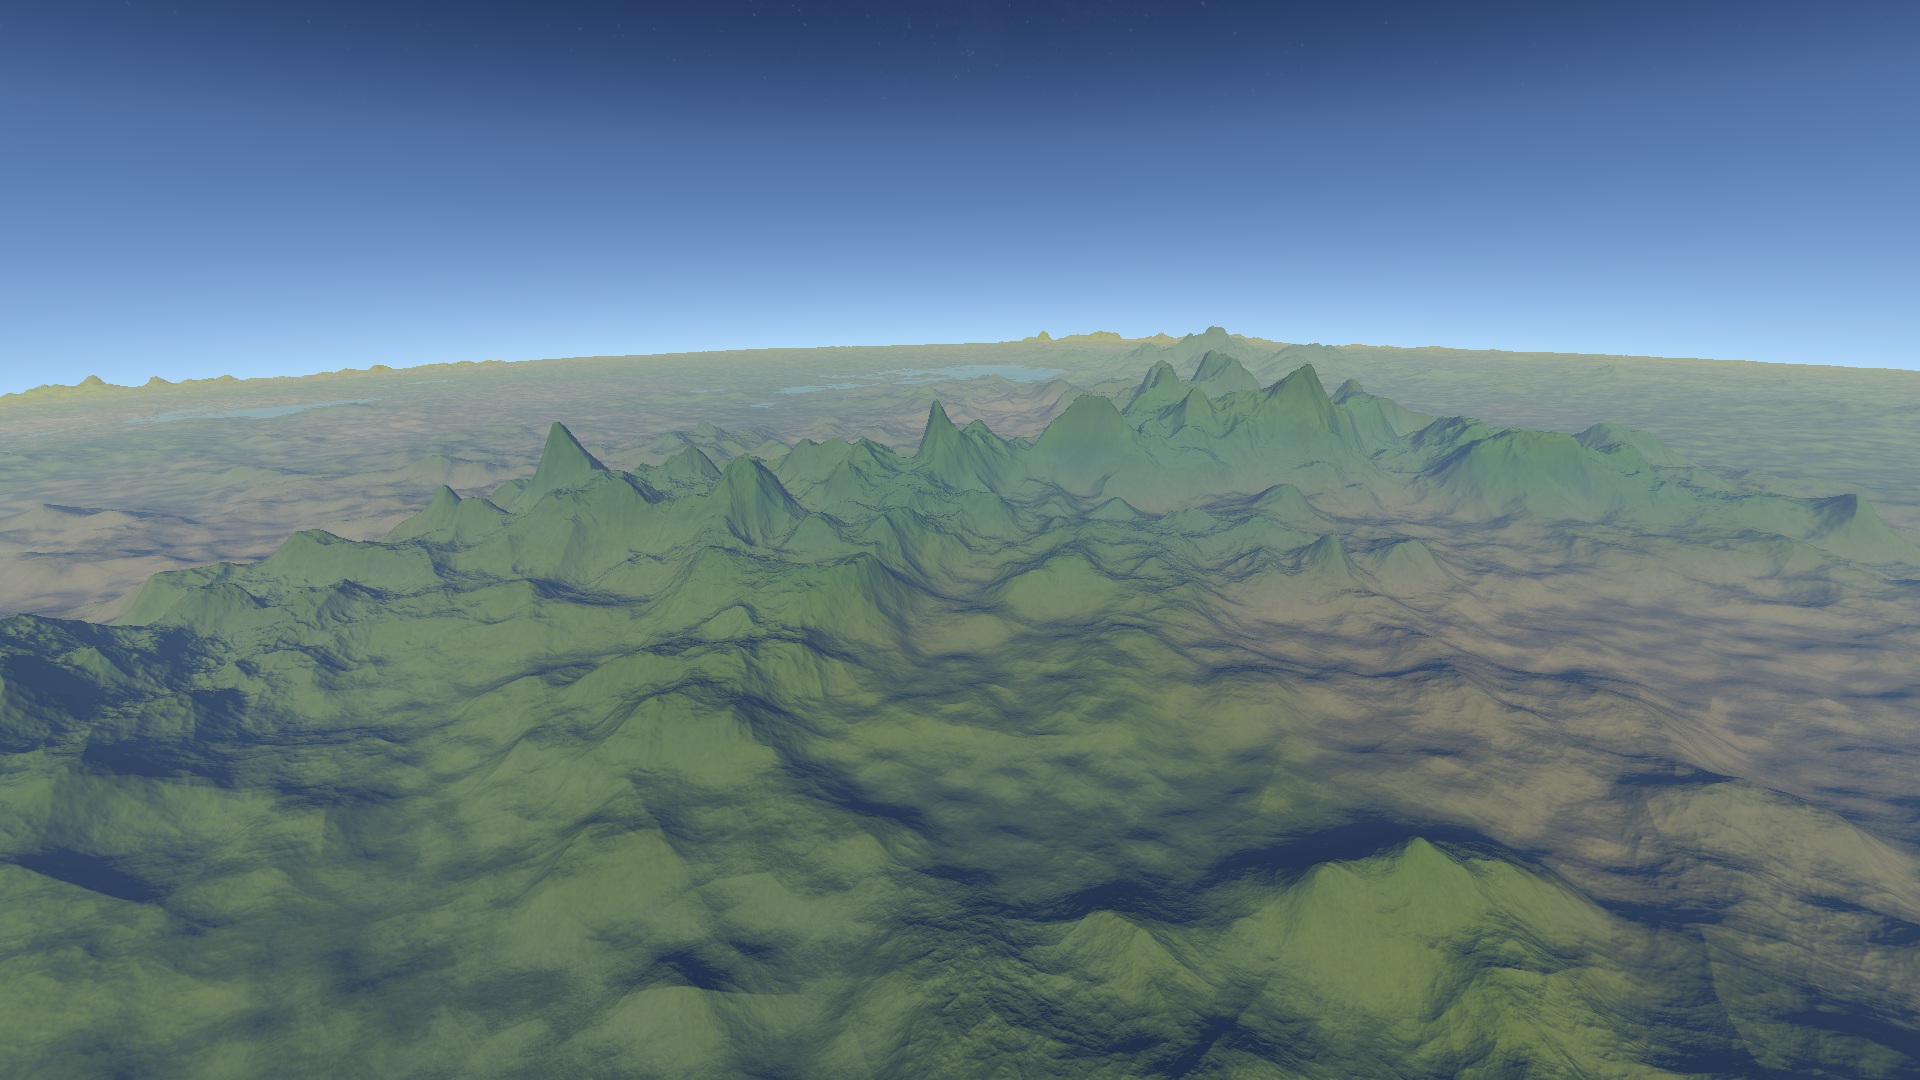
Now that we have figured out our terrain functions, lets throw em all in the pot at once and see what things look like!

The only thing I really don't like are the ravines, but there's still plenty we can do to make them prettier. Here is the final specification file in pastebin, since I don't want to paste it here again.
Step 11: Better Texturing.
I've been complaining about the texturing this entire time, so lets do something about it! If we provide the fragment shader with two textures, a grass texture and a rock texture, and blend between them based on the angle of the slope, we can texture the steeper parts of the mountains differently! To get the angle of a particular pixel, you just the dot product of the normal with the normalized vertex position.
float angle = min(dot(normal, fNormal), 1.0);
vec3 textureColor = grassColor * texture(unColorMap, fTemp_Hum).rgb * angle + rockColor * (1.0 - angle);
Let's see the difference this makes. Before:

After:
Nice! If we wanted to be really clever, we could use a second temperature lookup map for the rock, so that arid areas have more of a brown clay like rock texture, but for now this will do.
If we also drop temperature based on height, and blend with a third snow color or texture, we can get snow-capped peaks!

I hope you learned something, or were at least moderately entertained by this post. If you have any ideas for what my next blog should be, or if you think I could have done something better in this one, just give me a shout! Also, please share your own terrain functions with me!


Are you kidding me? You seriously managed to generate these randomly?? This is AWESOME! This is AMAZING! This is *put any word here that are better than amazing*!!!
Glad you like it :D There's still LOTS of work to be done. This is the very early stages.
2nd that! Simply amazing! Re: Settlements - will there be npc's/settlement development or just base building?
We are planning on having NPC's and settlement development, otherwise these large planets will be quite boring!
Do you have any Links to the information you used to do learn this??
There are some links to stuff in the blog, but much of it was just trial and error, trying to figure out the best way to make things.
great!!