We posted a before and after video of the lower city of Luftahraan last week, and today we have the accompanying developer diary from Doublie_Felix, our modeler in charge of those changes, talking about the process of remaking a large city district.
Hello!
This time in the Modelling Corner I would like to share with you some highlights of the development of Luftahraan's lower district.
Middle class citizens form the bulk of city's population, followed by rich nobles who have almost an entire second island for themselves. The poor folk, at least in the city proper, are relatively few in number. Since the city is situated on a pair of islands, there isn't enough space within the walls to accommodate everyone, so the poor and homeless are forced outside of the city into the surrounding farmlands.
This leads to competition over living space. Only the rich can afford enough land to build wide residences - the lower class folk must construct their homes vertically. Above ground level there is an abundance of small building extensions to make the most of what little space there is available. This leads to claustrophobic streets with tall buildings towering over them, leaving much of the street in shadow.
As mentioned in the previous modelling corner article, the city of Luftahraan has a long history of conflict - something that is more apparent in the streets of the lower city than anywhere else. Every city block is standing on the remains of what was once another building. These older structures were built during Luftahraan's golden era when resources were more plentifully available, and were made of stone rather than the more modern wooden structures.
Whenever you create new assets you risk damaging the established artistic feel of Skyrim. To make sure we don't go overboard, we have instigated a rule to refrain from using custom textures unless absolutely necessary. For an experienced modeller it is simple enough to create meshes that fit well within Skyrim, but making custom textures can easily and radically change the visual, making those meshes look out of place; as if they had come from another game. That being said, it is possible to get creative with the existing textures, mixing them up a little to create something new.
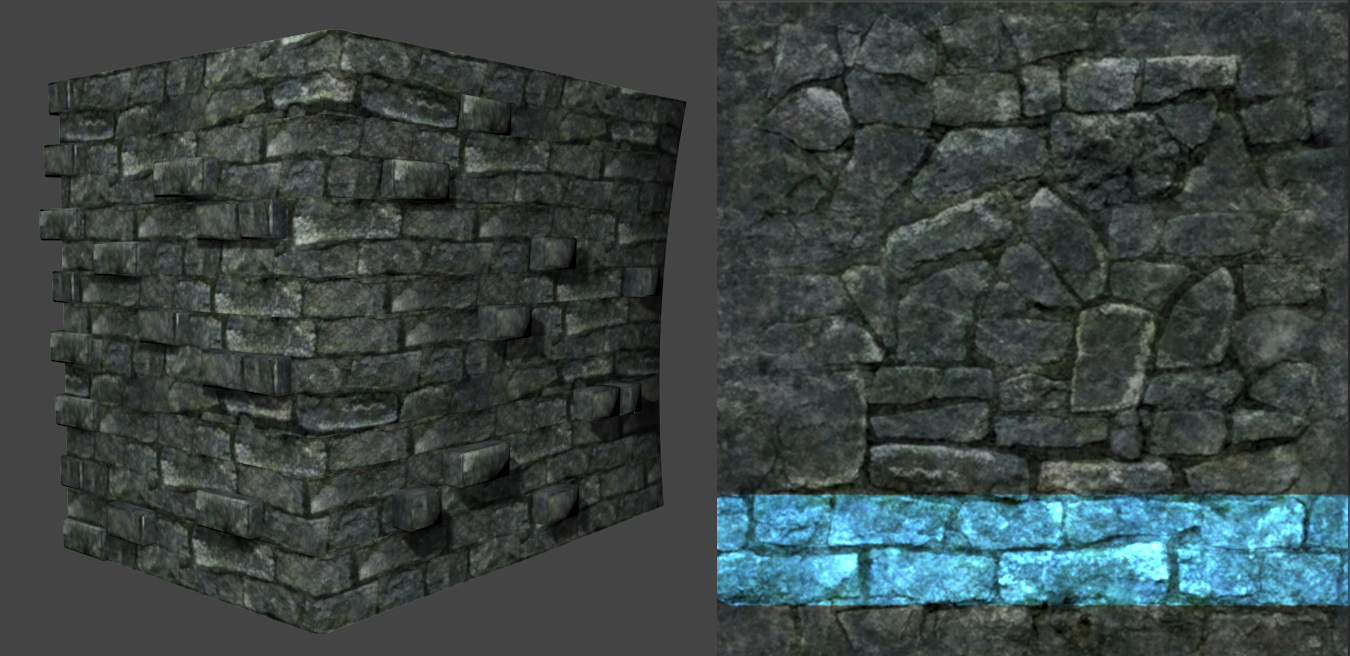
For example - the above brick wall was created from Solitude's stone wall texture by using the two most modular rows (highlighted). The protruding bricks were taken from the same source, and are used to break the repetition.
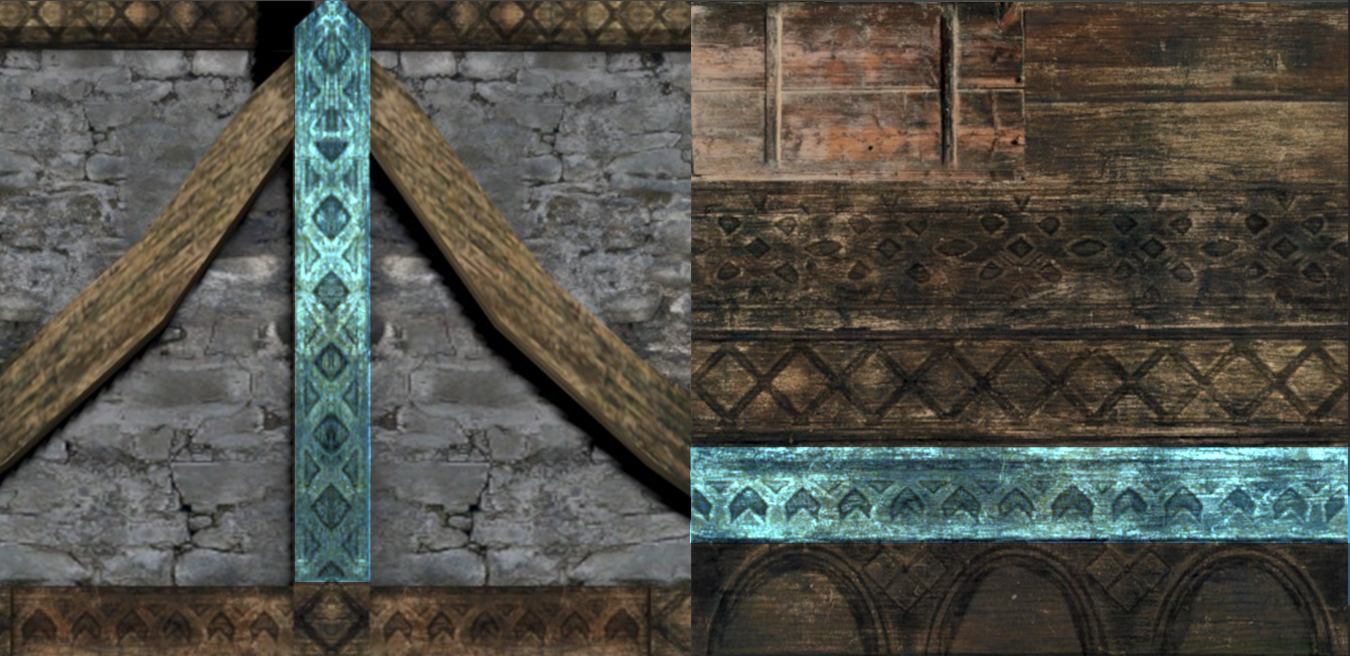
This example illustrates how the excellent and versatile Windhelm wood texture can be used to create entirely new ornaments. The highlighted part is mirrored on the beam.
To make sure the whole district has a consistent feel, I made myself a simple chart of the textures that would go well with each other:
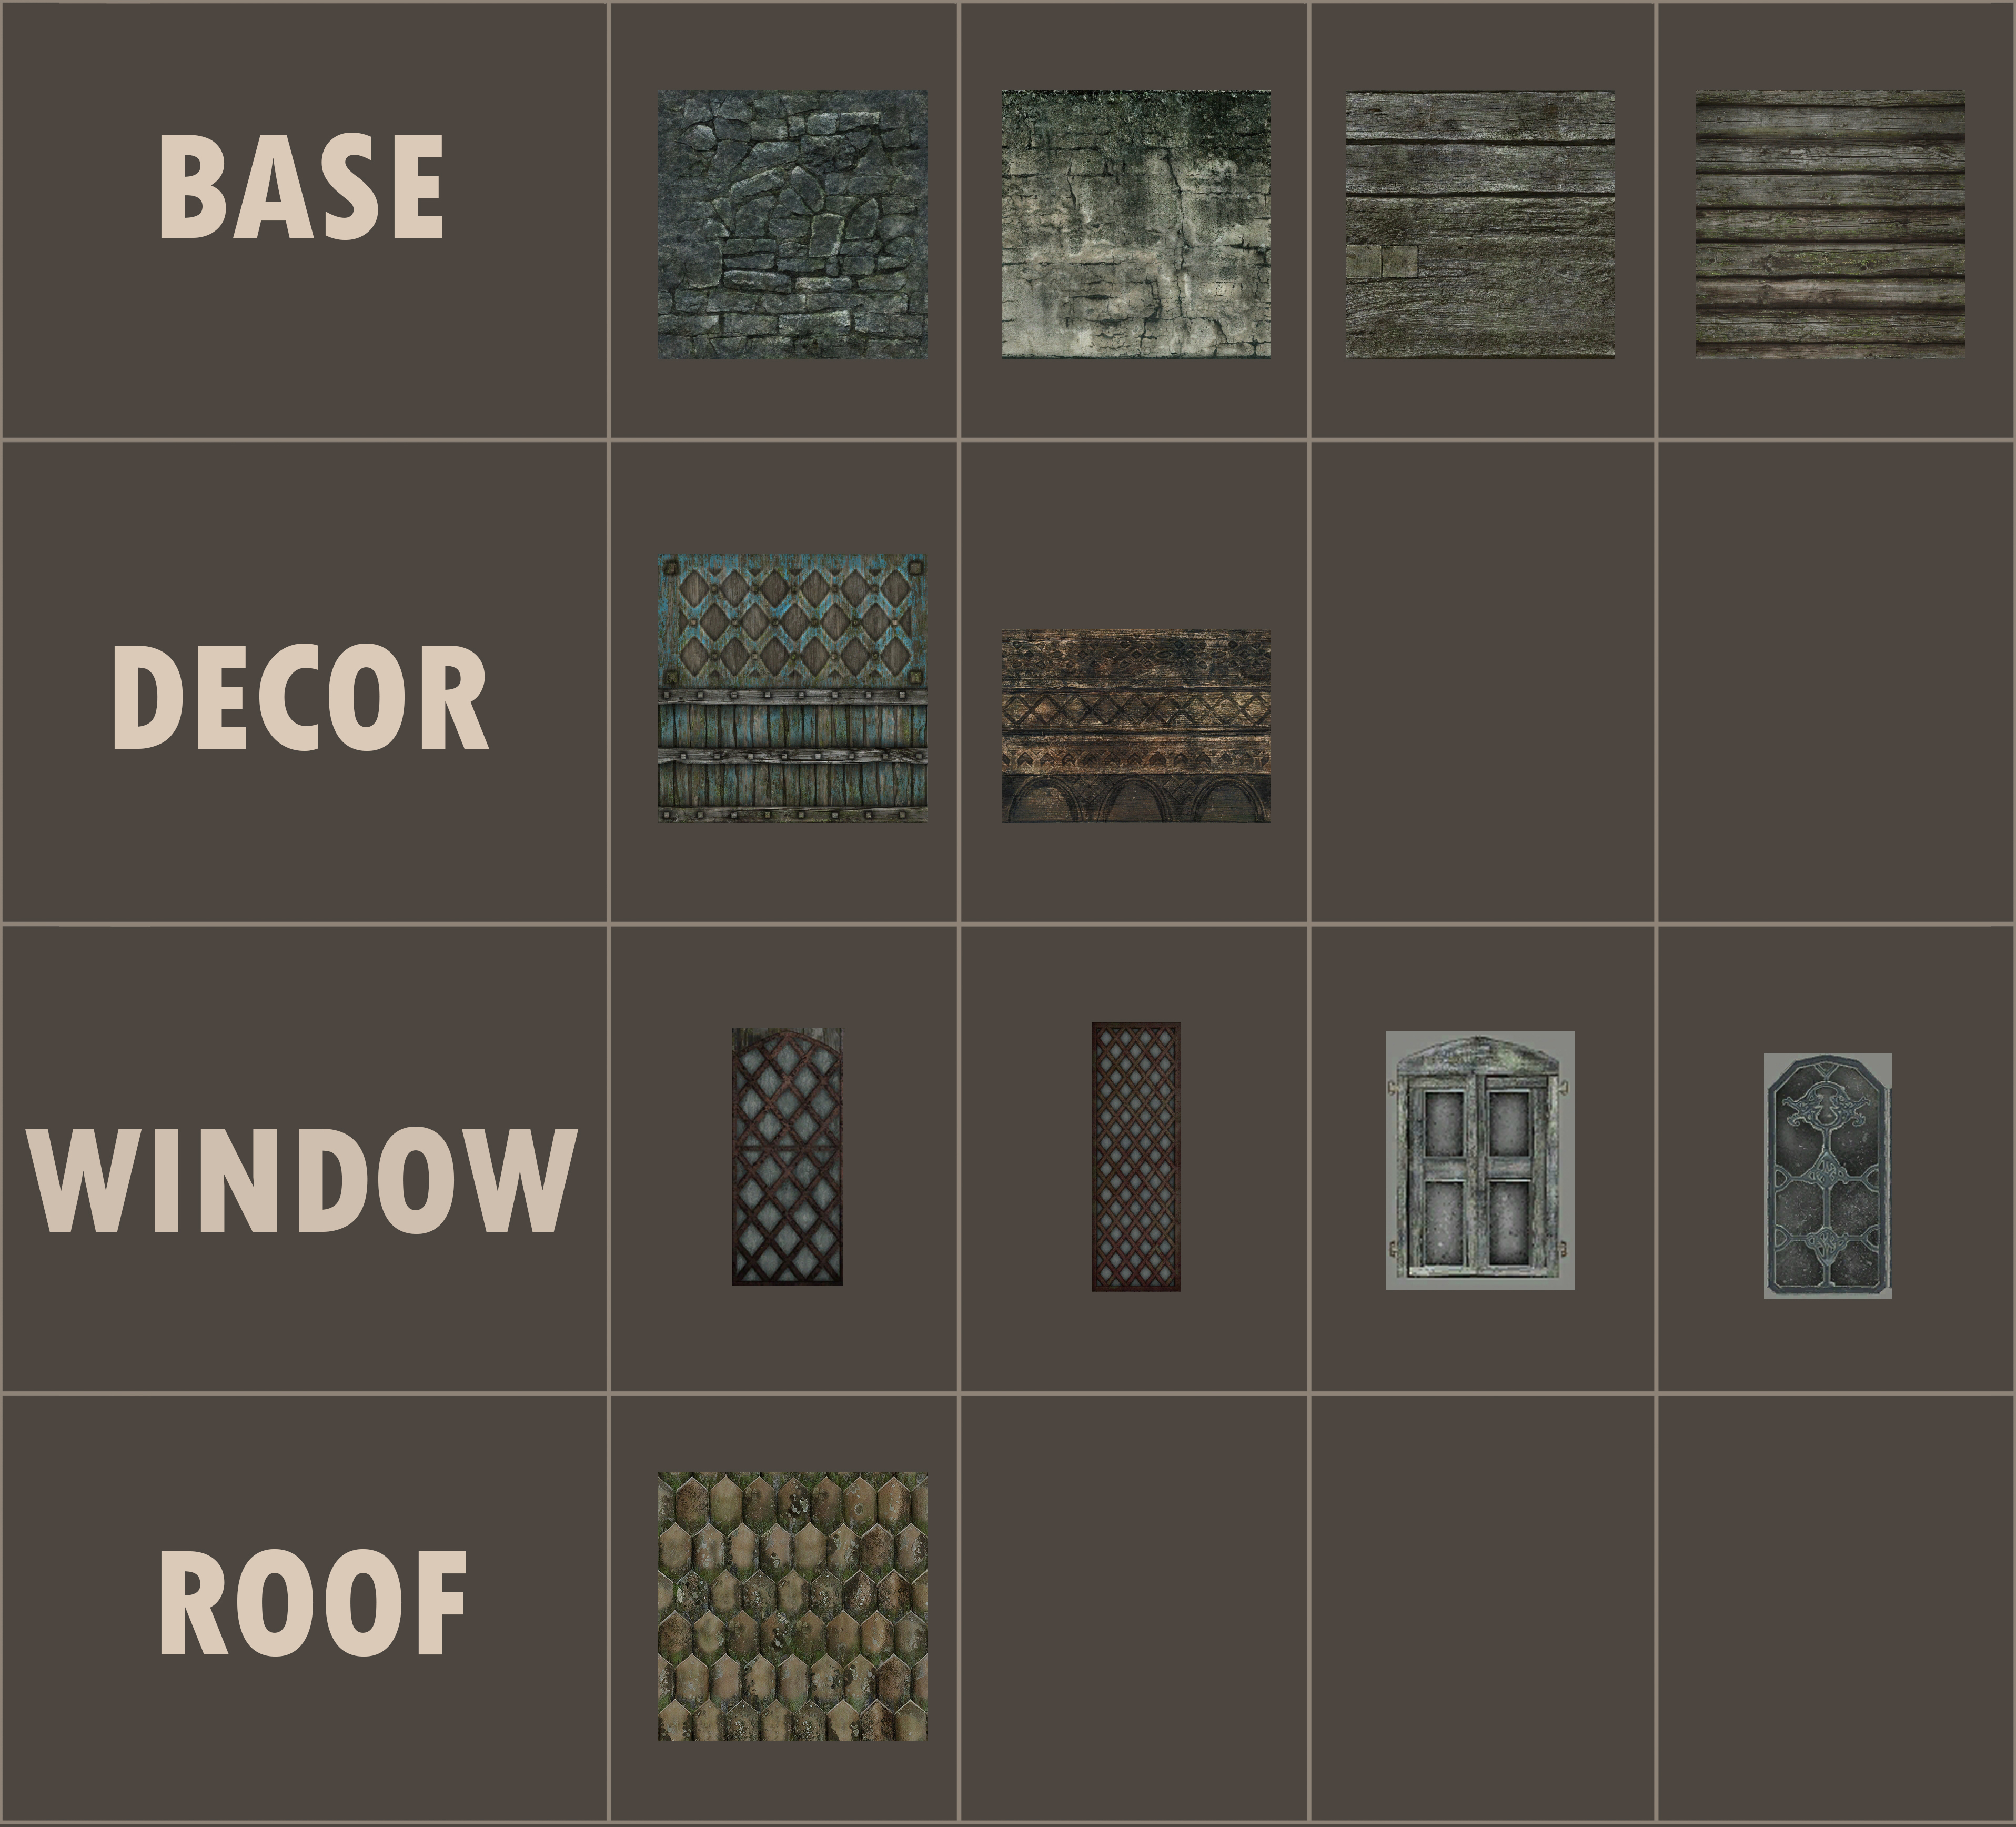
And so now that I had established a theme and rules, I was about done with preproduction. I can now move on to the first step of actual development which is:
Step 1 - Blocking:
Since I joined the Luftahraan project well after the city's layout had been decided and created, my work has mostly been about replacing existing buildings rather than making new ones. This means it is already decided meshes need to go, and how many sides of it will be visible to the player. If I was working on Luftahraan at the start of development, I would likely need to create highly modular buildings to accommodate the needs of environment designers. The current situation lets me take a much simpler approach, though and lets me know where to concentrate most of my attention.
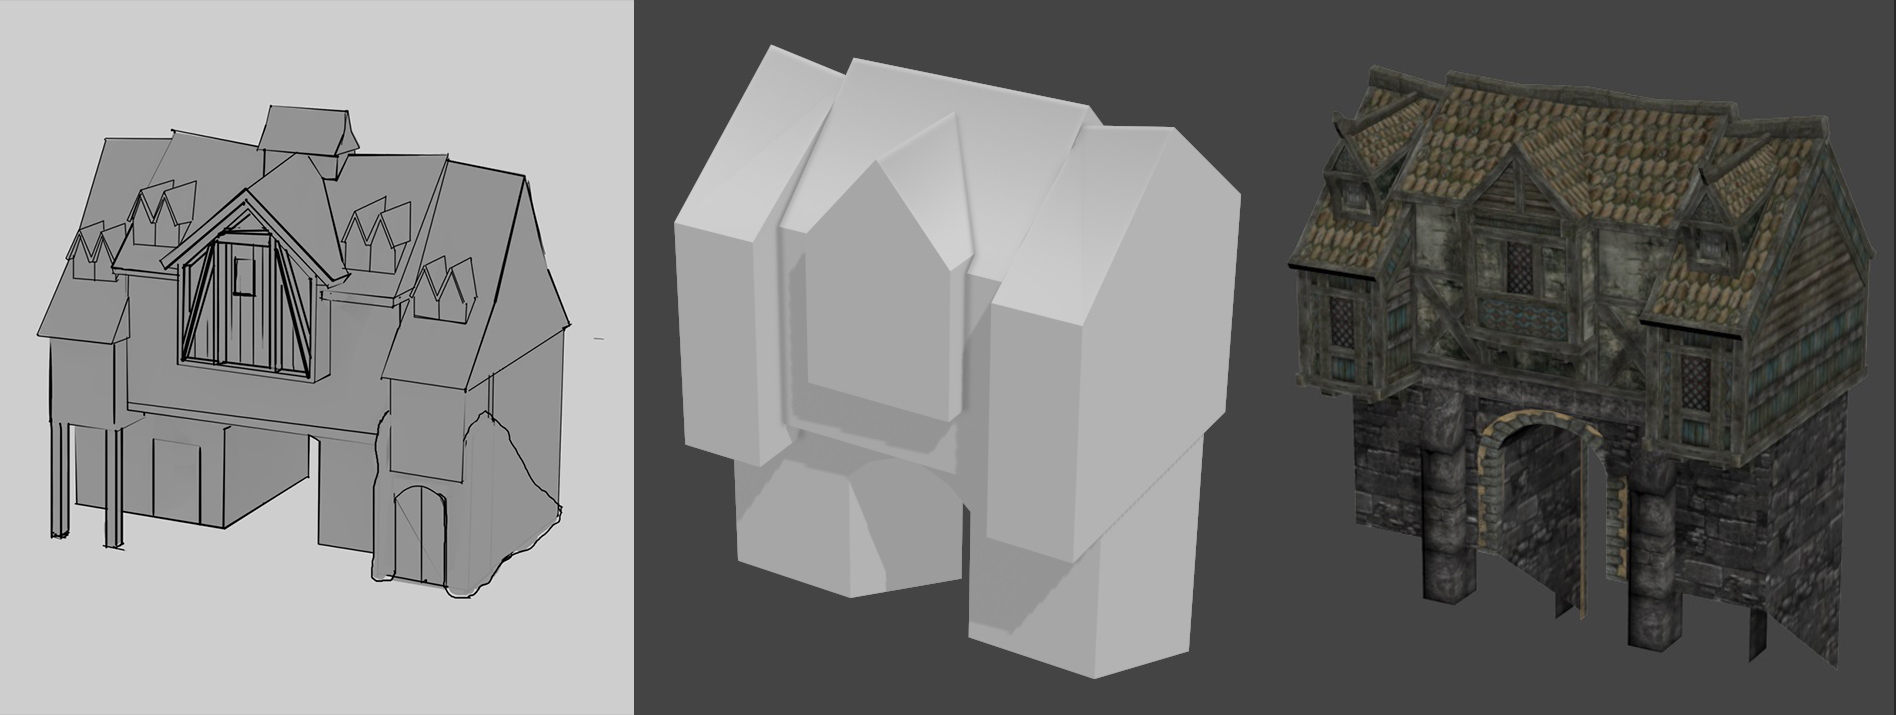
Above on the right you have a quick sketch made by our concept artist Akha. He had a great idea to make a house on top of city's second, inner gate - the one that leads directly to the lower city. After reviewing his concept, I made an even simpler 3D sketch of his drawing. This part is called ‘Blocking In', and is commonly used by game developers in level design. This lets me decide proportions of the building and quickly export the shape into the game to make sure it fits into the allotted area. Blocking can be also used as a basis for collision mesh and LOD mesh.
Step 2 - Modelling:
Afterwards I simply start modelling the actual structure. I usually go from the left side to the right side of the model, creating all of the basic beams that separate different areas of the walls. While the texturing is often done after the model is complete, I do the modelling and texturing simultaneously. After the wooden beams are in place, and the wall segments are properly textured, I insert windows into the walls. While it may sound good to have a lot of different windows for variety, it is actually better to stick to one or two main designs and only introduce more in special cases - otherwise the building often ends up looking like a chaotic mess. Doors are always left until last, and sometimes I even forget placing them entirely!
Step 3 - Detail:
Despite creating something in a completely virtual environment, it is still important to consider the laws of physics. To make something believable and immersive is to make something that looks as organic and natural as possible. The easiest way to do this in the case of wooden buildings is to bend their beams:
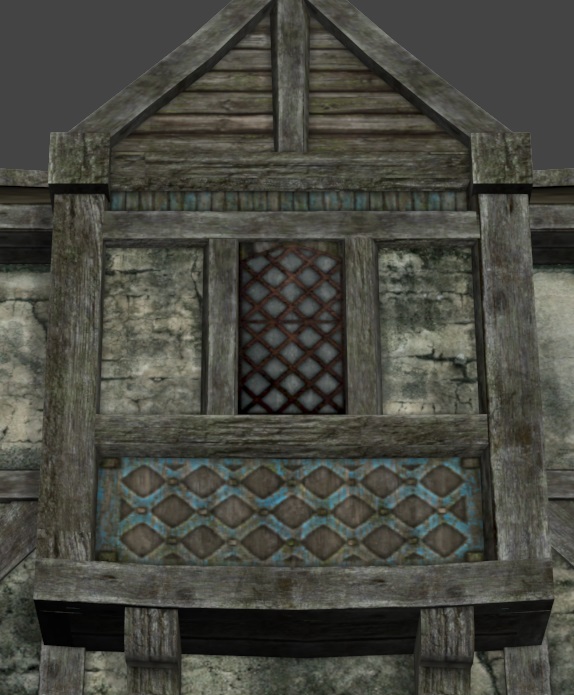
The diffracted floor on this dormer window looks much more believable than if it was straight - the homes of Luftahraan's lower city certainly weren't made by master builders. It was a rushed job and so the player will often run into bent and otherwise deformed parts of houses.
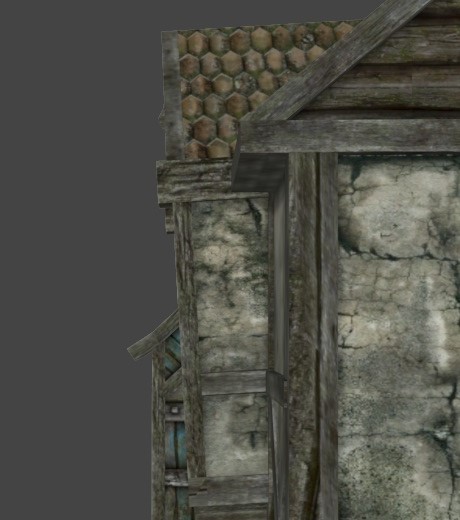
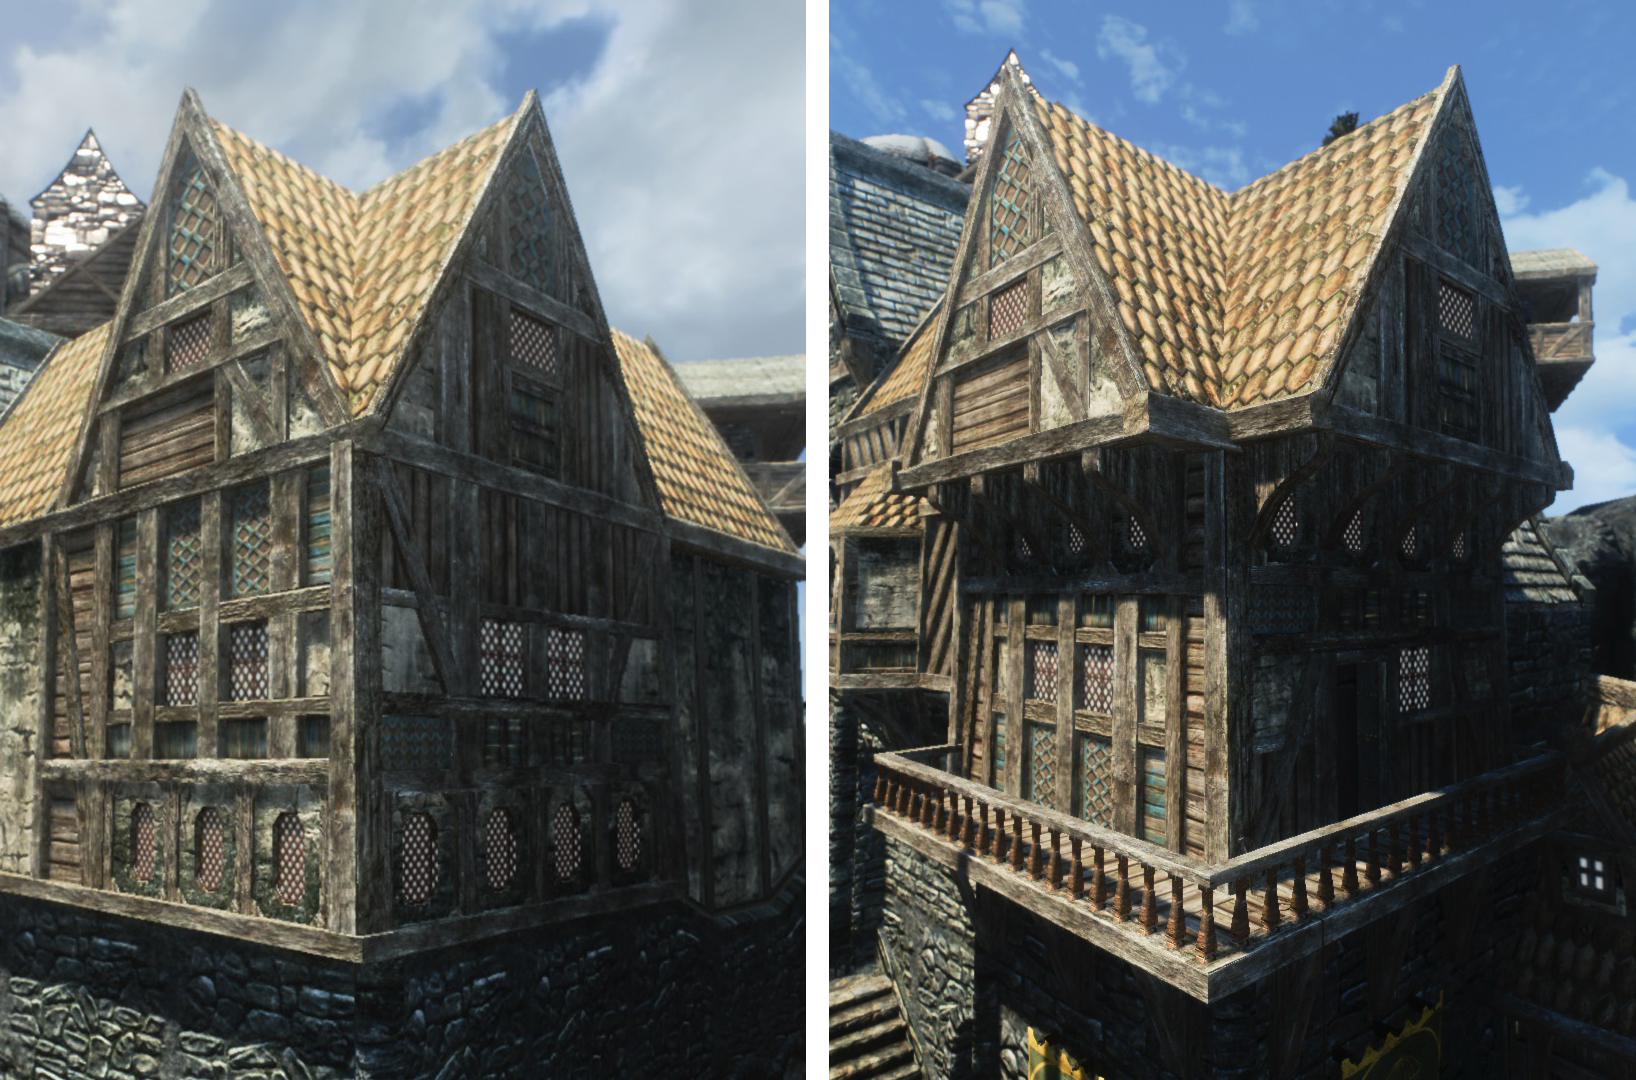
Another cool way to imply organic design is the outright skewing of an entire wall. This extension is now bending not only downwards but also outwards towards the player, and thus demanding his attention.
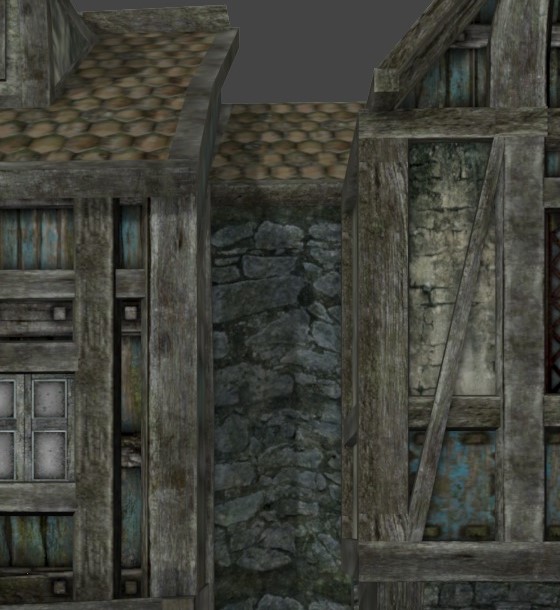
This effect can also be achieved with textures alone. This particular stone texture is perfectly straight in its normal state, but bending it gives the feeling that the two adjacent walls create a certain amount of pressure on the stonework between them, making the gap between tighter as time goes on.
Step 4 - Repeat:
After all these steps it may appear that I'm almost done but actually I have only just started. Whilst it might sound like I know what I'm doing, this often isn't the case. Much like any developer I often need to rethink some elements that don't work as well in practice as I had hoped they would.
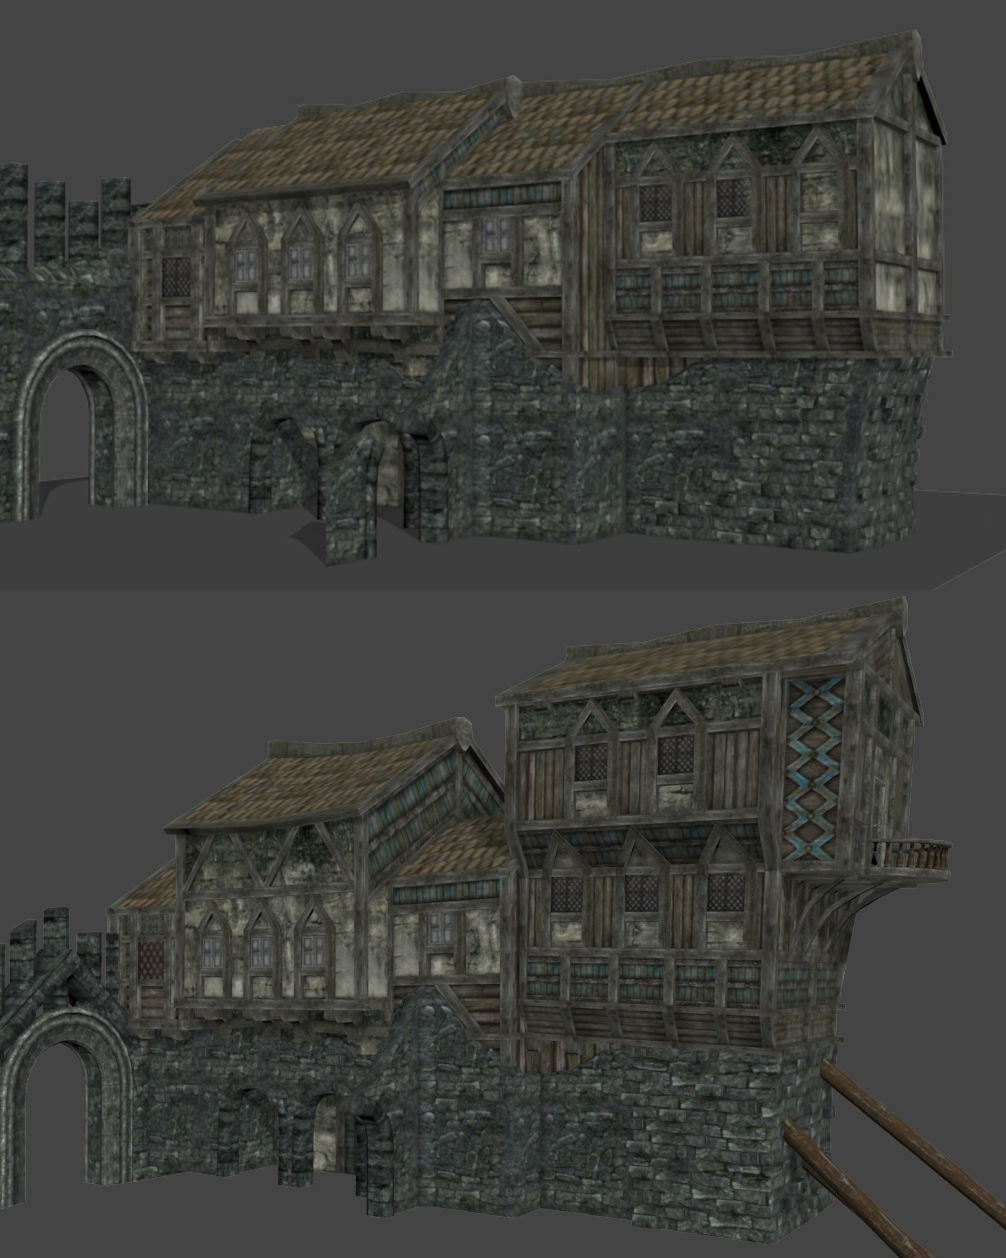
These are just two out of a whole ocean of examples. This repeating process can last multiple iterations until I'm finally satisfied with the result, and while redesigning takes a long time, it is always worth it in my eyes.
Afterwards what is left to do is to create the collision mesh and potentially the LOD. It is also possible to create fake ambient occlusion using vertex paint. But these are subjects for another article. Hope you had a good read!


I cant wait for this mod! :D
It's... beatiful.
More often than not modders simply import or create assets without considering whether it fits the already existing tone or not, but this... this is the best approach.
Looking great guys.
Hey! If you guys need a voice actor, I'd be happy to throw my vocal cords into this!
Awesome work! this architecture is fantastic! congrats :)
This comment is currently awaiting admin approval, join now to view.