As originally posted in the Rise VR Devlog
My original plan for this week’s post was to talk about portals! They play a prominent role in the game’s narrative and you interact with them quite a lot. They also proved quite challenging to implement in VR. Unfortunately, we are a few days behind on finishing them so I decided to change gears.
I still remember the first time I saw someone working, the aptly named, Houdini. I’d be damned if it did not look like black magic to me. Frankly, I thought he was some kind of genius that was using extremely complicated software to achieve the impossible. He was making a wooden bridge suspended with ropes. What made me stare in awe was that the longer he made the bridge the more planks appeared on their own.
For those who don’t know, procedural models are models that can be easily modified by a user interface. So instead of modeling just one bridge, you do the work once and have access to infinite bridge variations with no extra effort.
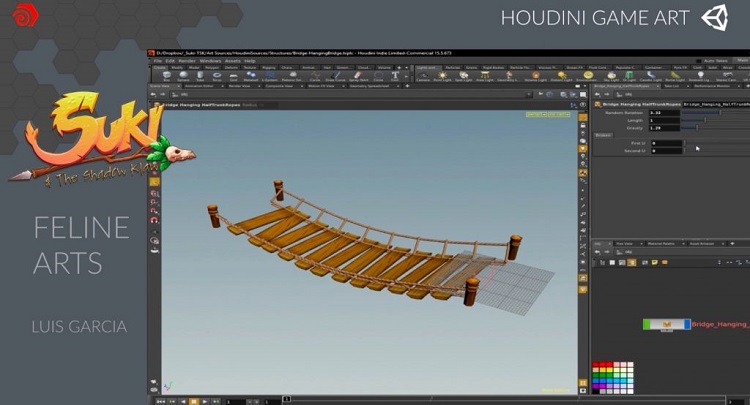
The bridge I saw a couple of years ago by Feline Arts.
My primary occupation in eNVy is programming. Until recently, I knew just enough about modeling to be able to communicate with the artists in the team. Over the holidays I decided to give Houdini a try and I was surprised by how easy it was to create procedural models with it. I would argue it is easier for programmers to use than it is for artists.
I was instantly hooked and spent about a month trying to create the ultimate procedural column just for fun. Imagine how excited I was when Annia designed a level of Rise VR that required three piers standing next to each other in a small dock.
Planks
We finally had an opportunity to test Houdini with our workflow. I asked Kostas for a plank so I could get started. I created a line with variable length and distribution of points and exposed these parameters to the user interface. In a few minutes, I had the following result.
Drawing the line.
Then I had but to instantiate a plank on each point and I had suddenly turned into the dark wizard that made geometry appear out of nowhere.
Hocus pocus, planka kadabra!
Of course, using only one single plank made for a rather boring result. Next step was to spice things up a little by having Kostas model a couple more planks. I had Houdini go over each point and randomly select one of the three planks using each point’s ID as the seed.
That worked but since Houdini’s random function is deterministic plank 0 would be the same on all piers. That’s why I exposed a random seed to the user interface. I added this seed to the previous one making it possible to “re-roll the dice” at will. I also wanted the planks to change for piers of different length so I added the length to the seed.
Random is not always bad.
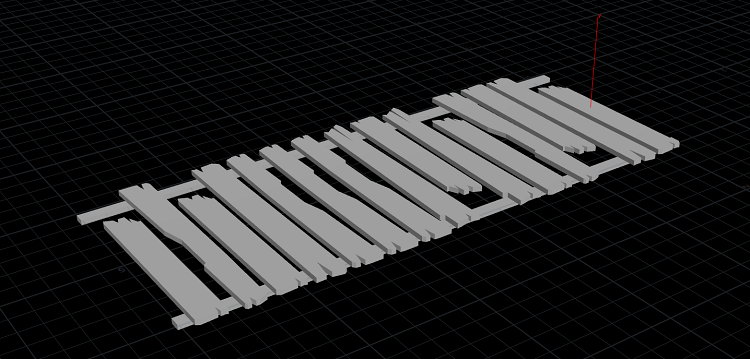
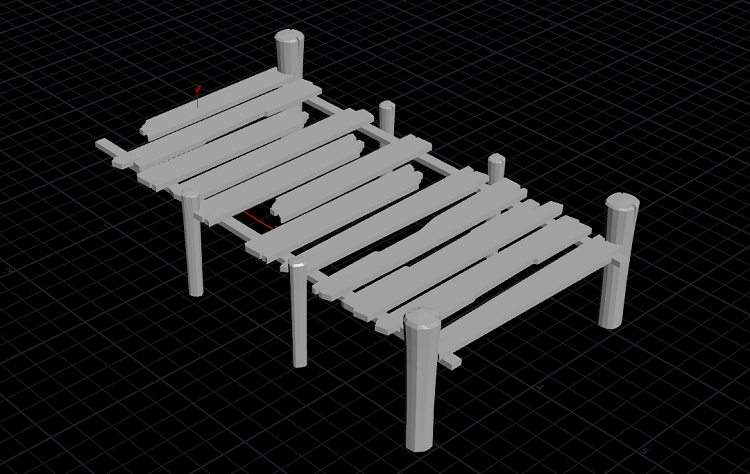
Pretty varied already right? Hm… What could we do to increase variety without creating additional planks? I know! We could randomly rotate some of the planks 180 degrees on the y-axis.

The 6 left-most planks are the exact same.
Rise VR is about recently abandoned worlds empty of people. I doubt wooden structures close to the sea would stay at pristine condition without human maintenance. Kostas created three more planks, this time damaged and I added them to the pool of available planks. Additionally, I exposed a “damage” property that would decide what percentage of the pier would be made of these new planks.
Moving the “damage” slider from 0 to 1.
As you can see we could now create piers in several states of decay. But what about totally broken planks? Why not add a few? Kostas created the 7th and final plank. This one was barely half the size of the rest. At first, I added it to the pool of damaged planks. The result wasn’t very pleasing. Completely broken planks would either appear too much or too little.
We needed more user control so I decided it would be better to use different parameters specifically for these planks. One would decide what percentage of the pier would be made exclusively of these planks, and the other would be a random seed that would “re-roll” which planks were broken. This gave us enough control to find just the right amount of broken planks.
Controlling broken planks.
At this point I was happy with the planks and decided to move to other parts of the pier.
Support Beams
The support beams were the most straight forward of the parts. I created a beam for each side of the pier that spanned its entire length. I added parameters for how close the beams would be together, how much they’d extrude from the pier and their relative height from the planks.
The support beams with the plank
At this point, I realized I was only one rotation away from making railroad tracks.
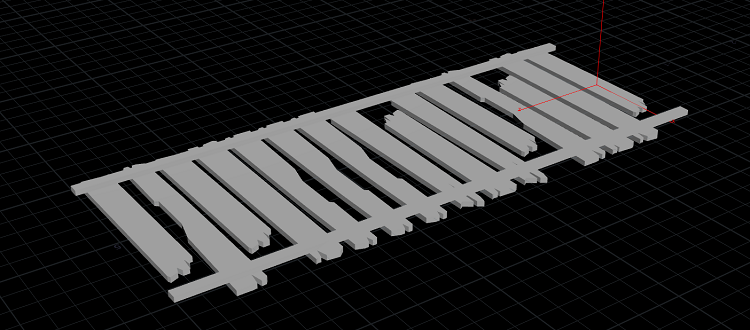
Two birds with one stone
Now that the main body was ready, it was time to move on to the poles that would keep it above water.
Poles
Kostas had already created a simple pole model. I created two more lines with their own distribution and instantiated the pole on the points.
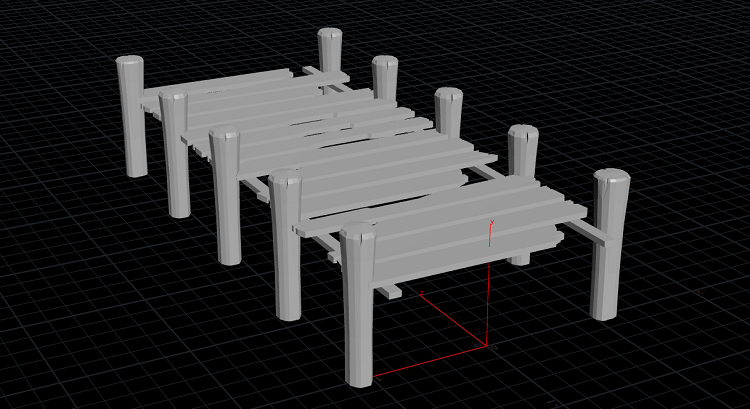
Now, that looks like a pier.
As you can see we were getting closer to a usable asset. But still, it was obvious we needed more poles. Not only that, but we needed the middle poles to be different than those at the edges.
Kostas went ahead and made a couple of wide poles for the edges of the pier and three distinct poles for the rest. For the first and last point of each line I chose one of the wide poles randomly, for the rest I chose one of the thin poles. Finally, I added a new random seed just for the poles.
Showing off pole distribution.
Now that I had more variety on the poles it was time to introduce some wear here as well. A similar “damage” parameter would decide how many of the thin poles would not show at all.
Removing poles at random
Finally, we decided to give an option for the wide poles to be missing as well.
Polishing
Now that the pier was almost done I added some finishing touches to make it look even more unique. For one I added random rotations to all poles. Then I added random scale ranges for both planks and poles.
Breaking symmetry.
Randomizing the scale of the elements helped make the pier look more organic. Then I added a random rotation to the planks on the x-axis to add some more variety. To make the broken planks more realistic I had their broken part rotate towards the interior of the pier. If I were more accustomed to Houdini I would have randomized this rotation as well but for now, I hope no-one will notice. I guess blogging about it doesn’t help my case.

Side view of the planks.
Finally remembering that original video that got me interested in Houdini, I decided to do one more thing. Make a hole in the middle of the bridge! I exposed two parameters, one to decide how many plans would be missing and the other to decide where the center of the hole would be.
Tearing the bridge apart.
Finally, I created a master seed to re-roll all randomly selected elements at once. With that, I handed the model over to Kostas to create as many variations as needed, unwrap the UVs and add the results to Unity.
Conclusion
I decided to unpack all sub-networks of the pier to show you a cool screenshot of the complete network, so here it is!
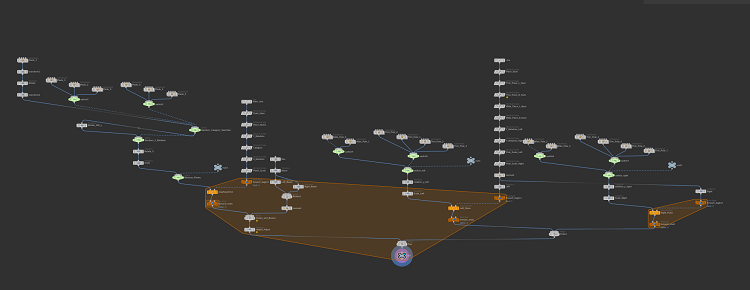
My entire Houdini network.
Thanks to Houdini we went from these elements:

To these models:
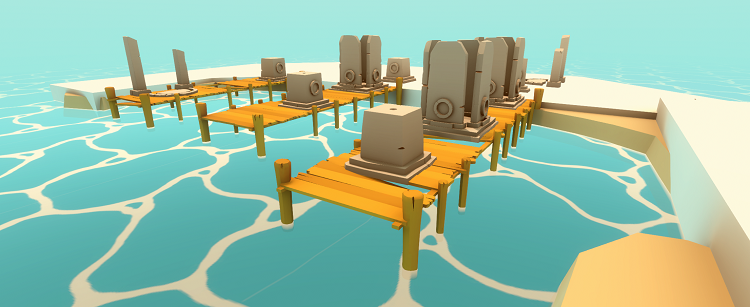
To this Unity scene:
Maybe creating the piers procedurally was overkill, since we only needed three of them but it made it easy to select between a wide variety of available options without actually having to model any of them.
Of course, if the piers played a more central role to the game this approach would be a no brainer. Even in our case, we now have access to a unique prop for the game that can be used at any time without any extra work.
Also thanks to Houdini’s non-destructible workflow I was able to create this post after I finished with the model extremely easy just by turning nodes on and off. So there’s that.
Most importantly, it helped us introduce a powerful tool in our workflow that I am sure we’ll be using a lot in the future. If not, at least for the first time in my development career I can point to an asset in-game and say “I MADE THAT”!