Hello folks!
Have you ever thought how works a small independent team that creates video games?
Making video games with a really small budget is possible, there is just need of some not conventional thinking, a lot of work and even more passion.
We are a small team from Poland. There is 3 of us, but only 2 team members work full time on our project. More about the team and about us you could find in other section HERE
Also soon we will going on Kickstarter! If you want to know when campaign will start klick here: Endofsun.com
It will really help us to get some more attention when our campaign will start :)
Today I'll try to share with you some making of stuff about the creation process of characters from our game "The end of the Sun". Keep in mind that screenshots that we share have "work in progress" state.
This text is only about static elements of characters: How we scanned character and clothes, how we created additional elements and how we set it up in Unity 3d engine to looks good like on these screens:

![]()
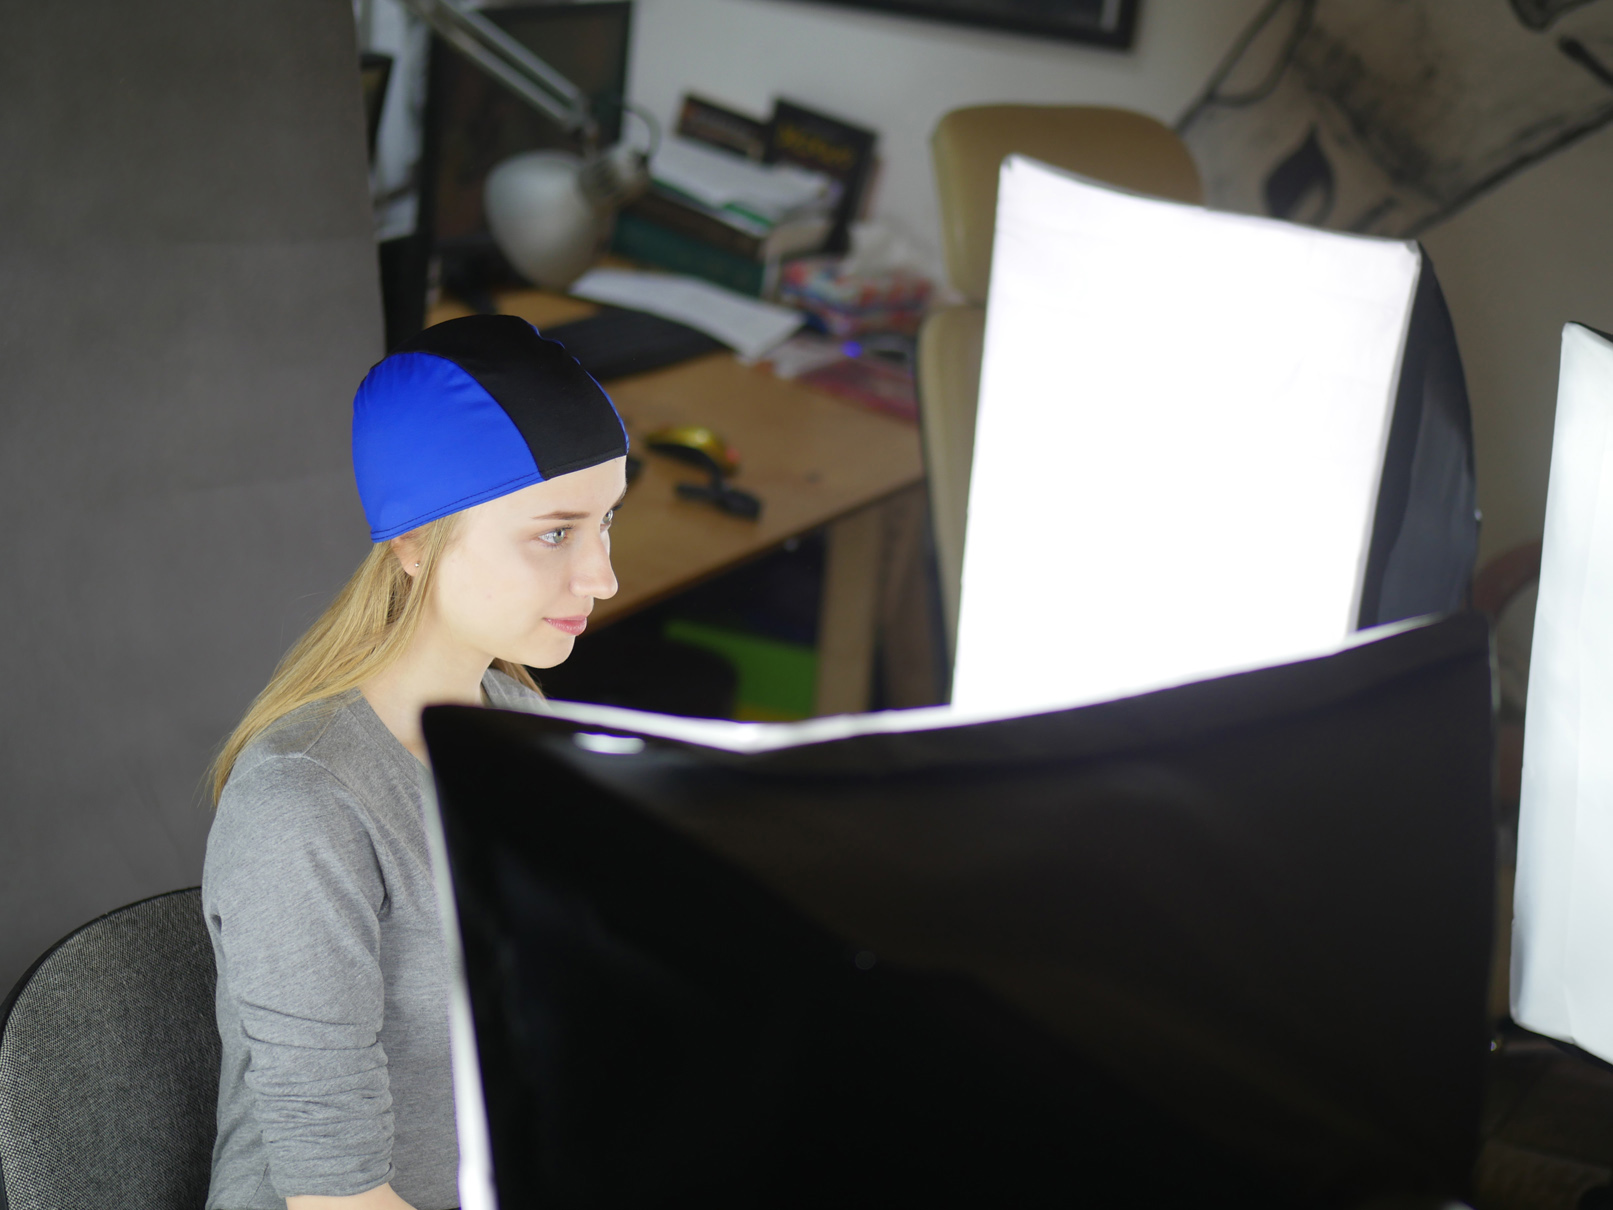
1. Face photogrammetry and preparing 3d body
Actress during photogrammetry session.
Photogra... what??
We started from the scan of our model face using photogrammetry method. This is the topic for another blog post but more about it you could find on our youtube channel.
According to Wikipedia:
Photogrammetry is the science of making measurements from photographs, especially for recovering the exact positions of surface points.
In few words: Photogrammetry is a method of recovering 3d depth from few (or many) photos to make a 3d virtual model that looks like an object in the real world
The end of the definition :) Now let's talk about interesting things.
In a huge AAA studio with a large budget to scan character, they use a lot of cameras. They set it up in proper places around the actor and made many photos around at the same time...
...But what if we have only one camera?
Yes, that's kind of problem, so How we did it? Scans made this way, will be worse than made from many cameras, but it is enough for us to have a base shape of a face and good quality texture baked. It is some kind of "Indie way" to do face photogrammetry :)
Few of photos that we made for scan.
We make many tries and there are some tips on how to take photos if you have only one camera:
- The actor/actress can't move until you stop taking photos of his face. He even can't blink or breath :) (It takes normally about 10-20 seconds but still hard to do)
-We had to take photos very fast around the actress. We use burst mode to do this. Sometimes there is a problem with focus, but this is the best way to make it fast so the actress could sit still.
-The best option is to ask the actor/actress to sit on a chair with backrest and armrests and keep hands on it. It is easier to sit still this way.
-We make photos only from the front side of the actress. On screenshots, you could see also photos from below, but in the final scan, we didn't use it. Overall you need only 8-10 good photos from the front of the actress to have your scan.
-Using polarizing filter for a camera is the good option, cause it decreases highlights on the skin, what makes the model shape and texture better.
-Use minimum 4 softbox light for this setup. it will give better texture and less post-production work.
-Use as fast shutter speed as possible to avoid motion blur and as low aperture as possible (by low I understand f.5 or higher) to have a wide focus range of photos. This is why you need minimum 4 very strong soft lights. ISO should be of course as low as possible to have no noise.
To analyze photos and make model we are using Photoscan 3d software. Here is how looks dense cloud after processing photos:

Points dense cloud and photos setup visualization.
As you see there are photos from above and below of character, but now I could say that I don't recommend that. It's much better to make about 8-12 good photos from the front of the face (on Arch from left ear to right ear) Then it gives you much better results with texture and model. Only one disadvantage is that you have to model neck in a manual way, but that's not a big problem.
After having dense cloud of points we are processing it to 3d high poly model:
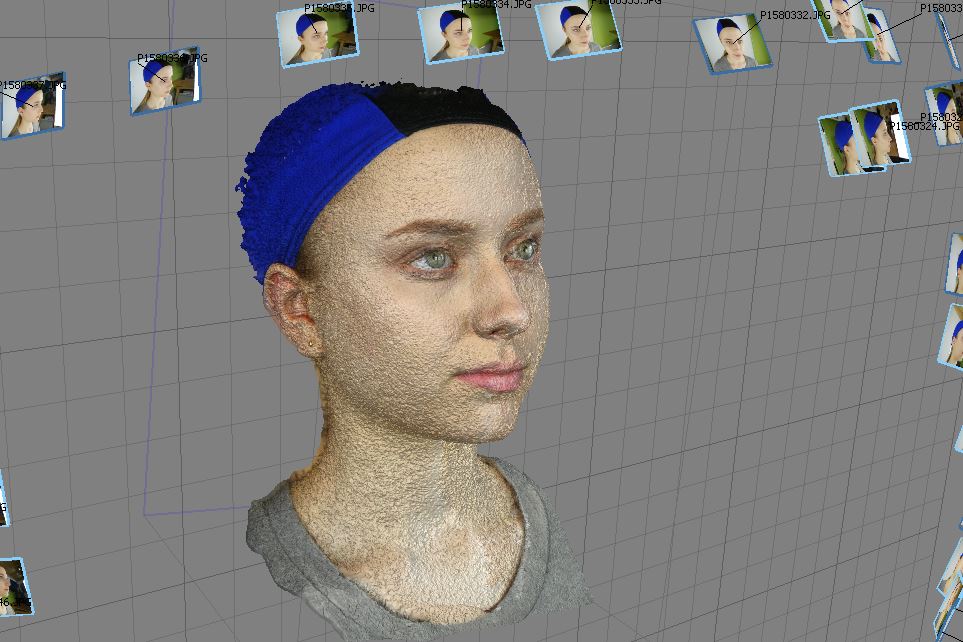
It looks better right? But as you see there is a lot of noise in the 3d model:
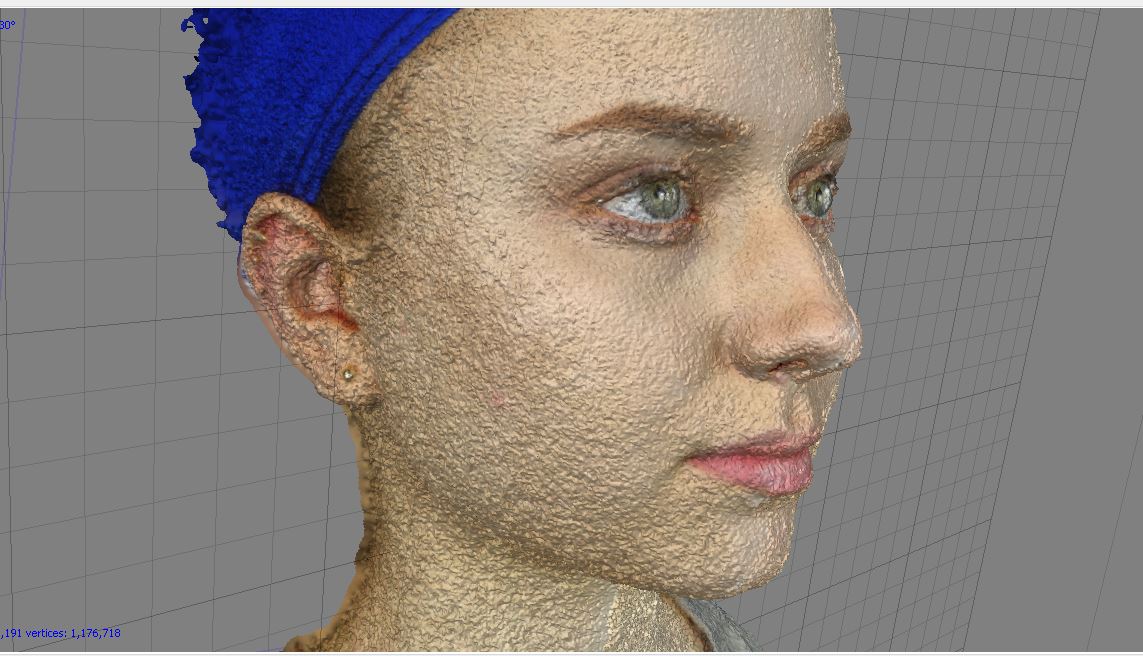
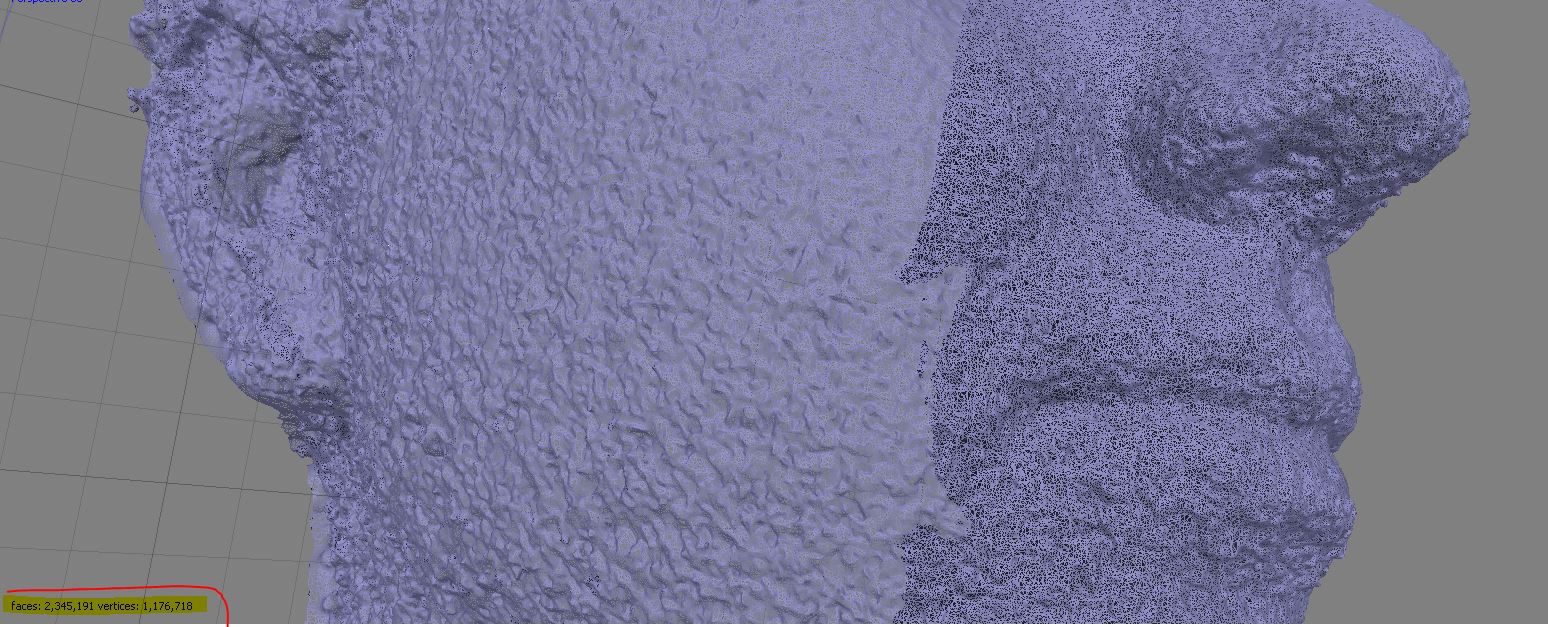
This is because of a few aspects like:
-some motion blur when making photos very fast
-our actress micro movements (Yes even 1 mm face move, cause that kind of noise)
Most of you probably think this looks really bad and you have right. This is why we are going to the next steps.
Now we have to make something that is called "retopology". This is the technique of making a 3d model with a simpler and better shape based on a high poly model.
Here is how it looks in practice:
Retopology of character.
This is because model you see above has over 1 million triangles. Normal pc is able to handle 5-6 millions to work on 30-60 fps. (Info just to give you overall look, cause, in fact, there are much more aspects that influence on that) It means that few models with that number of triangles could only appear in the game.
Another important aspect of retopology is to get good looking smooth face model, that is ready for facial animation. To make that "retopology" we are using Topogun 2 software.
There is our Face model after "retopology" (We'll polish it later after texturing):
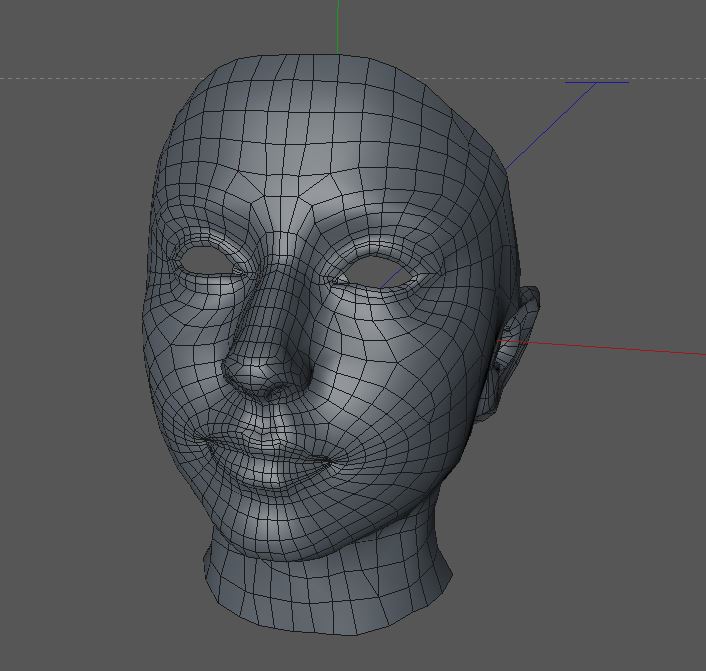
Mesh net after retopology
Then we baked (in 3d graphics slang in means just prepare/create)texture of face using our photos, This is almost automatic. This is why we decided to use photogrammetry, Shape of the face and good texture makes that our character looks natural.

Hmm, there is still a lot of things to do, as you could see there are some small errors on texture. Lack of eyes and back of the head is a small problem too :)
So the next step is to create elements that we didn't scan and elements that can't be scanned like eyelashes, hair, eyes. So let's see how it goes. We are using here next software called Cinema 4d. This is software where we could make rest parts of the model and polish its texture.

OK looks much better. Before we start to work on texture, we have to create the body with bones for animation (There will be another full post on the blog about it)
To our first character, we made the whole body manually, but it was a total waste of time especially that, then we put clothes on it and only in some special moments there will be some naked body part visible in game.
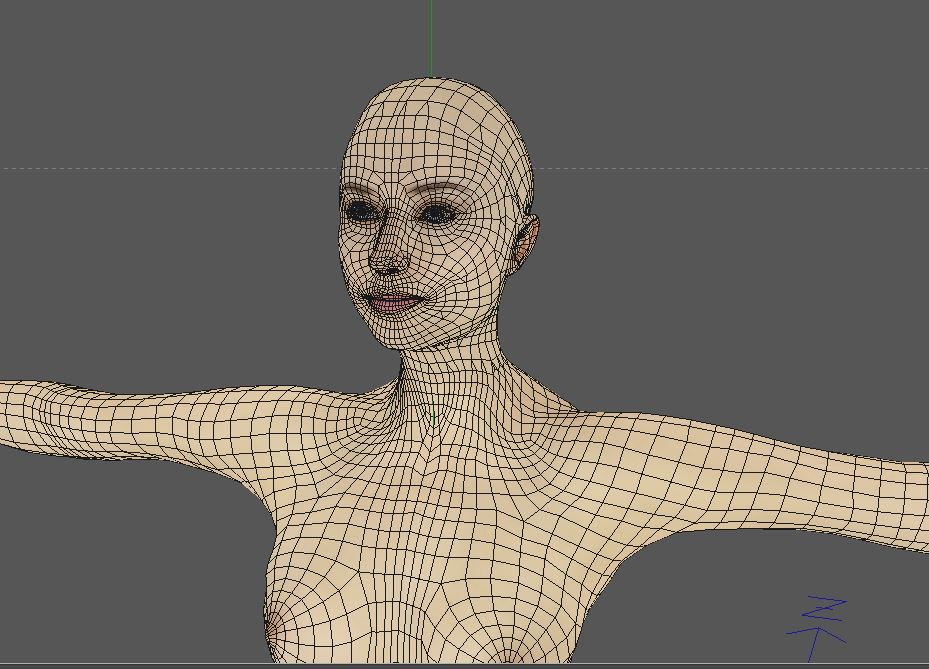
After some research, we found a great way to create 3d bodies for our scanned faces. We are using for it "Make human" free software for commercial use. You could create the whole body even with face and skeleton using that soft. You just move sliders until you will get the result you need, also it contains skeleton compatible with Unity 3d engine.

So in a few minutes, we have the whole body with great topology and even weights on it ready to animation! (if you have no idea what I'm talking about, there will be the second post about character animation soon!) That's really helpful.
The only problem is that now we have to destroy part of it, We have to cut head from our body model. (sounds quite scary) We need to do this because then we are able to replace it with our scanned head :) (based on our beautiful actress)
The most important part is that because of Make human software we have weights on bones ready for animation.

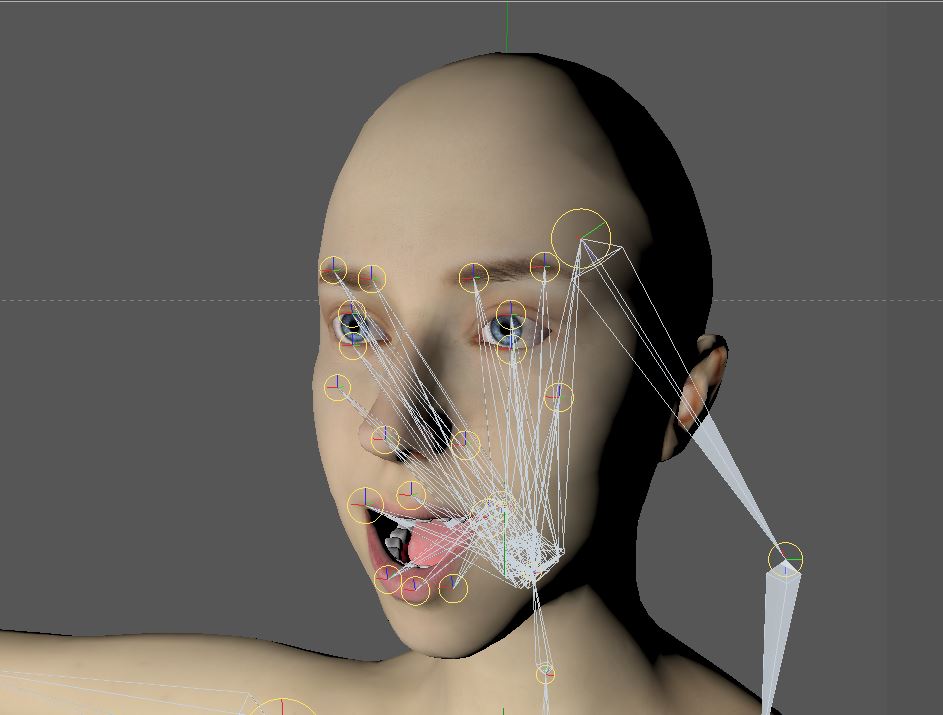
We just have to add facial bones to have the option to animate the facial emotions or for example lips synchronization with dialogues. But this will be in next post soon on our blog.
It could take even the whole day to make the proper system of facial bones for animation (Yes I know ... :) face have muscles, not bones, but this is how we call it in 3d graphics)
There is of course also a lot of work to make texture pretty. We're using Frequency Separation Technique in photoshop to remove lights and retouch skin, This creates the workflow that is also great for removing un-needed light from textures. (even if this is a scanned rock model, not human face) You should try. (There is a lot about Frequency Separation on the internet you could easily find info)
Final Albedo Texture looks like that: (sorry we don't want to share bigger size for now before the release of the game)

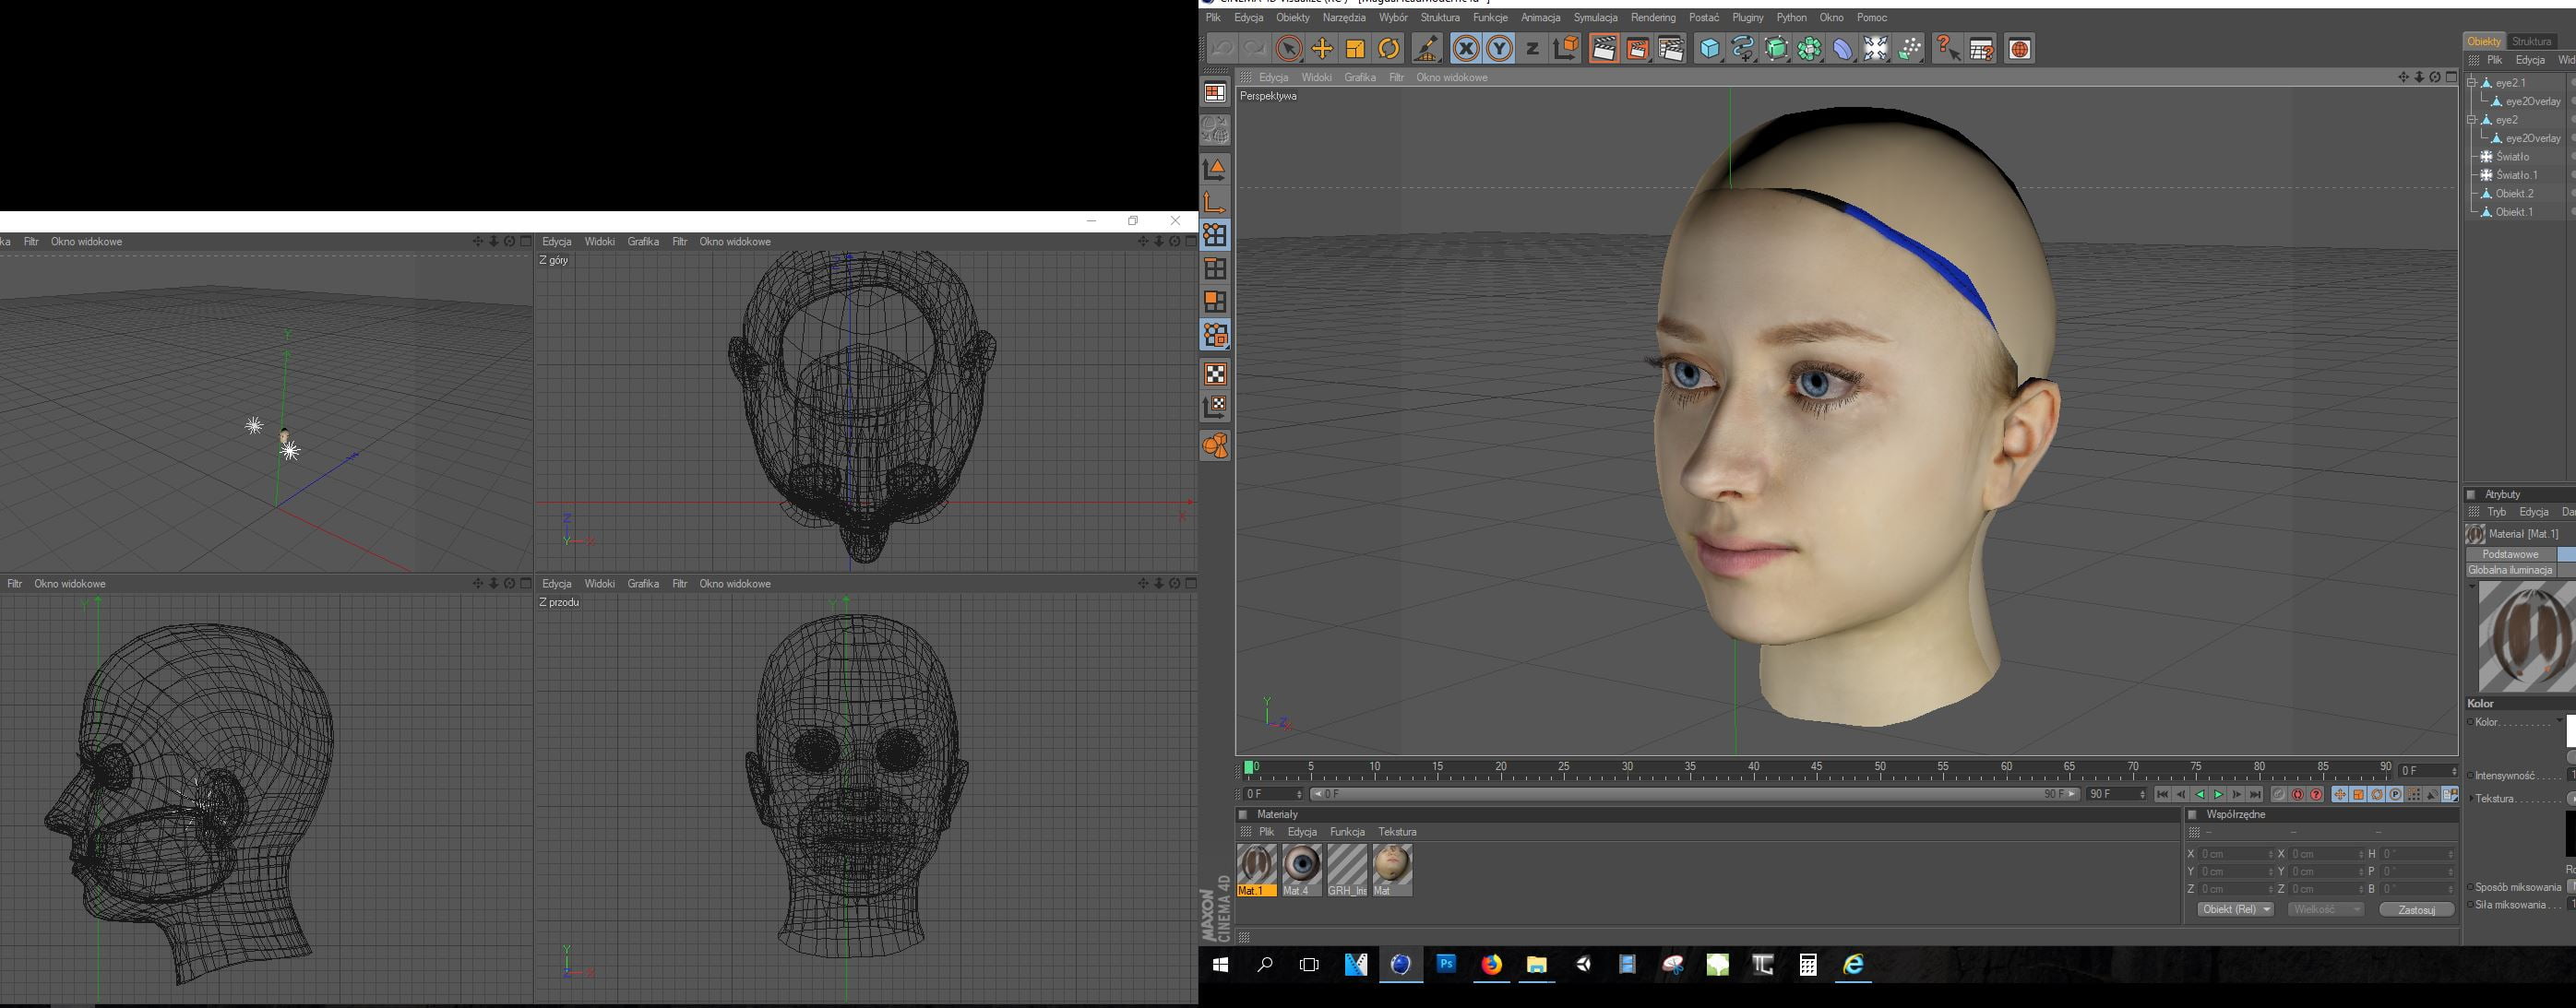
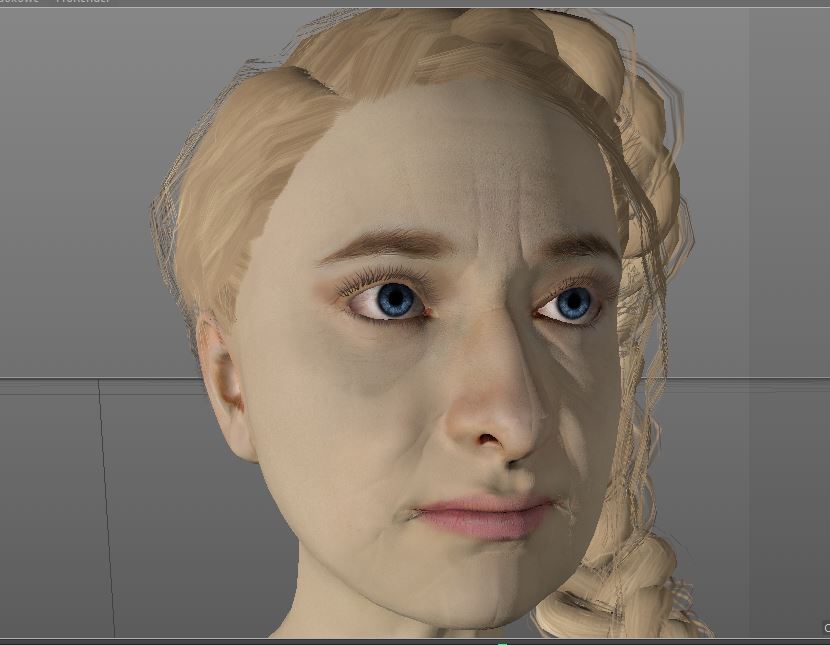
And here is how the model looks with ready albedo texture on it.

Now we are adding Teeth, tongue and eyes:

This is how finally looks our scanned face and body model connected together with prepared texture (some censorship for social media share :) )
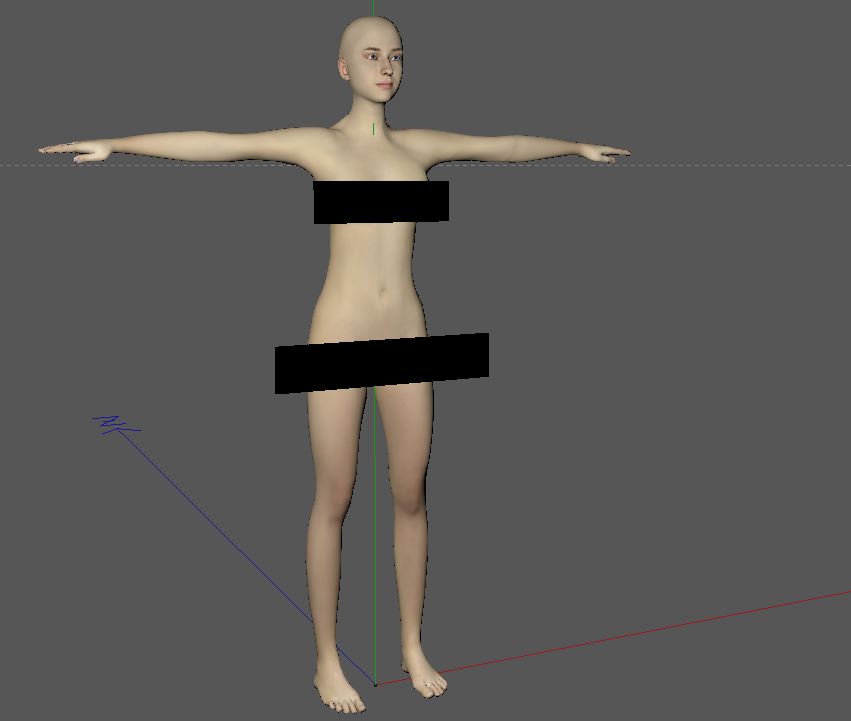
Final 3d body and face look.
![]()
2. Real-time Head Hair and eyelashes creation.
I created next chapter here cause it is a quite wide topic to made hair that works and looks good in a video-game. Probably you saw some great looking hair in triple-A games. We are indie so we don't have time to spend so much time on one aspect of our characters as big companies could.
What we do is creation hair from polygons with transparency texture on it.
How does it work?
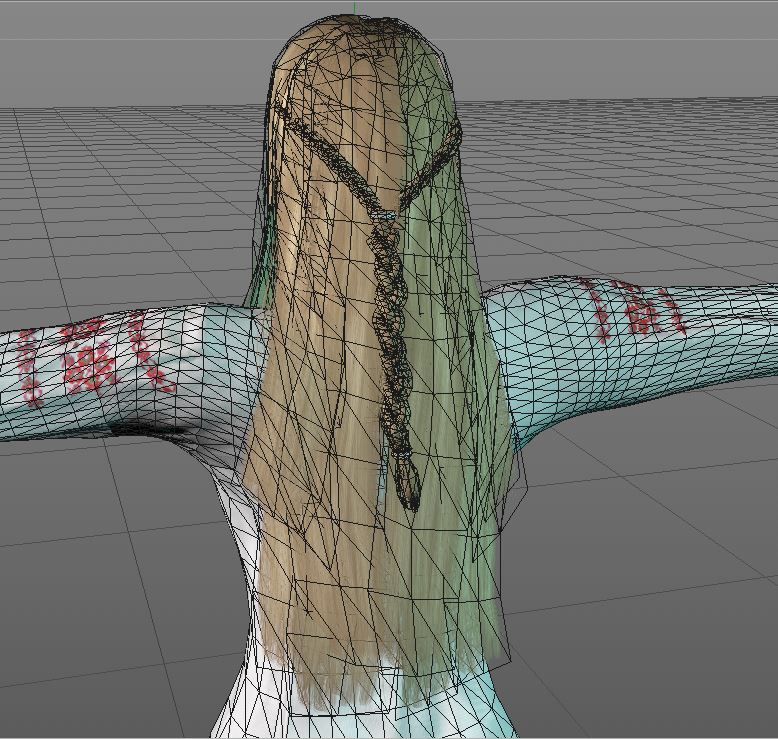
Firstly we are modelling polygons in the shape of the hair, then we are setting up these polygons on the head of our character and move/relax etc. it using some 3d modelling tools. (In our case Cinema 4d) You could do this also on spline generator, create a spline with dynamic mesh along it. Then you could manipulate hairs setup easier.
So all hairstyles are built from this kind of parts:
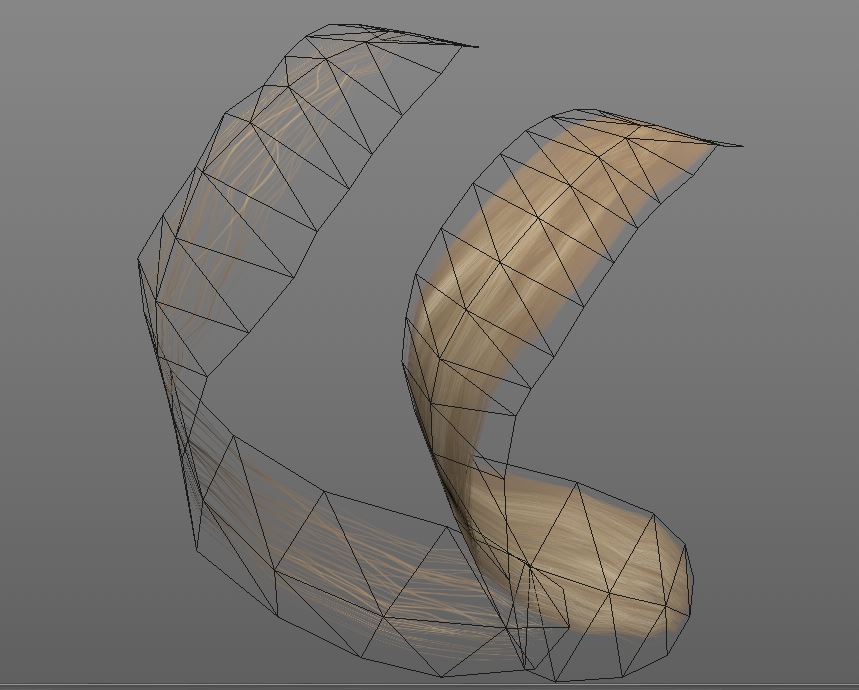
Hair without material looks like that:
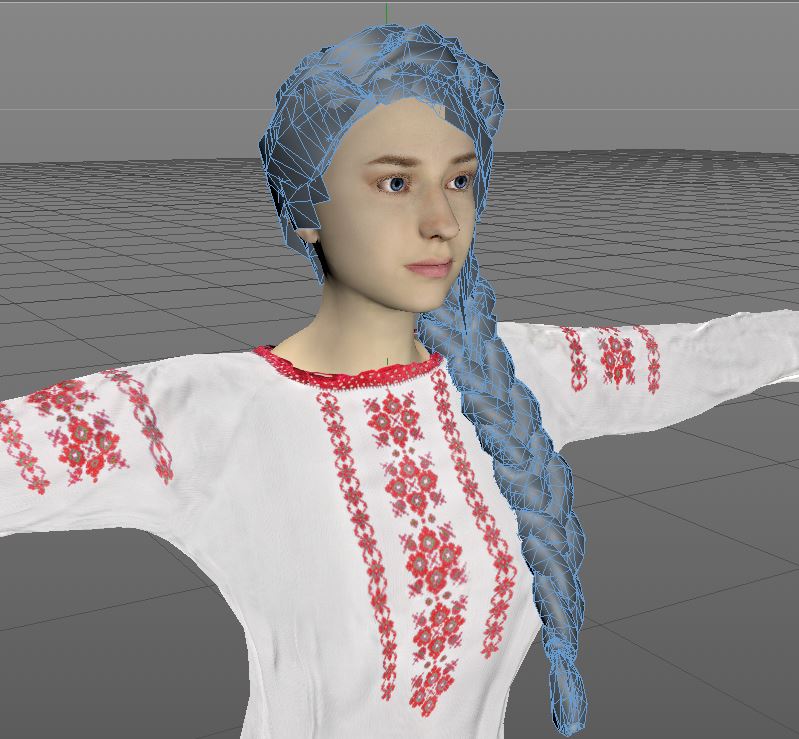
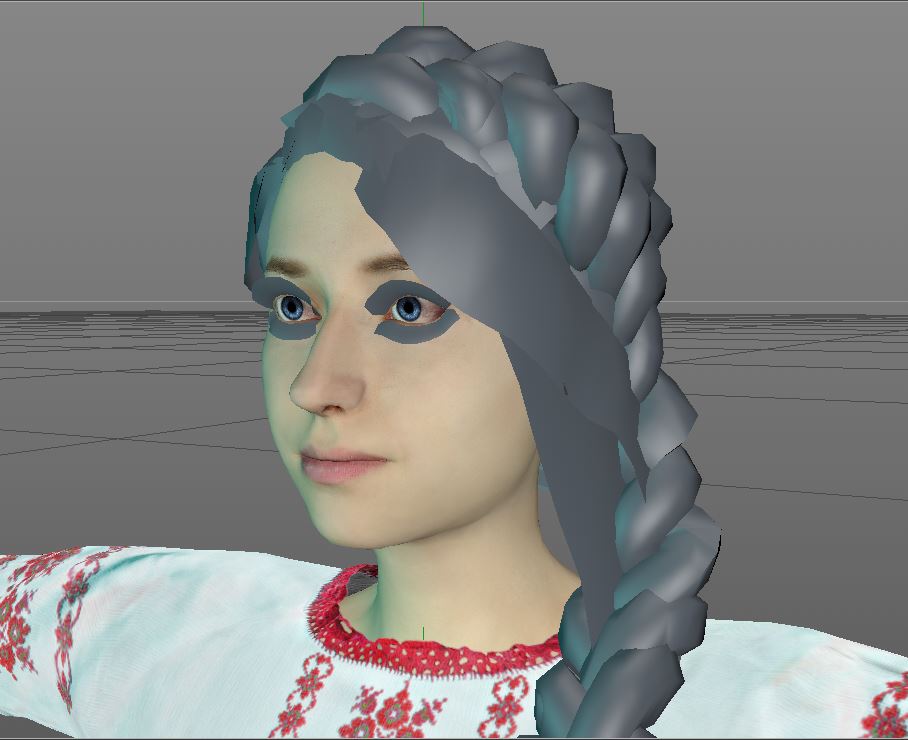
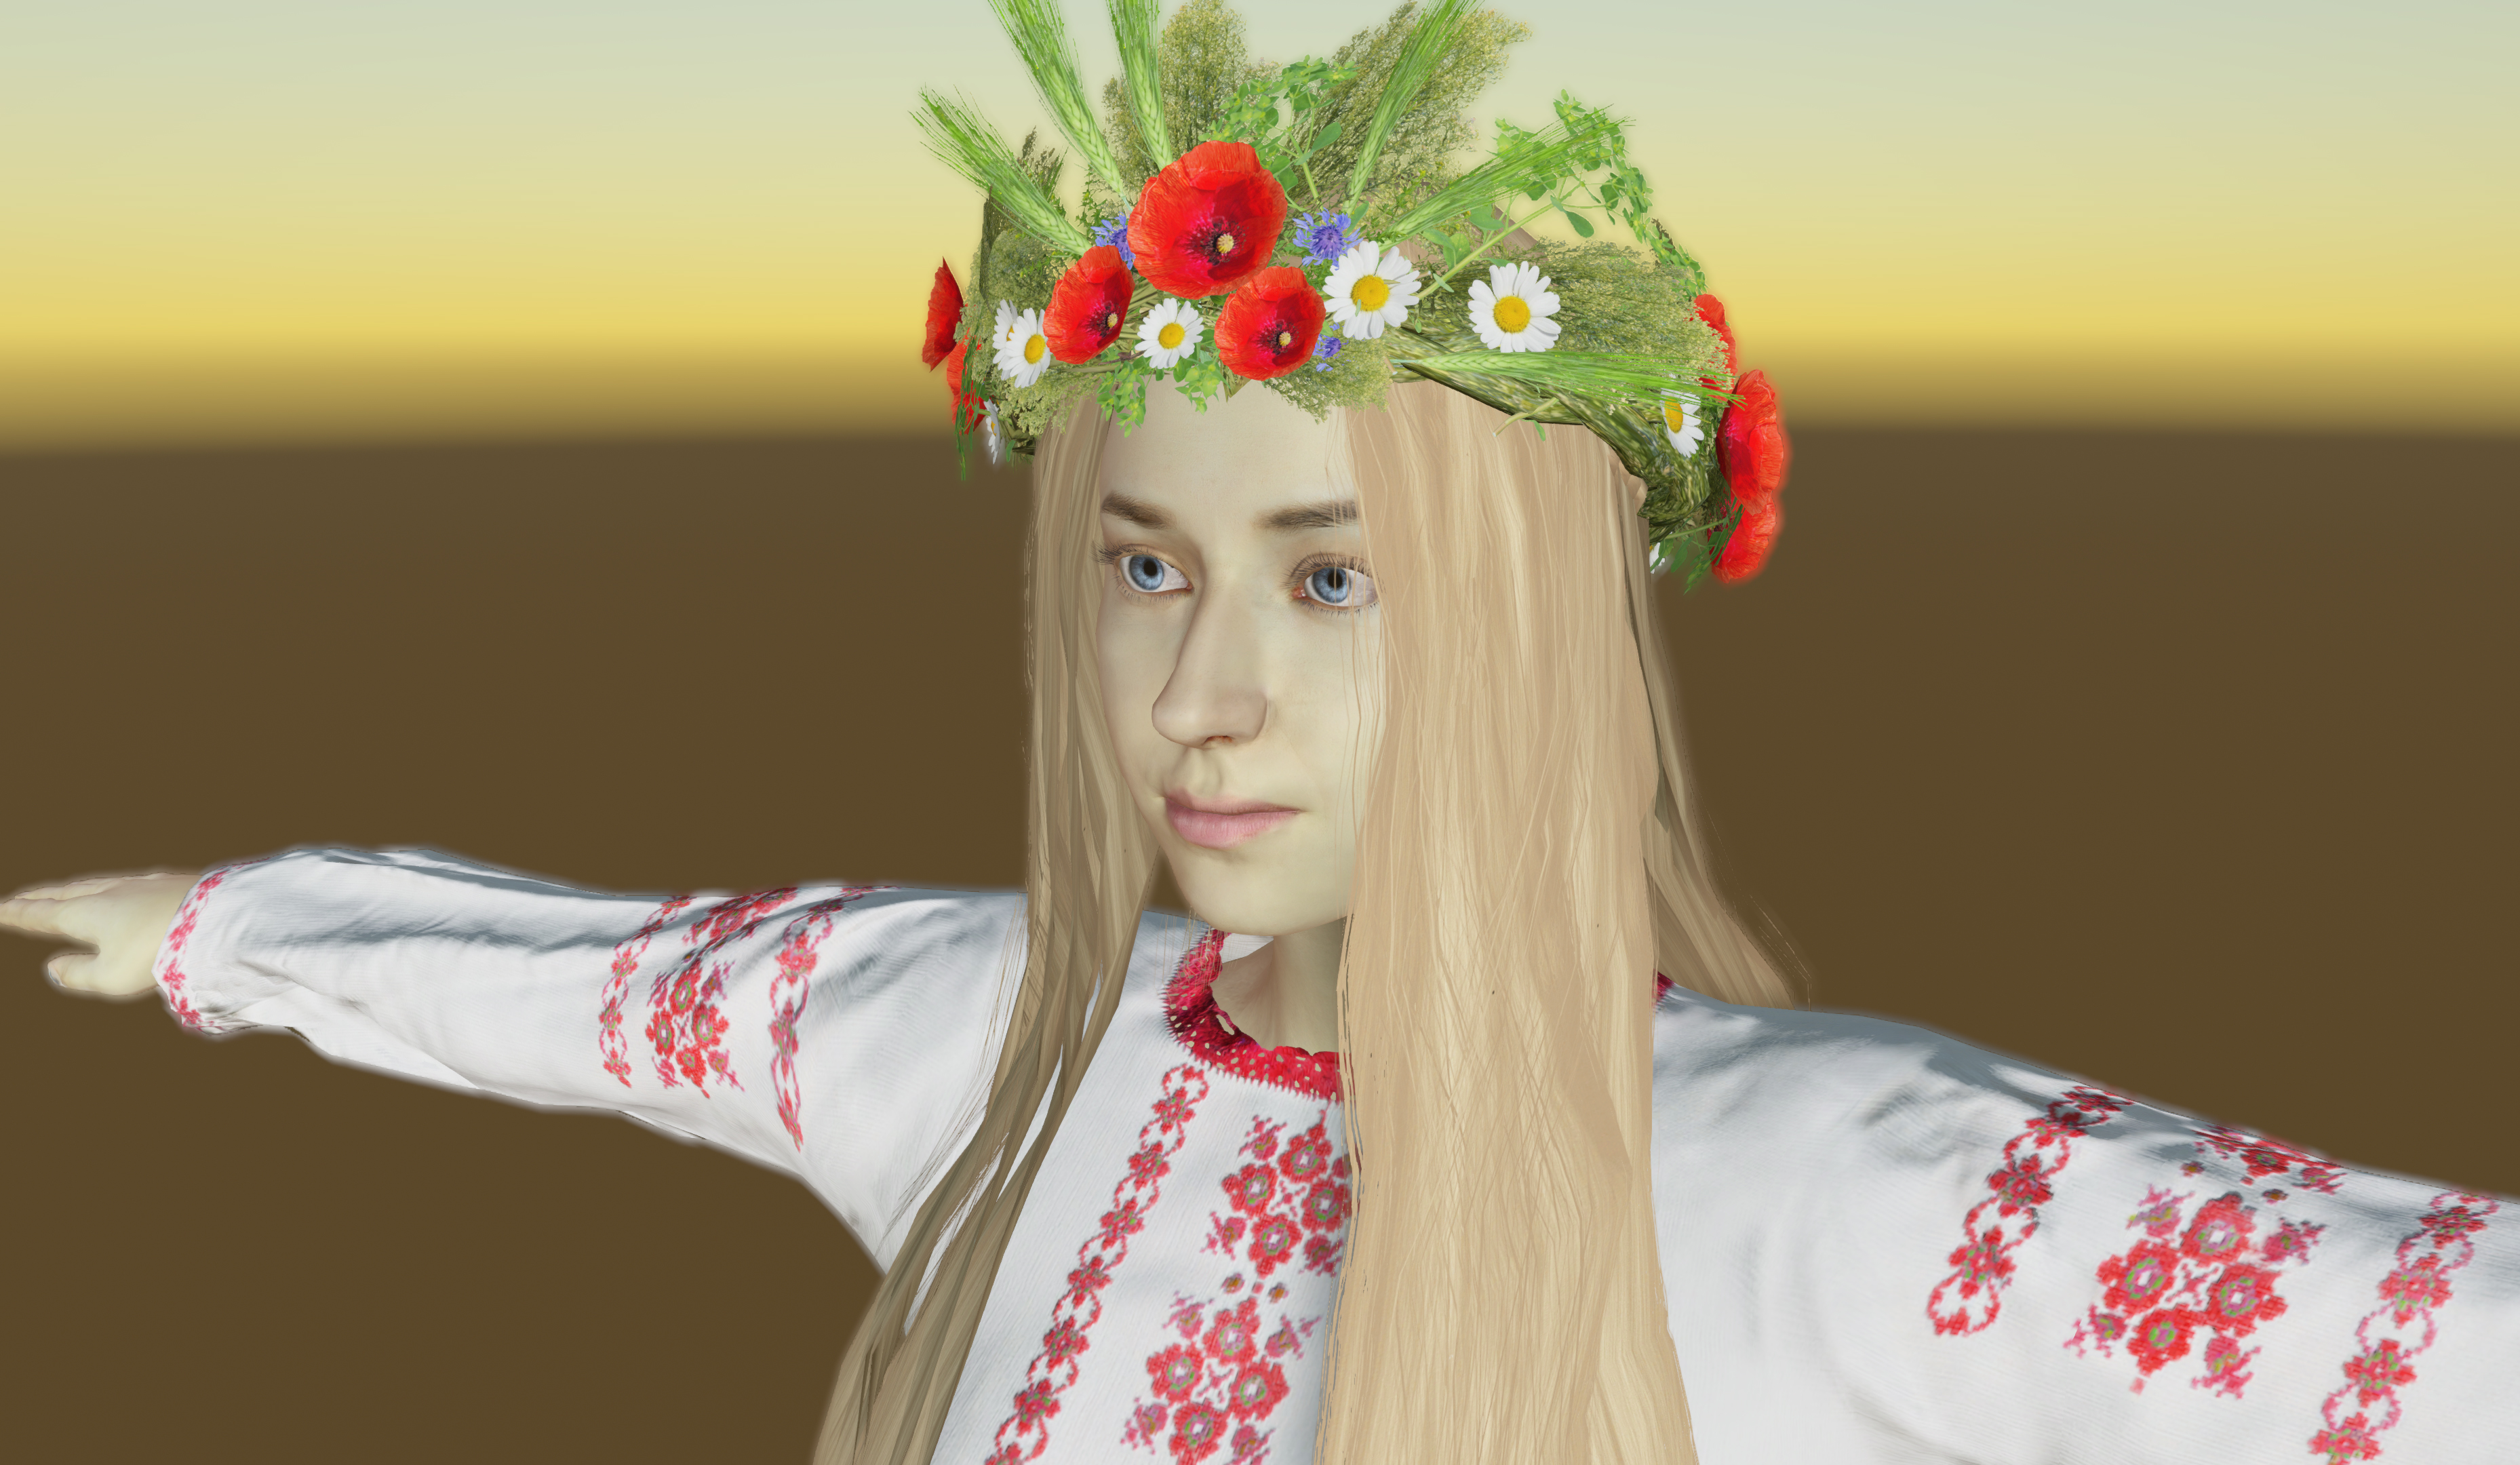
Here is hairstyle with final texture on it:
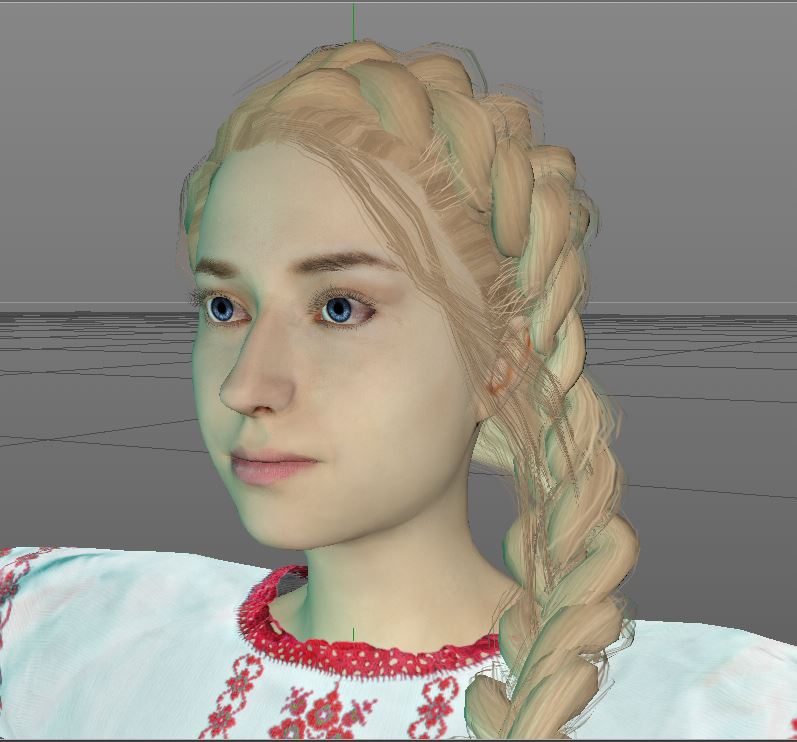
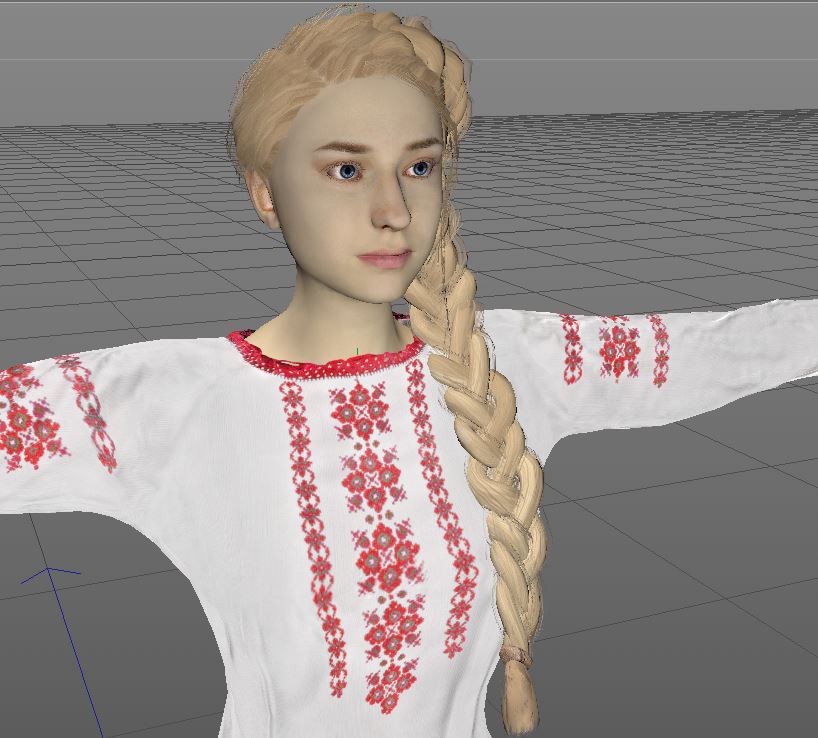
And here is how looks hairstyle from screenshots that you was able to see on the start of this post.
As you see we could change hairstyles, so there is no problem, for example, give old character hairstyle from the young character.

Of course, when making hair we are using Photoshop and BodyPaint 3d software to paint some hair stripes and elements of different shapes. You could use any other software for that but it is great if you have a real-time preview of Alpha transparency, then you could see what exactly you do. (not only grey blocks on the head of your character :) )
Texture of hair looks like that:
[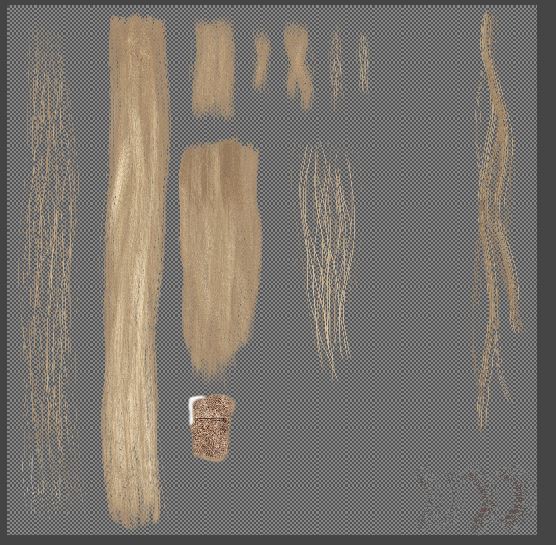
Hair albedo transparency texture
To give some natural behaviour. We tried to use Unity 3d cloth component on hair mesh to add some small wind or gravity effect, but more about it in another post.
![]()
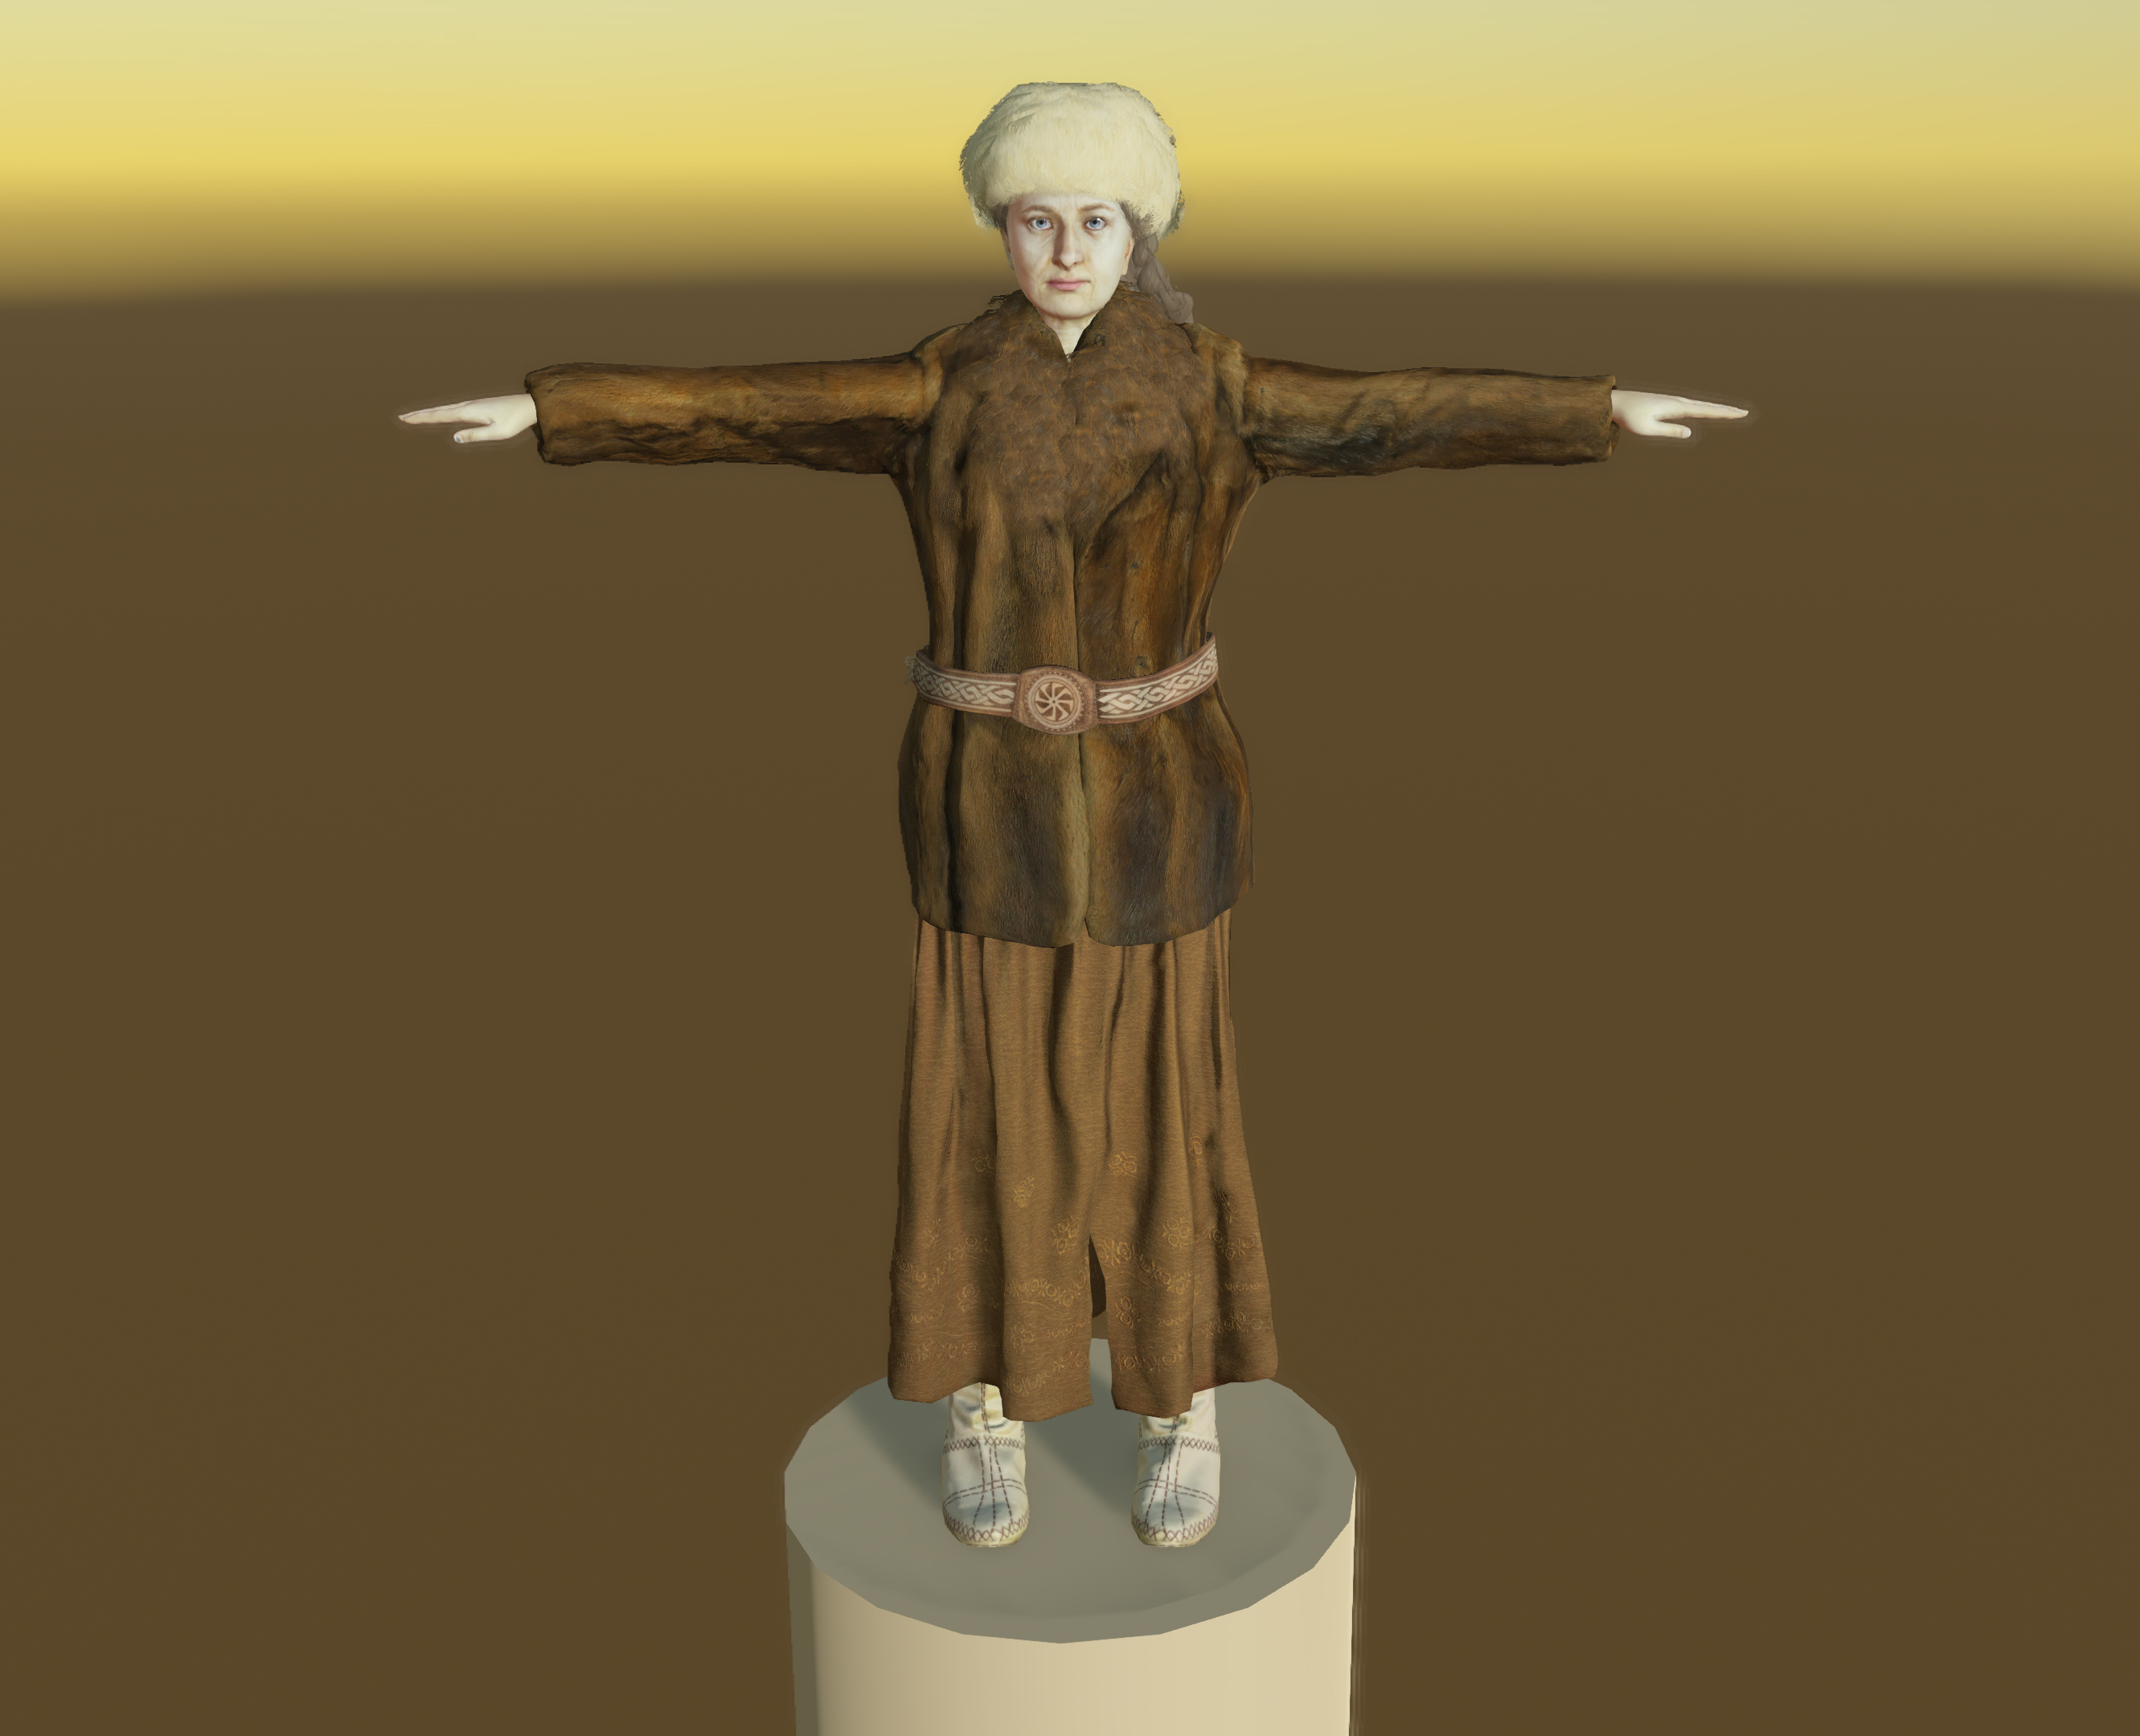
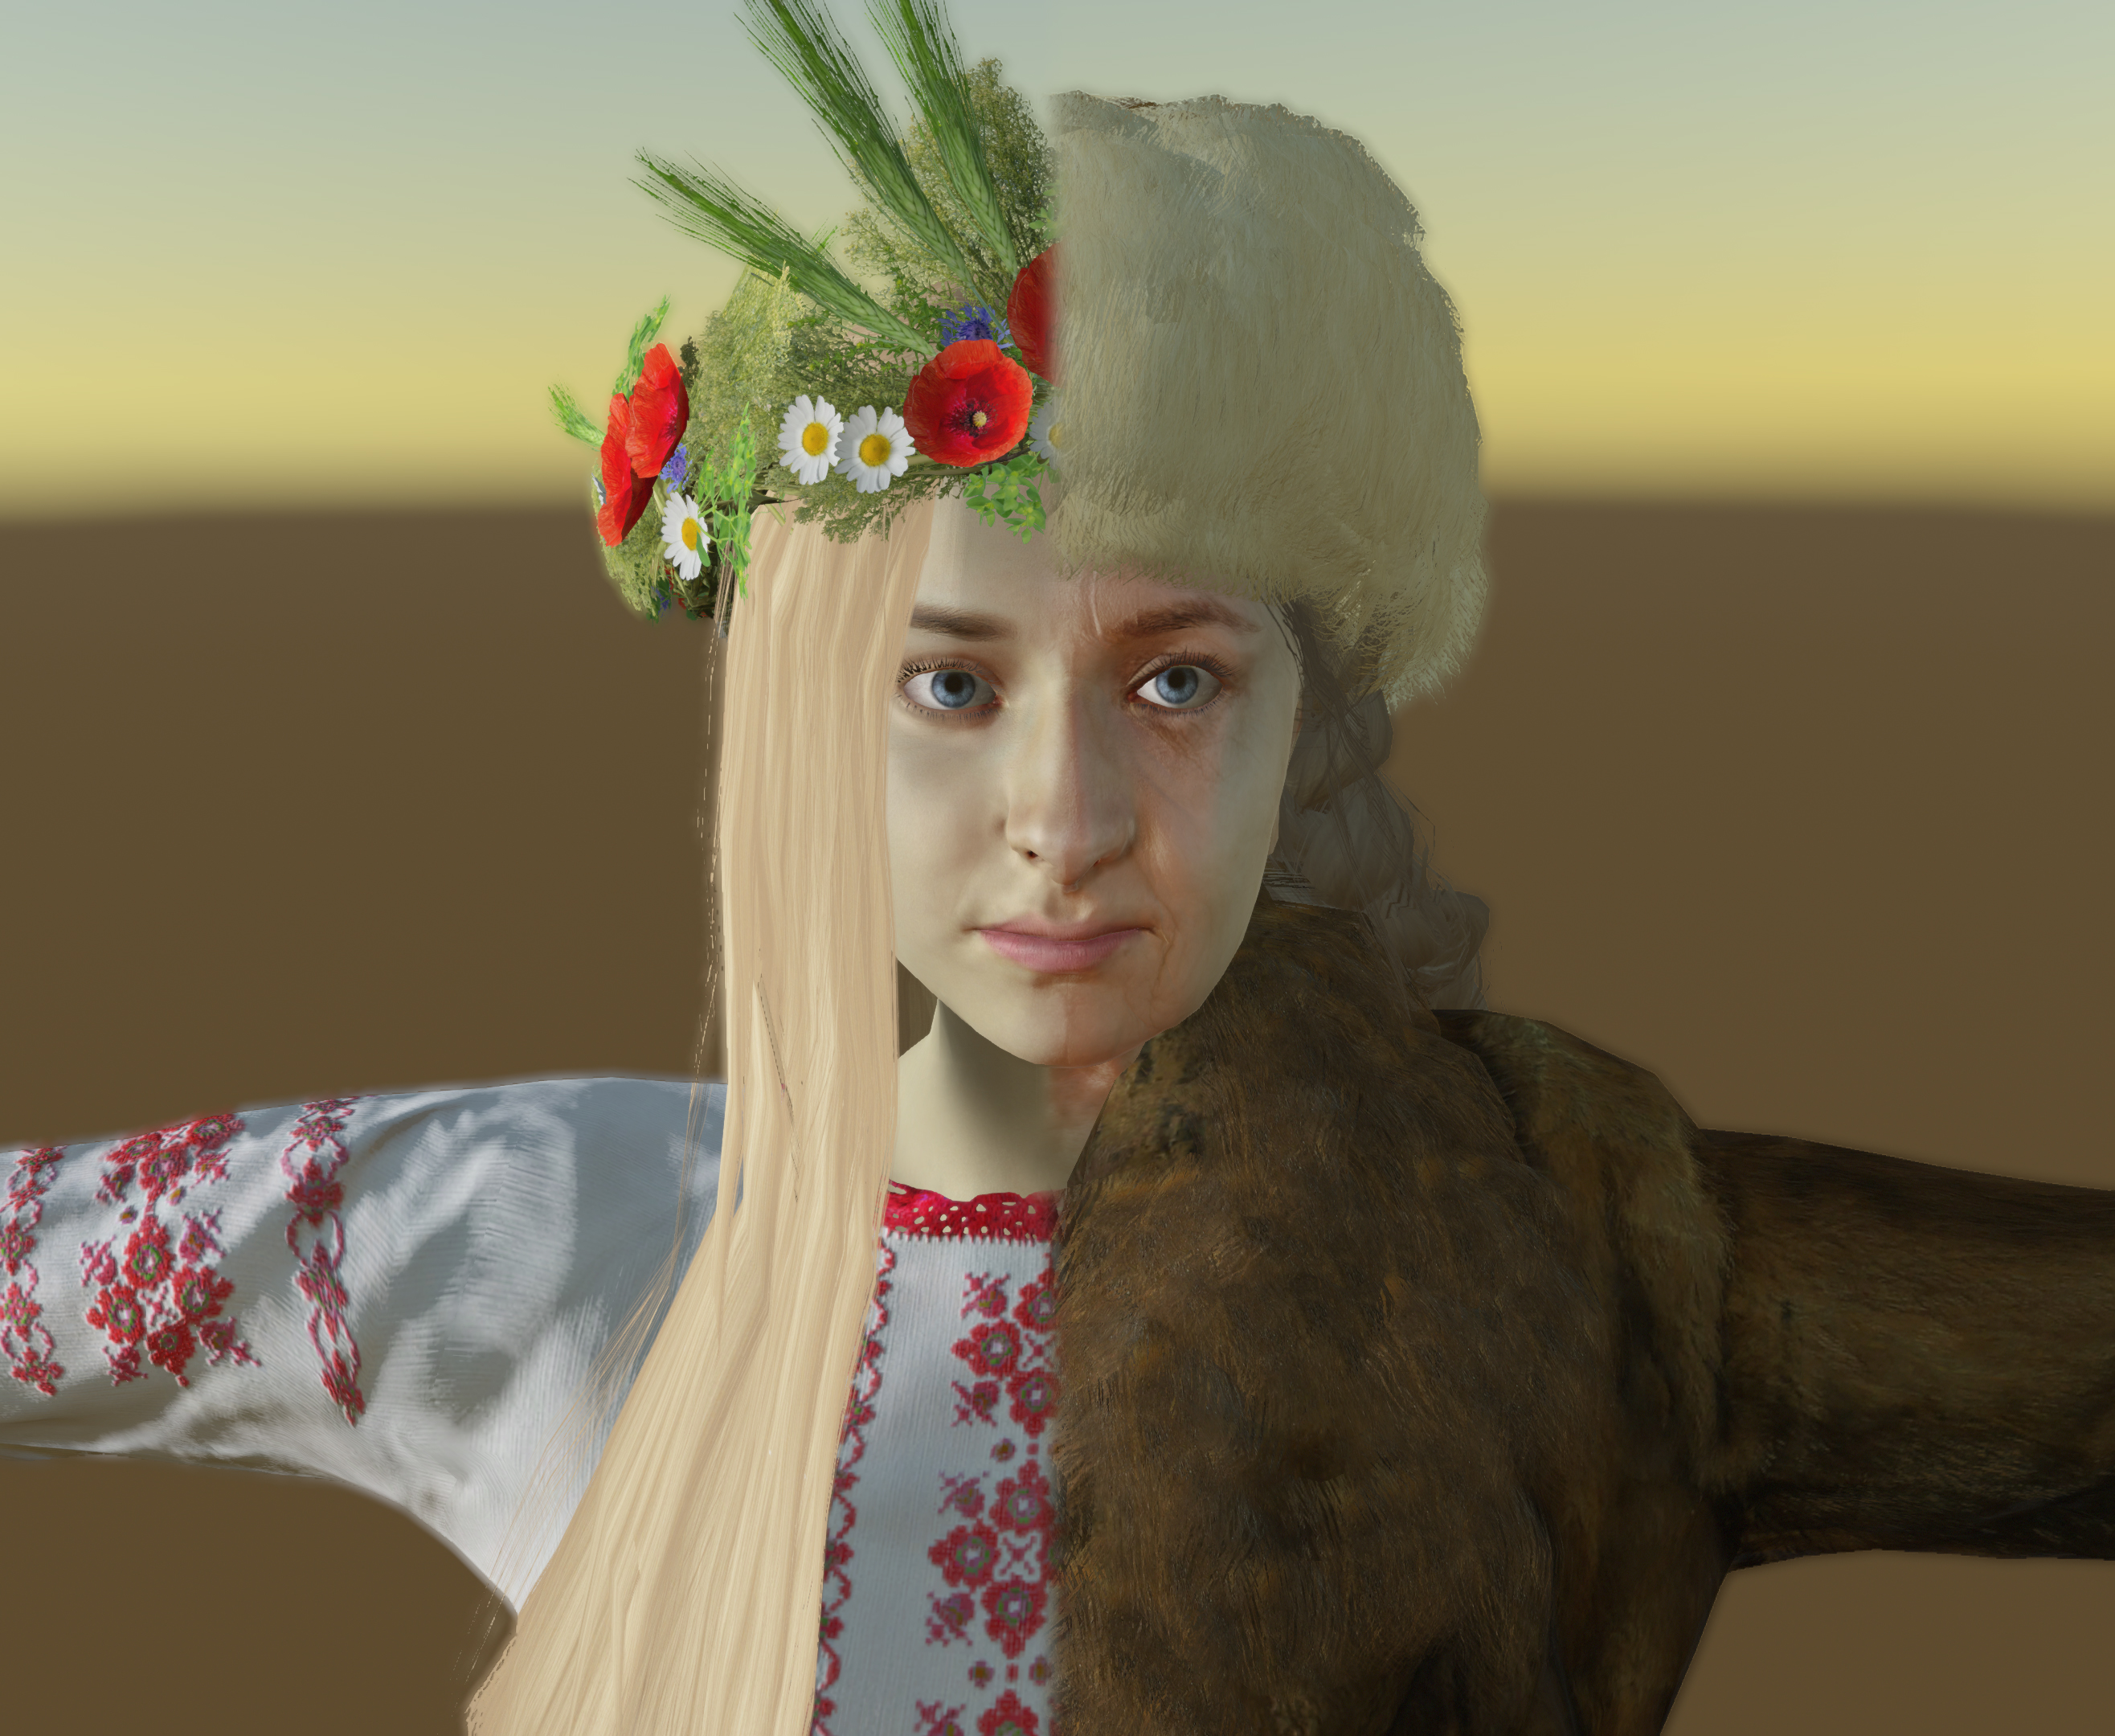
3. Making character older versions

"Girl you'll be the women soon" :)
I mentioned before that in our game you will meet the same characters in their different age of life. It means more fun for you when playing and additional interesting work for us :)
I will show you how we made our beautiful girl much older before we go into clothing.
Ok, so we watched a lot of videos, pictures and internet pages about how the human body is getting older.
The thing is not only about wrinkles, but the whole face is changing its shape. You could read more about it on internet, for example here.
Here I will tell you about technical stuff.
So firstly we finished young character 3d model with all bones. This is very important cause it takes a lot of time to prepare skeleton and weight it. After that, we just copy it and then work on the copied model. This workflow makes that we don't have to rig again our older version of character again cause it uses the same skeleton system. It is much more important in the engine. This set up makes that loading and unloading this kind of asset is faster, cause we only load/unload what we need.
So at first we're changing base mesh and pulling down some parts of the face to the ground, as mother nature does when the human becomes old. Nose, cheeks, eyebrows ears. We do it not too much because this model has the same facial bones like a young character model. (So changing base mesh too much could make problems)
 Only mesh deformation
Then we're sculpting bigger wrinkles and details in some sculpt software. You could do this for example in free Scupltris, Then we bake it to texture called normal map. Why? Because it gives us result as below without adding additional triangles to our model. (So your Pc could handle that) We're also making some detail normal map based on skin texture and mix it together.
 Mesh plus normal map
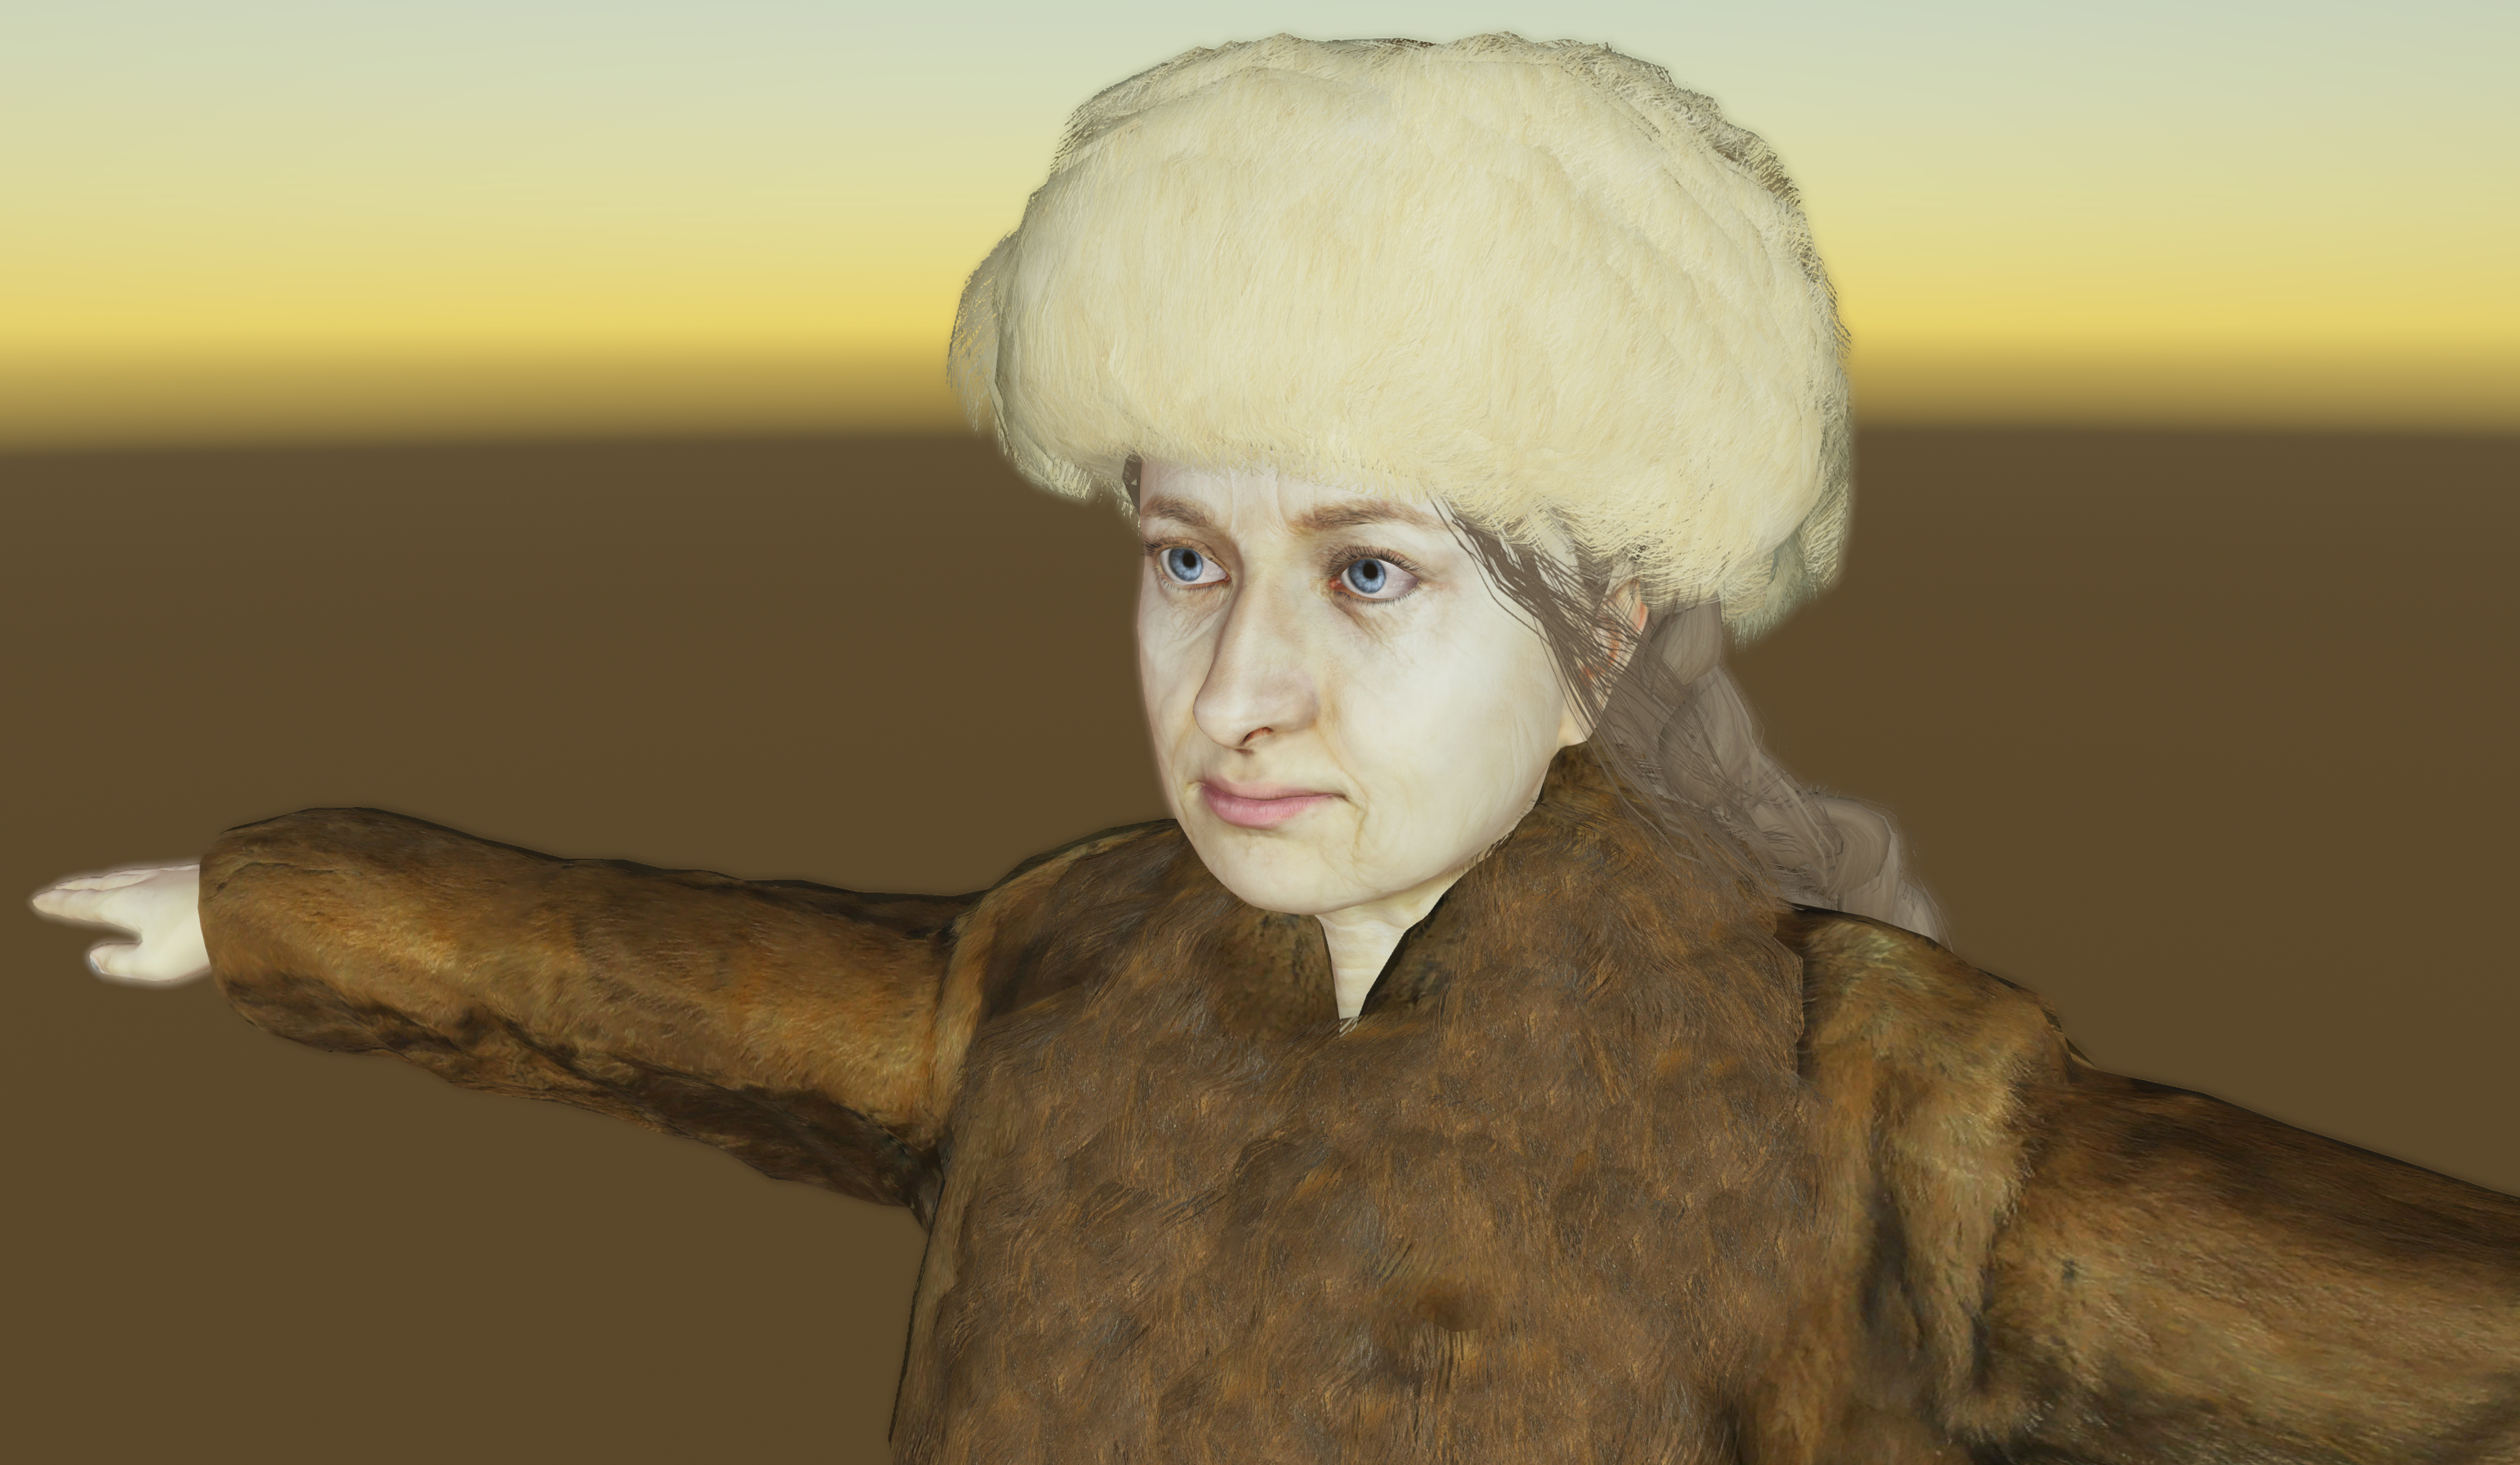
Finally, we're adding wrinkles to albedo texture (base colour texture) We made shots of some older people and then We're adding this wrinkles to model using photoshop mixing.
 Mesh plus detailed normal map and old skin albedo texture
So finally our old character model skin uses a detailed normal map and albedo texture. We'll prepare also subsurface scattering (The effect od translucency of light through the skin) texture and specular map, but what you can see on screens use only albedo and normal map (huge detail normal map + detail normal map mixed into one)
Here you could see part of:
1.Albedo Map.
2.Huge details normal map based on sculpted model details.
3.Huge details normal map mixed with skin details created from albedo texture.
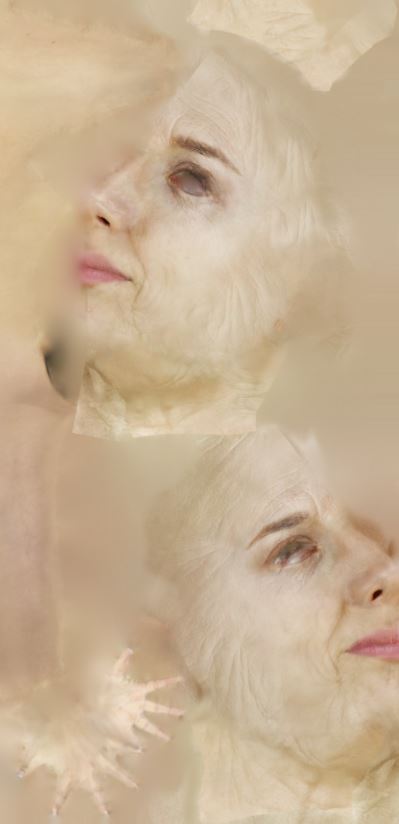


The older character looks much better in Unity 3d engine, where we use proper shaders:


And this is some Photoshop mix of 2 of characters (Just placed in the same position in the engine)

![]()
4. Scanning real clothes for characters.
Ok, so we are in almost final point, but still, much to do before getting final look of character :)
We scanned a lot of clothes, the technique is similar to scanning a face or other objects, but here you could do it slowly, the clothes won't run ...by most time... :D (wind or running cats, could be really annoying, especially if even small move will ruin hours of your work :D )
We can't find any good tips or solution how to scan clothes in a proper way, so here are our tips on what to do and what not to do:
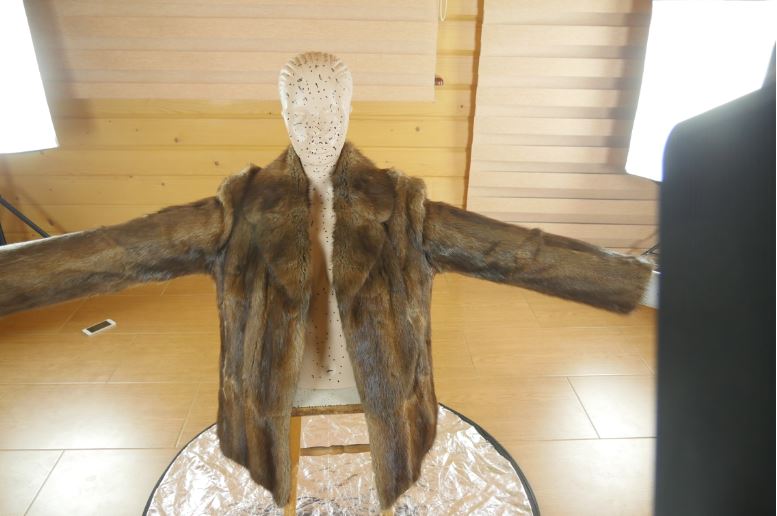
-Solid construction to keep clothes in place is the most important thing, even better is to have the possibility to set up cloth in stable T-Pose. What does it mean? This is pose with widely spaced arms, the standard position of game characters if you would to use animation on it, also best position to scan clothes well.
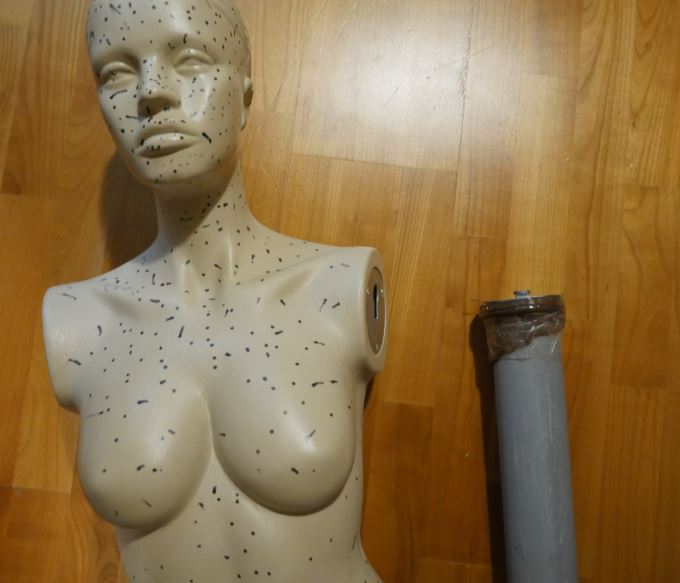
To do this we bought a mannequin. We didn't found any mannequin with T-Pose at first try... so taking photos under arms was really hard, also there was much more work with putting scanned clothes 3d models with arms set down on characters bodies. Our first test setup looks like that

Our first mannequin with arms down set up
...so we modified it to have this set up. We made new arms using PCV pipe. This is how looks our T-Pose Pipe-nequin :)
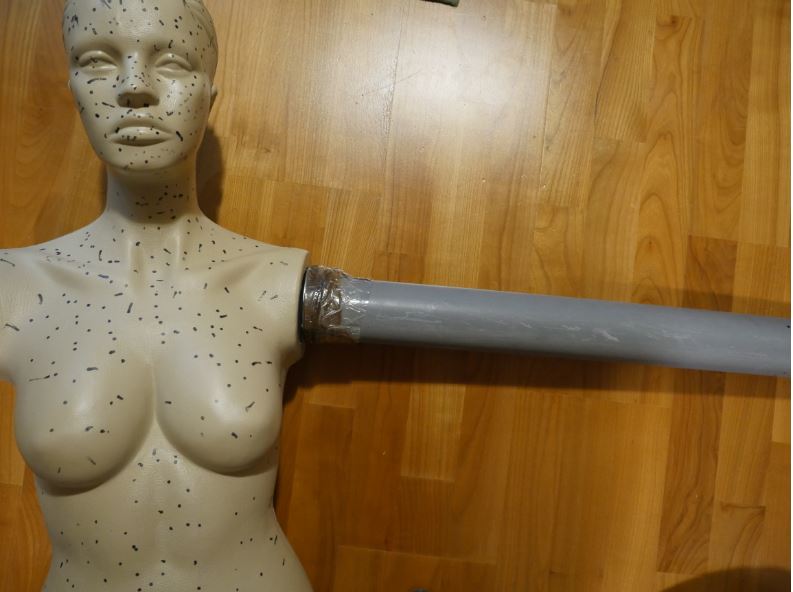
That one has arms made from PCV pipe and T-pose
We could remove that pipe to put on clothes in an easier way.
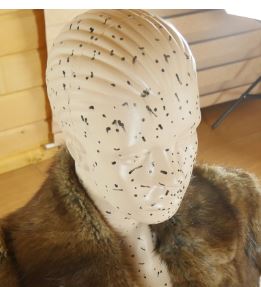
Looks a little bit scary but it works!
Ok, that's great... but why are there black dots on our plastic friend?
This is because the surface of it is very shiny, Photogrammetry matching point scripts don't like shiny things, but it likes dots and characteristic points, this is why we made there so many dots with a marker. It gives us better matching of photos positions in software so we have better clothes models scans :)
This is how cloth looks on it, fur in this case (in T-pose):
-The second important thing when making clothes with photogrammetry is to remember to take photos under arms and from below of cloth. This how many photos we had to make to have quite a good scan of this cloth:

Here you could see the dense cloud of points from the scan:

-Some clothes are very hard to scan, for example, long furs or very shiny materials, then it is probably better to do it manually than scanning.
For example, for that fur, we made additional fur elements on alpha channel transparency for a better look. We made it the same way as we did hair on characters.
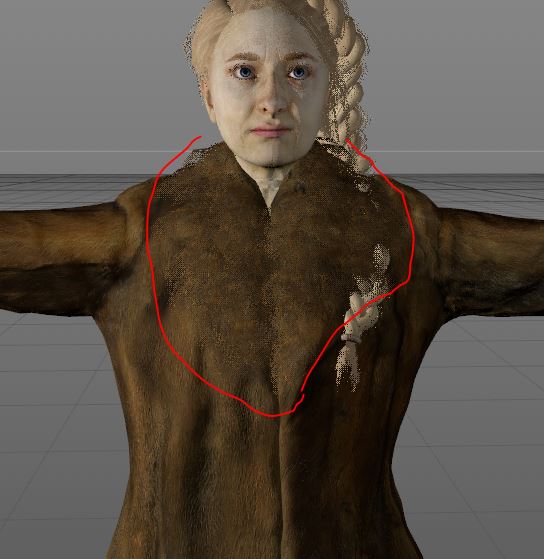
The red part are fur elements made manual way with alpha channel

Here is how it looks without texture
-Some kind of objects are easier for scanning, for example, that matt skirt looks really good because it is made from matt material. We also used here HDR photos to get more information in shadows and highlights, but making hdr Photogrammetry takes really a lot of time. Why? Because then you have to make every shot from a tripod in other case photos will be blurry. Now imagine our frustration when after 1 hour of making it, one of our cats, just jump over that fur. we had to start everything again :)


Looks good right? Overall more time you spend on scan better results you get, and less post-production work you'll have to do.
- Next elements that are better to manually create than scan, are belts. We prepared it manually. We made it texture looped so even small resolution of texture gives a high-quality look in game.


- The wreath was also made using transparency like hair. It is not finished but you could see it on screenshots:

Ok, that's all about clothes for now. :)
![]()
4. Setting up together in game Engine.
I mentioned before that we are using the Unity 3d engine. I'll just give you here some tips what shaders and what set up we are using for our model to look as on the screens.
For all elements of characters, we are using free Alloy Shader for now. We choose it cause it has all we need. Especially dissolve option for every variation of the shader and many other options in segments. You could use any other shader but here is why we choose Alloy for now. (apart from that it is free :) )
 Different Light positions give interesting effects
-Skin - for that part of characters we are using skin shader with subsurface effect and transmission. What is the subsurface effect? That is a simulation of skin light transmission factor. Look at this photo we made:
 This is how subsurface scattering looks in the real world on hand
As you could see the light (if strong enough) is going through the skin.
It gives a really good natural look especially when the light is low. You could see how it behaves in The End of the Sun on that gif. and screenshots above. (Keep in mind that for now it even don't have specular texture or Subsurface map so it'll look slightly better at final stage)

- Eyes - As you could hear - eyes are the mirror of our soul. That's really true, It is very hard to give natural look to character without making eyes looking great. Eyes are not just a simple sphere. It is flat in a place where iris is, also pupil is even below it. This is why we use Parallax shader. This is kind of surface that makes the illusion that something is deeper than it really is but it gives really good results! :)
- We are using an additional transparent sphere a little bit bigger than eye main shape to make a lens with reflections. It gave us really good effects.
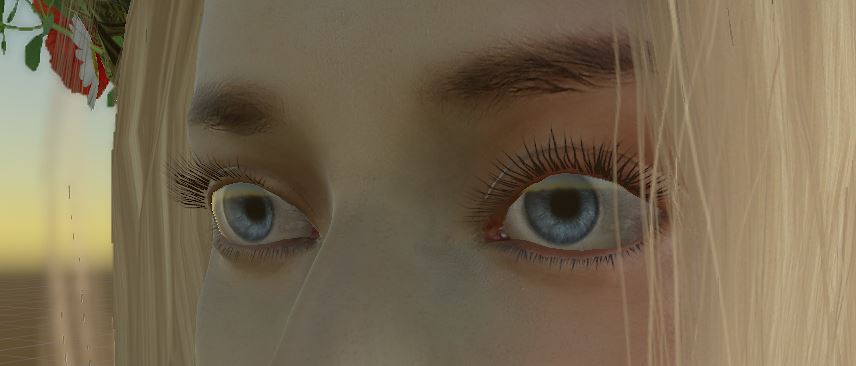
Eyes with an additional transparent bigger sphere for distance reflection effect
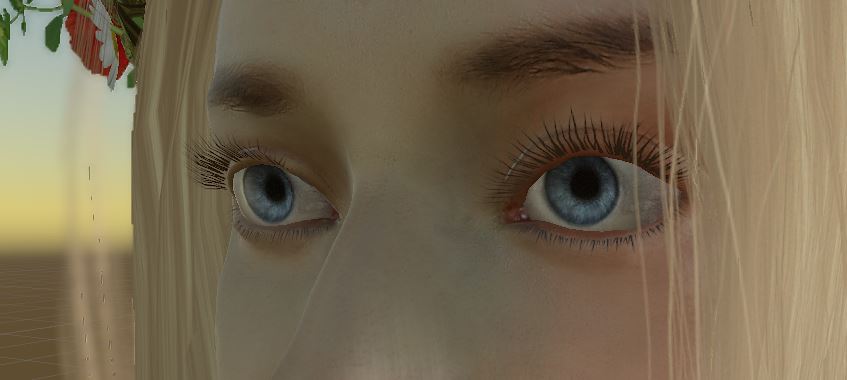 Eyes without this sphere.
What's more, we could control Pupil dilation of eyes now, in cutscenes it gives a really natural look. (little scary when the pupil size is set to max but still cool effect for some fantasy purposes :) )

How pupil dilation works on the shader.
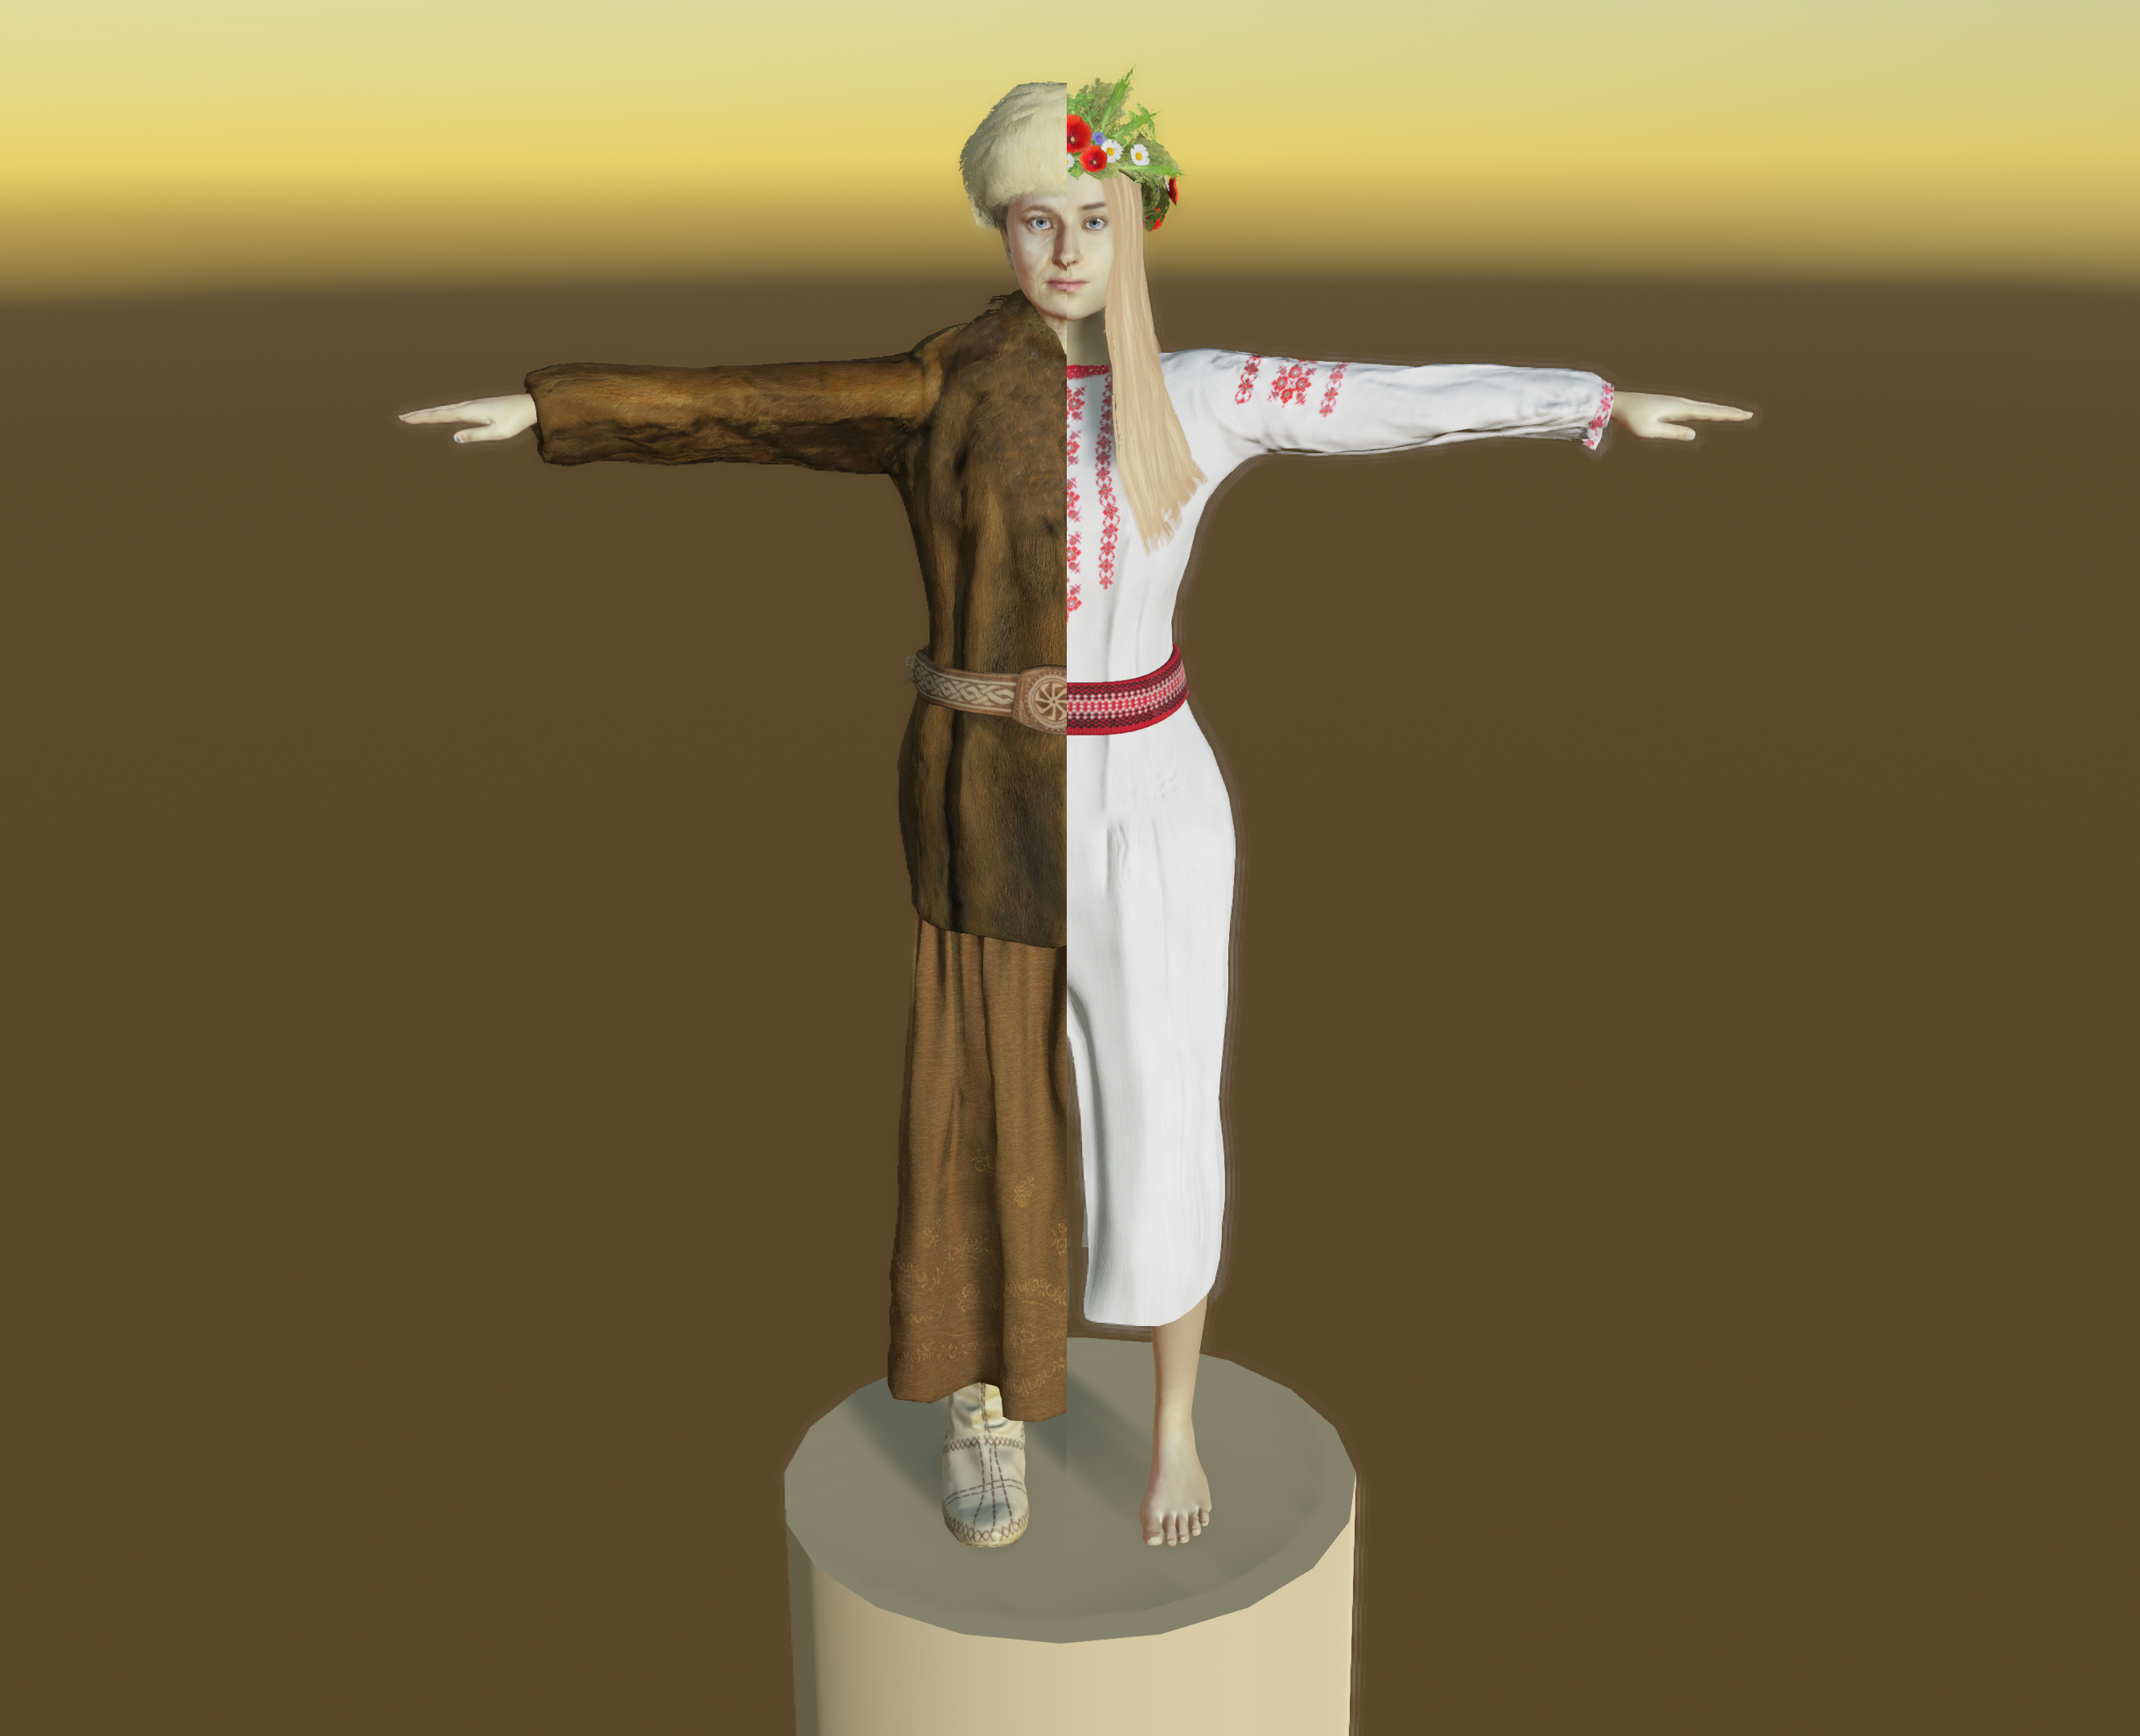
- Final thing is that because we are using one skeleton for all clothes and bodies versions, we could without problem make young from our old character or change its clothes, It gives us really awesome cinematic options and also is great optimization.
 This is how we could mix elements of character done this way.
- For Clothes, we use double-sided shader so you are able to see both sides of it.

- For Hairs, we use a special double-sided shader with smooth transparent edges.
![]()
I don't think that I mentioned and explained everything so feel free to ask us anything in the comment section or on our social media:

That was an awesome walkthrough of your process, keep it up I would love to see more! Subbed :)
Thank you very much! We are happy with you :)
Also soon we will going on Kickstarter! If you want to know when campaign will start klick here: Endofsun.com
It will really help us to get some more attention when our campaign will start :)