Bolter Unit, Range and Hit FX Production
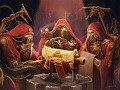
This tutorial will go through the steps necessary to setup a bolter Muzzle FX. This is the desired effect that we wish to achieve:

In the FX tool you will start by creating a couple of Beam FX that will eventually be used to build the muzzle flash for the Bolter. The three images in this case are:


In Beam FX, the origin (point where the FX is attached to the marker) of the beam image will always be at the left. These three images will be turned on and off to give a random flickering muzzle flash FX.
The fourth image within the muzzle flash is a Ring FX. Whereas the top three images will 'point' in a direction from the attach point, the Ring FX will always face the camera and give the FX volume.
The Volume image:

You have to build the FX in parts and then combine them. To start, create a new Beam FX in the FX Tool and load in the first image. Here is where you will specify length, width, and type. In this FX the blending mode will be additive, where the black from the image will be removed and the brightness of each image overlaying each other will magnify the brightness. Save this beam FX as something like beam_flash_1.
Create the other two beams with the other images. Use the Ring type when you create the volume ring FX. Here you can specify different parameters; radius, duration etc.
Now create a new combo FX and import each beam FX and ring FX into one of the combo slots. Once you have done that you can start modifying the individual parameters of each beam and ring; their duration (which I usually leave the same or the length of the fire animation that you will be attaching it to). Use the colour adjustments to fade the image of each flash in and out by taking the colour down to black (this works only if the blending mode is additive). Offset the on/off flashing of each until you reach the desired FX. Play. The 'muzzle flash' should be pointing straight up (which will be the Y axis of the marker it is attached to). Save the FX.

Now the FX is ready to be attached to the unit. This will be done in the Object Editor. Open up the Space Marine EBP.

Drop down the Event List; this is where you will create or import events to attach to the unit. Events are containers that hold FX. The event properties list on the right is where you will import and give settings to FX. The Anims / Motions / Actions? list contains the motion list. These motions are what the events will be attached to. Find the first 'Bolter firing' motion. I.e. idle_firing_bolter. Select it.

In the event list click New and name the event Bolter_Fire. With this event selected, select the under event properties. Add 'FX' from the parameter list. Then beside value, browse for the muzzle flash FX you created above. Next you will add another parameter; Marker. From the value list you will select from a list of available markers on your unit. In this example the marker should be Marker_Bolter_Barrel setup on the unit like below:

Now you have your Bolter Flash FX event setup and ready to attach to the unit. Select the firing motion from the motion list and then drop down the Motion Properties list on the right.

Within the motion properties is an events section. Open the drop down list of event selections and find the Bolter Fire event you just created. Click Add. Now you have to either select a time that this event is triggered or select if the event contains looping FX. In our example the muzzle flash FX is a looping event. If a time was entered (i.e. o.oo; the start of the motion's anim) and the FX was looping, what would happen is the FX would be triggered at 0 each time the motion looped while the previously triggered FX is still playing. This creates undesirable FX. Alternatively you could make the FX not looping, i.e. the Bolter Flash FX flashes a couple of times within the duration of the motion and with a time of 0.00 entered it is triggered at the beginning every time creating the illusion the FX is actually looping.
Now play the motion in the viewport.

Tracer Fire Creation
Tracer fire is created in the same way the muzzle flash is except it consists of a single beam with one texture being emitted from a Spray type FX. Keep in mind that the left hand side of an image in a beam is its origin side so with the tracer fire will be a slight reverse of the muzzle flash images:

In the FX Tool save a beam with this texture then create a new Spray type FX. Import the beam into the Particle Fx section of the Spray. In the Spray you can adjust things like the rate of the spray, duration, deviation etc. For tracer fire though, we need to look at the Particle Dynamics if we eventually want our tracer fire to reach it's target then terminate (visually linking the attack to its target). There are a number of settings under Dynamics with descriptions that line the bottom task bar. Select # 11. This has no description but is used for Spray FX that need to reach their target. Make sure the Beam's duration is an appropriate length of time as the Dynamics setting will get the tracers to their target but only if they last long enough.
There is one more thing to setup to complete the 'tracer reaching its target'. This will be done in the Object Editor during hookup.
Follow the same guides to setup up a Bolter Tracer event in the Space Marine's EBP. Setup the event with FX, and Marker parameters but you will have to add 3 more parameters with various value settings as follows:
- Fx_length distance
- Fx_other target
- Fx_target_group (select from list and select appropriate setting, i.e. weapon_range_upgrade_main)
The Bolter Tracer event will usethe same marker as the Bolter Fire event. Hookup in the motion properties follows the same rules as did the Bolter Fire event hookup. The tracer fire FX in the Object Editor will not fire off into the distance as there is not target here. Test in game. The tracer fire should be visible all the way to its target.
Bolter Hit FX Creation
Create an FX using the above guides, whether it's a Spray, a combo with Sprays, Rings or Beams etc. Hit FX will vary in appearance depending on what surface type they hit. DOW provides for four different surface types:
- Flesh
- Light Metal
- Heavy Metal
- Stone
Create an appropriate FX for each type of surface, i.e. Blood for flesh etc.
You have to create events that hold these FX and the appropriate parameters to be referenced through the Attribute Editor. This is achieved in the Object Editor the same way the events for Bolter Fire and Tracer Fire were set up. The only difference is that each event will be exported from the Object Editor. Before creating these events we have to open up any unit but NOT for edit. What unit doesn't matter as it will purely be for exporting events.
Keep in mind that the game calculates and calls a hit event for every hit in game so the Hit FX should be for one 'round' from the weapon and lean on the minimal side for particle count.
Open a unit and create an event for the first surface type hit. Event properties should consist of the FX, and Marker with parameters set to random. This way every time a unit gets hit it will be from a random marker. Under the event list, select and export each event separately. The location for events have to be under :
\Root\W40K\Data\Art\Events
Open the Attribute Editor and open up: weapon/shooting_weapons/space_marine_shooting_weapons/space_marine_bolter
On the right drop down the area_effect:area_effect_table and go to the weapon_damage:weapon_damage_table/hit_events
Beside each surface type the appropriate event location is typed in and voila!