With the advent of Osiris version 1.3, two hundred custom map slots have been added to the mod and are available for servers to fill with unique maps handcrafted by the player base!
This tutorial will explicate the process of how to name your maps, enable them in polls, and how to edit your server config to make any combination of custom maps available by default - without having to go into the game and manually enable them after every server reset!
1. Adding your map to the server
Once you've made a new map you can assign it to a custom map slot by renaming its .sco file after a custom slot. The slot names are in the range of 'scn_custom_map_1' to 'scn_custom_map_200'. So to assign a map to the first slot, you would rename your .sco file to 'scn_custom_map_1.sco'.
Once your map has the correct name, place it in the SceneObj folder found within the Osiris folder on your server.
Next, you need to assign the correct terrain code, outer terrain mesh and all other information to the entry for that map slot in 'scenes.txt'. This is a standard step for scene creation in Warband and additional information on this step can be obtained from other sources as required. Make sure these changes to mod files and all subsequent ones are being done in the server's files and not in your own local ones!
2. Naming your map
Finally, in order to actually name your new map, you need to edit a string in 'troops.txt'. Please note that renaming the map entry in 'scenes.txt' will not assign that name to your map in-game;
- Open up 'troops.txt' and search for the following text: 'trp_custom_map_1'
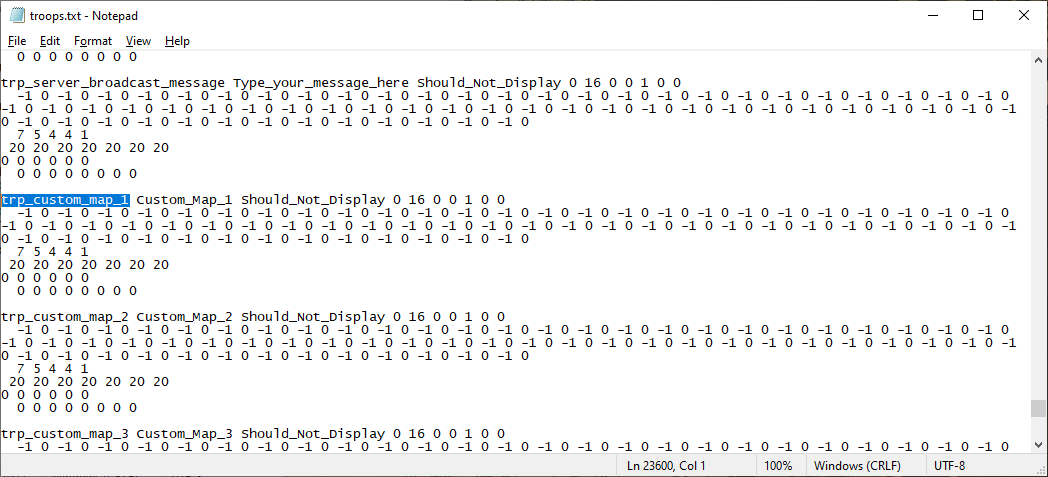
- Scroll down to the slot for the custom map whose name you wish to set. Then, replace the second string entry (the one to the right of the 'trp_' string) with your map name. So if you are changing the name for Custom Map 1, The result would look something like this:
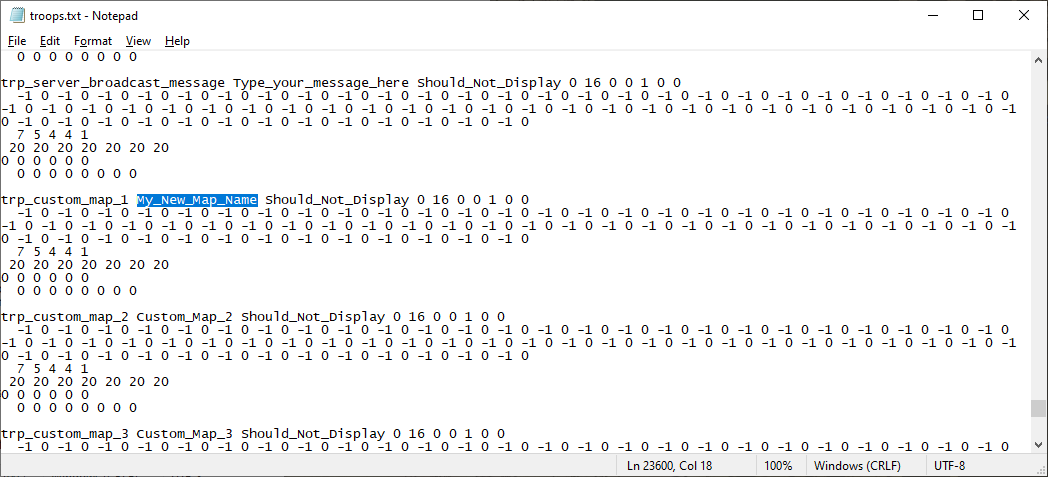
(Make sure to use underscores instead of spaces in the name!) - Save 'troops.txt' and restart your server. NOTE: If your new map is not yet set to be enabled by default on your server, the new map name will not show up until AFTER you've enabled it in the game's administrator panel. The next section will explain how to do this.
3. Enabling your maps
All maps in the mod - vanilla and custom alike, can be enabled and disabled from poll menus from the in-game server administrator panel. To do this, access the panel and scroll down until you see a button labeled 'Change Map Availability...'. Click it.
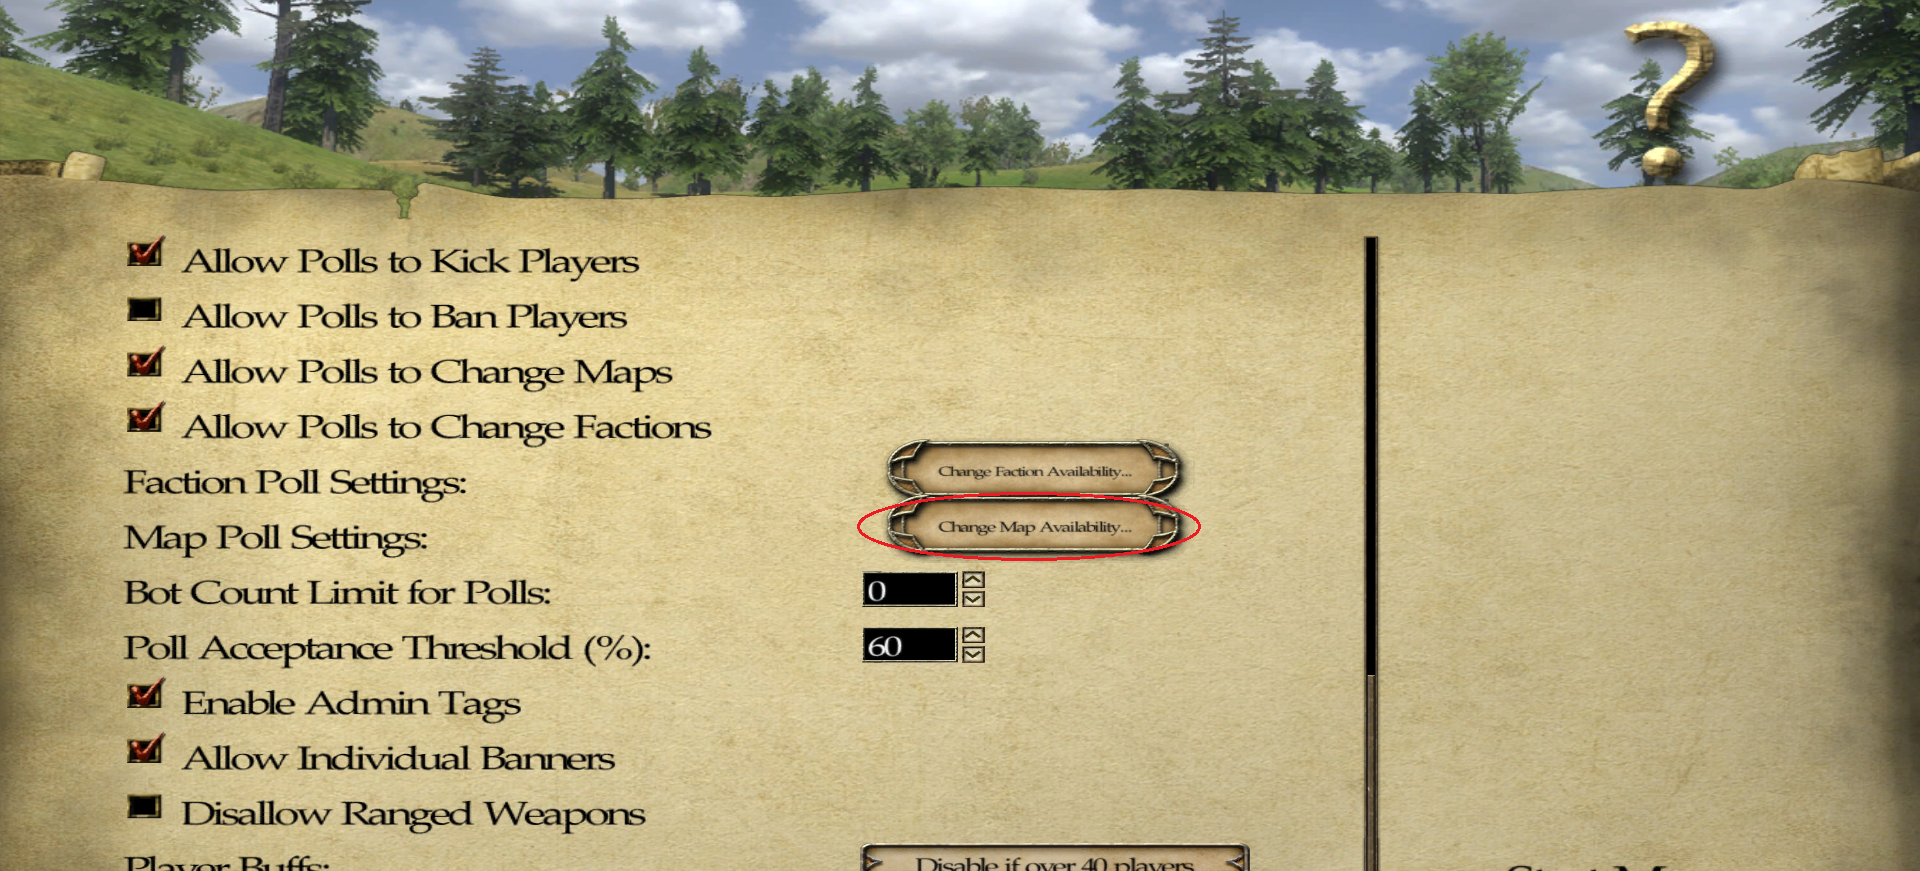
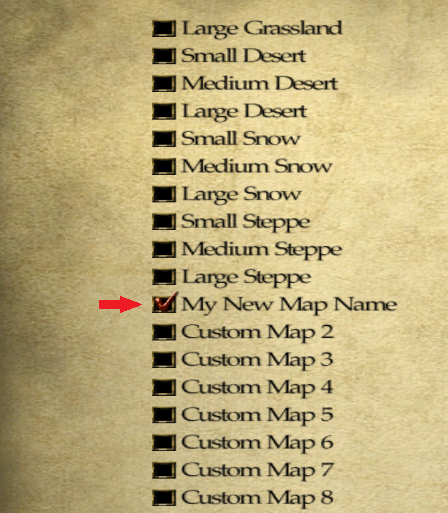
A list of all maps (and map slots) in the mod will be displayed. All enabled maps (which, by default, are all vanilla maps and no others) will have a checkmark in the box next to them. Clicking in that box will enable/disable that map from the poll menus.
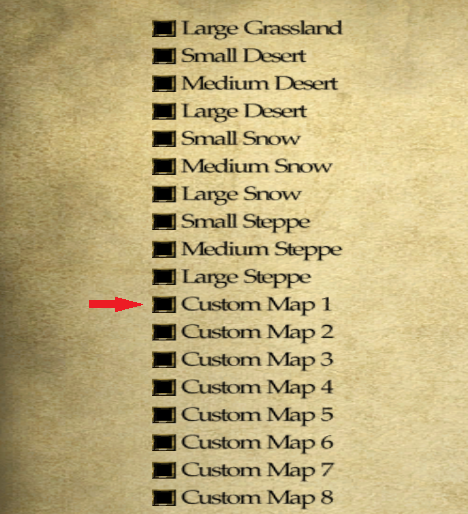
If you are enabling a custom map, its default name will show up in the list until after you enable it. So, to continue the example from Section 1, the map in this menu will have its default name to begin with:
After you enable it and reopen the menu however, the name will be displayed as you have written it in 'troops.txt':
This covers the basics of setting up custom maps in Osiris 1.3. However, if you own a dedicated server which makes ample use of custom maps, you may find that it gets exhausting having to reenable all your maps after every server reset. Fortunately, there's a way to instruct your server to enable specific custom maps by default whenever you start it up!
4. Enabling custom maps by default
This part requires a little bit of basic maths to set up. Depending on how many maps you want to have enabled and what configuration you want, you may want to have a calculator handy for this next bit!
- So first of all, open up your server's config file. We'll be adding a command in here.
- The command we'll be using is 'set_bot_count'. This command has been modified for our purposes but it'll still work exactly the same for its original purpose. So there's no need to worry about that! But before we can add it to the config, we firstly need to calculate what parameters it'll need to achieve the desired results. With that in mind, take a look at these data sets:
Custom Map Partitions:

	1: Maps 1-25
	2: Maps 26-50
	3: Maps 51-75
	4: Maps 76-100
	5: Maps 101-125
	6: Maps 126-150
	7: Maps 151-175
	8: Maps 176-200
Don't be intimidated by those numbers; what we're going to do is actually very simple. The 200 custom map slots are divided into eight sets I call 'partitions'. Each partition controls 25 maps slots. The command we'll be using requires two numbers. The first number you need to work out is which Partition controls the map slots you want to enable. So if you want to enable any of the maps from slots 1-25, you would need to modify Partition 1, any from 26-50 and you would need to modify Partition 2, etc. So, if we only want to have Custom Map 1 enabled by default, we would be modifying Partition 1 and so our first parameter would be '1'. Simple enough, right?Custom Map Flags: Map Index 1: 1 Map Index 2: 2 Map Index 3: 4 Map Index 4: 8 Map Index 5: 16 Map Index 6: 32 Map Index 7: 64 Map Index 8: 128 Map Index 9: 256 Map Index 10: 512 Map Index 11: 1024 Map Index 12: 2048 Map Index 13: 4096 Map Index 14: 8192 Map Index 15: 16384 Map Index 16: 32768 Map Index 17: 65536 Map Index 18: 131072 Map Index 19: 262144 Map Index 20: 524288 Map Index 21: 1048576 Map Index 22: 2097152 Map Index 23: 4194304 Map Index 24: 8388608 Map Index 25: 16777216 - To work out the second number of the command, we need to look at the Custom Map Flags list and add together the index values of all the maps we want enabled. Note that the map index is relative to the Partition we are currently modifying. So, if we were modifying Partition 2, Map Index 1 would represent 'Custom Map 26', for instance.
Some examples: Assume we are modifying Partition 1 (Maps 1-25); To enable maps 1-5, we would do: (1+2+4+8+16) = 31 To enable maps 1, 2, 4 and 21, we would do: (1+2+8+1048576) = 1048587
Assume we are modifying Partition 3 (Maps 51-75); To enable maps 55 and 58, we would do: (16+128) = 144
As you can probably tell, this is where a calculator might come in handy sometimes! If we are only interested in enabling Custom Map 1 however, then this value would obviously just be '1'. Easy enough, right? But there's one final step to do before we're done: - Add '500' to your final value - DON'T FORGET THIS PART! Doing this tells the server that the command we're using is being used to set custom map data and NOT for its default purpose of setting bot counts! This means that our final value for this part will be '501' to enable Custom Map 1 by default.
Thus, the final command for enabling Custom Map 1 by default is:
set_bot_count 1 501
Then you simply add this line to your server config file! It doesn't matter where in the file it goes, but I tend to put mine near the end, shortly before the port commands: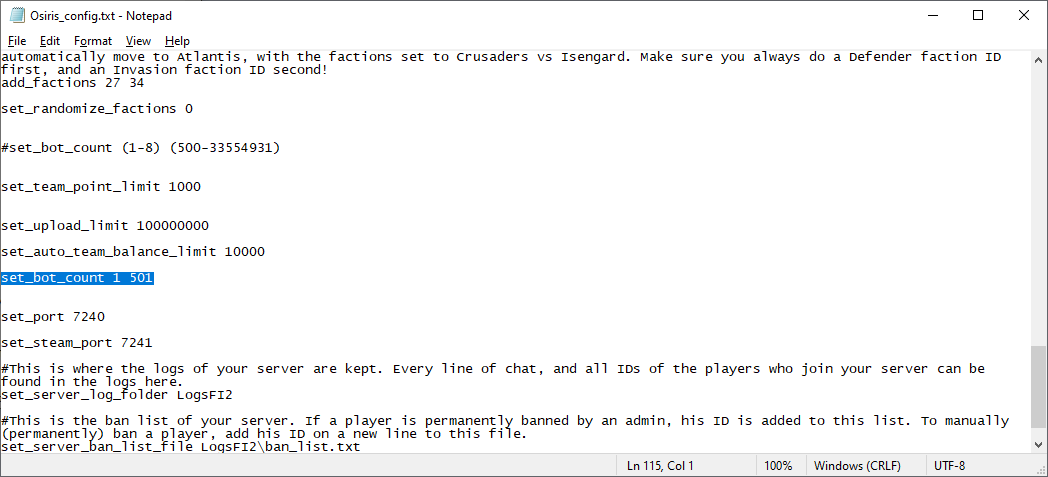
You are, of course, able to add this command multiple times if you need to modify more than one partition. So, to make use of some earlier examples, if you wanted to enable maps 1, 2, 4, 21, 55 and 58, you would add these commands:
set_bot_count 1 531
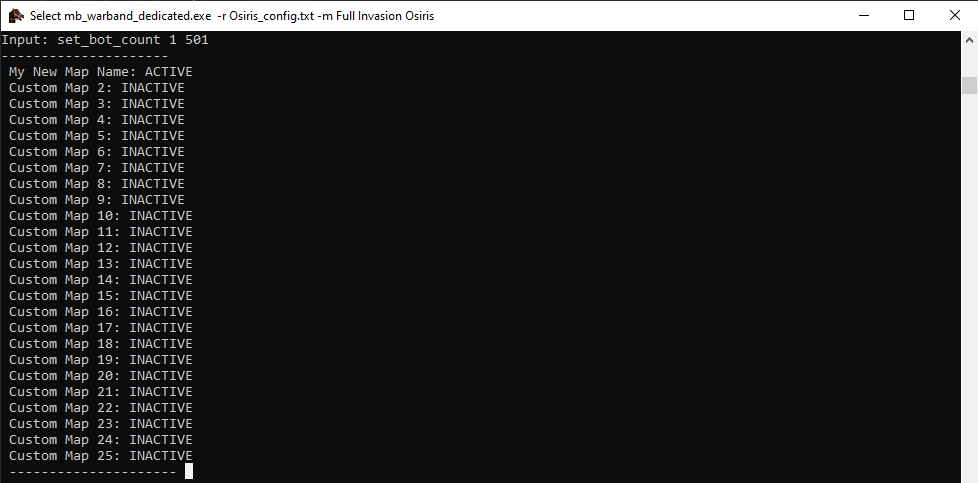
set_bot_count 3 1049094If you have access to your server's command console, it will print out map slot data for each partition you modify in this manner. So it'll be clear whether or not it worked without having to load into the game to check first-hand:
If you have any further questions, contact Borridian on our Discord.


Clever concepts, wouldn't have thought of using troops for map names. The script magician strikes again ^^