This is so people can remove parts of their texture, although similiar this shouldn't be confused with transparency. Rather than being able to make a solid object transparent, and thus see through while still being able to see the actual object, alpha masking is either 100% seen or 0% seen. Useful for making wire mesh fences have holes in it, and etc.
As a note; although this tutorial is set to basic, it assumes you know how to at least select layers and navigate around Photoshop or your own program a bit.
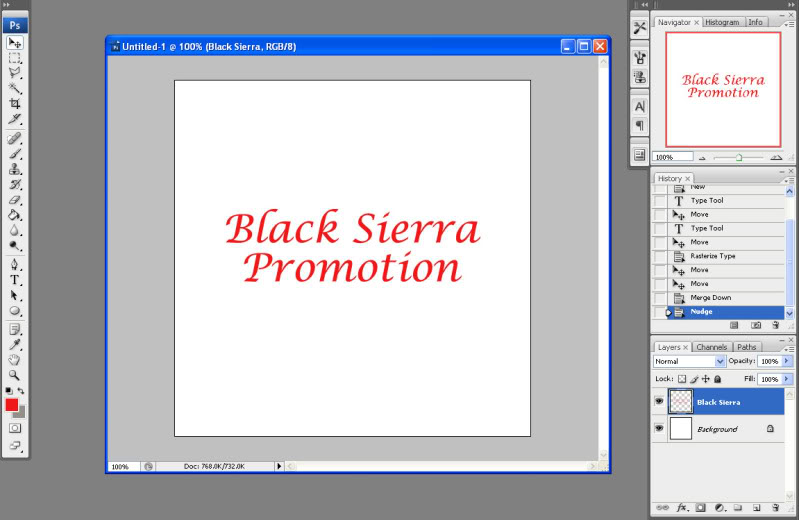
For our example, we have a simple text word.
After we save this as a targa (BlackSierra.TGA) we need to start pretending we want this to pop up in our game, but we want only the words to pop up, not the giant white background. So we need to make another texture out of this one. Be careful here, as I'm showing you to simlpy edit the one you currently have, if you accidently save the alpha version (which will be strictly black and white) then you'll lose all your crazy texturing detail, so be sure to hit SAVE AS before you even start the change.
So > File > Save As > BlackSierra_Alpha.tga
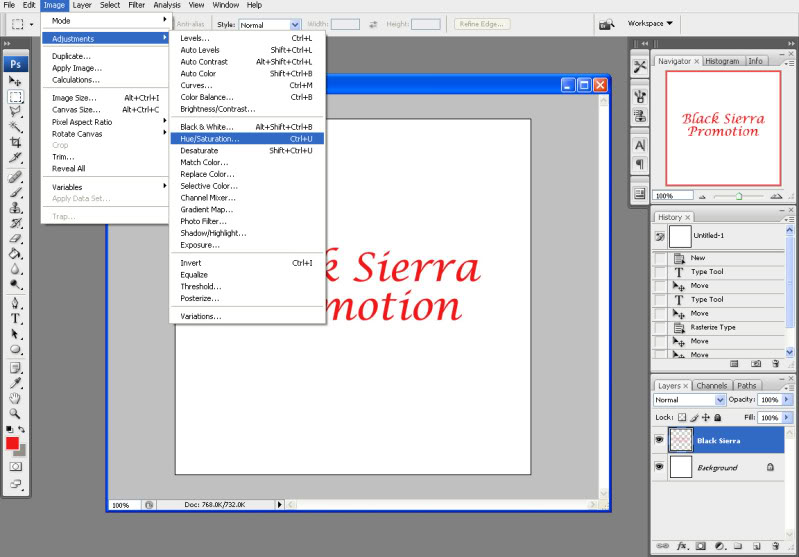
Now that we made sure it's saved seperately, select all your layers (easier to just combine them all together) EXCEPT your background layer. And go to Image > Adjustments > Hue/Saturation
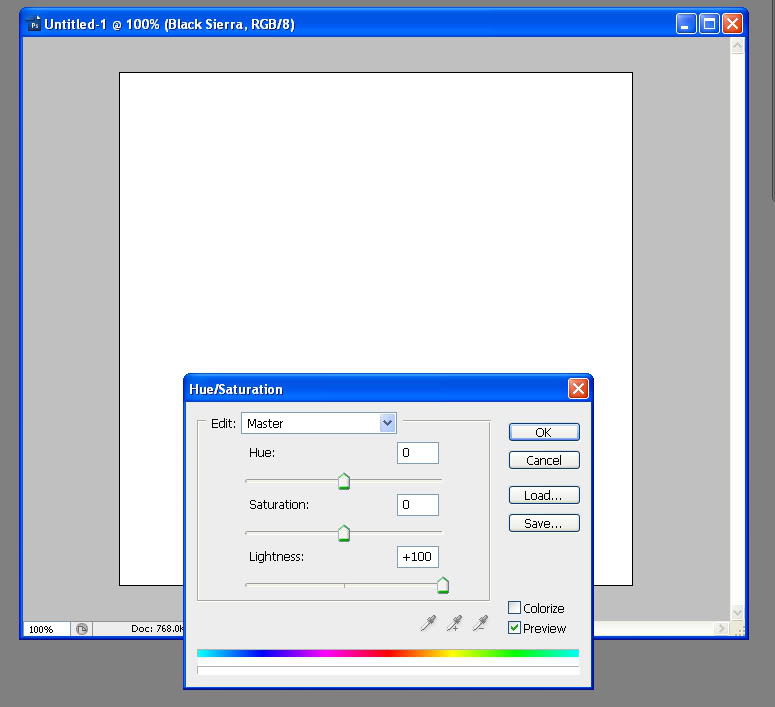
Set it to +100 in Lightness and it should turn completely white, and in my case (since I have a white background) disapear into the background.
Now select your background layer, and do the same thing except turn the Lightness to -100.

That's it, save your file (make sure you save it as YourFileName_Alpha.tga) although it doesn't NEED to have "_Alpha" in it, it's just helpful to keep things marked properly. So now that we're done, load up Uneral Tournament 3's editor AKA UED 3.0
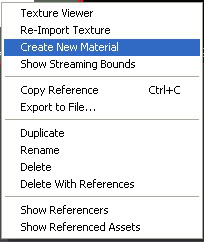
Select your generic browser ![]() and go to File > Import. Navigate to your files and open them both. Here you can now put them in your package, whever you want and have them organized in your own way. Hit okay to all and just let it do it's thing. Might take a few minutes depending on the complexity of your texture, the bigger the file size the longer it takes to import it. But! Now that it's done, make sure to scroll to your package using the left hand side list and open it. You should see your two textures. So, right click your normal textuer (not the alpha) and hit Create New Material
and go to File > Import. Navigate to your files and open them both. Here you can now put them in your package, whever you want and have them organized in your own way. Hit okay to all and just let it do it's thing. Might take a few minutes depending on the complexity of your texture, the bigger the file size the longer it takes to import it. But! Now that it's done, make sure to scroll to your package using the left hand side list and open it. You should see your two textures. So, right click your normal textuer (not the alpha) and hit Create New Material
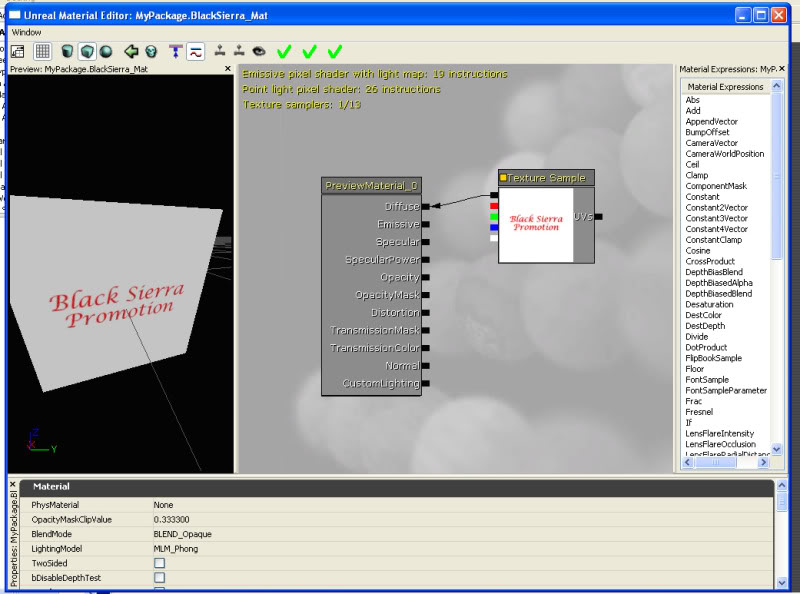
So! Now double click your new material (by default, it's YourFileName_Mat) and you should see a box that says "Texture Sample", if you don't know how to use the material editor, you can move the camera around just by clicking and holding the leftm ouse button and dragging, and you can move things by first clicking the item you wish to move, and then holding down Ctrl on your keyboard and then left clicking while dragging around.
So, first we need to make the object easier to see. So on the top left corner, click the bluish square, ![]() with that selected it'll make the texture flat. Now with your Texture Sample, click and drag it's black box to the PreviewMaterial's Diffuse Black Box, releas and you should see a line connecting them together. If it all went well, you should now see your texture placed over a cube.
with that selected it'll make the texture flat. Now with your Texture Sample, click and drag it's black box to the PreviewMaterial's Diffuse Black Box, releas and you should see a line connecting them together. If it all went well, you should now see your texture placed over a cube.
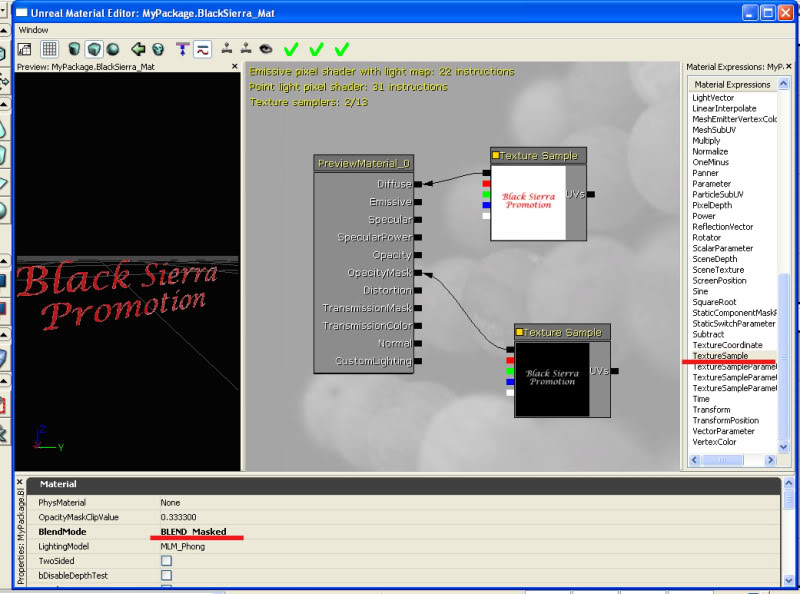
Now we want to make the white background transparent, right? Well first we need to minimize the material editor, go back to the Generic Editor, and select YourFileName_Alpha then click the exit button on the generic editor, it's important that you just minizmied the material editor, because anytime you double click to open up the material editor, the texture you want deselects its self, so with our texture selected, close the Generic Browser and you should see the Material Editor again. So on the right hand side you'll see a list of Material Expressions as they're called, scroll down till you find Texture Sample. Click and drag it below our original texture, then! Drag our newly imported alpha texture sample's black box to the "Opacity Mask" box. Wait? Nothing happened? Yeah, I know. You have to go down to Blend Mode on the bottom, and select BLEND_Masked. Now it should work.
Save your work, and you're good to apply the material to whatever you need!
Now I'll explain this a little. When you use Alpha Masking this way, it has to be either black or white. Shades of gray may produce issues. Color will confuse it. Etc. Basically, when the engine reads the alpha texture, it's being told that Black = Invisible and White = Seen. So anything you want to be able to see in-game, is white, anything you want to be missing is black. Hence the black background (when the original texture was a white background) and the white letters (when the letters were red).


A very nice and clear tutorial. Could well come in handy some time, especially the unreal part. Thankyou.
Sure thing =D
awesome, always wondered how to do that :P