File format editor style....
Texture first..
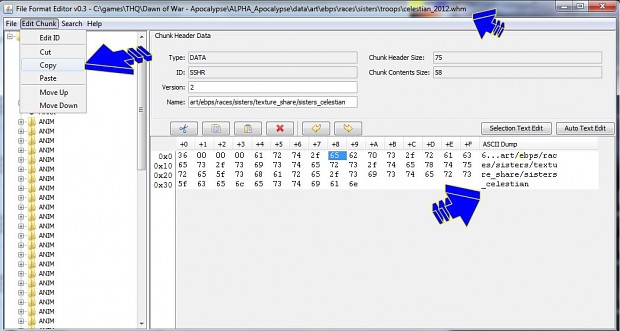
In the file containing the texture you want to import into your ultra WHM....
if you select the SSHR as you can see by the texture address on the right side of the screen,
Then Edit Chunk.
Copy....
Open the new file you want to import the image into. :P
then the fun begins. :)
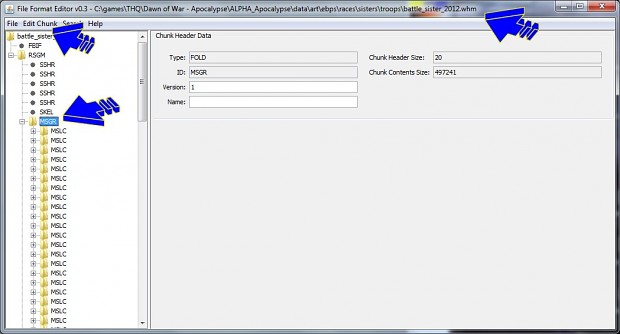
Here we are in File format editor...
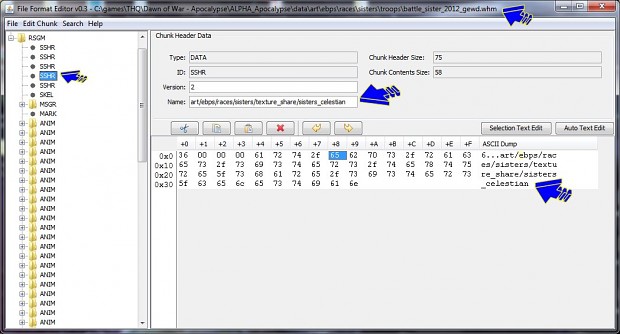
Into the whm you want to add the texture too.
select RSGM
"edit chunk" Paste
The move up SSHR, until it is in the same location as the other textures,
Save and bail.
Textures done. :P
I bet you enjoyed trying that, :P
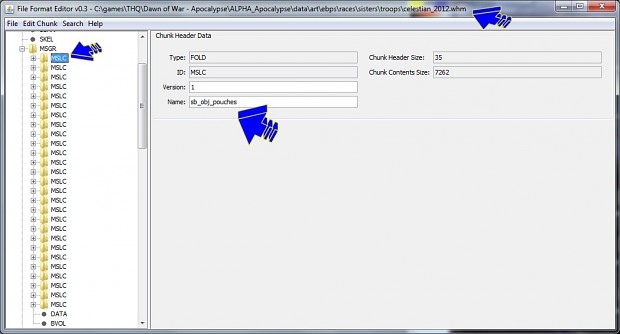
Now to the objects... MSGR/MSLC
Swapping objects into A whm with file format editor.
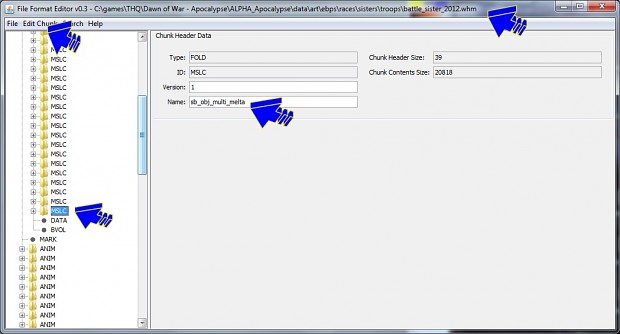
Open the whm you want to get teh object from.
select the MSGR/MSLC with name "object you want to add to your super whm"
Edit Chunk
Copy
then it is onto the file you want to put the object in. :)
in your super model file whm...
after opening your super model whm in file format editor.
select MSGR....
Edit Chunk
Paste
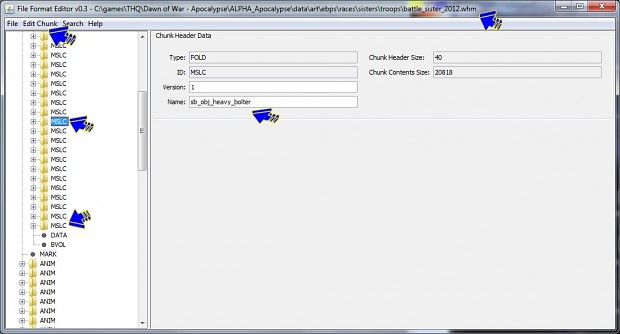
Renaming Objects:
Once the object is pasted into the MSGR you should see the MSLC and move it up into the list of object MSLC....
This is the name you want to replace with the object you want to replace in the model. :)
edit chunk holds the Move up...
move your newly imported chunk from down here to right under the object you want to replace.
as you can see you can just copy the name of the chunk you want to replace and paste it into the name of the new chunk.
edit chunk
cut chunk of the old MSLC you don't want in the WHM.
Save and bail and you should have the replacement part in there.
Also this file should now be able to be converted into SGM through mudflaps to change the fx in OE for the model. :P
Bingo boyz... you got it figured out now. :P
I on the other hand am trying to go further. :)
Be patient. :*)
If you get success...
Let me know with pictures. :P
Let us all know with pictures. :)
Link:
Forums.relicnews.com(FFE)-Pictures
Enjoy. :)
Bone Synchronization:
After adding an object in
* FFE and Move up to a location just above the object you want to replace.
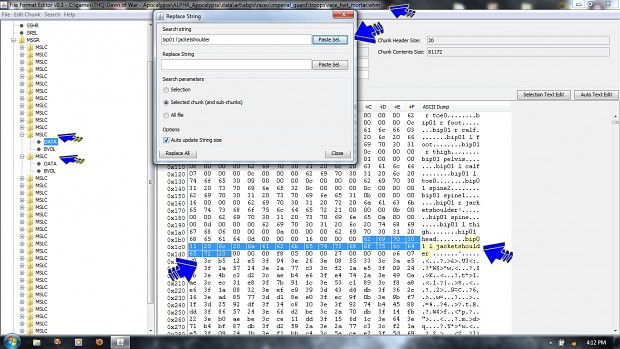
* into the data for the object that is replacing the original.
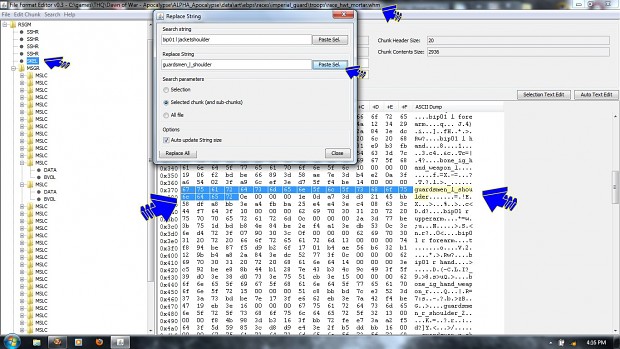
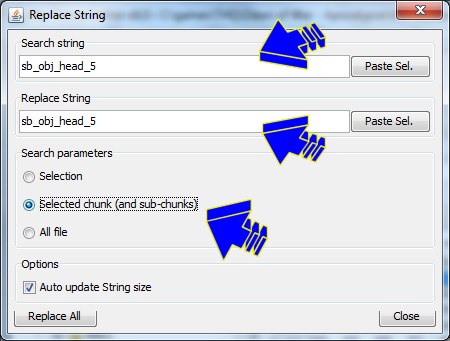
* open up replace text.
* use the selector over the Hex area to choose the text you want to replace.
* Paste Sel in the top section of the replace window. :)
Both objects open are the objects I imported and the one I want to replace. :)
Movement on. :)
Into the SKEL:
* Into the SKEL to find the Bone in the same location. :)
* select the text using the hex area of the window.
* Paste Sel. in the bottom replace window. :)
* then back to the object we imported.
Back in the MSGR/MSLC-data:
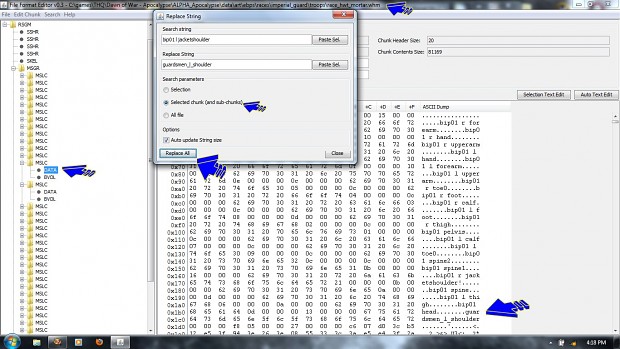
* Back in the MSGR/MSLC-data of the object with Paste and move up...
* Make sure you replace for this chunk & subchunks...
* Replace...
* As you will notice down the bottom it replaced the text.
If you synchronize all bones the new object imported will stop giving you Pink Bawkses.
Hey presto changed and working model. :)
* Get a pen and paper and write down what ones you have replaced, even go as far as preplanning and listing both sets of bones and what replaces what. :P
Enjoy...
Persistence pays off. :)
dissapearing Objects in FFE:
'ere we go....
IN File Format Editor.
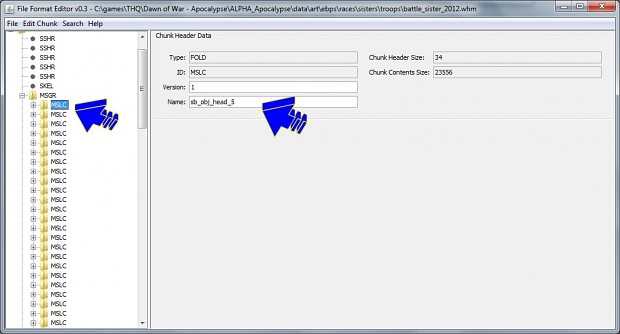
MSGR/MSLC are the objects in the model.
If you select a MSLC you will see a name window.
in the name window, place Blank_ in front of the name.
first part done. :)
In the MSGR-data...
you can drag across the hex for the characters of the text.... Fastest way. :)
then it is a replace. :P
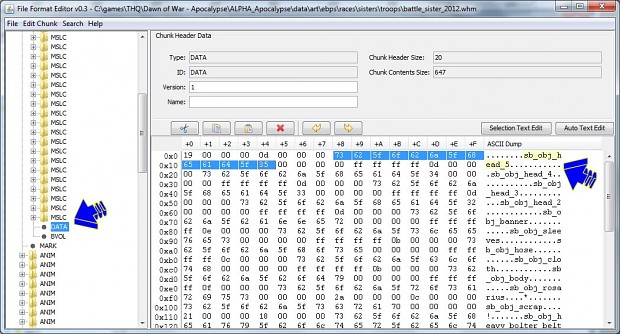
In the replace window....
* "paste sel"
* for both text box areas.
* in "replace string" text box.
* type blank_ infront of the name
* "selected chunk" should be selected.
* "Auto update string size" should be selected.
* "Replace all"
save and bail. :P
you should have parts missing. :P
![[DC] Veteran Mod](https://media.moddb.com/cache/images/mods/1/23/22486/crop_120x90/youtube_channel_01.jpg)