Overall Goals -
Let me start by saying this, in my trials of coding physics for Violent Sol Worlds I have had troubles finding a great example of how to pull off even simplistic physics. So My goal here is to give you a solid tutorial on how to code a real working physics engine that can be extended into any of your games.
I will provide step by step instructions that will lead you from no program at all to a working physics engine demo. I will be utilizing MonoGame for this tutorial, but will not be explaining MonoGame in the fullest so some knowledge of it might be useful. Let's get started.
Step 1 Project Creation -
Because we are starting this tutorial from nothing, we must start by creating a project. It is assumed that you have MonoGame and Visual studio 2015 Community on you development machine and that machine is a windows box. If there are deviations from these assumptions you might have some variations depending on those deviations.
To begin the new project select new project from File->New->Project and select the MonoGame option from the templates. If you do not see the MonoGame option in the templates you will probably need to install MonoGame to your computer. I am writing this tutorial for 3.5. You should now see a screen similar to this.
You can see I named the project for the tutorial SATTutorial. I also am choosing to crate a Windows Project. Click OK and run the program and you should see the lovely blue screen.
This is the foundation of the tutorial. You have a working program and display at this point.
Step 2 Foundation and Rendering -
In this step we will actually get something drawing to the screen and lay the foundation for the things on the screen being controlled through physics.
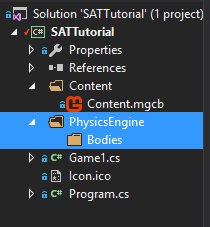
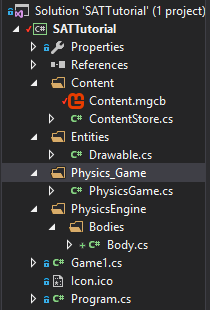
The first thing we need it a Physics Body. I start here because the Body will be the object in the entity that will give the entity position in the world. To start out I create two folders the PhysicsEngine folder and under that, the Bodies folder like so...
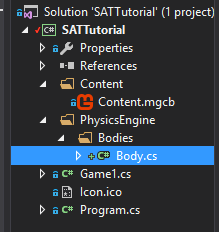
This gives us a good place to create the Body class. Create it under the Bodies folder as Body.cs. Your project should look like this now.
We now need to add some code to the Body class. We will start simple and add a Constructor and a Location Vector2.
using Microsoft.Xna.Framework;

namespace SATTutorial.PhysicsEngine.Bodies
{
    public class Body
    {
        public Vector2 Location { get; set; }

        public Body(Vector2 location)
        {
            Location = location;
        }
    }
}
The code here is simple we have a Vector2 that tells us what the location is of the body and we created a constructor in the class to take that type of variable in so we can set it. The next step is to create the Drawable entity which will use the Body.
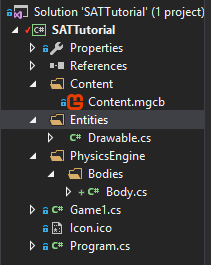
Let's start by creating an Entities folder for organization sake. Then add the Drawable class under that. Your project should look like this.
Here is the code for the Drawable class
using Microsoft.Xna.Framework.Graphics;
using SATTutorial.PhysicsEngine.Bodies;

namespace SATTutorial.Entities
{
    public class Drawable
    {
        public Texture2D texture { get; set; }
        public Body body { get; set; }
    }
}
That is actually as complicated as that Drawable class will get for our tutorial. You see it has two things in it, a Texture2D, and a Body. The Texture2D is used to store the image to render to the screen and the Body is the class we just created above. Now we have a central class that holds the image and the location information needed to render to the screen.
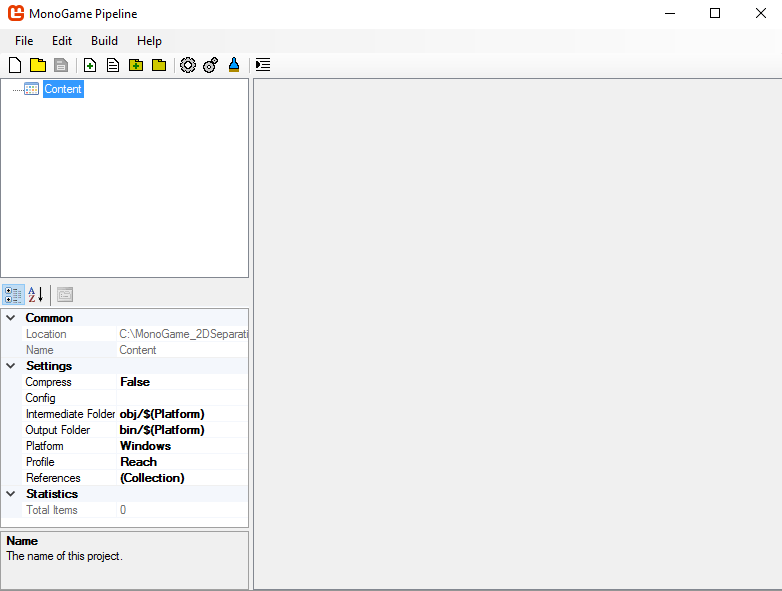
Now let's quickly add an image to the project So we can get to rendering something. To do this in MonoGame, you need to launch the Content.mgcb in the pipeline tool. You should start with an empty project at launch that should look like this.
Now let's add a simple image for a player into the Content folder using the following image.

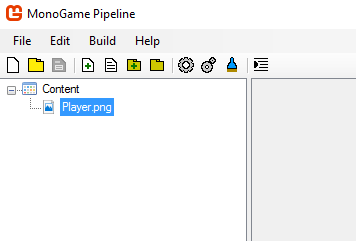
Just paste this image into the Content folder in the file system for your project. No need to add it to Visual Studio. Then in the pipeline tool right click Content and choose Add Existing. Then select the player.png you just added. You should see something like this in the Pipline interface now.
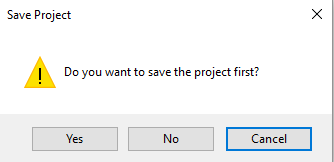
Now just click the Build menu and select build. A popup will appear asking you to save the project. Just click Yes and it should build the assets at this time.
You should see something like the following if it built correctly. Keep in mind this will not have to be done every time you tweak the content, just to add a new piece of content. MonoGame does a great job now of managing the content for display. All you have to do is add the image files here in the Pipeline tool and they will be accessible in your program.

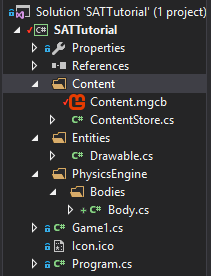
Now we have the Content needed to draw, lets get to setting up drawing that player to the screen. To do this we need to create one more class that will help us load content into our program. I call it ContentStore, all it does is load the images into the program and we can access them statically with it. Add it to the Content folder. Your project should look like this now.
Here is the simple code for the ContentStore class.
using Microsoft.Xna.Framework.Content;
using Microsoft.Xna.Framework.Graphics;

namespace SATTutorial.Content
{
    public class ContentStore
    {
        public static Texture2D Player;

        public static void LoadContent(ContentManager content)
        {
            Player = content.Load<Texture2D>("Player");
        }
    }
}
You can see we simply have a storage of the Player image, and a LoadContent method. Inside that method we call the content manager to have it load the Player image into memory. It is worth noting that the string to load the image in is the same as the filename without the extension by default.
To help organize the project let's create one more class and add it to a folder of its own. Create a folder called Physics_Game under the main solution and add the PhysicsGame class under there. Your project should look like this now.
The code for this will start off very simple and here is what we put in it.
using SATTutorial.Entities;
using System.Collections.Generic;

namespace SATTutorial.Physics_Game
{
    public class PhysicsGame
    {
        public List<Drawable> Drawables { get; set; }

        public PhysicsGame()
        {
            Drawables = new List<Drawable>();
        }
    }
}
This class currently holds a list of the Drawable entities so we will be able to quickly loop through them to draw. There is nothing more here yet, so it is that simple. Now lets start tackling placing the player into the list and getting the drawing to happen.
To do this we need to dive into the Game1.cs file and start putting everything together. Open up the code and at the top you have to add a PhysicsGame to it and set it up in the constructor as follows.
    public class Game1 : Game
    {
        GraphicsDeviceManager graphics;
        SpriteBatch spriteBatch;
        PhysicsGame physicsGame;

        public Game1()
        {
            graphics = new GraphicsDeviceManager(this);
            Content.RootDirectory = "Content";

            physicsGame = new PhysicsGame();
        }
That give us access to the list of Drawable entities in the PhysicsGame. So now we need to update the LoadContent method so we can use our ContentStore to pull in the player image. Update it as follows.
    protected override void LoadContent()
    {
        // Create a new SpriteBatch, which can be used to draw textures.
        spriteBatch = new SpriteBatch(GraphicsDevice);

        //use this.Content to load your game content here
        ContentStore.LoadContent(Content);
    }
Simply use the ContentStore to call the LoadContent method so we can get all teh textures into the game from this spot. Now in the future when we add images to the project we just have to add them to the ContentStore and never have to worry about loading them in again.
Up next we have the Draw method. We need to add a loop through all drawable entities in the PhysicsGame to draw each one. The code should look like this.
protected override void Draw(GameTime gameTime)
{
       GraphicsDevice.Clear(Color.CornflowerBlue);

       spriteBatch.Begin();

       foreach (Drawable drawable in physicsGame.Drawables)
       {
           spriteBatch.Draw(drawable.texture, drawable.body.Location, null, null,
                new Vector2(drawable.texture.Width / 2, drawable.texture.Height / 2), 0,
                Vector2.One, Color.White, SpriteEffects.None, 0);
            }

       spriteBatch.End();

       base.Draw(gameTime);
 }
Now run the program and witness all that is the glory of Blue Screen. If you have no errors then you did good. now the entire foundation is in place for the drawing of the entities using the locations of the Physics bodies and that is a good thing.
To start drawing something of note we need to add something to our PhysicsGame class. We need to be able to create a player object in the game. To do this lets create a new method in that class.
public void CreatePlayer()
{
     Drawable player = new Drawable();
     player.texture = ContentStore.Player;
     player.body = new Body(new Vector2(200, 200));

     Drawables.Add(player);
}
You can see in that method we declare a Drawable object and set its texture using the ContentStore. We also create a Body for it as well. In the end the most important part is that we added the new Drawable object to the list of them. So now run the game and see what happens.
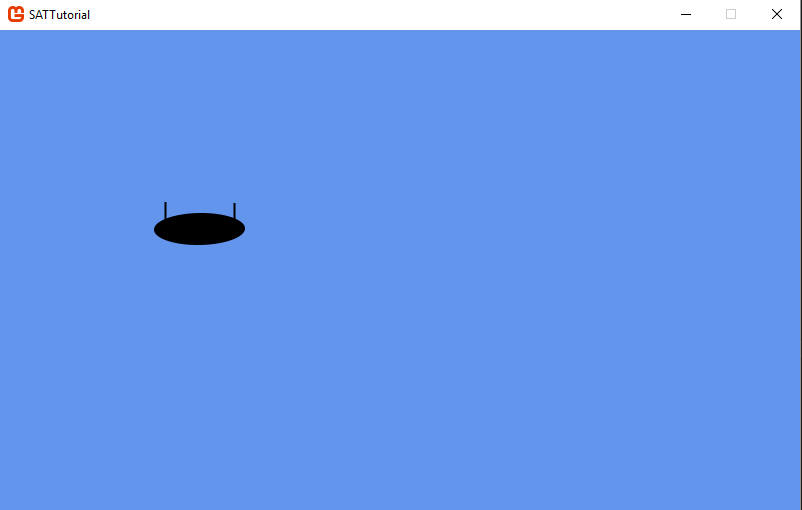
You can now see that we are rending the player using the position of the Body. It's not much but from here we can start adding physics code that makes things a lot more interesting and fun. Look for the next part coming soon and please do follow Violent Sol Worlds by clicking here to keep informed.