
UNREAL TOURNAMENT SKIN MAKING GUIDE by Kaal979
> SKIN FILE STRUCTURES UT player skins are defined with two files - once the Texture with the -.utx and twice the System file with the -.int ending.When seeing through the original files list they are findable with names like "SoldierSkins" or "SGirlSkins" for each different model. These files contents can easily be viewed - the INT with the normal windows text editor and the UTX either in UnrealEditor but also with tools like UTPT or UTX-Viewer. Those tools also allow exporting of the different skin textures preferably as Windows BitMaps (BMPs) which usual programs normally recognize. The original skin files shall though never be edited because then servers could not allow joining anymore and custom skin packages shall have own filenames.
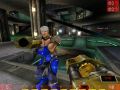
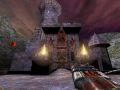
> SKIN ON MODEL PREVIEWING To see the original or edited textures on their models they can be viewed in programs like UnrealEditor or UT SkinMaker or direct in the games player select window. In UEd its best to place a bot actor of the desired model from ActorBrowser/Pawns/Bots/.. direct into a map and under its properties find the Display/MultiSkins/.. tab where the selected different textures can be inserted. This way the skins can also have UT and UEds different detail grades which are adjustable through the View/AdvancedOptions/.. window. But UEd import also causes a highdetail view malfunction when the textures had more than 256 colours not to mention the graphic distortions that also come this way. Besides the colour specification UT Skin textures also must have the original dimensions of 256 x 256 or 512 x 512 or 1024 x 1024 pixels and of course either the Windows BitMap BMP or the PCX filetype. Another hidden feature of UEd is the recommendable texture filesize reduction when reimporting PCX images which seldom also causes image alterations. Although when downscaling the colour depth with a program like e.g. the popular IrFanView the quality loss is quite huge especially after multiple times. And here comes the great UT SkinMaker program into play namely because besides import quality it also offers a few more features. Since all this is quite darkish its more than recommendable to use e.g. the Nvidia desktop graphic settings for brightening otherwise the textures itself had to be brightened and redarkened before viewing in game.
> SKIN PACKAGE CREATION To create and finalize the own package certain things like texture naming and INT coding are pretty interesting. First all textures of a skin file must have one four letter prefix like e.g. ALEY for "AstralEnemy" followed by the number that termines the models part. These be normally -1 for chest -2 for legs -3 for arms -4 for heads and -5 for the talk message icon but e.g. the Boss or Skaarj models have certain differences to consider. Then follow either nothing like for the arms and the default textures or the team colour specifications as there were T_0 for red - T_1 for blue - T_2 for green and T_3 for gold or the different names of the faces for head and talk icon textures. The codes which make use of these texture names can easily be copied and converted from the original INTs. Further the UTX and INT files must have one unique name which begins with the models original skins name plus the in game name what also must be termined in the INT codes. When importing the talk icon textures in UEd its also important that they must be 64 x 64 pixels and to uncheck the Generate MipMaps property in the window direct on selecting. But all this is much easier when using the UT SkinMaker that by the way also allows to save project files which upon reopening find the worked textures folder and load inserting them all at once. This is b.t.w. also important because multiple reimporting without restarting pretty sure distorts the skins in the saved UTX.
> SKIN IMAGE VARIATION AND CREATION Making new skin textures from scratch is unreasonable and difficult but its possible to use the wire frame images from the UT SkinMaker folder as base more preferably although is to alter and overpaint extracted original textures. Its also recommendable to temporary multiply the images sizes before starting because this besides reducing quality loss also eases the graphic editing. But its not unimportant to use the best editor for the scaling because e.g. Picture-It (MS Office) enhances the pixel colourations while e.g. MS Paint does not alter them. Now comes the best feature of digital graphic editing at all into play which is the creation of images with abstract borders and various transparencies - the Portable Network Graphics (PNGs). With the various tools for image editing area selecting parts of images can easily be copied and saved as PNGs. To avoid repositioning problems its quite tricky to leave small pieces of the corners as size keepers what makes it pretty easy to alter whichever designs of the basic images. Important properties for changes are at first the colours which once can be remade after black/whitening but even be varied in their tones what keeps white highlights white but sometimes has unwanted results. While this also the contrast adjusting comes into play what is abit difficultier than it sounds and not seldom requires multiple trys. So for example are there two ways of contrasting once the overall what also alters black and white areas and twice colour only. These are also interacting with brightening and darkening functions e.g. where some programs when brightening reduce or increase colour contrast when darkening while others dont. Another great way for reskinning is to apply pieces of extracted textures from other games since some programs even allow to form images like clay. This although often requires correction work with brushpen tools which also allow various tip styles what makes great differences. Also indispensible is the pipette tool for selecting colours direct from out the image. Finally equal how clean one worked the result will always be abit unsharp so trying around with the various sharpening filters is a simple way to improve the look overall but also locale. But also the contrary namely the softening is a invaluable function which allows to e.g. fade grey lines between black and white and also all normal coloured areas. While all this results are often not the desired improvement and for this a backup system folder with many new sub folders comes more than handy for simply returning to a previous result but even to try a semitransparent version. Basically a few recommendable graphic editors are enough to result great designs but also others may have undiscovered features like e.g. Adobe PS LEs min/maximum filters which in/decrease dark/brighter areas or (MS Office) Picture-Its useful border transparency. Or e.g. GIMP 2.8s outstanding magic wand outlining select tool which secretly requires to keep the shift tab pressed. The last hint - always view your skin in all of UTs brightness levels to find all unwanted differences.
UT Skin Making Guide V1
After years of trying around with the possibilities of digital graphic editing always focussed on UT skin making i am thinking its time to release this ultra hot tutorial that covers all the basic little things one needs to know when making player skins for his favorite game.
Posted by Kaal979 on - Basic Skinning

Or download the
UTSMPackV2 from here:
Skydrive.live.com