Thievery1 (TuT) to Thievery 2 Map Conversion Guide - Part 1.
This guide will explain the process of converting a Thievery (for Unreal Tournament) map over to Thievery 2 (using (usally) the latest udk version).
This map is designed primarily for the development team, however is released publically for custom TuT mappers wishing to convert their maps over in preperation of the Thievery 2 release.
On no account should you convert any Thievery map of which you are NOT the author without first getting permission to do so from the original map author.
This guide presumes you are still fairly knowledgeable of the ways of Unreal Editor, even if you haven't touched it in ever so long :)
And now the guide:
1) Open the ThieveryUT Unreal Editor, and load the map you wish to convert.
2) Within the Unreal Editor select (left click) on one of your geometery brushes.
3) Now Click on the selected (highlighted) brush, and choose Select> Select All Brushes:
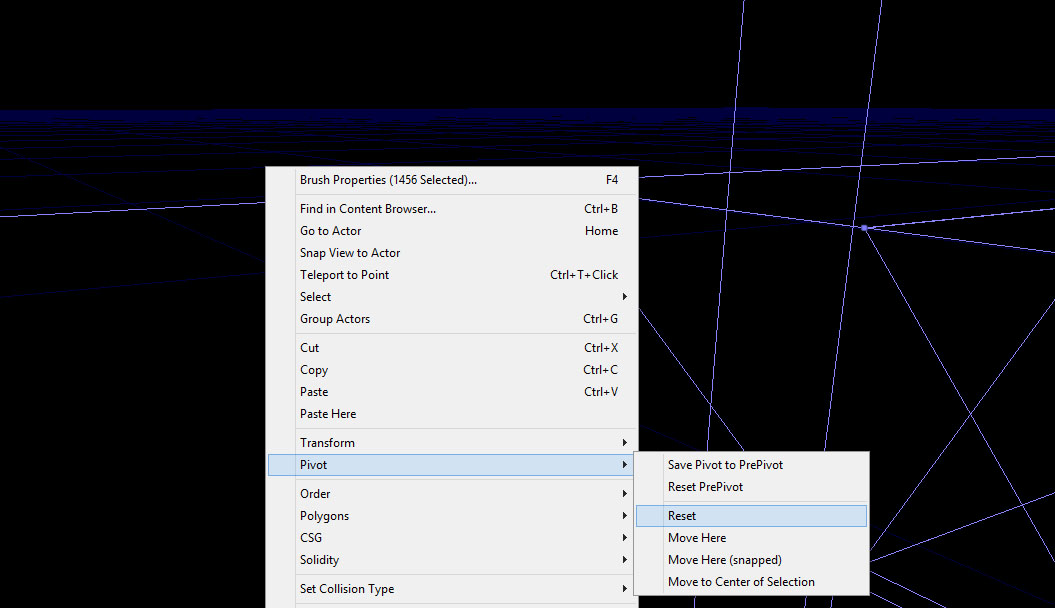
4) Now Right Click again on one of the brushes, and choose Pivot>Reset:
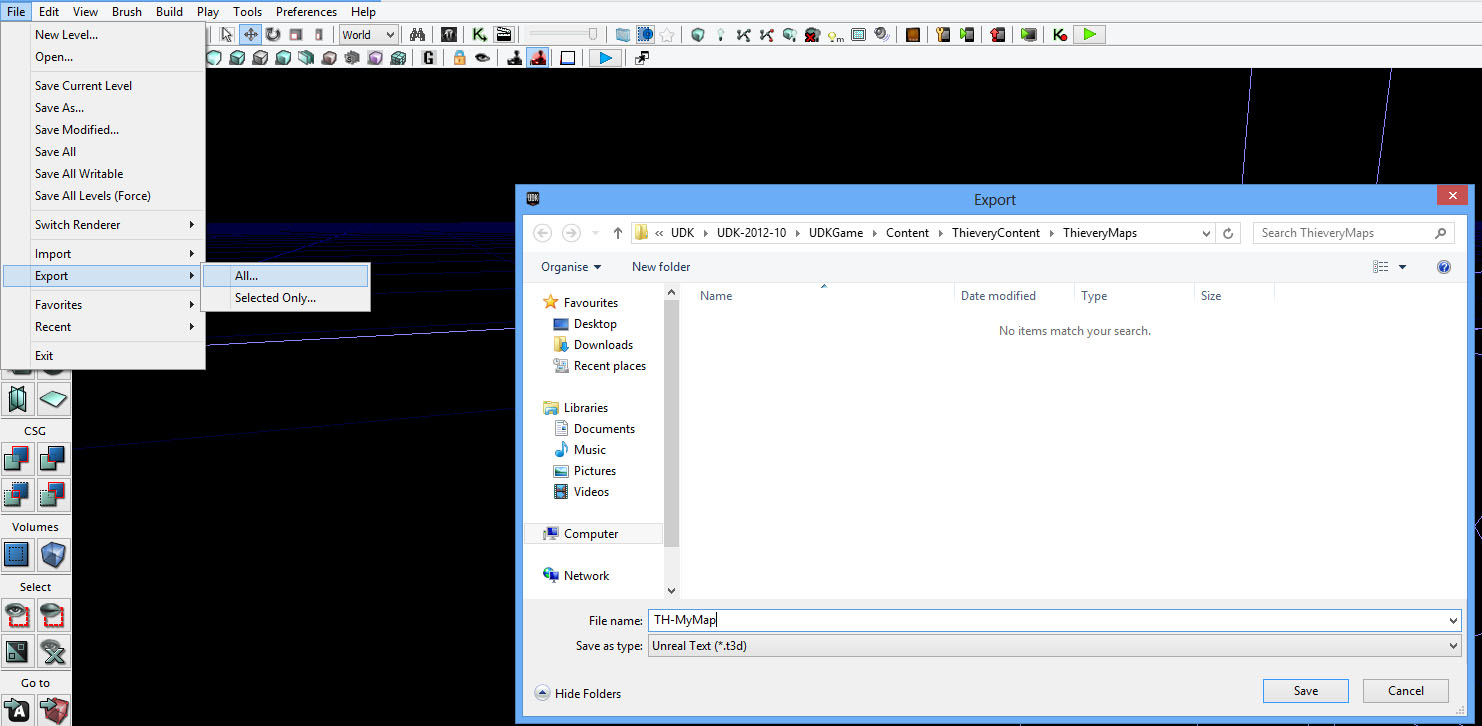
5) Now go to File>Export>All and save the map with the .T3D extension, named In (so In.t3d) into the map converters directory.
6) Now go into the t3d converters directory, and run "T3DConverter.vbs"
7) A command prompt window will now load, and if all goes to plan then it should export a file called Out.t3d within its own directory. IF it fails with a fatal error, then your map is not going to convert !
8) Launch the UDK Editor, you can do this by going into your UDK folder> Binaries> Unreal Frontend, and clicking on the Unreal Editor icon on the top right of the window:
9) Once the editor has loaded, go to File>New Level and choose Blank Map: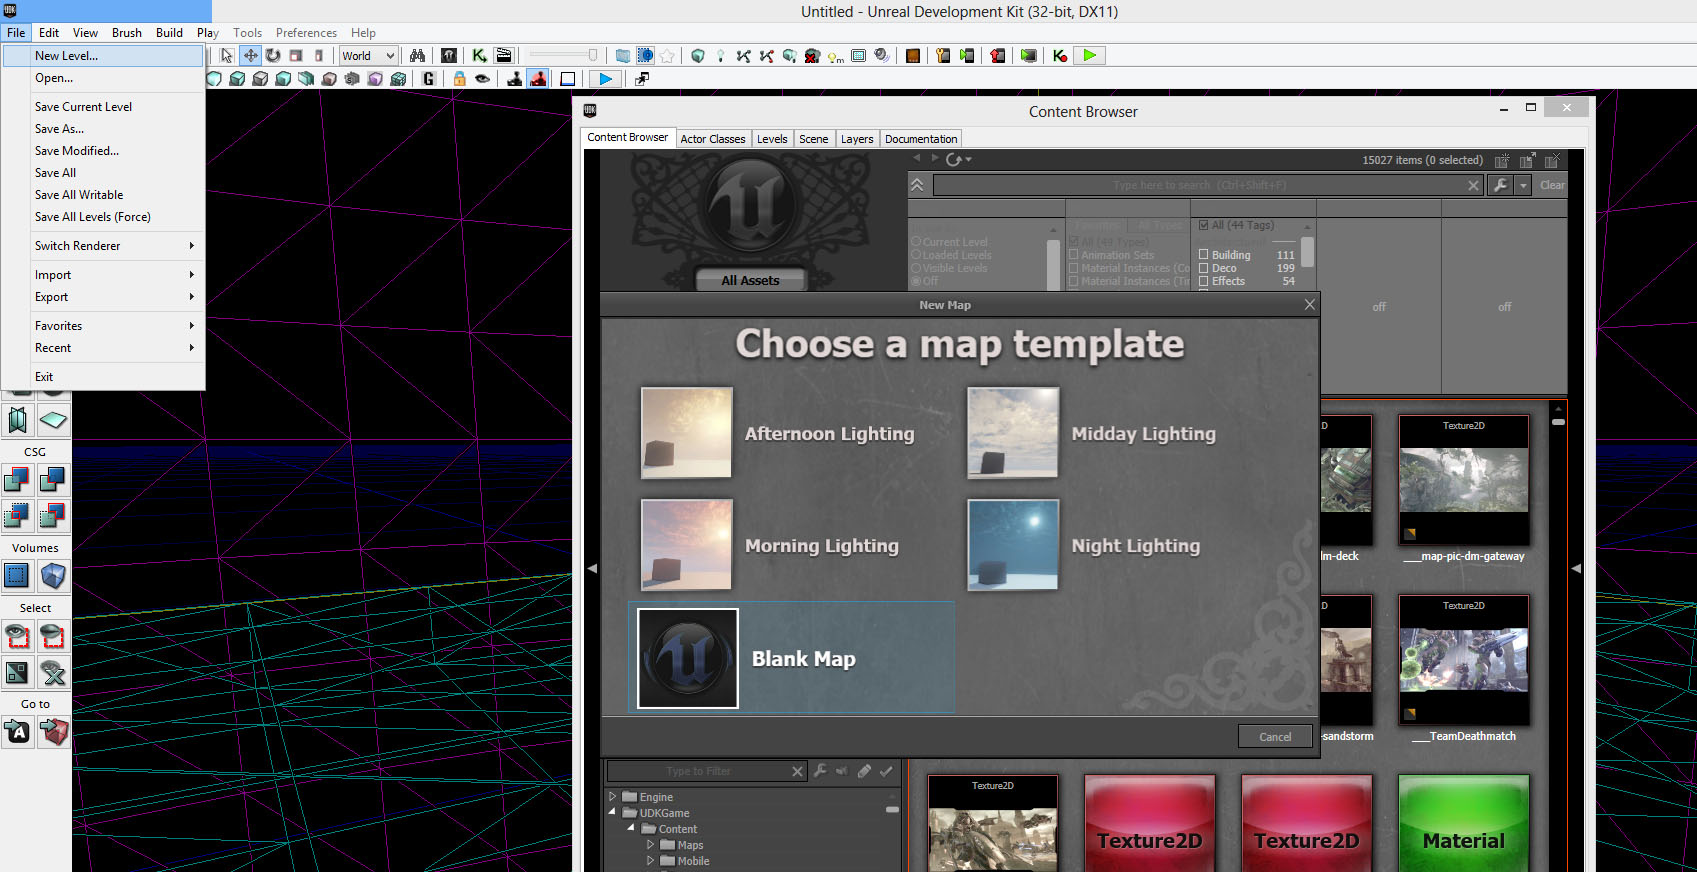
10) Now go to File>Import>Into Existing Map> and locate Out.t3d from your T3DConverter directory.
11) Now save your map with the name you want.
12) Now create a large additive brush encompassing your entire map, and then right click on this brush and choose Order>To First from the right click menu.
13) Now go to View>World Properties>LightMass> and uncheck Use Global Illumination.This can be enabled again later once you are ready to work on the lighting, but for now have it disabled.
14) Save your map, and then run a Build All.
15) Presuming the Editor didn't crash (if it did try again at the build) save your map.
This completes our tutorial.
Additional Notes:
Dealing with alot of brush work as we are currently doing tends to slow the editor down drastically, here are the settings I use when my PC tries to cope with Unreal Editor and brushes.
Also note wireframe mode is very useful for moving quickly through a map that is causing your computer to slow to a crawl:
The top most slider on the right, this can be adjusted towards the left. This affects the far clipping plane, meaning you see less visible things and therefore render less.
The joystick icon, make sure this is not highlighted blue (as pictured) but is disabled or your editor WILL be slow.
The circled bright cube, this is unlit mode and the mode you will want for now. By default the icon next to it is highlighted blue - that is lit mode and far more resource demanding.