
First of all, you need the right kind of software to open up a .pk3 file. A .pk3 file isn't anything special. It's just a .zip file that's been re-named. You can simply rename the .zip to .pk3 and when you've finished adding or removing files from, rename it back. If you would rather not do that, there are plenty of programs out there that can open them up. I myself reccomend Pakscape Fileplanet.com or Winrar Rarlab.com In this tutorial, we are using Pakscape. A lot of new skinners use paint to edit the images. This is generally a bad idea because: A great FREE image editor is GIMP Gimp.org. This program can open many types of files and has much better editing capabilities. We will be using this program in the tutorial. You'll also need to open .skin files. They are .txt files with different names. Anything that can open a .txt file can open a.skin file. I use Notepad ++ Notepad-plus-plus.org. Xian is one of the five 'special' models, which have been based on the developers, included in the game. None of them have blue or red skins thus, disabling them from being used in team gamemodes. Open up pak2. Open up the models folder. Inside, there will be a folder titled 'players'. Open up the players folder and inside look for a xian folder. Copy the xian folder into your baseq3 directory. Open the copied folder. The following files will be inside: The .cfg and .md3 are files used in modelling. We have no interest in them because we are here to SKIN and NOT to model. The files we're interested in are the .skin and .tga files. Delete all the md3 and cfg files. The Xian model has a black t-shirt with cream pants and brown shoes. We want blue clothes for blue team and red clothes for red team. Open xiantors.tga with the gimp. The image before us is rectangular. It isn't shaped anything like xian's t-shirt but we can tell it is the texture used by the tell-tale disruptor picture. Close the file and rename it to bluetors.tga Open xian facf.tga. Xianfacf.tga is xian's face. We do not care to edit his face, so delete the file. Open up xianarm2.tga. This image is for xians arms. They are also perfectly fin at the moment, so delete xianarm2.tag. Open up xianleg.tga. We can clearly see that this image is his legs. The picture is divided into three parts. Close the file and rename it to blueleg.tga Reopen bluetors.tga. The disruptor logo will go a dark, greenish-blue. The hue slider will change the colour of the image and the saturation slider will change the intensity of the colour. This is all good and well, but we have a problem. The Main part of the t-shirt will stay black. We want it to be a blue aswell. Go to the 'lightness' slider. Increase the lightness to about 20. Notice how the image gets lighter. We could just do the exact same thing we did with bluetors.tga however, there is a slight problem. Xian has some very pretty legs, which we want to see. If we just colorized the image, those legs would go blue. There are two ways to get around those legs. 1. We could copy that whole image, create a new layer and then paste the image on top of the new layer. We would then make it blue. Then we could use the eraser tool (rubber) and rub out his blue legs. This would leave the shorts and shoes blue, whilst his legs remain pink. 2. We could use the selection tool (dotted rectangle) and select his shorts. We could then colorize them and do the same to the shoes. Either one of these will work. Save the image. Copy bluetors.tga and blueleg.tga. Rename the copied files to redtors.tga and redleg.tga. Open up redtors.tga. Open up redleg.tga. Strait away we'll notice we have the same problem as last time. The pink leg. If we change the hue of the image, the leg could end up green. We could use the same methods as we did when colorizing blueleg.tga but, there is a much easier way for this. When in the 'hue-saturation' window, notice a tab with the word 'master' on it. Around it are multiple colous, each with a selection dot. Rename the skin files: Open up head_blue.skin. The following text should be in the file. h_head,models/players/xian/xianfacf.TGA Basically, it says that the head model uses the texture xianfacf.tga which is in the directory models/playes/xian. As our skins are using the same head texture for Xian, we need not edit this file. Exit it, but DO NOT delete it. Copy the file and rename the copy head_red.skin. l_lfoot,models/players/xian/xianleg.TGA This one is different - there are several parts that all use xianleg.tga. Each part is a different segment on the legs model. We want to make sure all the parts have the right texture. Where it says xianleg.tga, rename it to blueleg.tga. Like so: l_lfoot,models/players/xian/blueleg.TGA Save and exit. Copy the file and rename the copy to lower_red.skin. Open it up. Where it says blueleg.tga, rename it to redleg.tga to make it use the red leg texture. Like so: l_lfoot,models/players/xian/redleg.TGA Save it and open up upper_blue.skin. Inside should be the following lines: tag_weapon, This one is even more complex. One of the segments uses a different texture to the other two. But we can solve this problem easily. u_rarm and u_larm both use xianarm2.tga. Remember, we did not make a blue or red copy of that. Ignore those two. However, u_torso is using xiantors.tga. We DID make blue and red versions of that. Rename it to bluetors.tga like so: tag_weapon, Save the file, copy it, rename the copy to upper_red.skin and change blutors.tga to redtors.tga like so. tag_weapon, Save it. Copy icon_default.tga twice and rename one icon_blue.tga (for the blue .skin files) and the other icon_red.tga. You can make any changes to the icon images you want, however it's best to make it clear which one is blue and red.
Skinning For Newbies: Part 1
Setting up:
1. It cannot open .tga files (the most common image file in quake 3)
2. It's editing abilities are very poor.
And now, making a skin:
Once you have gotten all the tools, you need to find the files to start from.
All the player skins can be found in the files pak0.pk3 and pak2.pk3 in the baseq3 directory.
For our first skin, we're going to give Xian a blue and red skin.
Inside there will be the following folders:
botfiles
icons
levelshots
maps
models
scripts
textures
vm
animation.cfg
head.md3
head_default.skin
icon_default.tga
lower.md3
lower_default.skin
upper.md3
upper_default.skin
xianarm2.TGA
xianfacf.tga
xianleg.TGA
xiantors.TGA
The creamy top - his shorts.
The pink middle - his leg.
And the brown bottom - his shoes.
We want to make that shirt blue. With paint, we would just colour it all over with a brush. But, we are trying to make a good quality skin. Right-click on the image and a pop-up menu will apear. Select 'Colors'. Another pop-up will appear. Click on 'colorize.'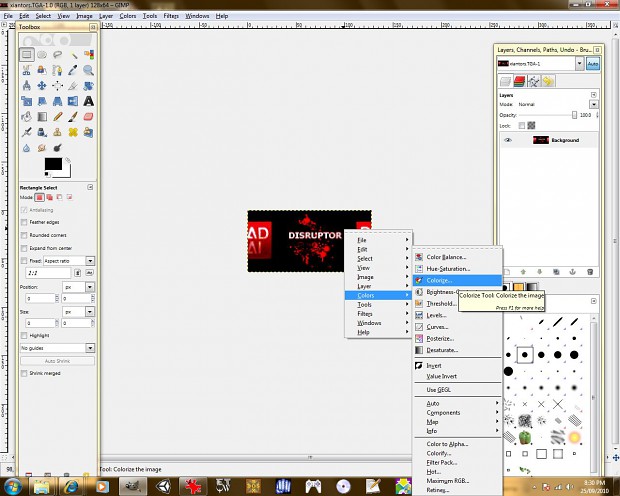
You can now change the colour of the entire image. Mess around with the hue and saturation. Make the image a blue colour. When finished, press ctrl+S. Exit the image and open up blueleg.tga.
We have just made blue skins for Xian. Now we need to make red. This one will be much quicker.
We want to make everything that's blue, red.
Right-click. Select 'Colors' and click on 'Hue-Saturation'. Select the 'hue' slider. Slide it along until the shirt has gon a decent red. Amke sure you remember what value for saturation is down - you'll need it for redleg.tga. Save the image.
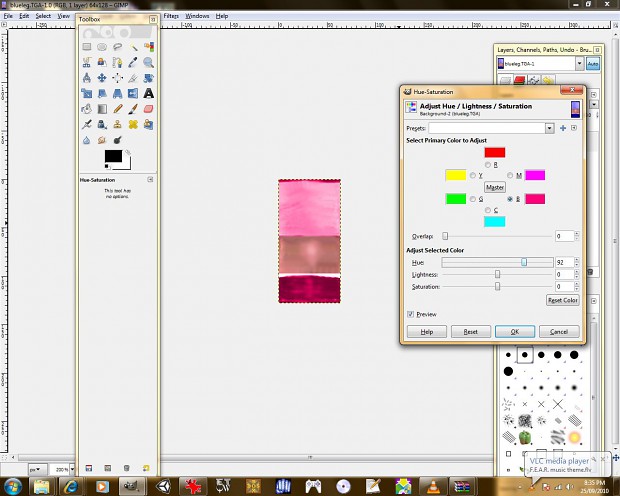
Click on the 'blue' dot. Change the hue to EXACTLY the same value that you gave redtors.tga. Then click on the 'cyan' dot. Again, change the hue to EXACTLY the same value that you gave redtors.tga. Save your work.
Putting a Skin Into the Game:
Now that we've made the images, we need to set it up to work in Quake 3. This is where the .skin files come in.
head_default.skin - head_blue.skin
lower_default.skin - lower_blue.skin
upper_default.skin - upper_blue.skin
tag_head,
Open up lower_blue.skin. Inside should be the following text:
l_rfoot,models/players/xian/xianleg.TGA
l_lcalf,models/players/xian/xianleg.TGA
l_lleg,models/players/xian/xianleg.TGA
l_rcalf,models/players/xian/xianleg.TGA
l_rleg,models/players/xian/xianleg.TGA
tag_torso,
l_rfoot,models/players/xian/blueleg.TGA
l_lcalf,models/players/xian/blueleg.TGA
l_lleg,models/players/xian/blueleg.TGA
l_rcalf,models/players/xian/blueleg.TGA
l_rleg,models/players/xian/blueleg.TGA
tag_torso,
l_rfoot,models/players/xian/redleg.TGA
l_lcalf,models/players/xian/redleg.TGA
l_lleg,models/players/xian/redleg.TGA
l_rcalf,models/players/xian/redleg.TGA
l_rleg,models/players/xian/redleg.TGA
tag_torso,
u_rarm,models/players/xian/xianarm2.TGA
u_torso,models/players/xian/xiantors.TGA
u_larm,models/players/xian/xianarm2.TGA
tag_head,
tag_torso,
u_rarm,models/players/xian/xianarm2.TGA
u_torso,models/players/xian/bluetors.TGA
u_larm,models/players/xian/xianarm2.TGA
tag_head,
tag_torso,
u_rarm,models/players/xian/xianarm2.TGA
u_torso,models/players/xian/redtors.TGA
u_larm,models/players/xian/xianarm2.TGA
tag_head,
tag_torso,
Move the xian folder into pakscape, making sure that it's in the directory 'models/players' and save pak2.pk3. Run quake 3 and...
If You Did It Right:
You now can play as xian in team gametypes. Of course, you don't have to use Xian, you can use any character you want and you don't just have to make blue and red skins. Thanks for reading my tutorial.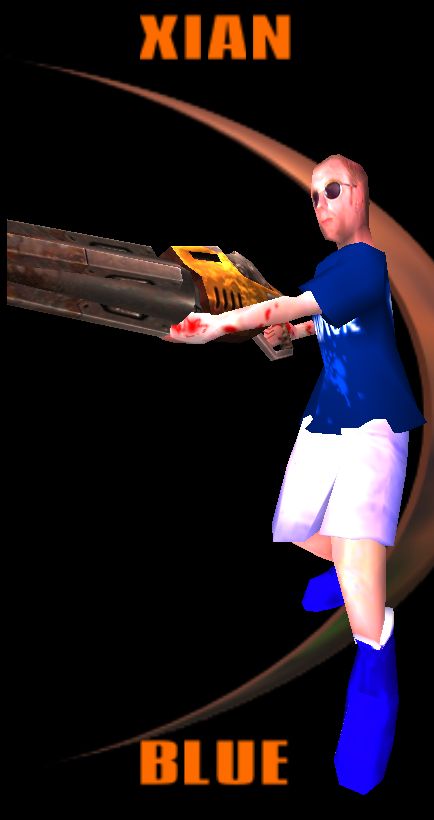
Skinning For Newbies: Part 1
In this tutorial I hope to tech people new to the art of skinning how to make good skins. In this part we cover making a basic skin starting from other assets.
Posted by ZakkarZarZar on - Basic Skinning


This comment is currently awaiting admin approval, join now to view.
This comment is currently awaiting admin approval, join now to view.