Tutorial written by Dirt Twister. Mirrored here for archival purposes. You can find the Motocross Mania YZ level editor here.
Converting Motocross Madness 1 Tracks to Moto-X 2000
Overview
I thought I would put up a page about what I've learned so far on converting MCM 1 tracks to Moto-X 2000. For this discussion I will assume that you are already familiar with making MCM 1 tracks and that you have made at least one track using the Moto-X 2000 editor - XZ.
So far I have converted about 8 tracks from Motocross Madness to MX2k. I have only released 3 so far. Some tracks will lend themselves to converting and others will not. G-Out is an example of one that does not convert very well. It is a rideable track, but it just doesn't work like the MCM version so I do not want to release it. Hang On is an example of a track that converts well and is a better track then in MCM.
Bike differences
To start, I would like to mention a few differences in how the Moto-X 2000 bikes behave differently then MCM. These differences affect the choices that you make when converting. Here are the ones that I have noticed that may make a difference in your tracks:
MX2K Differences
- bikes jump higher then MCM 1
- they do not jump as far as MCM 1
- have a tough time starting on a hill
- turn sharper
- can stick to the side of hill
- uneven and off camber terrain can get the bikes pogo-ing
- the bikes hate whoops
The first two are quite noticeable on a track like Kip's Kreations Silent Haze. The big quad was changed to a triple and you really get a feel for how high you get as you glide down for a landing on that triple.
World differences
The main center area in MCM 1 is 756 ft x 756 ft. I don't know how wide the Moto-X main area is, but my experience shows that it is somewhere between 950 and 1150 MCM ft. Tracks that were created with an MCM grid resolution of 3.75 to 4.5 convert over quite well without many changes. Tracks that were built with a grid res of 3.0 (the standard MCM grid res) become bigger. This can be good if you have a track that was a little tight in places like Hang On. On tracks like BaatKips SX 2000, which is highly tuned for a grid res of 3.0, it is way too big when converted. A good compromise is to reduce 3.0 tracks that you want to keep the same size to about 65-75 percent of their original size.
The outer area in MX2k can be left alone or you can make a large displacement map so that you can control what is there. In MCM 1 that would have taken many ASC files to accomplish the same thing. XZ will blend your terrain to match the edge of your main area.
DispMap differences
The Moto-X 2000 editor (XZ) uses different file sizes and types then MCM 1. The center displacement map is only 145x145 and is a BMP file. A lot of detail can be lost when resizing your 257x257 displacement map.
The outer world can be ignored or you can create a 721x721 displacement map to use. Your center displacement map will override the center part and XZ will blend your outer terrain to match the center terrain. It's possible to ignore the whole MCM 1 fixedges stuff that you had to go through to get your terrain to blend with the outer terrain. On Hang Time and Hang On I actually modified the displacement maps to remove the fixedges so that it could blend better.
When you resize your displacement map to 145x145 you will lose some detail. The XZ editor does a great job with this 145x145 displacement map. When I first did it I thought that there was no way that it would be good enough. I was wrong. You do lose some detail, but for the most part that detail will cause problems with MX 2k. Whoops are a good example. If the whoops transfered exactly like they were in MCM then the MX 2k bikes would slow down and have a hard time making there way through them. The loss of detail here is a benefit. This means that moguls like in Slaughter Trail - South will not make it over into MX 2k.
When I need to reduce my dispmap by 65-75 percent of the MX 2k area, I first reduce to 145x145 and then reduce by the appropriate percentage. I then paste that dispmap as a new layer onto a 145x145 image that has been filled with the color of the elevation that I want the surrounding terrain to be.
Example BaatKip's SX 2000 disp map
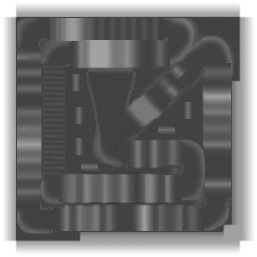
The dispmap on the left is a modified BaatKip's SX 2000 disp map. I've removed all the hay bales, smoothed out some of the track surface, and moved some jumps. It is still the same size as used in MCM 1. The dispmap on the right is the dispmap on the left reduced to 145x145, reduced by 65% of that, and then pasted as a new layer onto a 145x145 flat dispmap. These mods are what it took to get the highly optimized jumps of BaatKip's SX 2000 to work in Moto-X 2000. I believe that 65% is the extreme and that 75% is more the norm for an MCM track of 3.0 grid res.
Altitude differences
In MCM 1 you specified how high your terrain was by either using the 2nd number of the command line of TGA2ASC or as the strength value in 3DStudio. This number needed to be multiplied by 3 to get the MCM altitude in feet. I have found that using this number in XZ works well. You can fine tune by increasing or decreasing this number by + or - 15% depending on what problems you are having. Decreasing this number will make the face of jumps shallower allowing you to jump longer and not as high. Increasing this number will make the face of jumps steeper causing you to jump higher and not as far.Example:
If you used 15 on the TGA2ASC command line (tga2asc 1 15 >abc.asc) or you used 15 in 3DStudio, then you would multiply that by 3 (15 * 3 = 45). You would then use 45 as your altitude in the Moto-X 2000 track editor (XZ).
Texture differences
The main texture is 2041x2041. It is quite possible to work on the textures the way that you always have and just resize to 2041x2041. You can add more detail to your texture then you could in MCM 1, because of the higher resolution. Be sure to zoom in and pay close attention to your texture as you reduce the colors to 256. Try the different options available in Photo Shop and Paint Shop Pro, so that you don't lose the detail. The more colors you use the more likely that your texture's detail colors will get changed to the same color leaving large areas the same color. I've been using the "Optimized Median Cut" in Paint Shop Pro. I didn't figure out until I did Joy Of SX - SE for MCM 1 that this is a good idea even in MCM 1. MCM 1's MakeTerr.exe will reduce your colors to 256 anyway. In MCM 1 you were better off reducing your colors yourself, to ensure the best results.
Spline differences
First I recommend going to "Jan-Pieter's Extreme Biker Page" and reading his excellent tutorial on making track paths.
The splines are quite different. The first thing is that you don't need to lay down a spline like you do in MCM 1. In MCM 1 you need to create a spline that has a point on every jump, several on the straight, and several in the turn. A spline with well over a hundred points is not that difficult to end up with. In Moto-X 2000 you cannot have more then 100 points in the spline. At first this seems like a major limitation but the reality is for most tracks this isn't so. I just converted AMA - Fire Road and it is the first track that I've come up with that really needs more then 100 spline points.
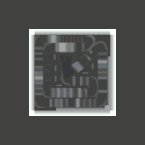
Fire Road's - 97 Node Spline
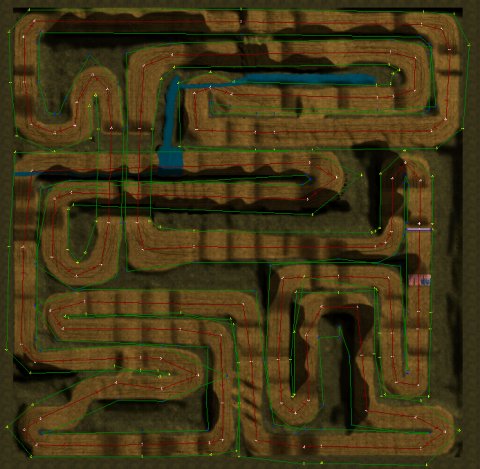
At first glance you may notice large gaps without any nodes, but that really isn't a problem. The real problem with this one is to fine tune the AI I need to add a few more nodes. To do this I'll need to steal some from places that I have already added them to tune the AI. I'm sure I'll get it, but it can be tough. All of my other tracks I haven't had any problem with not having enough nodes or tuning the AI.
I have found that I have to do some things that Jan-Pieter says not to and it causes the "Off-Track" message to be displayed (just as he warned). When getting the AI to ride the corners right, I have to add more spline points in the turn and you get the next node closer then the outer edge of the spline. I haven't found any negatives to doing this except the node turning off early and you getting the "Off-Track" message briefly as you go around the turn. This happens mostly in 180 degree turns.
With the ability to set the speed limit at each node, it is easier to control the AI's bike in Moto-X 2000 then in MCM. This really lets you tune the AI to the track.
What I do, is to lay down a very basic spline to start with. I use just one point in each turn. I then watch the AI ride it. I then smooth out the turns and add points to the straights to identify landing spots for jumps that the AI overjump. On most tracks I have stayed below 85 nodes in the spline. I find that if I don't add extra points in the turns, then the AI will kick the bike sideways and lose speed. It still happens, but not as bad or as frequently.
I've thought of writing a utility to convert an existing MCM 1 spline to the Moto-X 2000 spline but with the 100 node limit it didn't seem worthwhile.
Quick jump start to convert an MCM 1 track
Basics:
You don't need to use a picture, overlay, alpha, spline, or any of that stuff to test your track. You can also ignore the outer terrain until you really need to worry about.
Save your dispmap as a 145x145 BMP file.
Take your main 1016x1016 texture and resize it to 2041x2041, reduce the colors to 256, and then save it as a BMP file.
Take your tile texture and resize it to 255x255, reduce the colors to 256, and then save it as a BMP file.
Use your strength * 3 as your altitude in feet.
The steps:
If you modified your files like I described above you can make a bare bones track by doing the following:
- Open XZ
- Go to the Landscape Plugin
- Click on the Disp Map button under Import Center.
- Select your 145x145 BMP file
- For altitude in feet use 3 * your strength
- Click on Add Center under Textures
- Select your main 2041x2041 texture
- Click on Add Tileable under Textures
- Select your 255x255 texture
- Go to the Info Plugin
- Enter your track name
- Select Motocross, Supercross, or Free Style
- Add any comments that you want.
- Go to the Settings menu and select Fog On. This is important, because of a bug. Your rider and bike textures will have black streaks and other objects will also have black areas, if you don't have fog turned on.
- You can add a spline, objects, and other stuff later.
- Go to File->Save and save your new track.
- Copy the .WLD file that you created to your Moto-X 2000 "Tracks" folder