Tutorial written by Neverman
Mirrored here for archival purposes. Note this is an unofficial tutorial the official Remedy tutorials are located here.
Note some of the images are broken due to being retrieved via archive.org. Unless someone comes forward with a full archive, this is currently the best this tutorial can be viewed.
MaxEd concepts for newbies
This is Neverman here, writing a tutorial to try and help bring a better understanding of how MaxEd works and what you’re doing in it. Knowing how to do things without actually understanding what it is you are doing does work, but it leaves you unable to figure out any problems that may come up. This tutorial is written for those with limited modding and editing experience. Those of you who are 1337 can probably skip this one. This tutorial is not a "how-to" guide, it is a "why" guide. A few commands will be explained, but for the most part the focus is on explanation. Some of the things that will be covered are:
- What a poly is, and why they are extruded
- Poly-based modeling vs. Brush-based modeling
- Normals, the biggest problem for newbies
- Scale in virtual space and the grid
What a poly is, and why they are extruded
Yes, this is a basic concept, but there are those who don’t understand it very well. Indeed, some of those who think they understand it would have a hard time actually explaining it well to anyone else. MaxEd is a poly-based editor, and because of that it is essential that everyone have a good understanding of what a poly is.
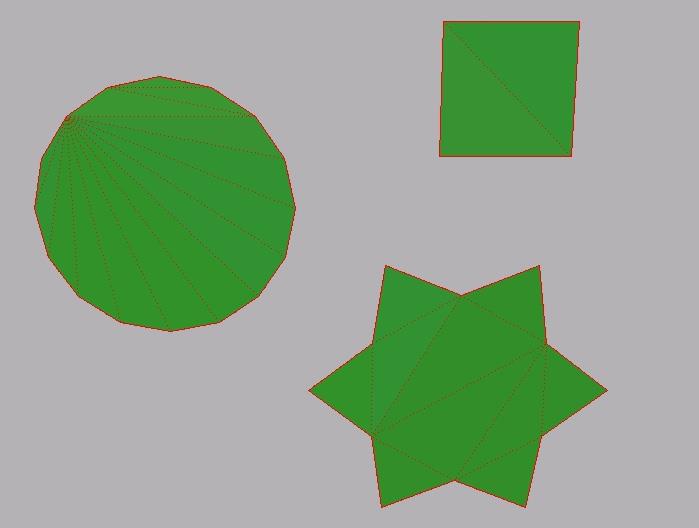
Poly is short for polygon, which means a multi-sided planar figure. A polygon can have as little as three sides or an unlimited number of sides. A polygon with only three sides is a triangle, and is called a “face” in 3D terminology. A face is the smallest element of the surface of a 3D object. If you have a four sided polygon, then it has two triangles that together form the “square” of the polygon. Below is a pic that show the faces making up a rectangle, a circle, and a star. MaxEd does not show faces, so these pics were done in 3D Studio Max.
Notice how the red lines divide the shapes into triangles. These triangles are the faces that make up the surface of each polygon.
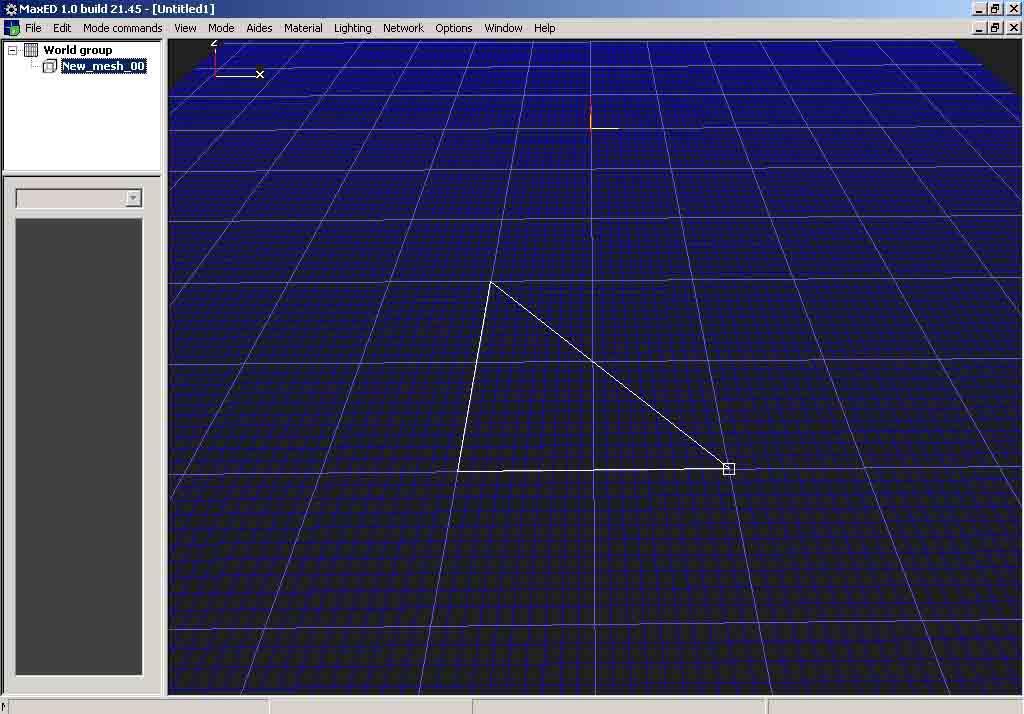
The faces can be laid out in many creative fashions to achieve the overall shape of the polygon. In MaxEd you will rarely have to worry about faces as you will be drawing polygons and the program will handle how the faces are laid out to create your polygon. Each side of a polygon meets another side at a endpoint. This endpoint is what’s called a “vertex”. Any time two or more sides of a polygon meet at an endpoint there is a vertex. In MaxEd you cannot edit vertexes, which is a common editing method available in most commercial software packages. You can only edit polygons by their edges in MaxEd. You will find some pics below to show you vertexes in MaxEd.
The little white box is on a vertex in each pic.
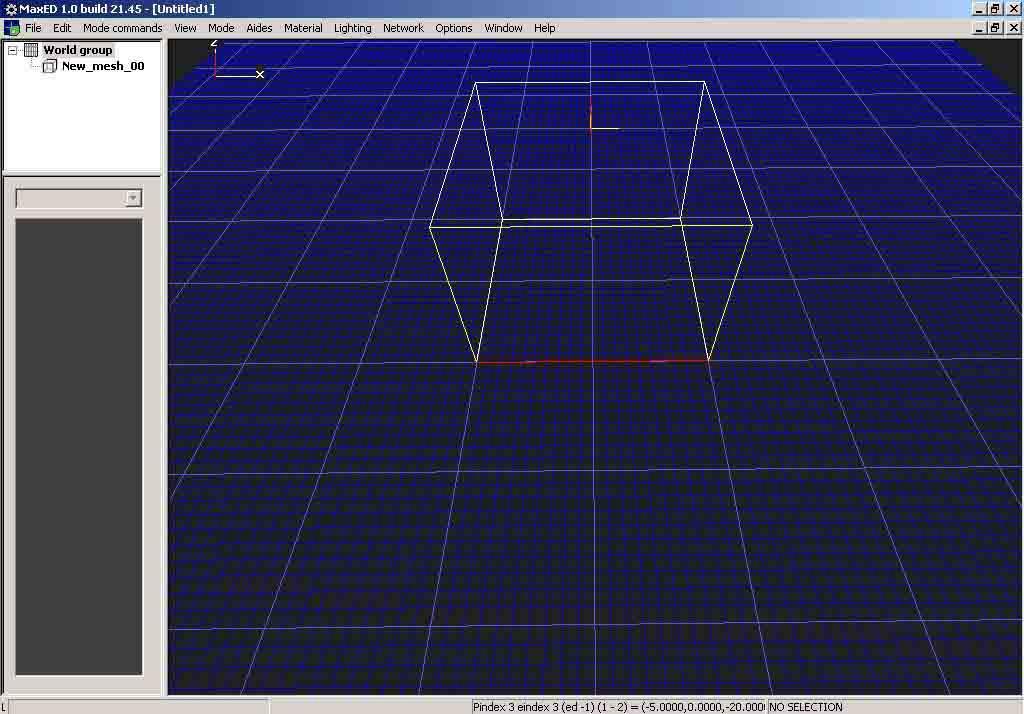
A polygon is defined as a multisided planar figure. The planar aspect means a polygon is not 3D dimensional. It is a flat plane, like a poster you would hang on the wall. It must be “extruded” to make it three-dimensional. Extruding pushes the shape of the polygon out and gives it depth. If you could push on a flat surface of a poster and it became thicker until it was a box, this would be the essence of extruding. To draw a poly go into Model mode with F3, then click the left mouse button to create a vertex, and drag the mouse to where you want to create the next vertex. Use the left mouse button to click where you want each vertex, and when you are done, click the right mouse button to automatically close the shape. In MaxEd when you draw a poly it will automatically be extruded to one grid unit (.5m) in height. If you wish to make a polygon and not have it automatically extruded, hold down the SHIFT key when you right-click with the mouse to close it. This will make it totally “flat”. If you create the poly this way it can NEVER be extruded. For most projects you will want to close the poly normally and let MaxEd do it's default extrusion. See the difference in the pics below.
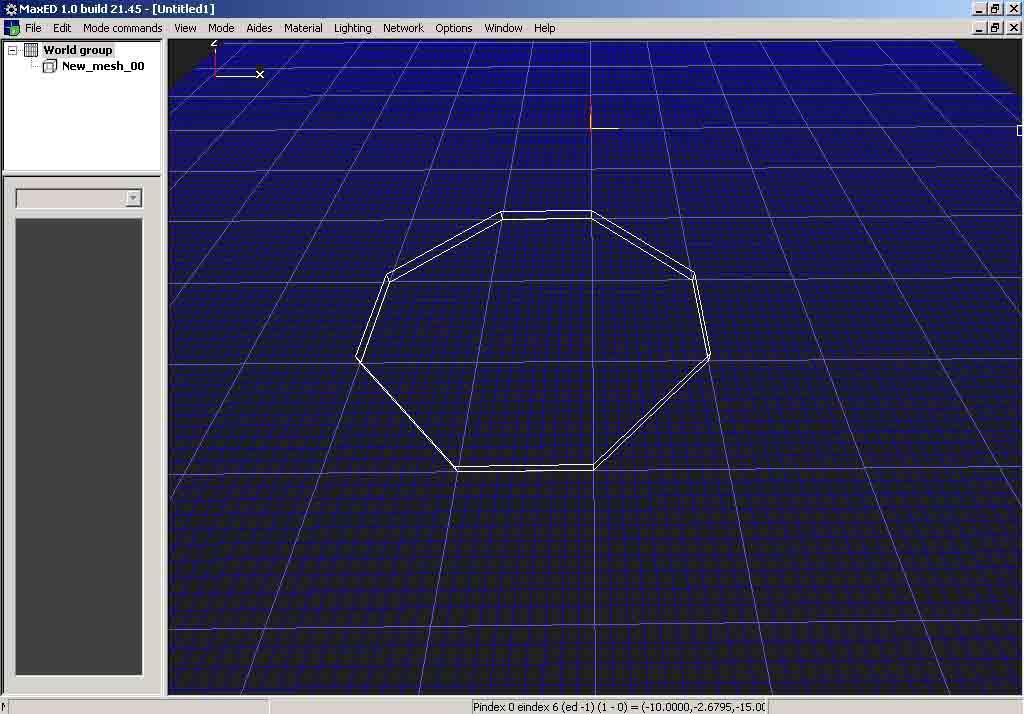
Holding down SHIFT when closing the poly:
Closing poly without using the shift key (the normal way with default extrusion):
Once you have drawn your poly shape, you will most likely need to extrude it further than the default one grid unit it started out at. To do this you will enter Extrude mode by pressing F4. Then click and hold down the left mouse button on the side of the polygon you want to extrude (give depth) while dragging the mouse around. That side will extrude out in one grid unit increments. Once you have extruded it you can extrude it again and make it smaller, but not less that one grid unit in thickness for each side. You can also “skew” the polygon. This means to extrude it unevenly. If you want to skew your poly, select the side you don’t want to extrude, click and hold the right mouse button while dragging the mouse.
Poly-based modelling vs. Brush-based modeling
Many of you may have used UnrealEd , WorldCraft, or another brush-based game editor. MaxEd is a poly-based editor and works on different principles. In a brush-based editor you have a solid worldspace that you are removing and adding pieces to. For instance, to make a room in a brush-based editor you typically make a “brush” shaped like a box, and then that brush is subtracted or “cut” out of the worldspace leaving a box shaped hole. To add a box into this “room” you add a box shaped brush, which adds a section of worldspace equal to the brush back in.
In poly-based editing you are using an entirely different methodology. The worldspace is empty and is not what you are editing. Instead you use objects to fill the empty space and create your level. To make a room you draw a square shaped poly, then extrude it. This creates an object in the worldspace. This object is solid, and it’s sides cannot be moved through. To create a box inside the room you draw another poly smaller than the first one and extrude it, then place it appropriately in the first one. One of the benefits of poly-based editing over brushes is that because you are dealing with objects, they can be changed at any time. Once you subtract or add a brush you're done. However, with objects once you place one it can still be moved, rotated, or scaled whenever you want. Look at the pics below to see examples. Because these are poly-based objects they could be moved around at any time during the level design.
Draw the first poly box large and extrude it:
The draw the second poly box small and extrude it:
Normals, the biggest problem for newbies
Remember that we talked about faces above? Well the faces that make up the surface of a poly can only be seen once textured from one side. By default in MaxEd this is from the inside of the object. To make the faces seen from the outside of the object instead of the inside, change to Extrude mode with F4, select the object, and press Ctrl+F. This will flip the direction the surface of the poly is scene from inside out. The direction the surface is scene from is called it’s “normals”, and this process of flipping it is often called “inverting the normals”. Any object you want visible inside a room will need to have it’s normals inverted after it is created.
Scale in virtual space and the grid
Scale is very important when creating objects in virtual space. An chair could accidentally be created as big as a house or as small as a golf ball. MaxEd uses a predefined scale of meters. By default the grid unit is .5m or half of one meter. That is about nineteen and a half (19.5) inches for those of you who don’t have a good feel for the metric system. Each little square in the grid is measured in this size (.5m). Another way to think of it is that each little square is approximately the size of a 19” television. When you draw out your polys, keep this scale in mind. You can see the length of any side in a poly as you are drawing it by looking at the numbers near the bottom of the window. Remember that it is measured in meters.
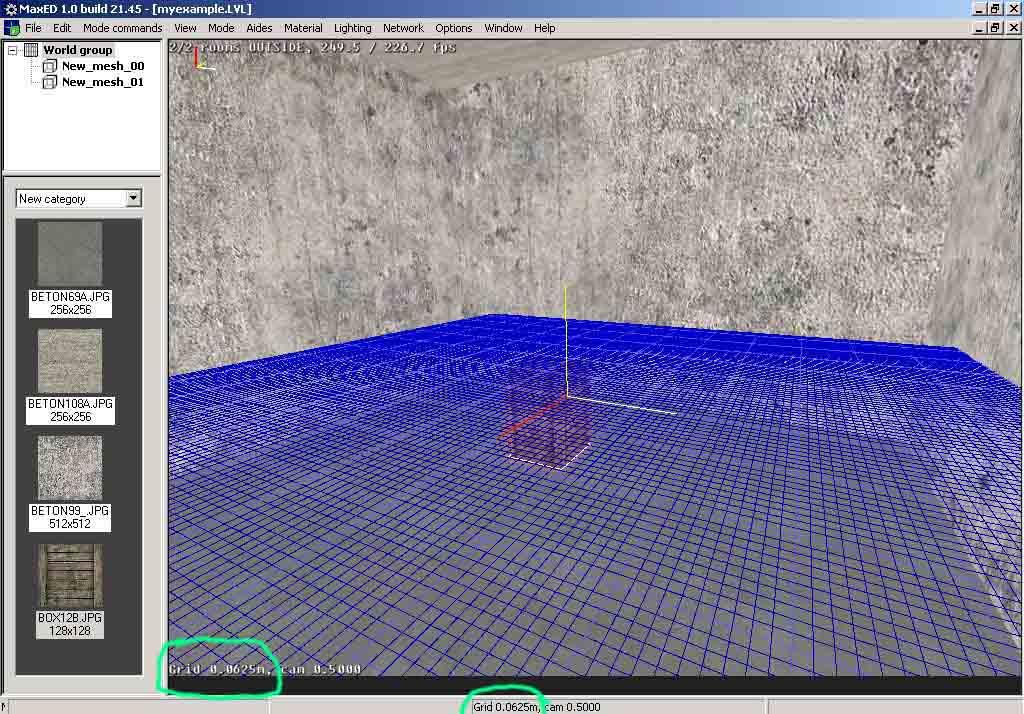
You can change the size of the grid by pressing the plus + or minus – keys on the numberpad. This will double the size of the grid units (.5m, 1m, 2m, 4m, etc.) or reduce the size of the grid units by half (.5m, .25m, .125m, .0625m, etc.). Be careful that if you change the size of the grid you don’t forget your sense of scale to the new measurement. You can also raise or lower the grid’s position by using the PageUp and PageDown keys while in F12 mode, and if you align the grid to another axis these keys will move the grid back and forth. While in F12 mode you can also snap the grid to any of the X, Y, or Z axis by pressing the keyboard 1, 2, or 3.
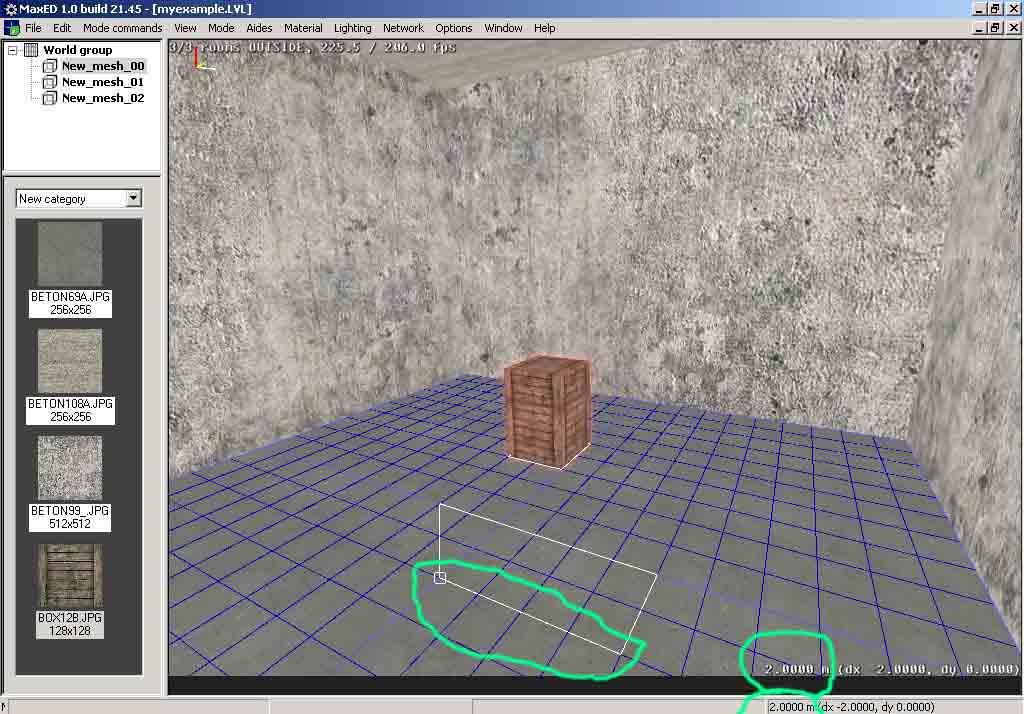
The numbers in the bottom left show the grid size as I change it to 2m (4x default)
This pic shows the grid raised with the PageUp key:
That's the end of this concept tutorial. You should now be ready to read other tutorials with a better understanding of what they're teaching you to do.