I've mentioned it a few times before, but I've never really got into the details of the process behind animation in Life's Impetus. It's what I've been working on for this past week, so now's a good time to talk about! Besides describing the nitty-gritty stuff, I'll be showing a lot of in-process pictures.
Art of Movement

Before I can get into the actual description, I need to define the main technique on which my process is based: rotoscoping. I've used this comparison too many times, but it works; rotoscoping is basically the 2D equivalent of mocap. You record the action you want to animate, and then print and trace it. My process is not exactly not the same though, so let's start with the explanation!
The Recording
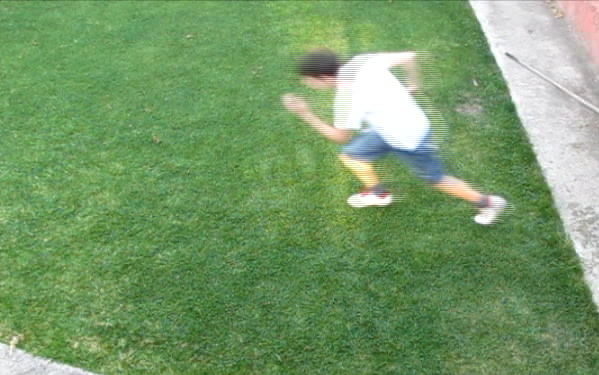
First up is the traditional first step, the recording. I try to practice in a area with a mirror or record myself in a smaller area, but in the end it only works for the simpler actions. Once I feel I'm ready, it's time to go out and put the camera on the roof! *Life's Impetus* has a 3/4ths perspective (think Pokemon), so to achieve the look I need the camera to be high up and at roughly 45 degrees. It's a pretty slow and tiring process, considering most actions need to be done in 4 directions and that I need to climb a ladder each time I want to check what I've done. Most of the time I end up just doing many takes and then choosing the best. But, even if it feels slow, I usually don't take more than a couple of hours, and then it's time for the next step.
Frame Selection

With the recordings done, I can now concentrate on studying the action frame by frame. The first step is to actually get the frames, so I open up the video file and rip them with VirtualDub. After an initial inspection, it's a time to cherry pick them. I import the frames into Pencil2D, an animation program that's pretty good for quick experimentation, so I use it to experiment. This usually means deleting frames and moving others, until I make the movement feel "right". I'd define "right", but it really depends on the action. Then comes selecting the ones I'll actually use for the animation; for slower actions (like Corrupted walking) you can get away with really low FPS (the animation below is 8FPS), so I need select one frame every three (1, 4, 7, 10...). Once I'm pretty sure I got the frames I want, I print them and I'm ready for the next part of the process.
Drawing the Wireframe
So, I have the frames, and I'm ready to trace them, yet here's where I diverge from normal rotoscoping. From what I can tell, rotoscoping follows the source material as closely as I can. But, in my case, that would mean everyone in the game is me (which is creepy although interesting), so I have to do something else. So, my solution is doing a wireframe; I only trace the basic "skeleton" of myself, and later use that as a base for the animation. By doing this, I'm free to give my "base skeleton" any form I want. This is probably the most relaxed (and thus messiest) part of the process. It's very quick, and once I'm done, I quickly test it out in Pencil2D and fix anything that doesn't really look like I want it to. But after this calm, it's time for the storm.

Animation
This is probably the most meticulous and time-consuming part, but in the end it's the most important one, isn't it? I animate the character or enemy, using the wireframe as a base. First up are the key frames; they're the ones that will define the rest of the animation (usually beginning-middle-end of an action), so I do them with a lot of care. After that is done, I can relax and concentrate on the in-between frames. Once this is over, it's time for another check-and-fix.
In The End
Well, I'm not done yet, so what comes next? To be honest... I'm not entirely sure. I haven't got this far yet in my actual animating, but I have an idea of what I want to do. Now that the actual animation is done, I can test it in-game. If it passes that test (yeah, I do a lot of checks) I can finally ink and color it, thus finishing the animation! The thing is that at the moment I'm waiting to have more art before I start doing in-game checks, so it'll be a while before I do anything clean. Nevertheless, I'll have a lot of sketchy pencil stuff to show you, so look forward to it!

Bonus Question: What animated movies have had great quality animation that you really liked? One that really stood out for me was The Illusionist.