![]()
Introduction
Last time we've introduced you to the photogrammetry technique telling you about our first steps in creating high quality content using such technology. This time we will continue our tale about our research in such field of work but this time we will be focusing on material creation. Well, let's get to it.
Photoshoot and processing
After our first photoshoot at our closest forested areas it was quite clear that we had to find a perfect spot with variety of interesting objects to shoot and varied landscape in order to use our time more effectively. City park areas though is not abundant with fallen trees, huge rocks and rocky cliffs. After a short search we've managed to find a perfect place - a federal reservation «nearby» the city area.
Long story short we've gathered and took off over there on a small «expedition» over 130 kilometers which turned out to be quite a fairy tale to tell!
Shooting various surfaces for the sake of creating materials was quite troublesome and difficult experience. In order to create an interesting material with a wide range of details it is required to make photos of rather wide area - at least 3×3 meters. That said, one has to shoot an object in close proximity in order to get the highest level of detail possible and each close shots have to intersect one another, ideally close shots have to intersect at least for 50-60% (this exact intersection will be used later in the process of photogrammetry).
That process requires slow paced movement along the required territory and taking a lot of shots (150-200 photos) in one try while being in a very uncomfortable state. Taking breaks is risky of losing the precise spot you've stopped at or because of a chance of losing the required lighting if a sun comes out of the clouds while you were resting. The other matter to be taken into consideration is where you step. A moved branch, a bootprint, even forgotten belongings in the shot - everything can be accidentally added into the game which would be really really bad.
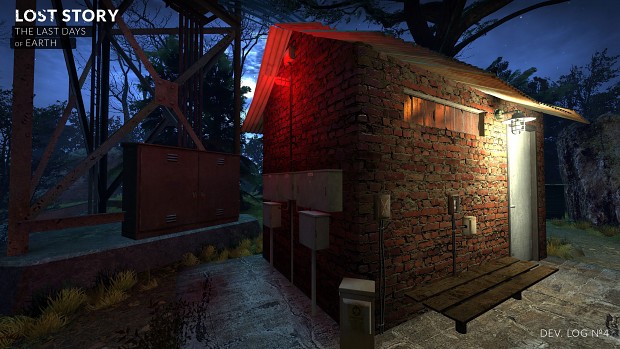
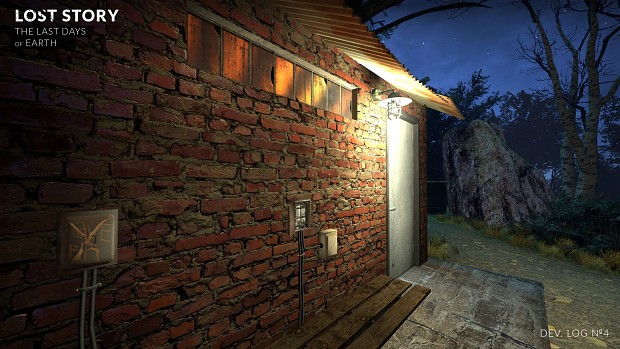
Even though at first we thought that shooting different surfaces for material creation seemed more difficult (at least physically) than shooting objects, it turned out to be even faster eventually. We've managed to shoot six natural materials, lots of forest photo-references, couple of models and some brick material on our way home, even though it wasn't in our plan, and all done in a single day! Brick material turned out to be quite useful though.
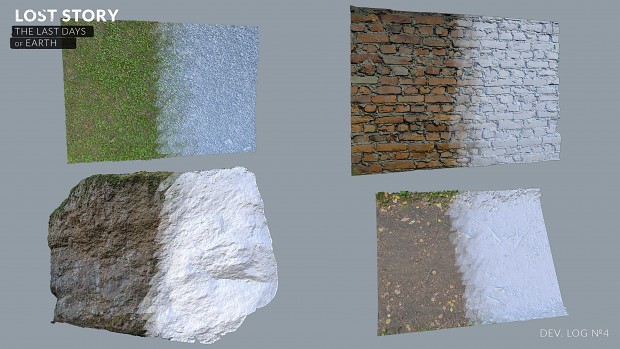
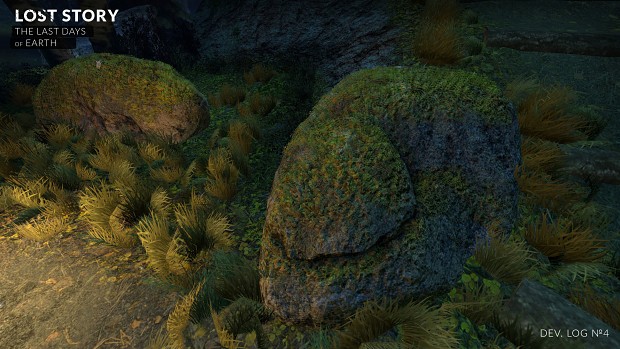
Photo processing for material creation is not that much different than the process described in the previous part of the diary, the only difference is a bigger number of polygons on models. You can see the results on the image above - high poly models of the surfaces (11-16 mln triangles) each with 16 384 pixel albedo map.
Tiling
Since we've decided to use photogrammetry initially as a method of creating landscape materials (ground, grass, rocks), eventually we had to come across the tiling problem. Tiling - is a method for 3D graphics optimization used for filling wide spaces when only one texture is being applied on polygons. This texture then reappears in every direction filling the said space. The edge transitions of such texture should be as smooth as possible in order for the texture to look as nice as possible.
It is quite obvious that smooth continuous edges are very hard to get with photogrammetry. One variant for solving such issue is decking together nine copies of high poly model and using a special software custom change the shape of the polygonal net to get smooth transitions. Unfortunately such process takes a lot of time and each new material will have to be processed from the very beginning. That means this method isn't suitable for fast processing of photogrammetry results. This is why we've chosen another way.
Our decision was to work with texture maps that we already have from our high poly models and to prepare them for tiling in one of the special programs used for creation of procedural materials. The best thing about it is that we've managed to create our own custom graph templates and saved a lot of precious time on creating similar materials.
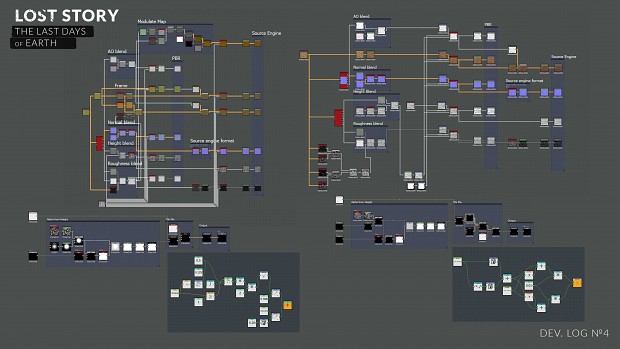
We've created two big templates (see image above) consisting on dozens of operations. One of them is designed for materials with chaotic structure (grass, dirt, moss, rocky surfaces and other natural materials), the other is for materials with more or less repeating pattern (brick, tiles and other hand-made materials). But both templates are similar in the ability to extract and adjust additional texture maps for creating a full material without any quality loss.
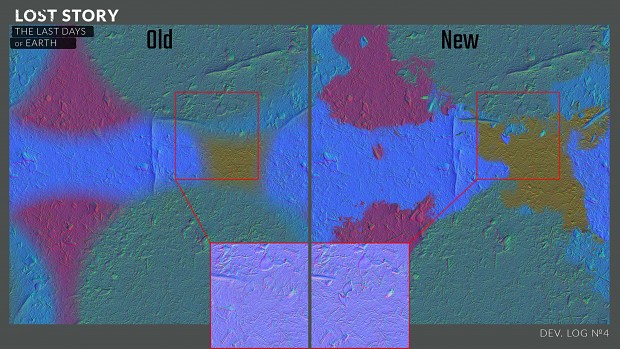
In order not to lose quality while preparing materials for tiling we had to drastically change standard tiling graph-scheme included with the program. Our new graph-scheme allows us to use additional detail height info for mixing different tiles (copies of the original texture map).
The original graph simply mixes the edges of texture map tiles. Such method is plausible while creating albedo map tiling, but using the same method with normal maps is risky in terms of losing information on tile intersections. This is the reason for refusing to use the original graph. You can compare the results of normal maps preparations on the image below.
Based on our newly made tiling graph we were able to create another graph for tiling materials with patterns (where we've added more settings for mixing mask and tile deformation). The second tiling graph has grown into the second template.
That said, after we've prepared the first material we've already got a fully functional template that we can now use to create new "chaotic" materials in two day's time (photoshooting time excluded). And the brick material turned out to be a great base for the second template that will definitely help us in creating patterned materials in the future.
Results
Well, it's time to draw the conclusion of our two developer diaries. And what's better to summarize our conclusion than images of our final results? That's right, nothing! Here below you can see the renders of the final materials.


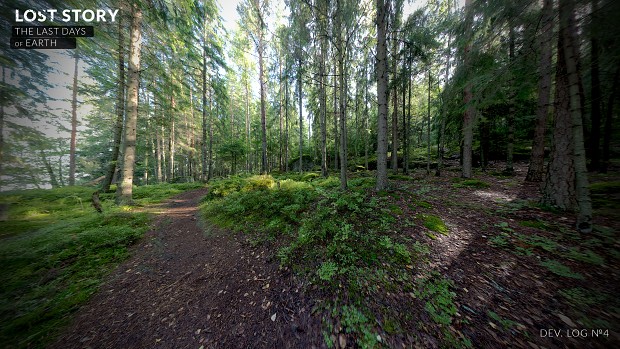
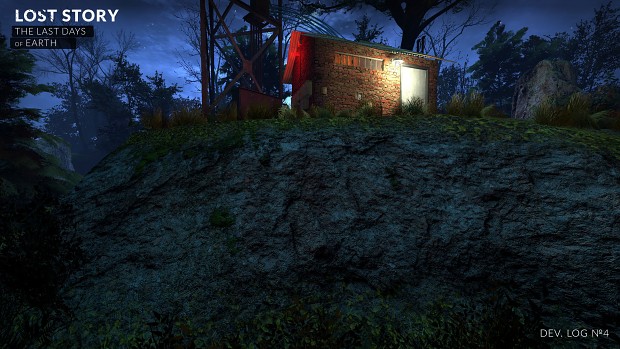
We've also prepared a small scene on the test map to show you the new models and materials as they would look in-game. In the same video you can see the changes of our map that occurred during the two days of preparation. Please tell us if you enjoy such format.
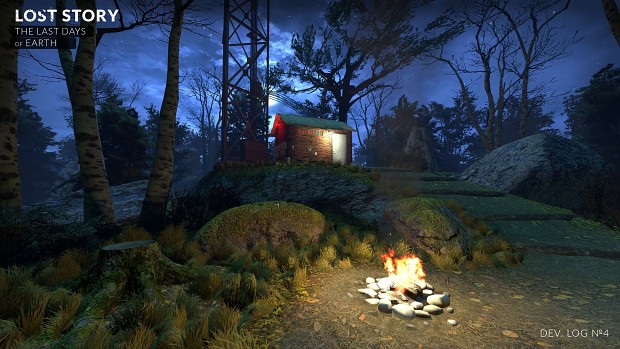
We would also like to point out that this is not the final build for natural locations. We still have to work on new trees, grass and other natural materials, as well as the skybox.
And some more screenshots for closer detail inspection.
And now let's get back to our results in the text format. We believe that our photogrammetry experiment turned out a success. Not only did we get new experience but we've also created a chain of methods on working with such technology.
Photogrammetry has proven to be a reliable and powerful tool for developers that can help in solving a variety of difficult issues with limited resources and we've enjoyed working with it. We will definitely do more photoshoots out in nature to gather new objects and materials and we are also thinking about getting in the industrial zones for unique hand-made materials (even objects perhaps). Stay tuned, this is going to be fun!
And that is all we have for now. Stay tuned and don't forget to share your opinion with us regarding the Dev.Logs and the project's wellbeing in general!
Your hedgehogs in shades from
Rock Path Collective.


Your Dev.Logs are great to read in bed :3
You do incredible ammount of work, I don't think I've ever seen someone putting so much effort in their game. You guys are wonderful, keep it up!
I'm happy that your team is pushing the graphics to the limit on Source but the next steps are lighting and gameplay?
You can find information about gameplay improvements in our previous Dev.Logs:
1) Indiedb.com
2) Indiedb.com
3p1) Indiedb.com
3p2) Indiedb.com
How does this run? Can't imagine its very smooth on Source.
This runs fine. Power of optimization on Source. c:
Damn, the fact that y'all are doing all this on Source is amazing enough already. I wish y'all the best of luck!
This looks like the best Source game I've seen in a while! Since Transmissions: Element 120!