
[page=The Tutorial]
Many new mappers wonder how they can add a sky and make a cool outdoor map. You'll see many of them sticking with indoor corridor maps before they eventually dig up a tutorial somewhere. So, I figured I'd write a quick one to help newcomers to Source mapping.
I'm going to walk you through the creation of a skybox. Lets begin...
Step One
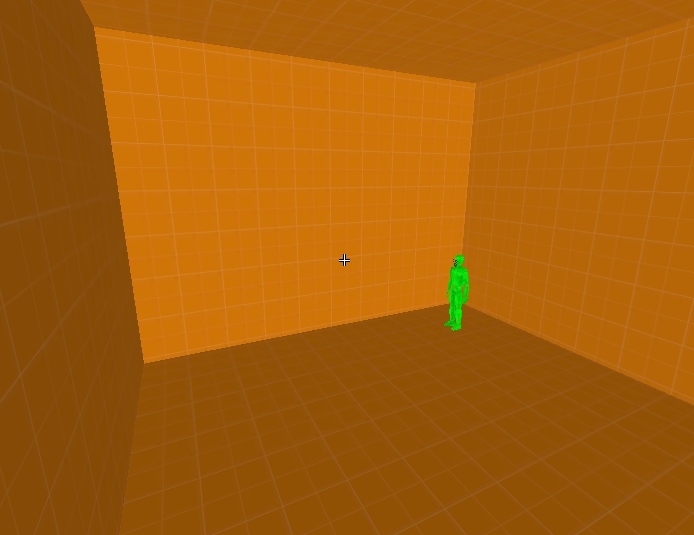
Open up hammer under any game you wish to create the skybox for. I'm going to assume you have enough basic knowledge to create a squared room with an info_player_start as shown below. Any texture will be fine for this.
Step Two
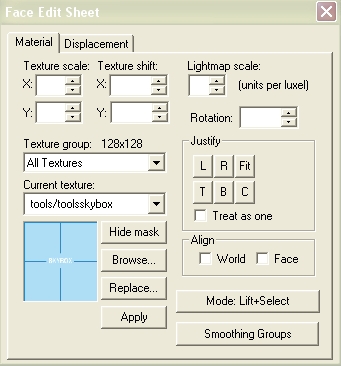
Press Shift + A to open a small window that allows you to texture individual surfaces. Hit the browse button in this window and navigate to the tools/toolsskybox texture. Then right click the ceiling of you room to apply it to that surface.
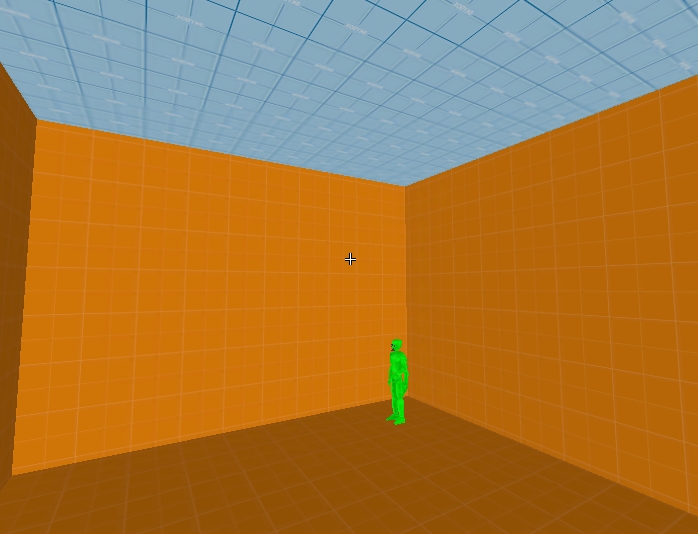
Your map should now look like this
Step Three
Now we are going to set which sky that surface should display as. Go to Map>Map Properties. In this box navigate to the skybox field and enter one of the skyboxes on this list.

Step Four
The map is now ready to compile. Compile it with the default settings and open it in-game.
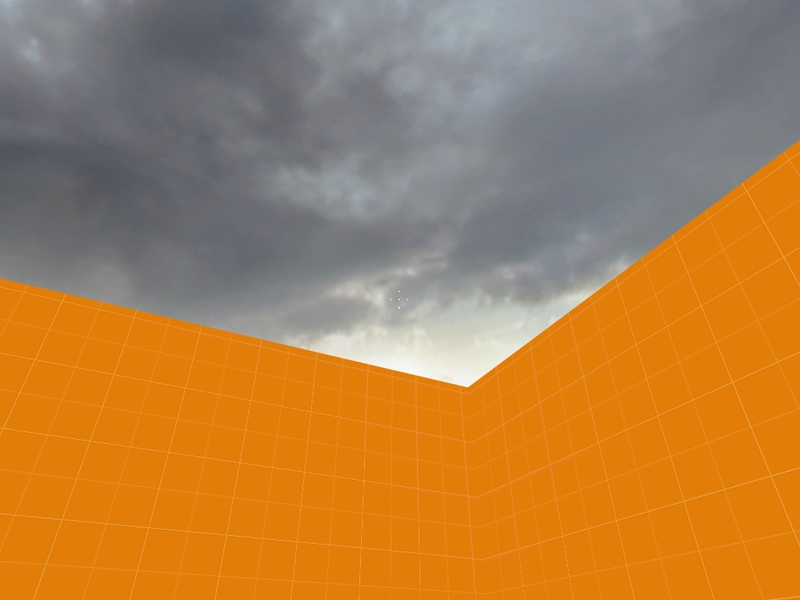
There you have your map. Complete with ugly full brightess ;)


Why use this instead of a 3d skybox?
Sometimes a 3d skybox isn't necessary. 2d is less taxing on the system.
Ive just been getting into mapping and this helped alot thanks.
thank you so much!
what about night textures and the 3d ones?
3D skyboxes are probably not covered in this tutorial because the title says "2D".
thank you so much
I cant find tools/toolskybox texture... someone help
thanks, i never wanted to create indoor-maps and trying to improvise a skybox without this skyboxtool makes a lot of skin-adjusting-work
It doesn't work for me... I made the EXACT same room as you (only slightly bigger) and after applying the tools/toolsskybox texture and a map properties nothing happens after I enter in the name of the sky and when I click apply.... help me please!
gee thanks