Ready the grenades, fix bayonets and let ‘em have it!
With all your help we have come this far – Festung Europa found a place in the Top 100 of IndieDBs Game of the Year Award! Which rank will be finally achieved is entirely up to you however, and because of that we ask you to give us once more your help and attention:
Only a little over 30 hours remain to cast your vote in the 2013 Indie of the Year Awards!
Follow the Screenshot to vote for Festung Europa!
Make sure to cast your vote on the page linked above, clicking “Vote for this Game” on the project’s page itself does not register the vote! If done correctly, it should confirm your vote with a green text in your browser.
Once you have voted, please don’t forget to tell those you think would be interested in the game.Every Vote and every Like & Share will provide Festung Europa with the exposure this project needs to be successful!
We would also like to take the opportunity and present you with a brand new Dev Diary, providing a sneak peak behind the scenes of creating Fesung Europa! This time, Lead 2D Artist Günther gives an insight inot the creation of the Commonwealth’s main battle rifle during World War 2 – the Lee Enfield No. 4 Mk I*. We had already produced a version of the Lee-Enfield, but decided after following internal and community criticism, that we would revise the existing model. We put him to work, and it quickly came apparent, that we would need a brand new model! Here is what he has to say of the experience:
Hello, my name is Günther “r0tzbua” Feldbaumer, I’m 28 years old, from Austria and the Lead 2D Artist over here at Jackboot Games. I have been a texture and 2D Artist since the golden times of Half Life modding and worked on some games and mods since then, for example The Trenches. My goal with Festung Europas’ art direction is to provide an authentic and realistic portrayal of every aspect of Normandy ’44. Weapons are my pet peeve though – I cannot help but find and point out inaccuracies and problems in movies or games. Therefor I always try to make my weapon models as realistic and close to the reference material available while maintaining the general art direction set for the project.
The Lee Enfield No. 4 Mk I*
One of the first tasks I got assigned when I joined the team back in early 2013 was revising the Lee-Enfield No. 4 Mk I* model and texture we already had, mainly because of combined community and team input regarding inaccuracies and other problems with the model. While crosschecking our existing Enfield with references I found that it would be easier to redo the asset as a whole than try and fix single parts of it.
First Things First: Research
When doing weapon models for a community which is known for caring for historical accuracy such as you guys are, research is one of the most important parts of creating an iconic rifle such as the Lee-Enfield. In conversations with our two lead producers Eric and Graham I found out which manufacturer, model and production date was realistic for the combat units and time frame of Normandy ’44 and settled for a 1943 Long Branch Lee-Enfield No.4 Mk I*. After collecting a lot of reference material on the internet and my own reference books I have at home (for example: “Enzyklopädie der Infanteriewaffen”, Reiner Lidschun & Günter Wollert, Bechtermünz 2001) I started with the modelling process.
Highs and Lows
I have produced next-gen assets prior to this project, but this was surely my first big and “complete” weapon model, so I was very excited when starting. I followed my standard workflow of creating the high polygon version of the model first and then creating the low polygon version out of this to bake the normal maps. Each iteration of the high poly model was then cross-checked with our Lead 3D Artist to see if I made any technical errors as well as the Producers to check for historical inaccuracies. After both, high and low poly models of the rifle, the bullets and the clips were done, I baked down the normal maps in 3d Studio Max and xNormal. I then exported the model into the engine and applied the normal to check out if there were any smoothing errors or other problems. Since that was not the case I started with the next part: texturing.
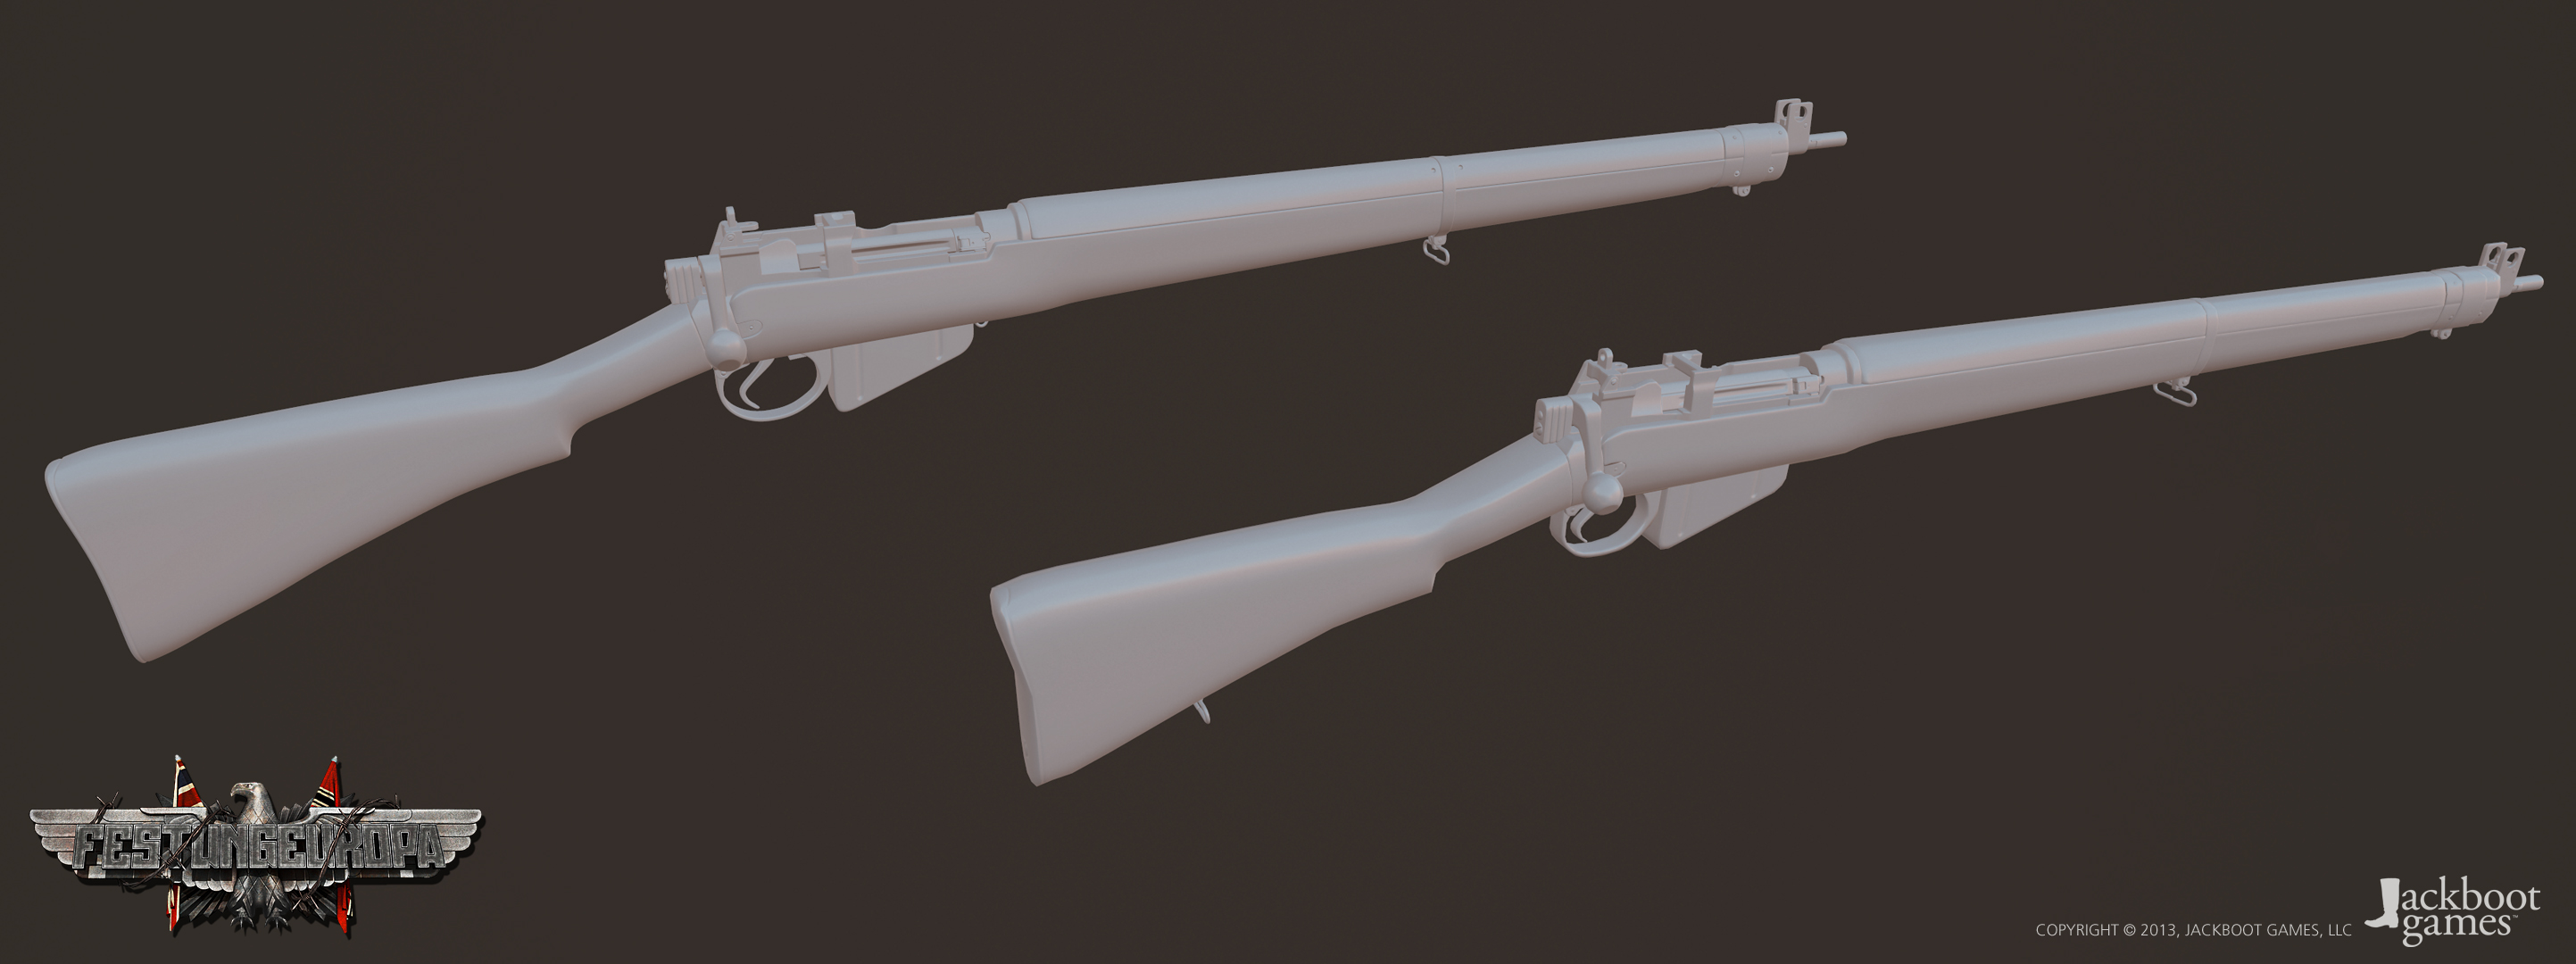
High Poly Model on the left and Low Poly Model with applied normal map on the right.
Applying colours
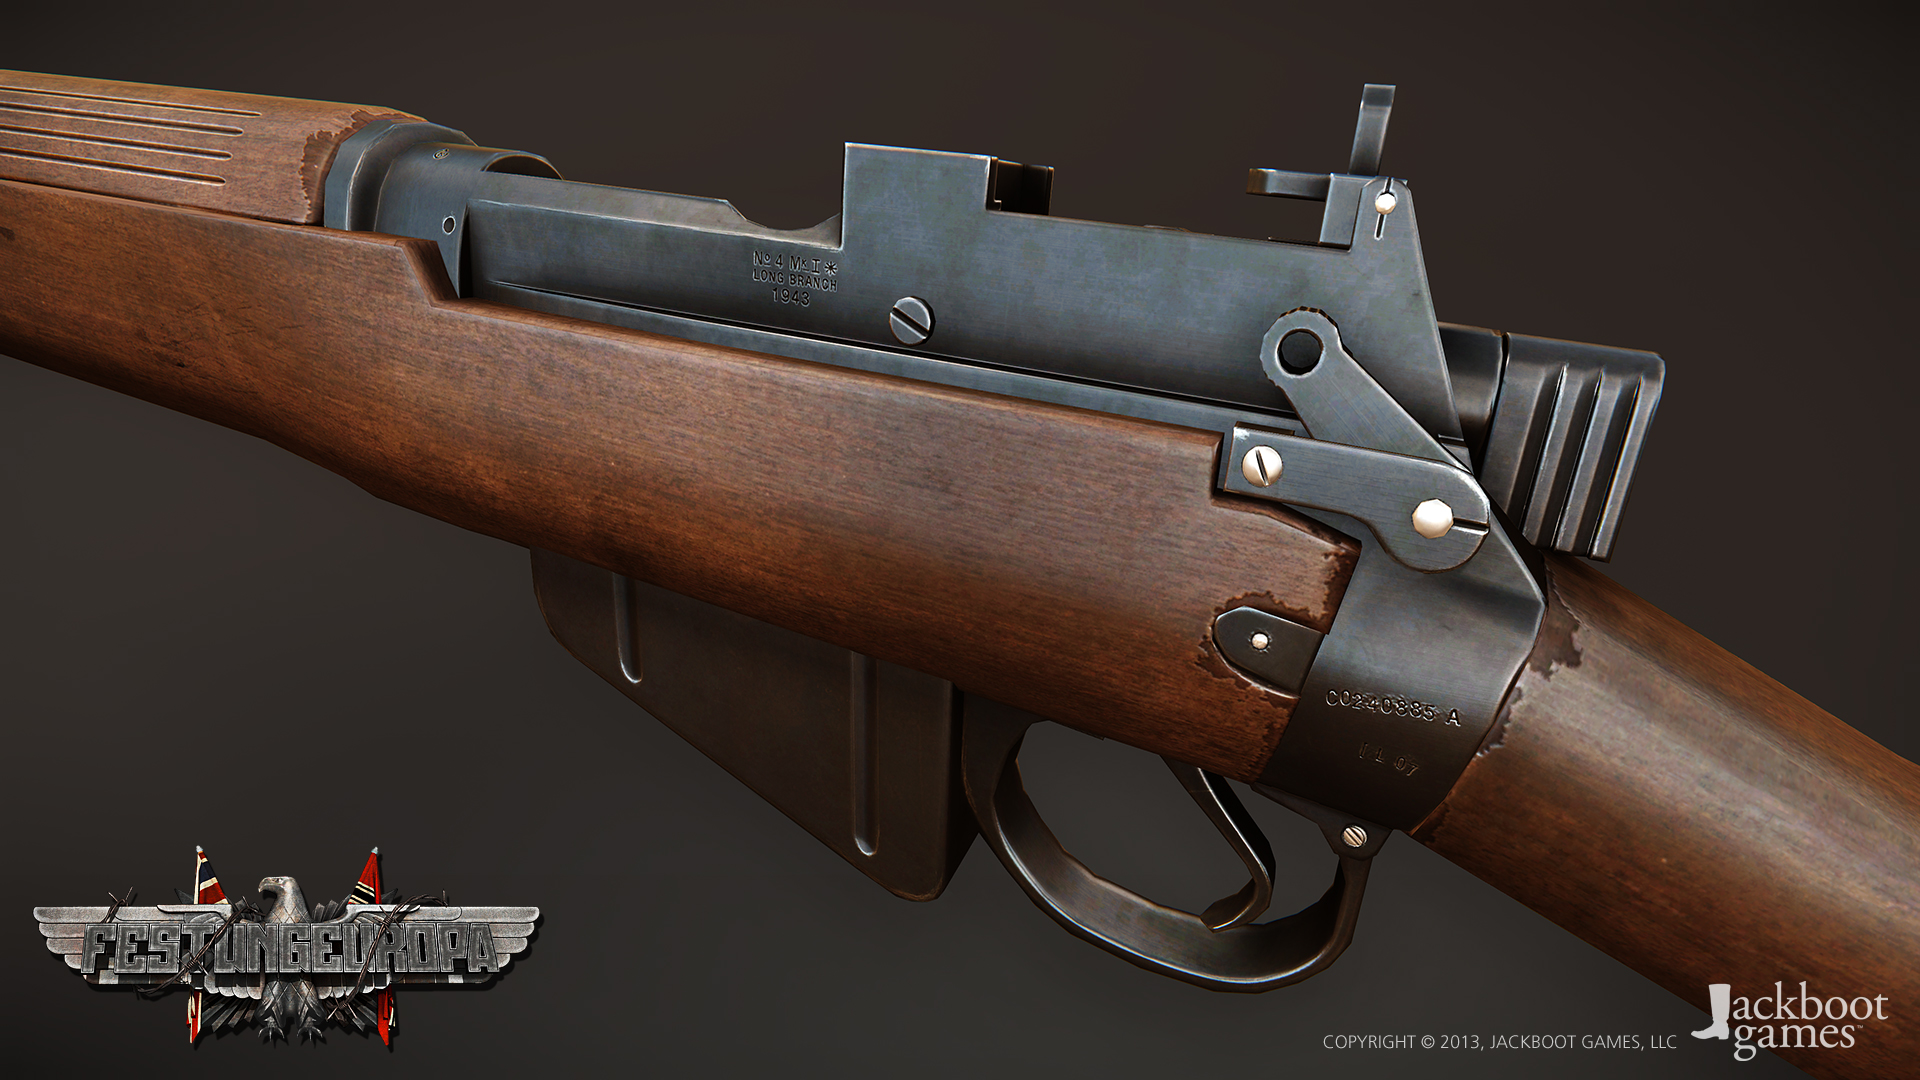
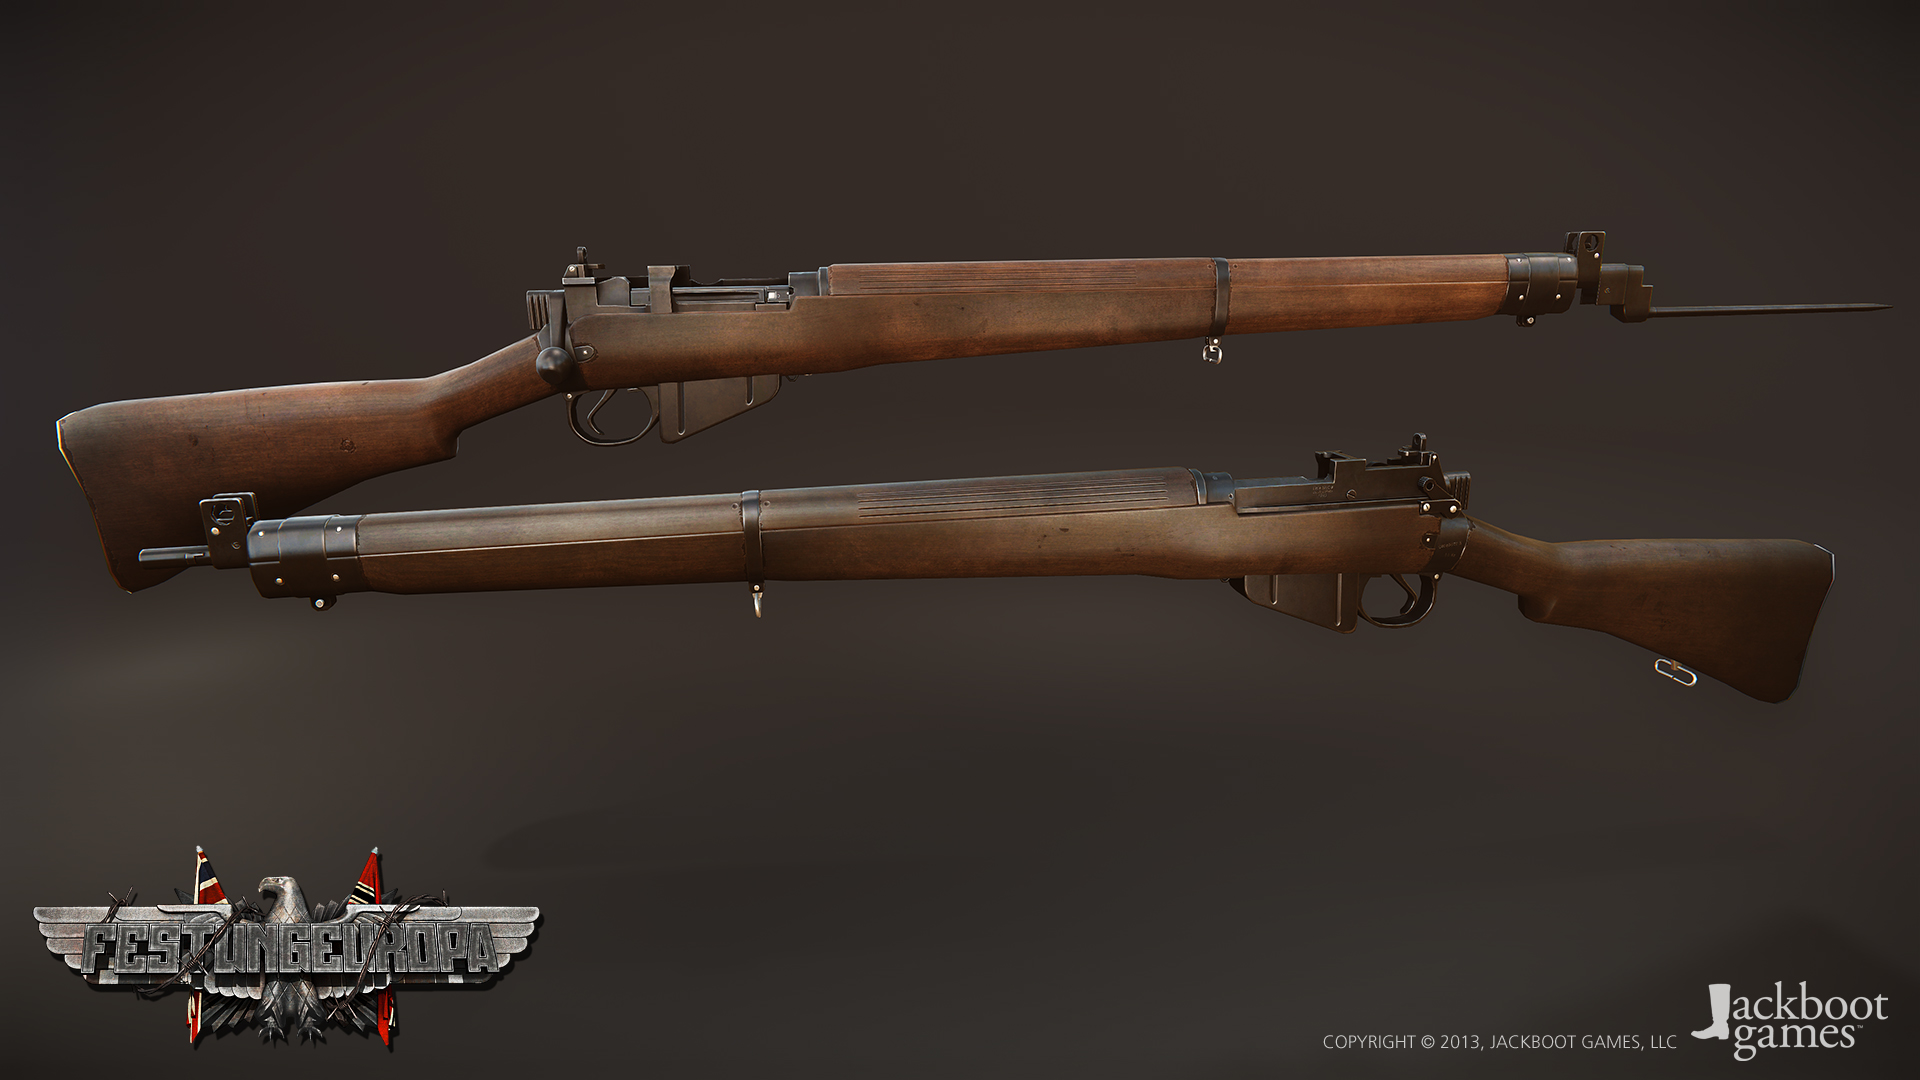
Texturing is still my favourite part of the process, mainly because it was the department I originally started doing my game development in 10 years ago. I started by using nDo2 to edit my normal maps and add different markings like production numbers and the “broad arrow”, the ownership and acceptance mark of the Commonwealth. (In this case it was a broad arrow with a C to indicate the Canadian origin of this particular rifle). My texturing workflow then progresses by applying the basic materials to diffuse and specular map, to differentiate between the different materials on a rifle (for example a dark metal for the main receiver, barrel and so on, a lighter type for screws and different small parts and wood for the stock. In this particular case I also made the buttplate a different material, because the Enfield uses a brass, and in some cases zinc, buttplate). By differentiating small parts with giving it a slightly different material definition the overall texture gains a lot, because it makes it look less dull.After that I start to refine the texture, apply some wear to the edges and other parts where it most likely could occur on the real weapon. Through that whole process I always make sure to keep cross-checking with the rifle inside CRYENGINE to make sure all I do also works and looks right inside the engine as well, because a lot can change when exporting it. When I’m happy with the materials I refine them by finishing the gloss map which helps setting the different materials apart even more and then finalize the material files inside the CRYENGINE editor.
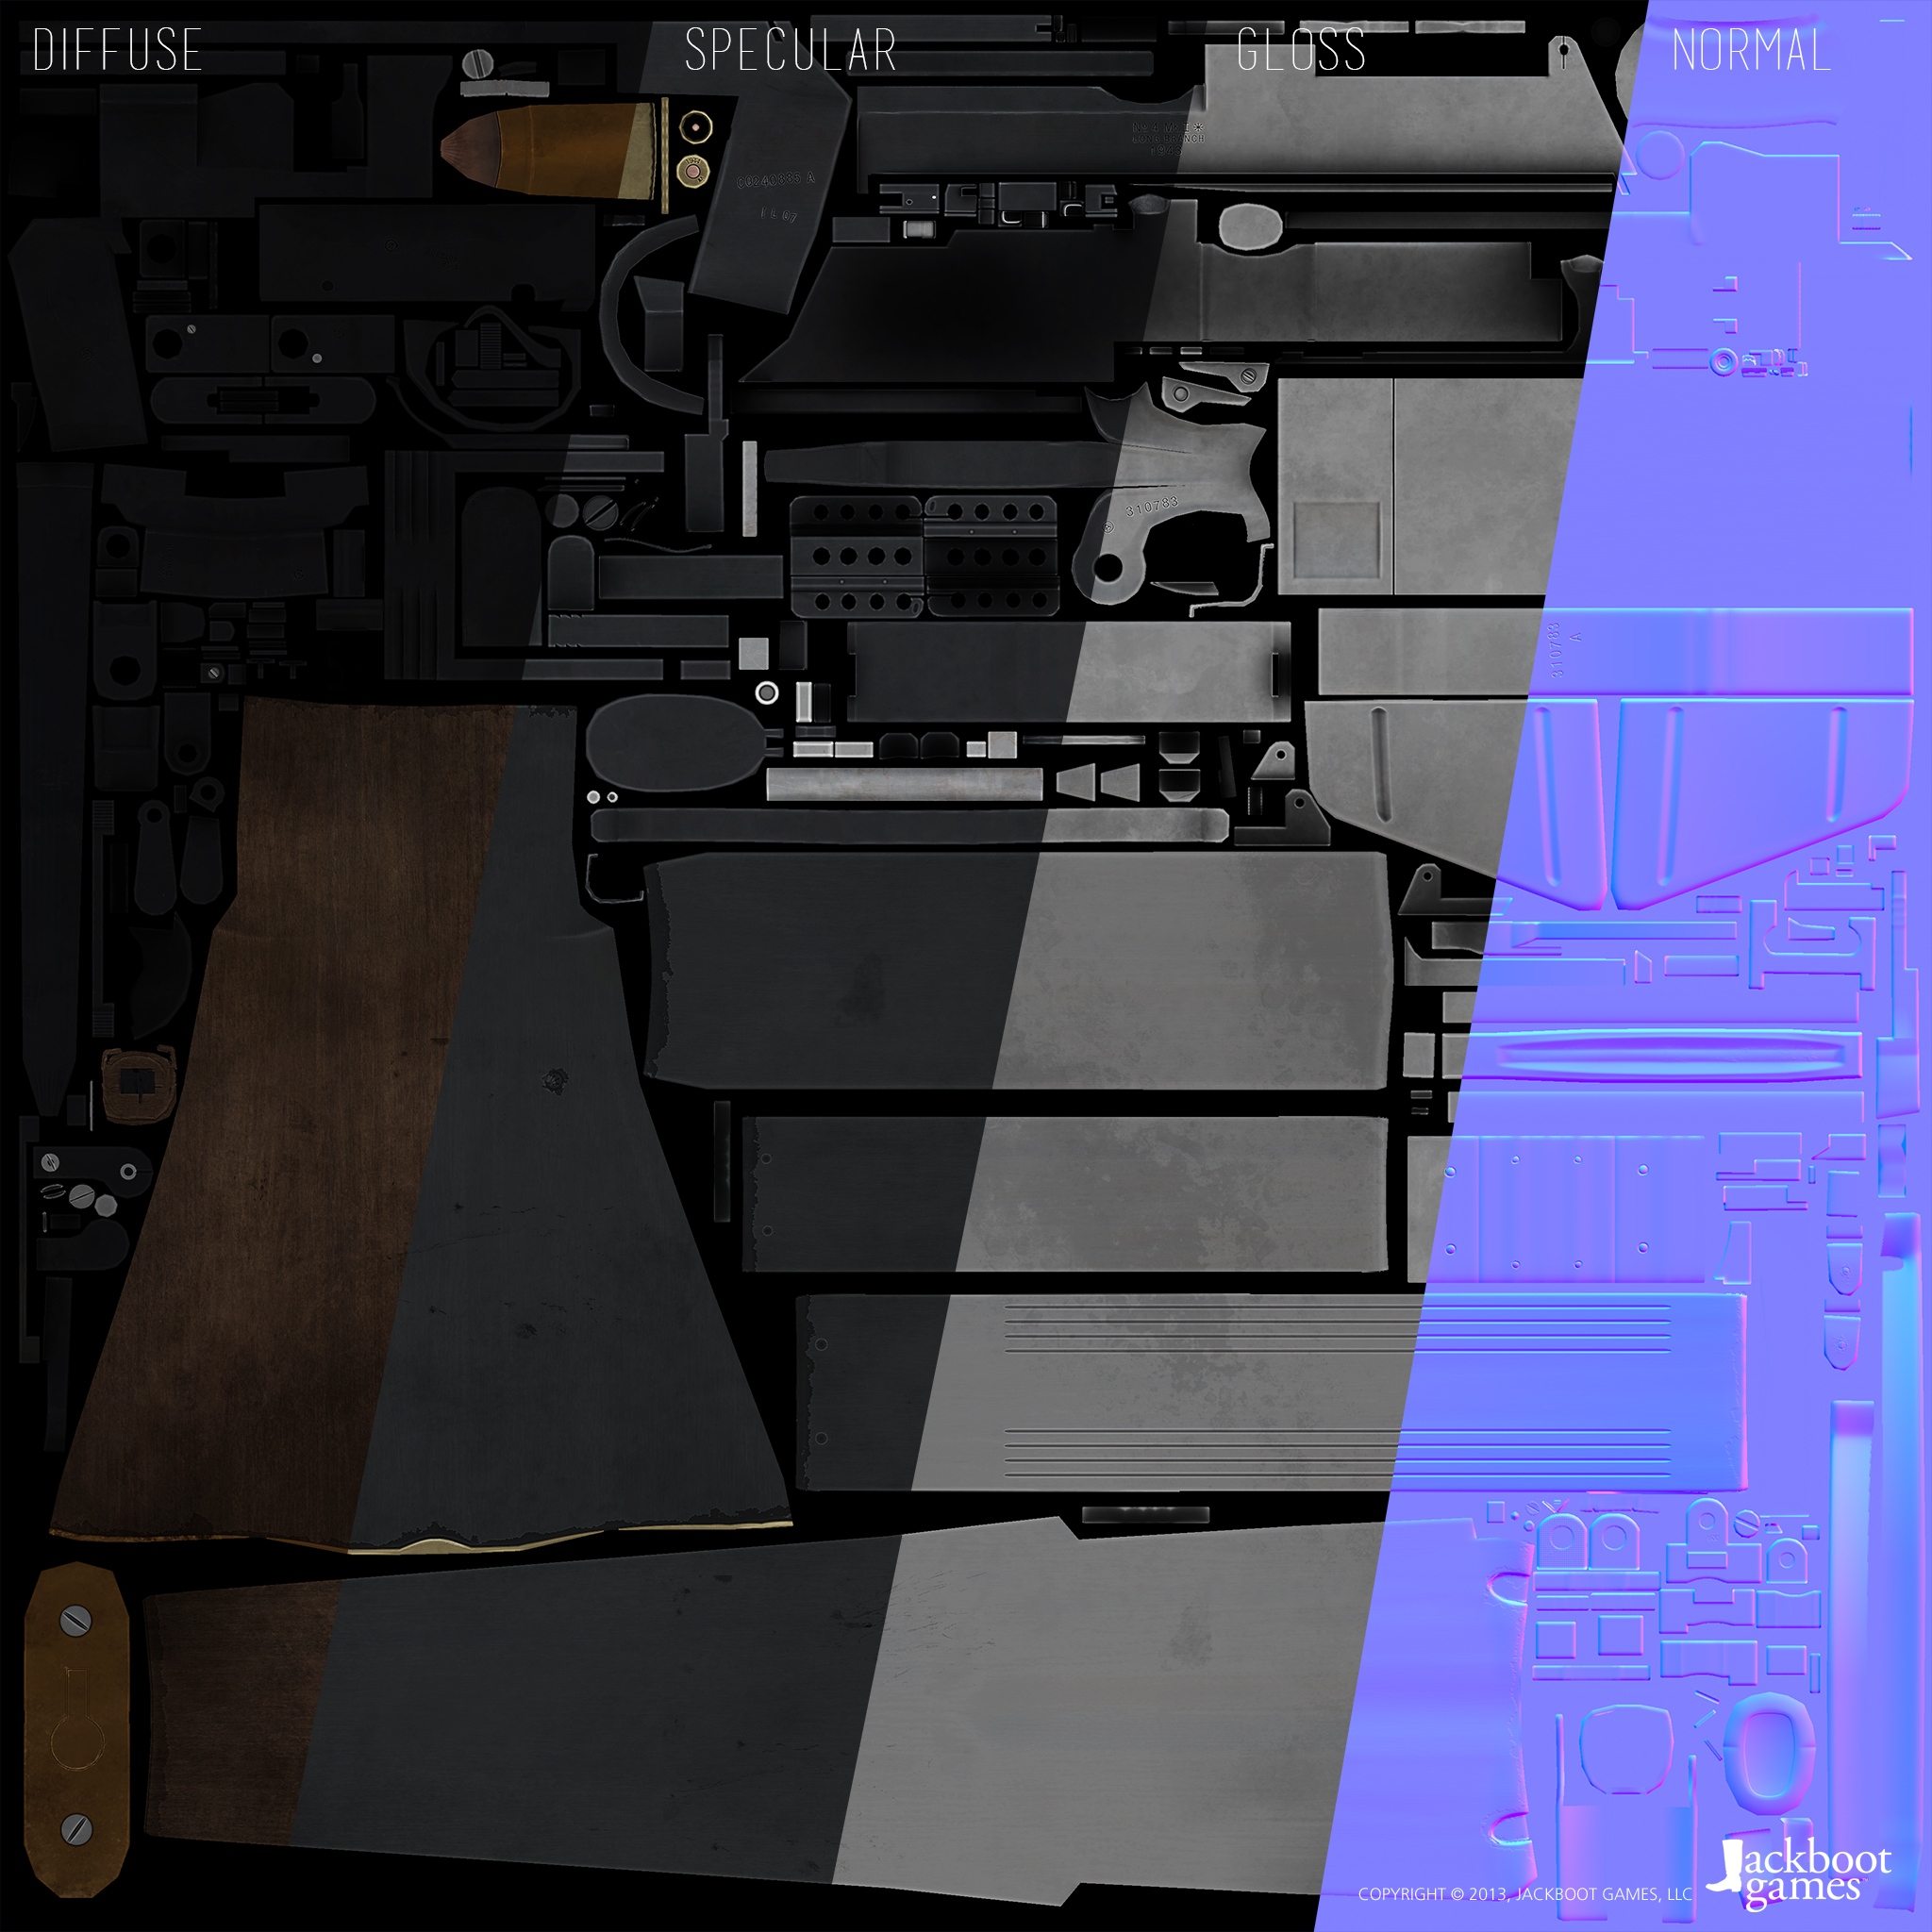
The Lee-Enfield’s Texture Maps.
Wear & Tear
One kind of criticism that I have encountered several times now is that weapons do not look realistic if there isn’t a lot of wear and tear on them. For me it is a misconception that weapons in historic video games have to look like they are centuries old. Many games strive for making their weaponry look very used, which may originate from looking at the reference images of most weaponry of the time. In these images the weapons most of the times are up to 60-70 years old in the case of World War 2, have been used a lot over the time, were lying around in garages or boxes for quite some time, changed hands a lot and have been cleaned a million times with various different methods.
While texturing the firearms for Festung Europa I try to keep in our minds that most of these weapons that we are producing are about 3-4 years old in our timeframe, or may even just have been delivered to the troops some weeks ago. This doesn’t mean that they should look like they’re just out of the box, of course a weapon that sees action gets dirty, of course it accumulates edge wear, but it does not look like it has been on the battlefield for nearly 60 years. Another thing is that a soldier keeps his weapon clean all the time. It’s his life saver and this means a weapon model should never be rusty or look like it has been worked on with a hammer or sandpaper the last few years. So I try to keep my basic weapon textures rather clean, but that doesn’t mean they will stay like this through the whole battle. With the possibility of adding dirt masks in CRYENGINE we can change the weapons appearance throughout a match.
Colourful
Dirtmaps are only one of many cool features of CRYENGINE shaders. With the technique of diffuse tinting we can make sure we have quite a bit of different colouring in our range of weapons, so they don’t look all the same. That’s it, I’m done – thank you for reading this far!
This concludes our Final Push & Dev Diary Update!
Remember: We read everything you guys send our way and we take your criticism serious!Help us squash historical inconsistency as early as possible!
Please help us spread the word – by Following, Liking, Retweeting, Sharing our messages and Talking about Festung Europa on the forum!
We are recruiting – take a look at our Jobs Section and contact us!
www.jackbootgames.com/jobs
Discuss this on our forums …


Great model! Did you bake as one or did you explode the mesh to get a clean bake? Why do you use both and not only XNormal? I sometimes do that too because I get clean results on one part of the mesh in one software and on another in the next. So I can mask and combine them later. Same for you?
The mesh was exploded for the bake, yes. I use both xNormal and 3dsmax to bake as I found out that both have their own strenghts in different places, like you said. That's why I bake it in both and pick out the parts of each bake that work on the end product.