Hello everybody,
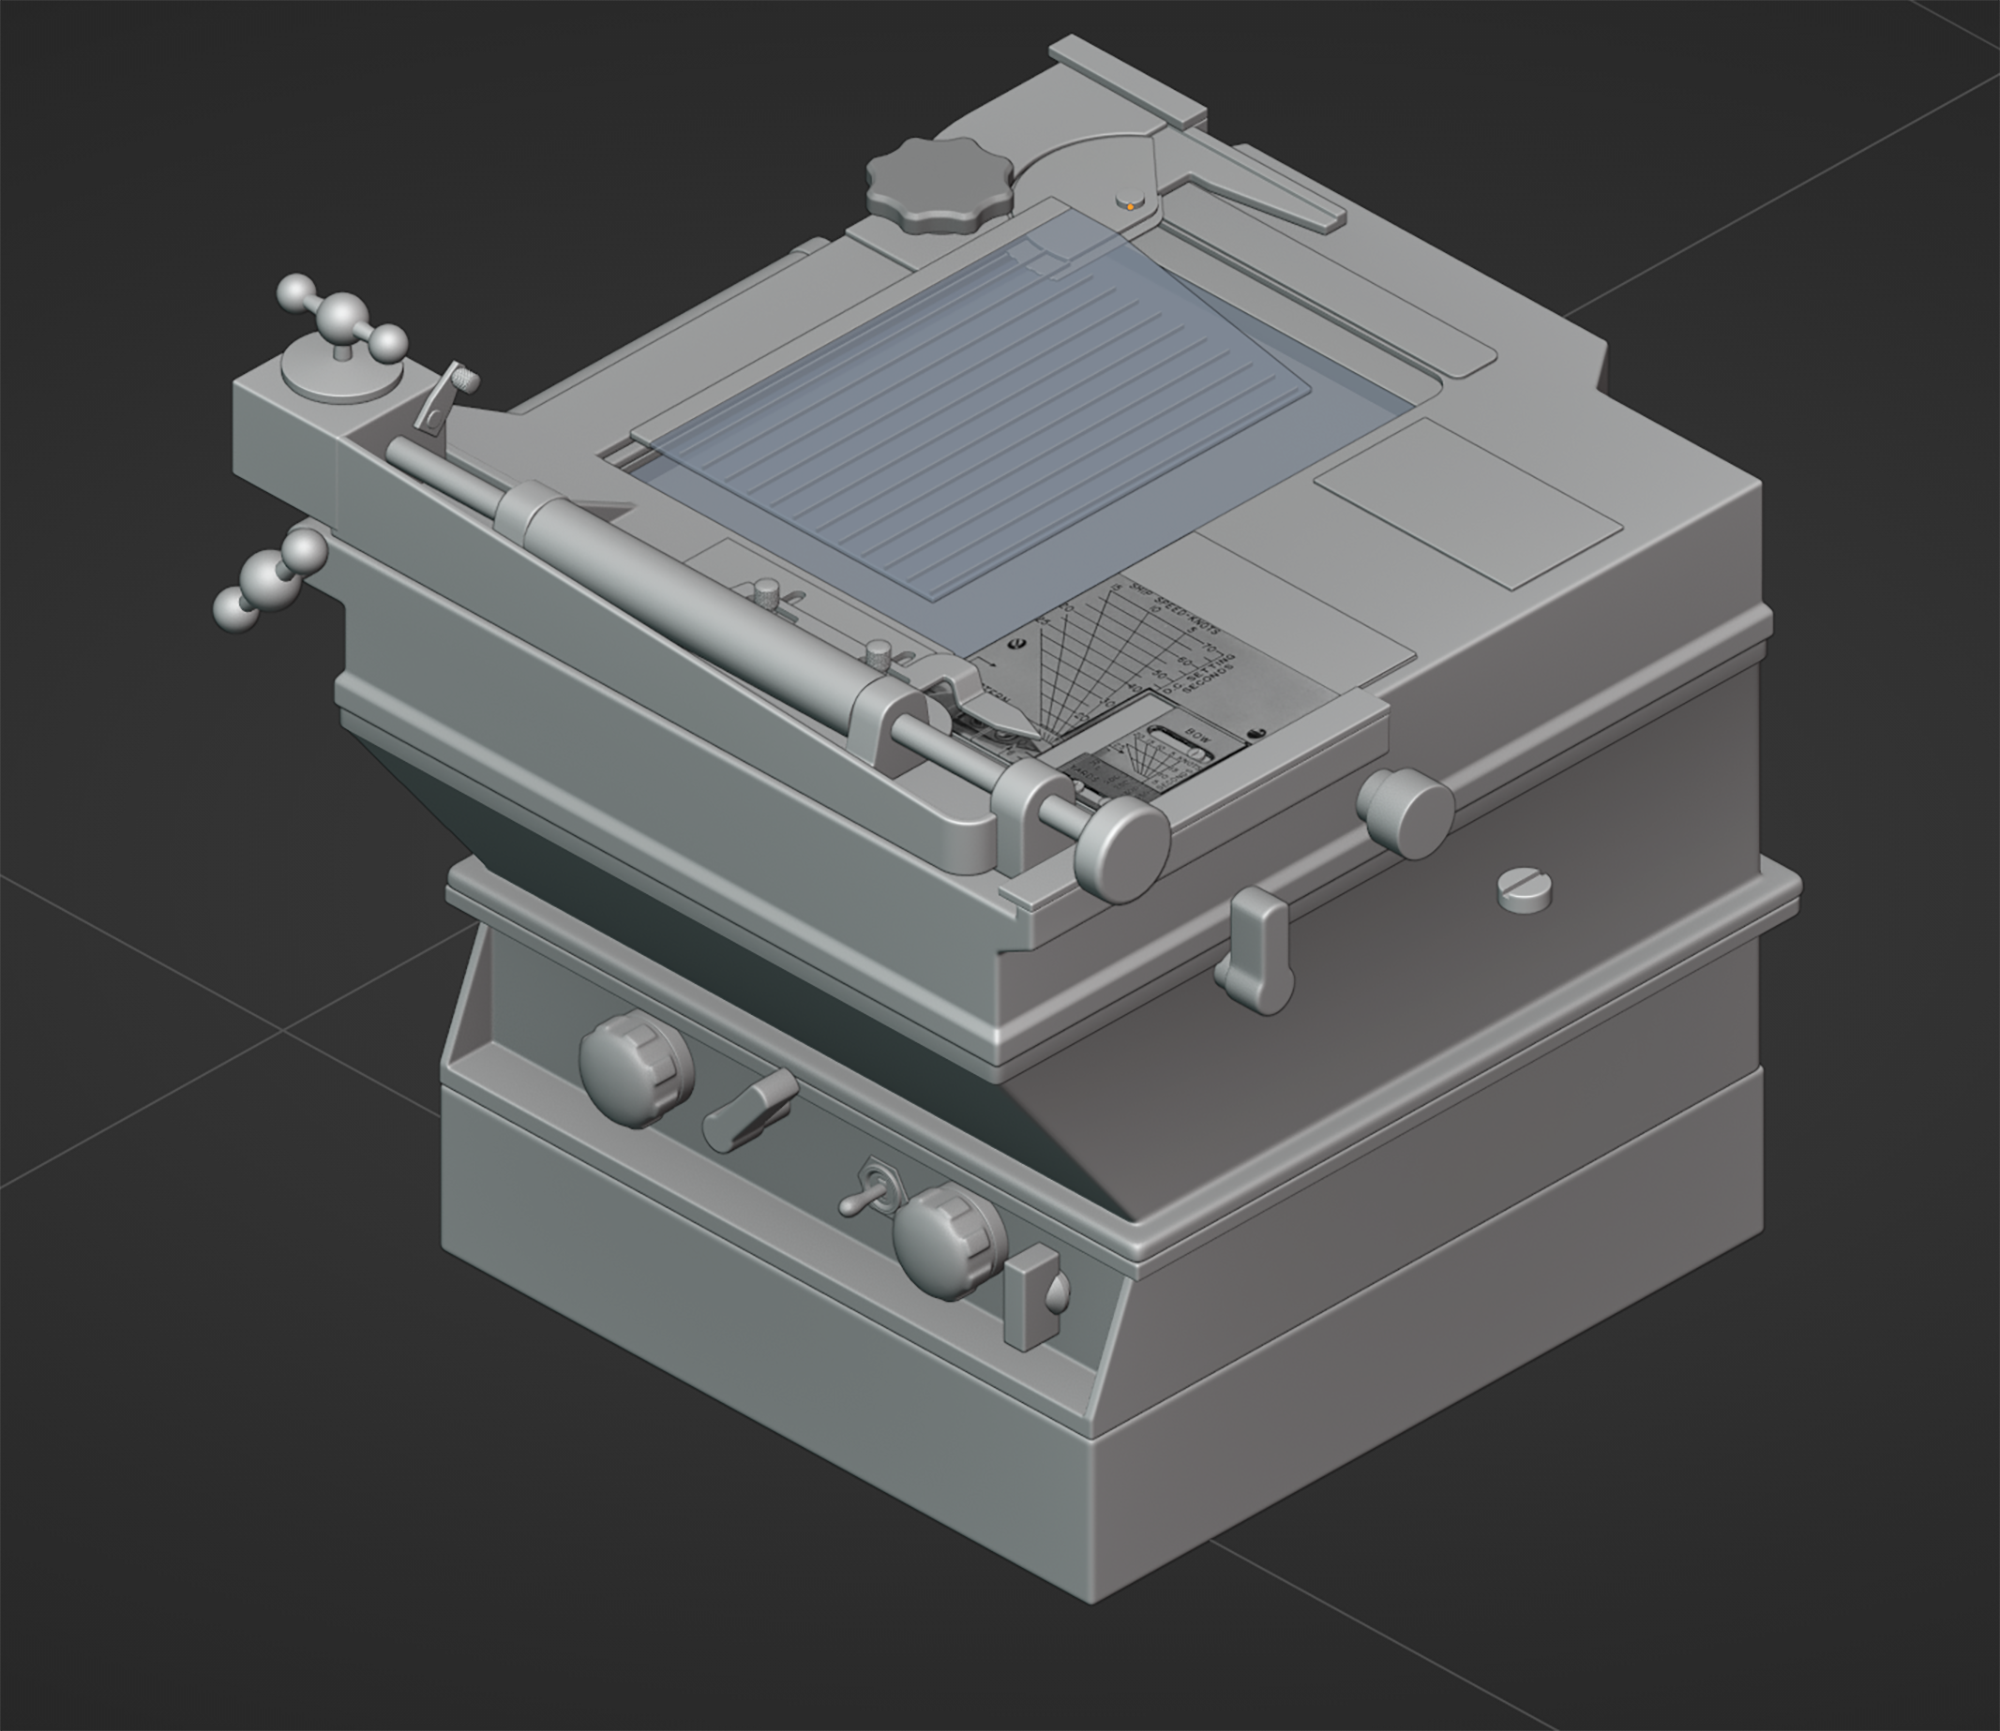
We are beginning our work on the Sonar Room, which means that I can once again share a few (hopefully interesting) facts about the equipment contained therein. I guess it doesn’t come as a surprise that there is a sonar, but perhaps a little less obvious is the other station you will find there, namely the Tactical Range Recorder. This hugely important device was introduced in 1942 and was of great help to destroyer crews in making accurate attacks against submerged U-boats. And, since I shared a few different sonar details in the previous devlog, then, for a change, I guess I could say a word or two about this long-forgotten piece of technology. If you ask me, this is some real WW2 archaeology right here 😉

The Tactical Range Recorder measured the so-called ‘range rate’, i.e. the speed at which the distance between an anti-submarine ship and its submerged target would close during an attack approach. It had a mechanism that could translate the sonar’s echo into electric impulses that energized a stylus which, in turn, marked the current distance on a special kind of paper that was rolling through the device. The result was a line graph which, when interpreted using different settings of the device, would indicate the best moment to fire a depth charge barrage.

The paper was rolling downwards, while the stylus was moving from its starting left-side position to the right, marking distance to target on a horizontal scale and then returning to its initial position. As the destroyer was approaching the target, the diagram would eventually shape into a straight diagonal line - the heavier it was leaning left, the faster the distance was closing. A key element of the operator’s job was to properly rotate the transparent plexiglass piece (called the ‘plotter bar extension’) with parallel lines marked on it, so that the angle of those lines (including the all-important ‘firing line’) would match the angle of the line graph. If this alignment was correct, the perfect time to launch the barrage would be signalled by the graph crossing the firing line.

There were, of course, tons of other adjustments to make on the TRR, but we are not going to burden you with all of those (simply because there’s quite a lot of them!). What you will need to do, however, is to set the depth of the depth charge explosion and adjust the angle of the plotter bar extension, so that the lines marked on it align parallelly with the range-rate graph. It may sound simple, but with the rest of the operation on your mind, it will be more than enough to wrap your head around.
In short, all those minute settings influenced the arrangement of the plexi’s hinge against the “window” through which the paper was moving. The “zero-zero” point was in the top left corner of the window, while different scales allowed the operator to adjust the position of hinge, thus correcting time (vertically) or distance (horizontally). This was done based on variables such as the expected depth of the U-boat, own ship’s speed, or even the distance between the sonar transceiver and the ramps which the depth charges were dropping from. Especially for a new player, that would be immensely challenging, so the game won’t require you to do it all by hand (although, at some point, we may opt for a ‘hardcore’ mode... Who knows, right?).

Therefore, as always, we will be focusing on the very essence of the operator’s work. Keeping track of the graph for a while will allow you to align the plotter bar extension correctly, and once the graph goes beyond the firing line, it is time to fire! If you execute the above instructions correctly, then together with proper planning, plotting, and captaining, your chances of scoring a hit will rise exponentially! And, above all, with its fluorescent markings on the paper, the scales around the ‘window’, and all the moving elements, the TRR is simply a cool piece of gear! Perhaps our version doesn’t look like much yet, but once we manage to get all the textures and lighting into place, it will look like a proper sci-fi targeting device straight out of the forties.
And, come to think of it, each time I try to explain how it works to a new person, I always use the analogy of the X-wing targeting computer that Luke Skywalker used in the famous Death Star trench run.
Funny as it may seem, this explanation always works like a charm 😉


Oh, oh, I learned something… ;) Thanks for sharing!
Very cool. It's nice to see historical research applied to a game :)