Here are some tips on how to edit your map.
- Click
 often to save your progress. Or you can use shift+S as a shortcut key.
 - Click
 regularly to check your map for common issues, such as buildings which don't have any doors.
 - Click
 to stop editing your map, and return to your map list. If you're not finished, you can come back and finish your map later.
 - When the move tool
 is selected, you can drag the map to move it around. You can also use the W, A, S or D keys or the arrow keys to move the map around, even when a different tool is selected.
 - If you make a mistake, you can use the undo button
 (or shift+Z) to undo up to the last 20 changes.
 - If you undo too much, you can use the redo button
 (or shift+Y) to bring back your changes.
When you first create a map, it defaults to being fully covered by the road / ground / grass colour (grey).
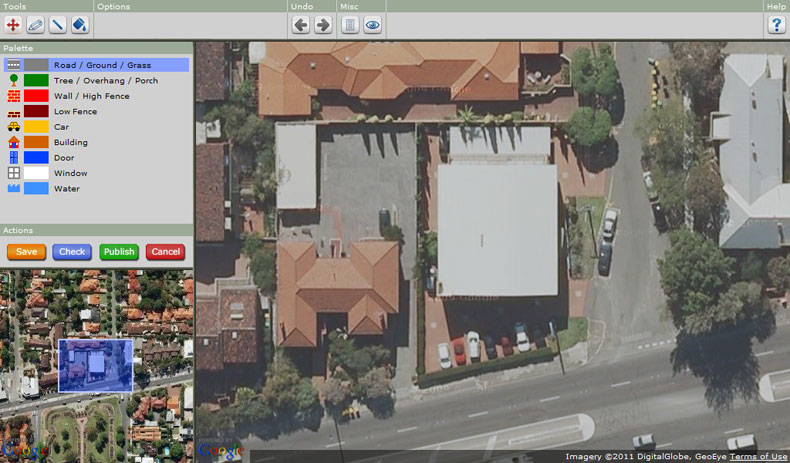
It's usually easiest to start by drawing in the fences and the walls of the buildings.
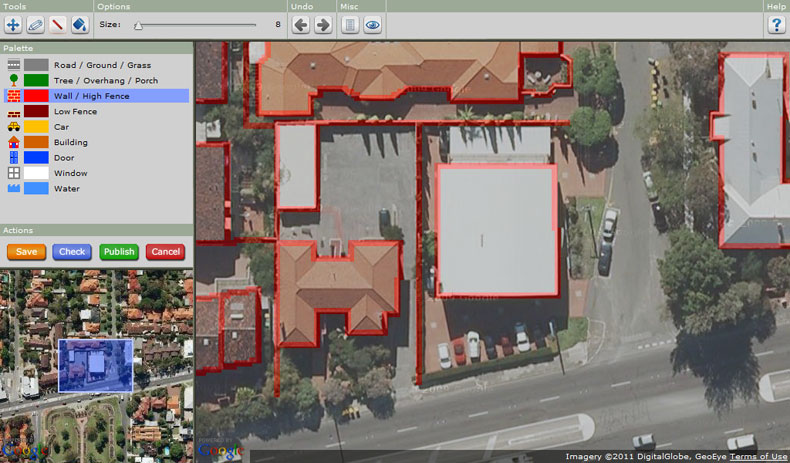
- Click the Wall / High Fence colour (red) in the palette on the left.
- For straight walls and fences select the line tool
 in the toolbar.
 - Choose a line width (size) under the Options. The recommended size for walls and fences is 8 pixels.
- Draw lines on the map by clicking and dragging.
- For curved fences or walls, use the draw tool
 instead.
Next, fill in the buildings.
- Click the Building colour (brown) in the palette.
- Select the fill tool
 in the toolbar.
 - Click inside each building to fill it.

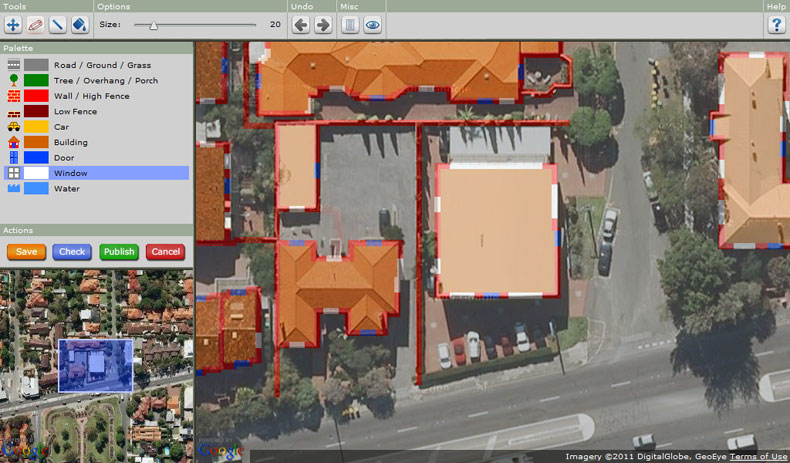
Now to add some doors and windows.
The door and window colours are designed so that they can only be drawn over walls, to make them easier to use.
- Click the Door colour (dark blue) in the palette.
- Select the draw tool in the toolbar.
- Choose a larger brush size under the Options, such as 20 pixels.
- Draw over the sections of wall which you'd like to turn into doors.
- Click the Window colour (white) in the palette.
- Adjust the brush size if you want larger or smaller windows.
- Draw over the sections of wall which you'd like to turn into windows.
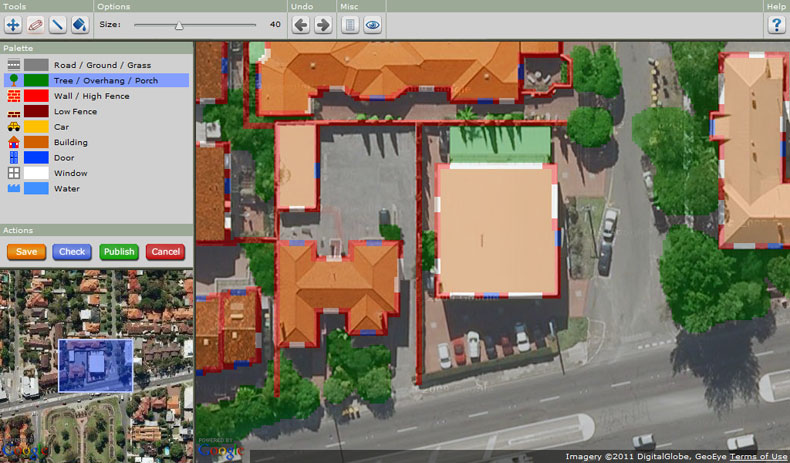
The next step is to add some trees.
- Click the Tree / Overhang / Porch colour (green) in the palette.
- Select the draw tool in the toolbar.
- Choose a larger brush size under the Options, which is close to the size of the trees you want to draw, such as 20 to 40 pixels.
- Draw in the trees, as well as any other areas covered by something which people can walk under, like porches.

- The tree colour can only be drawn over Road / Ground / Grass (grey). This makes it easier to draw trees next to buildings and walls.

- In some situations, it may be easier to use a small brush size (eg 4 pixels) to draw an outline, and then fill it with the fill tool .

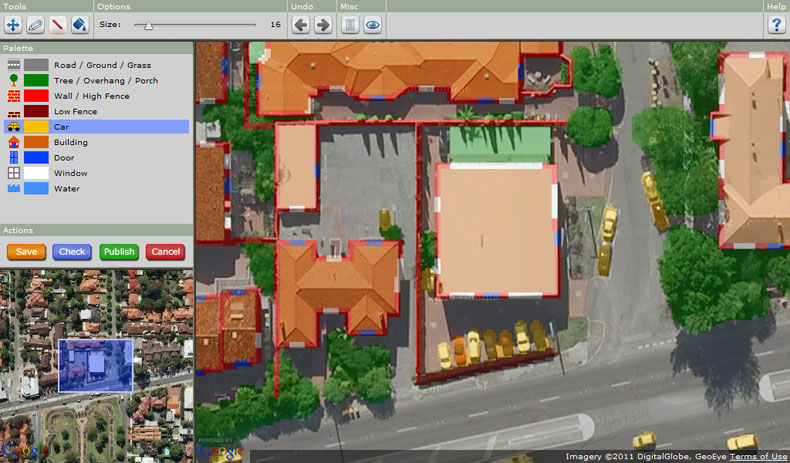
You can now finish up your map by adding remaining details such as low fences, cars and water.
- Draw low fences using a similar technique to walls and high fences - with the line tool , and a line width of 8 pixels (or higher if required).
- For cars, it is often easiest to draw short lines along the length of the car with the line tool , with a brush width of around 16 to 20 pixels.
- Where cars are parked together such as in a parking lot, it is often easier to join them together in a clump, rather than ensure that there is sufficient gap between them for people to walk through. The button will tell you if you've left unreachable areas between cars.
- For water, use the draw tool to draw the outline of the water, and then the fill tool to fill the region.
The following tips will help you prepare your map for publishing:
- If you need to redo an area of the map, you can use the Road / Ground / Grass colour (grey) in the palette, with the draw tool and a large brush size to 'erase' what has been drawn. Then draw in the required details.
- Use the title and description button
 to give your map an optional title and description, which is shown on your map's game page.
 - Use the visibility button
 to change the visibility of the colours on the map, by cycling through different opacity options. This can be useful when it is difficult to make out the aerial photography through the map colours.
Once your map is finished, click ![]() to publish and play your map!
to publish and play your map!
If you discover an error in your map later, you can edit the map at any time and then re-publish it.
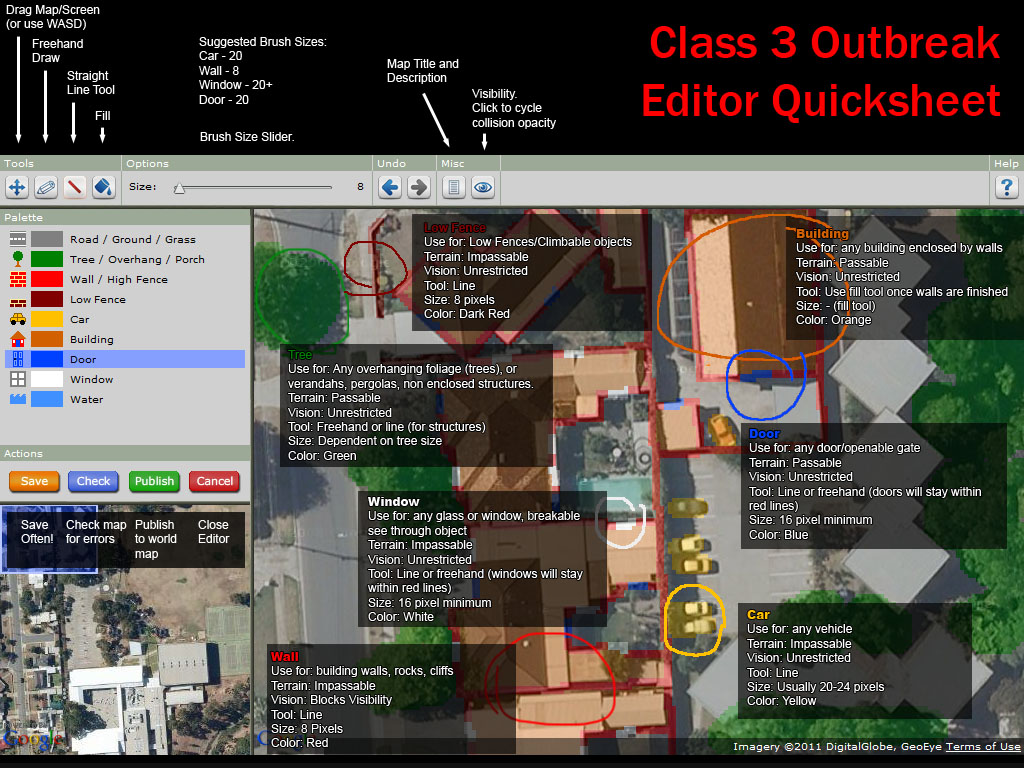
The following quick reference sheet covers all of the major details of the editor, in a single image for easy reference (click to enlarge).