My Solid Tutorial for Cryengine2 is also posted on the CryWiki site:
Crydev.net
UPDATE 5-7-2011 Solid Tool Tutorial 2.0
Solid Tutorial 2.0 (for CryENGINE 2)
Content of tutorial:
- 1 Solid Tutorial
- 1.1 Basics About Solids
- 1.2 Texturing Your Solid
- 1.3 Adding Details and Adjusting The Solid
- 1.3.1 Option One
- 1.3.2 Option Two
- 1.3.3 Option Three
- 1.4 Adding "Wallpaper" Details
- 1.5 Fixing Transparency Problems
- 1.6 Creating a "Tight Fit"
- 1.7 Rotating and Copying Multiple Solids
- 1.8 Creating a Simple Accessible Building with Solids
- 1.9 Creating Breakable Glass From Solids
- 1.10 Creating Pillars
- 1.11 Clipping Tool (by Fubz)
- 1.12 UV Mapping Tool
- 1.12.1 Align a Texture
- 1.12.2 Rotating a texture
- 1.12.3 Scaling Textures
- 1.12.4 Additional Information
- 1.13 Liquids
- 1.13.1 Creating the Water
- 1.13.2 Creating the Water Material
- 1.13.3 Change the Water color (dirty look of the water)
- 1.13.4 Examples
- 1.14 Multi Texturing Solids
- 1.15 Occluder Area
- 1.16 How to fix Orange Balls while exporting to Engine
- 1.17 Final Words
1 Solid Tutorial
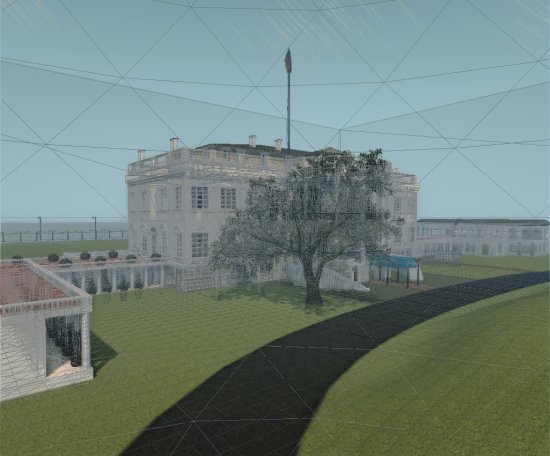
The White House map (from 2008) was made entirely with the Solid Tool
Welcome to my Solid tutorial that will take you through everything related to the Solid Tool! This guide will take you through everything from basic construction of solids right through to complex manipulation of the stucture and materials of a solid. At the end of the tutorial, you will have learned everything you need and more to create the building on the right pictured below.

1.1 Basics About Solids
As you can see I’m working on a building on the right side of this typical dirty Industry street. First make sure the “Follow Terrain” button is ON (located at the top bar).
![]()
Zoom out and select the Solid Tool (highlighted in yellow in the image below). Make sure you have selected a "BOX"with 4 sides under Create Brush Parameters. Now select a corner of your street and click and hold the left mouse button.

Drag your mouse across the screen to make a Box. You can always adjust the form later on so don't worry if it doesn't fit straight away.

Now once you have a nice shape for the box bottom. Release your left mouse button and push your box upwards with your mouse.

Once you’re satisfied with the height of the box, click your left mouse button again. Now, for more detail select " Cast Shadows " until it says "True". I’m also changing the viewing distance to "150" for my map (255 is maximum, and object with 255 will be seen anywhere on the map if the view isn't blocked by another object or terrain). You now have a completed box.

1.2 Texturing Your Solid
Now that we have a naked grey box we better add some texture to it. Select your solid and then select the material editor as shown in the image below.

A new screen will open. Select "Add New Item" , as shown in the image below.

Another screen will open. Here you need to type in a temporary name for the texture, then save it. I usually call mine "test" as the name doesn't stick when you save and load the map. But I will tell you how to fix that later on. Once you saved it this screen will appear.

Now scroll down until you see "Diffuse", and click to the right of it to open it. Once you open it, the screen below will appear. Now my screen is filled with custom textures but you can also choose the standard textures located in "Game/Textures/" (The custom texture I selected is made by T.Ahlen with his permission). Once you selected your texture for the building press "Open".

Now assign this texture to your solid (make sure you have the solid selected befire you do this). Open up the Diffuse and Tiling buttons as shown in the image below:

Notice that custom textures have to be a power of two. Some suggested resolutions are: 128x128, 256 x 256, 512 x 512, 1024 x 1024 and so on. Custom textures need to be in .DDS format for use in the Material Editor in Sandbox2. A free program that can create .DDS format is Paint.net; make sure to save textures in .DDS DTX1 format for “normal” textures and for decals/glass in DTX5 format. Some good places to look for textures are: CGTextures, Texture Forrest, TextureLand or even my own textures. Some texture sites require that you ask permission first, so please read before usage. You’re free to use my textures of course as long as you credit me. As you can see in the image below, the bricks are a bit small. So next I’m teaching how to tile a texture.

Go back to your material editor and change the following.
- TileU = The horizontal scaling of the texture.
- TileV = The Vertical scaling of the texture.
- OffsetU = with this you can scroll the texture sideways to align it.
- OffsetV = with this you can scroll the texture up and down to align it.

We need to change 1 more thing before we can save (rename) the texture. Scroll up again until you see the words: "Surface Type". Click on it and the following screen will drop down.

Since I’m building a brick building I selected : Mat_concrete. Material concrete has a nice effect when you it with bullets, but feel free to play around with the surface type to create the effect that you want. Once you're satisfied, we need to save the texture. We can do this by renaming "test" to the final name (see this image]). Select "test" and right click or press F2 and give it a different (final) name. I named my texture brickdirty. Its also a good idea to name it the same as you named your texture. This makes looking up textures and its .mtl file that goes with it easier. Now Save your map and reload it again and you will see the texture is still there.
1.3 Adding Details and Adjusting The Solid
For this part I’m adding details to my dull looking building. There are many ways to do this, but I’m telling you my way. Create a small box and select "Editing mode".

Select "Face" and then select the Top of the solid. It will show up with a red color. If you don’t see the red face then you have to hit Shift+Space to activate the helpers. Personally I turn it off so I can see the texture and transparency problems. Once you have selected the top face, press "Split". Now a little helper gizmo will appear. You need to drag it up a bit to make the top of the solid more angular.

If you can’t succeed in pulling the Z axis up then you have 3 other options.
1.3.1 Option One
Select "Vertex" as a selection type in editing mode. Then select the little dot that connects all the faces in the middle.

Pull up the Z axis with the mouse button by dragging it along the Z Axis.
1.3.2 Option Two
Change the Z figure at the bottom of the perspective with the helper gizmo selected in the middle of the face.
1.3.3 Option Three
Use the up and down arrows to modify the Z value of the helper gizmo. The number used for both options two and three is visible in the image below.
![]()
You will now see a square based pyramid on top of your box. This is useful for roofs, churches and other similar architecture. For my detail support beam I’m deleting a face. Select the face at the back and press "delete".

Select the word "Solid" again and you will see the "face" will disappear and the solid will show up as below:.

Select the material editor, select the brick texture and press the assign texture button.

Now I find the solid a bit high so I’m going to scale it down a bit. Select the solid and select the scaling button on the toolbar above. Press the Yellow lock off (see image below), and you will see that each side X, Y, Z has a different color and shows which direction you are scaling in. You can also use the “Editing Mode” and change the size by selecting a “face” and drag it along its axis or by changing the number down below. See the official Crytek Solid Video here on Crymod for more details on Editing mode. For my solid I’m changing the "Z" size to 0.5 (which scales down the height). Once you're done adjusting the scale press "Reset XForm" to update the texture and the collision size (collision means that you don't walk straight through the solid).
Ok now I’m going to move this solid to the final position. Select the Solid, and select the Move button on the toolbar above. You can either drag it with the mouse or use the X,Y,Z positions (Z being the height).

Now select the Solid again and copy it several times and move them along the side of the building (Ctrl + C is copy). While your dragging the copy you can left click to paste it. Don't worry if it isn't on the right location, you can adjust that with the move button. Make sure that after you have pasted the beams, you select Cast shadows on and change the viewing distance ratio to the setting that you want. Support beams add more details to your building but more importantly it improves the gaming experience. It gives players that gets caught in the streets great cover/hiding spot to ambush soldiers/tanks and such. Another tip for improving street battles is not to glue 2 buildings together. Leave a small distance between them. Test it in game if you can walk through it. It can be just wide enough to pass a player and small enough to not allow vehicles to pass. Players alone without a vehicle gain a safe escape route.
1.4 Adding "Wallpaper" Details
Since big solids aren't detailed I thought of a system to add details like doors and windows. Create a new solid and scale down the "Y' (or X depends on your direction) to 0.05. Hit "Reset XForm" and scale it again to 0.05. Reset XForm again after the second downscaling. What this does it create an extremely thin solid which you can move on top of the big solid building to add doors, windows, signs, and such. You can also do this with placing decals, but that depends on what you prefer and the circumstance. For example the disadvantage of decals is that scaling in just 1 direction is not possible. Tiling and scaling the textures is very important at this moment. I suggest you read Chapter 11 of this tutorial to learn more about Uvmapping a solid. For saving performance you do NOT have to select cast shadows on true. The reason is because its so thin it doesn't need to cast shadow the big solid will do that for you. Also make sure your "View distance radio" is set to at least 150. Reason. Very thin "wallpaper" object disappear faster then the big solid objects, leaving you with the dull big solid without the details when you're just 100 meters away.

I added several details and now my industrial building is finished on one side.

Take a look at the beams that connect the building which the pipe runs through.

Now open your paint.net. Find a beam texture somewhere on the net, and use the eraser tool to delete the areas between the metal. Now save it as .DDS DTX5. Make a long solid move it between the buildings and open material editor. Add a new material as learned in the tutorial above. Set Opacity to 99. Tile/scale the texture till its seamless on all 4 sides. You will see that the erased parts of your texture disappear and you can see through it. For more detail I added a pipe from the harbour section of the geom entity section that fits inside and I added a steam particle on one of the pipes to make it appear that its leaking.
1.5 Fixing Transparency Problems
To know what this error is, view the next screenshot and check the strange corner (the corner with the pink line around it on the image below).

Its really annoying when making solids. It doesn't always appear , but when it does its does it randomly for no reason at all. So how to fix this. First of all I will need to make clear that this method does work most of the times. But its not 100% proof. Select the solid with the transparency problem, and select the scaling button up in the toolbar. Now very carefully scale the object with 3 digits behind the point. To something like 1.001 or 0.999.

Then reset the Xform on the solid.

If not rescale it again with 3 digits behind the point. If the problem becomes worse scale it down. For example if you scaled it to 1.001 and it became worse, you need to scale down it 2 times with 0.999 until its gone and don't forget to hit "reset XForm" every time you scale it.
1.6 Creating a "Tight Fit"
The goal of this part of the tutorial is to perfectly align solids together, creating a tight fit. I see many screenshots where solids buildings have been created with transparency glitches or black lines. Now for this tutorial I created such a black gap between 2 solids. For tutorial reasons I created it larger then it normally is.

Now select the outer wall solid and press "Editing Mode" at the rollupbar on the right.

Press the "select and move" button, select “Face” and select the inner side of the outer wall solid. The face will turn red. If it doesn't turn red you may need to turn "Hide Helpers toggle" on or off.

The selected face is alongside the X Axis as shown on the marker. Now write down the number as stated in the X axis in the console down below. In this case 882,2937. Once you wrote it down, press solid on the right.

Now select the solid that you wish to fit onto the outer wall solid and select "editing material" on the right. Select the face that will be glued onto the outer wall. In this located along the X Axis. You might have to zoom in close to select this face.

Press "Select and move" button on the top bar. Type down the exact number as stated in the image above. In this case 882,2937 then deselect the number. Once your done select Solid on the right.

Now the X axis of both solids will perfectly fight tightly together without showing a gap. Only problem is that I need to align the Y axis of both solids to make a perfect straight wall.
Now I’m going to fit the front of the house by "fitting" the 2 solids in the Y Axis. Press "Select and move" button on the top bar and write down the number as stated in the Y Axis as shown below on the console. Once your done press Solid again.

Select the outer wall solid and press "Editing mode". Select the face that is pointing outwards along the Y Axis Type in the number as you wrote down earlier of the Y Axis. Once you're done press Solid again.

As result you see the wall up close without showing a slightest sign of a crack, black line, transparency error ... just an clean outer wall and you won't notice they are made out of 2 separate solids.

1.7 Rotating and Copying Multiple Solids
When trying to rotate multiple solids at the same time, it turns into a mess.

This is a useful method of performing actions on multiple solids quickly. Make sure you reset the Xform on all the solid parts that you selected. Select all the solids you wish to group, then select Prefabs from the upper toolbar. Select "Make From selection". You can also do this with “grouping,” but I personally prefer prefab which is easier to categories in different section and easier to look up. But its up to you what you find easier to use. Now I can turn and scale it anyway I want to.

Now it doesn’t cast any shadows (and most of the times shows up like orange balls when you Export the map to the engine). So what you need to do after you rotate/place/scale the prefab is slide down the rollupbar to the bottom with the Prefab selected and hit "Extract ALL". This will extract all the solids again so you can add shadow again to each individual solid. Now make absolutely sure that you reset every Xform on each individual solid after you extracted the prefab. If you do NOT do this you end up with strange “orange balls” when you export the map to the engine. The prefab stays in the prefab tab, so from now on you can copy it anywhere to the map and rotate and scale it to your liking.

1.8 Creating a Simple Accessible Building with Solids
For this part I’m creating a small accessible bunker. What this tutorial will learn you is that you can make any kind of building/house if you practise around. The bunker that I’m making doesn’t have any windows, but in the next part I will teach you how to make breakable glass for windows. For starters I added a human model to check the scaling and height. Then I created a single long solid, since I’m building a bunker it has thick walls. So I suggest that if you want to create a accessible normal building/house that you scale the thickness of the walls down. Now by now you learned from earlier lessons that you always need to “reset Xform” every time you change something to a solid. So I’m not going to mention it again.
I added a standard texture from: textures/detail/ directory of the crysis game. Added the bumpmap texture that goes with it. And I also selected Mat_concrete as my surface type. Furthermore I changed the diffuse color to make it a bit greyer. Remember to rename the material to save it.

Now select your solid and copy it. (Ctrl+c) Place it to the right. Then copy the solid again and rotate the Z axis 90 degrees. After rotating it place it behind your other 2 solids. Now it sticks out so as you can see you need to scale down the “Y” Axis until it fits.

Now copy the third solid and place it at the front of the square. Open the Entity/ Doors and select “Door". Now I placed the door entity in the middle of the fourth solid. Click on model (as shown in screenshot below). With this you can change the appearance of the door. For this bunker I choose: objects/library/architecture/aircraftcarrier/doors/doorbig.cfg. When your more experienced you can alter the sound the door makes when opening/closing and many other options on the entity.

Now its time to scale down the fourth solid so that it fits between the right wall and the door. Make sure it doesn’t touch the door or it will have problems on opening. Copy the solid again and do the same on the left side. Last you need to fill the gap above the door, copy the last solid and de‐scaling it and move the solid above the door.

Now to add a roof create a new wide solid and scale it around to make it fit on top. Assign the concrete material on the roof and you have a bunker that you can open.

1.9 Creating Breakable Glass From Solids
First I want to credit and thank Fortran for explaining me how to make breakable glass from solids. First you need to create a single small solid. De‐scale it to 0.05 and hit reset Xform. Then De‐scale it again to 0.05 and reset Xform again.

Select the solid and open the material editor. Click add new Item, and save it as testglass (since first saving doesn’t stick you don’t give it its final name yet). Select surface type and select: mat_glass (if you want it bulletproof then select mat_glassbullet_proof). Change Opacity to around 70 till 90. Opacity 90 is for glass which is hard to look through, which might be useable for sun protected windows. Change the Diffuse and Specular color to your likings and press Assign to Material. Once your satisfied with changing the opacity and color , you have to rename the material for its final name to make it stick.

I’m moving the solid to the window and scale it inside the bars.

After copying and scaling it between the other bars 14 times I finished my window. Now I can use the lessons learned in Chapter 6 to copy the 15 separate glasses onto my other windows. As you can see it looks much better and realistic then using a single standard glass from Geom Entity section of the Hillside Cafe . Now every glass can break on its own.

1.10 Creating Pillars
Creating “round” objects with solids can be very hard to make. I use a method to mimic the round effect for pillars. Select your solid tool, and create a GIANT box with 12‐16 sides (more then 16 sides will usually not work without allot of problems). Now de‐scale your giant solid down. You may have to scale it down several times to create your size (don’t forget to reset Xform every time).

I have placed and scaled it to its final position, but most of the times you will end up with transparency problems. Refer back to the previous chapter on this to remedy this issue. With this method you can create many pillars, as shown below.
1.11 Clipping Tool (by Fubz)
Lets start with something easy... a window. Instead of creating 4 solids (Left of window, Under window, Top of window, and Right of window) we can create 1 solid and just cut it up. When using the clipping tool you are going to want to use your 2D view ports. You can see these by going to: [View] > [Open View Pane] > [Top] or [Front] or [Left] each one will give you a different view of your solid, the reason you use them is because of the grid in them, it becomes very useful. As you can see my solid is visible in my [Front] 2D viewport. Now Select your Solid.

Now go to [Brush] > [Clip Tool] A yellow plane appears in the [Perspective] viewport, But that's not really important ‐ but it lets you know you are about to clip. In your 2D viewport [CLICK] and [DRAG] or mouse around and you will notice a small blue circle will follow your mouse pointer. Bring that ball to the top of you wall.... like so.

Now [CLICK] and [DRAG] the other small blue circle to the bottom of the wall directly under the top one.

Note:
Sometimes when you click and drag the second blue circle the editor grabs the first one. This can get extremely frustrating. It seems it mostly happens if you move the viewport at all after placing a circle, to solve this problem I like to put both blue circles to where one of them ends up so after I place one I don't have to move the viewport and the editor won't grab the wrong one. Also note once you grab the blue circle you can move around the viewport without losing grasp of it. Also note that one side of your solid is outlined in yellow, and the other is outlined in white. What this means is that when you press enter the editor will DELETE the side outlined in white. But we are cutting out a window, not sizing the solid you say... well this is where another button helps us. The [Split] button will split the solid, keeping both parts.
After pressing that button the editor splits our solid, and we are left with the part of the solid that was outlined in yellow selected. Now you don't have to re‐select your solid to clip again, you can just drag your blue circles around for your next cut. If you do want to de‐select your solid press the [Esc] key. After a few more clips, you are left with your solids ready for a window!

Now lets do something a little more advanced. Lets make a roof! So take a minute and throw up 3 more walls.

Create a new Solid that fits exactly on top of your hut's walls. Now select your roof block and initiate clip mode ([Brush] > [Clip Tool]) Now you are going to want to put 1 blue circle at the lower left corner of your roof block. The second clue circle goes in the middle of the top edge. This is where you hope your length is evenly divisible by 2 within the limits of the scale, since my wall was 11.25 meters using the grid I was easily able to find the center at 5.125.

If arranged your blue circles in a desired fashioned (look at my image) you can press [Enter] and you are left with half of a slanted roof otherwise you will have to use the [Split] button and then select the extra piece and delete it. Now do the same thing again for the right slant, and you will have a pleasing slanted roof to your hut/house.

Maybe that doesn't cut it for you. Have you been looking for a vaulted ceiling on the inside? Well that is not a problem, just another couple of cuts.
But things are a bit trickier, I hope you brought your maths skills with you.
Select your roof solid, and initiate the clip tool once again Brush>Clip Tool
Now you want to put one of your blue circles on your lower edge, but not on the corner like the last time, this time right above the inside of the edge of your left wall.

Where do you think you place the second blue circle? If you said the tip you may not like the results.
Since my left wall is 0.25m thick. (notice the 2 grid marks, I'm in 0.125 grid mode) that means you need to place your second blue circle 0.25m to the right of the tip, or 2 grid marks. This will give you an even roof piece.

Now hit the Split button, we want to save both pieces, I will explain later. Now using the same technique cut your roof piece.
You should have something like this:
 Wondering what we were going to use the lower triangle part for? You wanted a vaulted roof, I know, well that piece just happens to be the perfect size for the wall. So let's scale it. Duplicate it, and set it up on both ends. Now you have an open room.

Thanks Fubz for his great Clipping Tutorial.
Personally I found great use for his clipping tutorial and used it on my house for several layers to create openings for stairs:

1.12 UV Mapping Tool
The UV Mapping tool allows you to align/scale and rotate textures on Solids.
Now all of the actions can also be done within the Material Editor, but with the UV Mapping tool you do NOT need to create a new material for every aligned/scaled/rotated texture
1.12.1 Align a Texture
Ok, for example the texture on the solid above the door that I selected is not aligned.
First you need to select the Solid with the texture that you wish to align. Then select Brush from the top bar. (See arrow)

Now turn off the helpers tool (when it's yellow is on) See arrow in the image below.
Then select the "face" of the solid that you wish to change. You may need to select it twice, The face will turn res as you can see in the image below.

Zoom a little closer to the edge of the solids you wish to align:

Now change the U (horizontal) and the V (vertical) until you think it fits the texture on the solids besides it.
Once you're satisfied press Solid.
1.12.2 Rotating a texture
You can also rotate a texture. Select the face of the solid again using the UVMap tool. (Don't forget to select it twice)

Now fill in under rotate (see arrow) 90 degrees:

You will see that the lines on the wallpaper are now horizontal. You can rotate this to any degree from 0 to 360.
1.12.3 Scaling Textures
You can also scale the texture on the solid.
For this example I selected the same rotated wallpaper on the solid and filled in 0.5 in both of the scaling factors. You can see from the result that the texture became half of it's original size:

With this method you can change every face of the solid if you would like to.
1.12.4 Additional Information
In this part I'm teaching you how to quickly allign a texture to fit the size of the solid.
As you can see in the attached images this is the standard solid with the standard material size.

For this part, I'm using a DTX5 saved sign and I set the material with a glow amount of 2 and the opacity is set to 99 like in the picture below:

Now I'm fitting the texture to match the size if the solid.
Select Brush at the top and then select UVMapping tool. After you did this, select the face of the solid you wish to UVmap.
Then press Fit Texture as seen on the image below.
 Now the texture fits the size of the solid.

1.13 Liquids
1.13.1 Creating the Water
This part of the tutorial will teach you how to create water inside geometry/brush objects without the need for a water volume. You can do almost the same with a watervolume but the effect of a liquid solid seems nicer to me.
In this section of the tutorial I'm going to fill this sink with a liquid solid. Now you may ask, why not use a watervolume for this. Very simple I started with the watervolume tool, but I found out that I couldn't make it look realistic inside very shallow objects. I also had trouble getting the right waves and color inside very small objects.
So I turned to the solid tool and started fooling around
Select the geometry or brush object Sink Local 1
And press Solid.

Now create a small (4 sided) solid, it doesn't have to fit, we will fit it in later.

Move the solid into it's place, using the X,Y,Z markers or the numbers at the bottom. After that press Editing Mode on the Rollup bar.

Now select face and select one of the sides (Faces)of the solid. Move slowly into the object if you can't see the face. If the solid isn't blue as in the image you will need to select Hide Helpers toogle off or on, depending on what you see.

Now using the X or Y marker you can slowly drag the face to make it fit inside the object. I suggest you turn the camera to 0.1 so you can slowly move you camera around the object to check if the solid isn't spoiling out of the side of the object.

Now I slide all of the 4 sides so that they disappear inside the sink.

Now that the solid fits inside the object we are going to give it a 'texture'.
Open the material editor.

1.13.2 Creating the Water Material
Select All Materials and create a new material inside your level directory. (Preferably inside the /levels/levelname/texture folder
Now I'm going to give it a temporary name: Test1 (since I already have a test)

Giving it a 'test' name is an easy way to keep track of the material that are temporary and you can delete them once you have the finals.
Now press and you will see this screen:

I filled in the following things:
1) From the selection Shaders I chose Liquid

2) From the selection Surface type I chose mat_water

Then I changed the diffuse color and specular a bit and then press: Assign to Object Of course you still have to have the solid selected.
Before you exit the material editor, you will have to Rename the material in order to save it.

And here is the result:

It moves like liquid and if you shoot at it you will receive the water on your lens if you're standing close to it.
Now I even can do tricks with it like, make it appear as frozen water in the sink:
All you have to do is select checking frozen on the Material Layers option. (See the image below on the right side on the screen.

1.13.3 Change the Water color (dirty look of the water)
Now I'm going to teach you another trick to color the water into a different color. In this case make it appear this sink is dirty and it stinks.
Select the solid in the sink. Now copy this solid (Shortcut:CTRL+C) and move it a little down to the bottom of the sink. You may need to rescale the Z axis.
Now create a new material. (For details look below)

Change the diffuse and the specular color to something which looks a bit dirty/darker. Then assign this material and rename it again to save the material.
And Voila you end up with dirty water inside the sink:

1.13.4 Examples
I found more uses for this method, here are some examples:

The water in the toilet is a very small 6 sided solid. And the water inside the toilet tank is a very small 4 sided solid.
Kitchen Sink:

Using the dirty water method makes the dishes appear to be dirty.

Or even in the smallest places inside a pan on the kitchen stove.
1.14 Multi Texturing Solids
With Credit to RoyB for showing me how to use multiple textures on a single solid. I merely wrote this tutorial to fully explain the method that RoyB uses.
I created a simple solid that I would like to have a plastered out wall texture and on the inside a wallpaper:

e Helpers Toggle is off and the solid becomes light blue. If it's not blue you need to press the Hide Helpers Toggle again.
Now select Face and select a face on the solid that you wish to have a different texture. The face that you have selected will turn red.

Now move the arrow keys of the Material ID number up (or down) until you reach nr.1 and assign this number to the face that you have selected:

If you want you can check which side has which number on the solid. In this case I selected Mat ID nr. 0 (0=default number) and pressed select. This will show you with the red color which of the faces will have the first texture.

After you're done with selecting the different numbers of Material ID's on the faces of the solid, press Solid.
Next open up the material editor (Press M or select on the top menu. Right click and create a new multi-material.

Select your Level folder (or sub-folder) and give the multi-materials a name:
 Right click your newly created material and select Set number of Multi-Materials

In this case I only need 2 materials. 1 for the outer wall (plaster) and 1 for the inner wall (the wallpaper)

Once you press 'OK' you will receive a warning. Never mind that and press 'OK'

Open up the '+' and it will show in this case 2 sub-materials.
- SubMtl1= Material ID 0 (0=default) on the solid
- SubMtl2= Material ID 1 on the solid
And so on, you can assign as much sub-materials as/Mat.ID's as you want.
Now select the first Sub-Material: SubMtl1 And add a diffuse or more maps (see for more information Chapter 2 of the solid Tutorial) In this case I selected a plaster texture as default/MatID 0

And then select the second sub-material: SubMtl2

Make sure you still have the solid selected and then select the start of the multi-material and press Assign Material to Selection.

As you can see the 1 selected face with material ID 1 now has an wallpaper texture.

And the rest of the solid has the default texture (Material ID 0) the plaster texture.

As always don't forget to Rename your material once you're done with it and then save the map.
1.15 Occluder Area
If you use a lot of solids in a map then you are bound to run into disadvantages of solids. One of the biggest disadvantage is that solids do not occludethe area behind it. Which basically means that all objects inside the viewing range will be calculated be the processor even if you can't really see them.
To partly solve this problem you can use occluder areas inside your solid walls.
For this part I created a small house for my map. We are going to occlude both of the sidewalls. Before we begin make sure that Hide helpers Toggle is off see upper right in the image below.
Now select area and occluder area.

Now zoom to the front corner of your side wall and click on it once( and make sure follow terrain is on)
 Now wherever you move, the occluder area will follow your mouse. So move the mouse inside the corner of the back part of the wall:

Make sure you check both, the outside wall as well as the inside of the wall so that the area doesn't stick out on either side.
The height of the occluder area is 5 as standard. If you move in closely into the solid wall, you will see that the height is not high enough to reach the top of the building as shown on the picture below.

I changed the height to 9 and as a result you can see that the occluder area comes out of the wall.

Now you have two options. Either change the height value until the pink occluder area isn't visible anymore. Or move the complete area downwards (along the Z- Axis). You can look at it's moving from below the terrain by pressing the Q-key and move the camera downwards.
In this case I lowered the height until the area wasn't visible anymore.

Last thing to do is copying the are to the opposite wall.
Press Ctrl+C and move the area to the other wall and carefully place this copied area inside the wall.
And again make sure no purple area is visible through the walls.

To show you the difference in processor capacity I'm going to spawn right beside the building.

The first image is the date in first person view of the side of the building without occluder areas.

As you can see the number of Tris=319,419 and the number of drawpoints (DP)=411
Plus the FPS (Frames per Second) on my pc is 55,6.
Now here is the exact same location with the two occluder areas inside both walls.

The number of Tris has gone down to 240,705 but more importantly the number of drawpoints has dropped to 290.
Remember this is just the result of 1 building and 2 occluder areas. You can go wild and place occluder inside almost every solid.
There are some disadvantages of the occluder areas though. They don't always work from certain angles. Things behind that wall will still be calculated and there are no horizontal areas available in Sandbox 2.
Overall it does improve the Framerate/processor capacity for the better. And I highly suggest using them.
1.16 How to fix Orange Balls while exporting to Engine
I you're having problem with exporting the Level and if you can only see orange balls where your solids should be I suggest the following:(Orange Balls usually occur when your Level was renamed to another directory)

To fix this open your Level.pak (using winzip or winrar)
Extract the brush directory into your level directory and all solids should appear as they did in the Editor.
They should now be located in /Crysis/Game/Levels/YourLevelName/Brush
If you use custom textures/materials you must place these in the level.pak in order to make the solids work in-game.
Follow the tutorial which can be found here.
Note:
Now before you start zipping the level.pak as explained you need to copy your materials, textures and any other custom assets to the new folder that you created in the beginning of the tutorial. After that zip the level.pak.
Once you placed the custom textures and any other assets inside the level.pak you can delete these folders to save space for the final release.
1.17 Final Words
I hope you enjoyed these tutorials and found them useful.
I wish to thank Fubz for his Clipping tutorial, Fortran for his help with the breakable glass, RoyB for his advice on multitexturing solids and of course my girlfriend and everyone else I forgot for their support.
-Dennis 'Duruk' Schenkel

what the f+ck!?
Awesome, totally helpfull!
Holy Mozes, please post this on the Crywiki page, here:
Wiki.crymod.com
And good job!
ahh, already did ;)
Thanks for compliments.
It was a learning experience since there was little written on Solids at the time when Crysis came out.
I started out as just a few chapters and continued to expand for over a long time.
Im waiting on Cryengine3 to add new chapters.
wow, excellent tutorial answering a lot of questions I had in this area. thanks mate.
it's very usefull for me,thanks
hope your more articles
Thanks glad I could help.
have you ever used two diffuse maps on one face by using an opacity mask in the material editor ? (in cryegine2) I cannot seem to get it to work..ie ; I want a plaster wall diffuse map to reveal a brick wall map.. using a weathered opacity mask..
This is one of the greatest tutorials about the CE2 Sandbox 2 Editor Solids I've ever seen. Very detailed explanation by the author and lot's of other stuff covered that's not even in the CE2 Sandbox 2 manual. I learned a lot from this tutorial. Your effort in making this tutorial back in March of 2011 is still being read by those of us who are still modding Crysis 1 today. Thanks for making this tutorial and good job!