Originally posted on the site Globalops
Mirrored here for archival purposes
Introduction:
The purpose of this tutorial is to teach the best way (that I have seen) of multiplayer mapping for nolf. In order to be able to complete this tutorial you will need some very basic knowledge of dedit. If you dont know how to build brushes or move around in dedit then I suggest you play around a little until you get the hang of dedit. This tutorial will cover basic nosnap techniques, assuring there are no leaks, vis blocking, clean building, and touch on terrain. By the end of this tutorial you should have a building with 2 small rooms inside, and a small hill on the outside and hopefully enough knowledge to get started on a multiplayer map with a little lag.
Understanding our method:
To do our method well you will need to understand how and why it works. The basic analogy of the map being a submarine works fairly well. Your map needs to be air tight so that you dont have any leaks in the level. I personally liek to think of it the way it is more like... All of your map's brushes, from walls to floors to detail are all detail 1 brushes. This makes it so that it doesnt process those brushes unless it actually sees them. These brushes will also be 2d polies meaning they will only have one side to them. This is to avoid drawing unneaded polies that you cant see. And surrounding all the walls we put invisble vis blockers that are detail 0. The detail 0 brushes block out the visiblity from the other rooms making it so your game doesnt show the other rooms when it doesnt need to. Then we add one final shell of detail 0 brushes to insure no leaks occure. In order for all this to work you need to put "-nosnapnocsg" into your extra parameters when you are processing. I hope you undestood all that and if you didnt you should by the end of this tutorial. Note: If you want to test your map before you add your vis blockers, you will need to make a large 3d invisible brush.
Our first nosnap room:
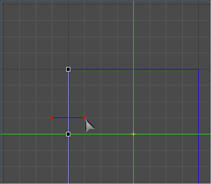
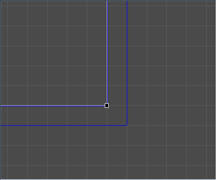
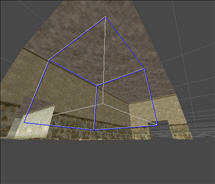
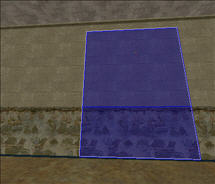
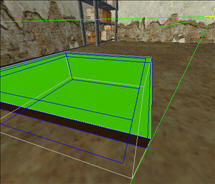
The first thing we will work on is our two rooms. These rooms can be as big or as small as you like but should be able to allow the player to jump around inside. I made mine at 192 units high but it can be higher or lower if you wish. So start off by drawing your rectangle in dedit. Now you should have a large square,
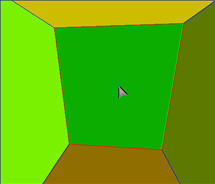
but we dont want a square we want a room. To do this we are going to flip all the sides of the brush, so select the box and press the "F" key. F is the shortcut for flip, it comes in very handy when you need to make rooms/hallways or other hollow places. Note: Dedit has a funny bug where you cant select from the inside unless you move it. So press up then down on your keyboard and then you can select it. Notice how it looks like some of your walls are missing from the outside, this is because all your walls in the box are 2d. Think of it as a two way mirror where one side you can see through and the other you see the texture ( even though it is actually not like this at all :P). Go into this brushes properties and set nosnap to true, and detail level to 1 . You will do this to all your future brushes unless it is a vis block. Now we are left with a large room, but all the walls and floor are still one brush. We want to seperate them so we can edit each brush without effecting the rest. Select the brush and use the unjoin shortcut by pressing "Ctrl+J". Notice how each wall is now its own brush and is completley independant from the rest of the room. It should now look a little like this.
Starting our hallway:
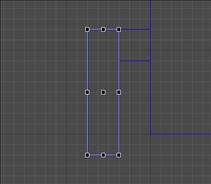
Remember that second room we were going to make? We are going to need a hallway going between the two. So select the wall that you want to contain our hallway. Now that you have it selected we are going to slice it vertically twice so we have a small center piece. To do this select the wall you want, go into the top down view and hold "S" now press the spacebar once on one side of the brush, and another strait across from it and release the "S" key.
Notice how you have seperated the brush into two peices. Repeat this process 64 or 92 units away to make it so you have three brushes from your wall.
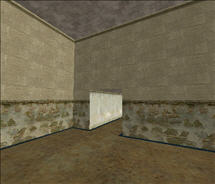
Since most hallways dont go all the way to the ceiling we want to make it about 128 units high, select the small middle brush. Grab the bottom edge in the front or side view and raise it up 128 units.
Now for the actually hall, start by making a brush that is the same width as the opening
then raise it so it is the same height as the door.
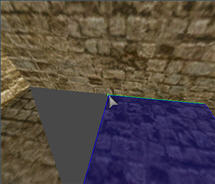
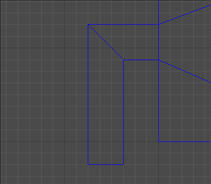
The next thing we need to do is flip the box inside out ("F") so we can walk in it (remember we have to move the brush before we can select the inside polies). Now we have a small hallway, but it still has its ends on either side. To remove them we will have to select our hallway brush and go into geometry edit mode (Ctrl+G). Hover over the wall that is blocking our view of the room and press the "Page Down" key.
This removes the selected poly without damaging the rest of the brush.
Do the same to the other side of the hall. Return to brush edit (Ctrl+B). Remember to set this brush to "nosnap true" and "detail 1" . This is the last time I will remind you and you will have to remember on your own. At this point we should join our wall back together. Select all three peices of the wall that contains our hallway by holding Ctrl while clicking each brush and press Shift+J to join
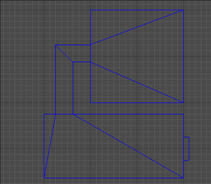
We should now have something that looks a little like this.

Bending our hallway:
Just for the sake of doing something new we are going to bend this hallway into an L shape that leads to the next room. We should start by making another brush for our bend. Make the brush at a 90 degree angle from our other hallway and head around down to where we can build another room and make sure it is the same height as the other hall
Flip the new hallway brush ("F") so it is a hallway not a box. Now, we are going to need to edit the sides of this brush independently so unjoin it (Ctrl+J). The first thing we need to change is the brush that is covering the entrance to our room so select and resize it so it makes a corner.

This is a fully functional corner, but since I like to build clean just incase, we are going to make this corner shine. First things first, we need to unjoin our old hallway so we can edit those polies as well (Ctrl+J).
Now delete the far wall of the new hallway and drag the old one accross.
There are still a few T-Junctions left

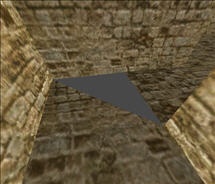
The first step we will take is to slice away part of the new hallways floor and ceiling. Select the two brushes and slice diagonaly from the corner of the bend to the other corner.
Delete the leftover brushes from the floor and ceiling
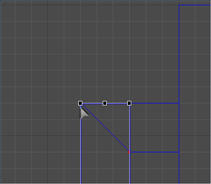
Now we need to fill the gap with our floor and ceiling from our original hallway, select the floor brush. Go into geometry mode (Ctrl+G) and in top down view hover over the the floor brush's corner
Now hold the "E" key to move the vertex to the corner of the bend

Do the same to the top. If you would like, you could go back and fix the T-Junctions in the first room now that you know how. You should have 6 polies to be added. The T-Junctions for the hall have now been fixed. All that is left to complete the hall is to remove the final wall that will be blocking our new room.
You could also join your hallway back together for simplicity. The hallway should now be looking something like this.

Our second room:
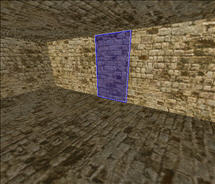
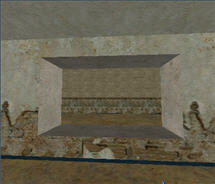
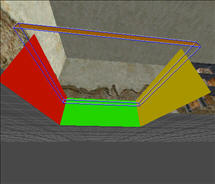
Ok, we now have a room and a bendy hallway that is going to lead into our second room, and contain the door to go outside. First off draw another large brush and lets make it taller than our last room and flip it as usual
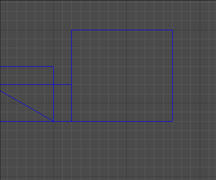
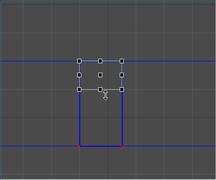
We need to clear a peice of wall for our doorway so we need to unjoin the room (Ctrl+J) and slice our wall verticly twice. Then raise the new brush enough so that it shows the hallway fully (same as our first room but has to be at the hallways position)
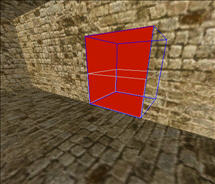
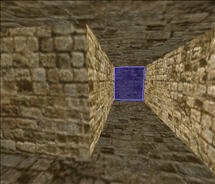
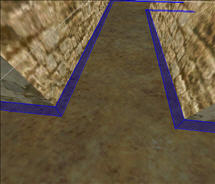
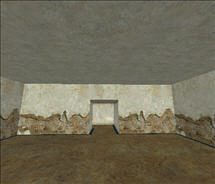
Wow that was easy now wasnt it? We just need to add the exit and we are finished the basics of our inside. Simply slice out a hole from one of the free walls that has enough space to head outside. Then make another short hallway (32 units or so) to lead to the outside
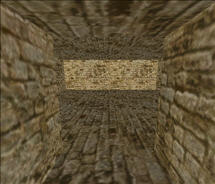
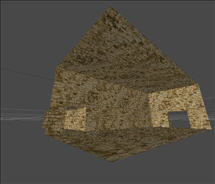
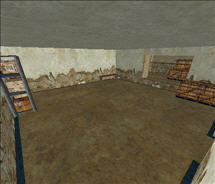
The basic frame of the inside of your building is complete and should be a little bit like this.
Adding decent textures:
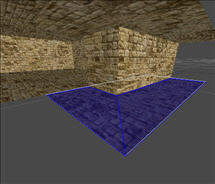
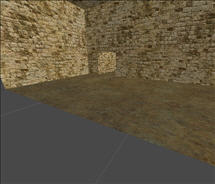
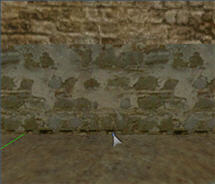
So we now have a small building with two rooms and a hall but its still pretty boring so we are going to add decent texture work. Alot of people dont realize how much better a map can be with good texture work, but it really does make a map what it is. Good texturing may not save the map FPS wise but it sure makes it look better. That being said, To texture a brush simply pick the texture you want, select the brush, and press "Ctrl+T". Lets start by differentiating our floors from our walls. Personally, I think mine looks like a type of hut, so I am going to put some dirrt floors in(Tex>Terrain>TR02>TR0091) but you can do whatever you like..
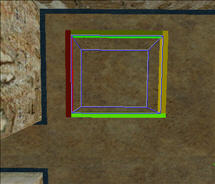
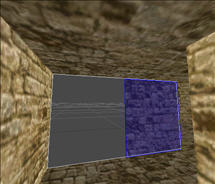
I think it looks good. Now I want the walls of my building to have two different textures. We will need to slice the walls in half, select all the walls of the big room. Go to your front or side view panels and slice it directly in half horizontally.
Now I am going to apply a rockey wall texture to the bottom half of it(Tex>Stone>ST10>ST0466). Notice how my texture isnt aligned right?
I want the small line near the bottom at the top so it gives off the apperance of separation. To do this, right click the brush and select "Map Texture Coordinates" from the drop down. This brings up a window with a few options. UOffest represents how far off it is horizontaly, and VOffset is verticaly. Scale is how large you want your texture to be. My VOffset is at -32, by setting it to 0 it fixes the problem, you could also align it to fit what you wish including scaling/rotation/ and offsets and flipping the texture the other way (helps when you flip text inside out). Now the texture is nicely aligned and I can get on with my map.
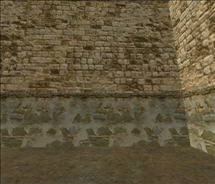
I have always liked the way (Tex>Stone>ST10>ST0470) goes with the other one so I am going to texture the top half that. I also want a trim near the top so I have to slice all the wall peices near the top. I am going to texture it with (Tex>Stone>ST10>ST0478), I like it.
Now I will make trim on the floor around the bottom of the walls. I start by slicing the floors edges. I only want the trim to be around 8 pixels thick so I have to lower the grid size for the top down view (+ / - on the key pad), you can check the size of the grid near the bottom in the status bar. It should say Grid:8 where 8 is the size of your grid. Slice from the top down view 8 units away from the wall ( 1 grid space now) strait to the other side
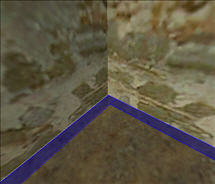
Remember we want this to be semi-clean so we will fix this T-junction. In geometry mode you should use "E" to move the vertex of each corner to the right position.
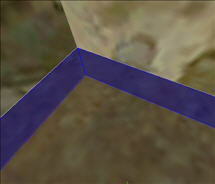
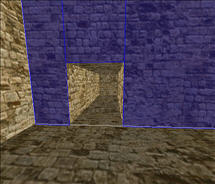
Corners into the hall/doorway should be done in the same way
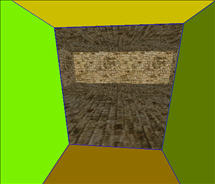
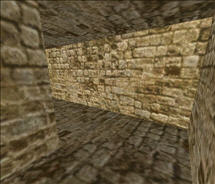
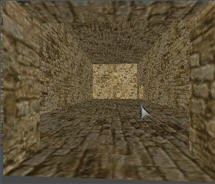
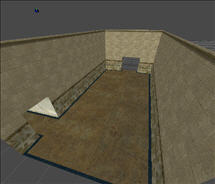
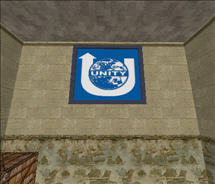
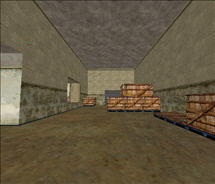
I then textured the trim with (Tex>Stone>ST06>ST0278) to represent unity. Keep texturing the room untill you are satisfied of the results. This is what I ended up with.
Adding detail:
Now that we have added our texture it is looking better, but its still a little empty. This is where our little details come in. Sticking with the run down building theme I am going to put some wooden boxes into the room. My first box I am going to use a prefab. To add a prefab select your prefabs tab and go to crates>PALLETMEDIUM. Place your marker where you want to add the box (mine happens to be in the corner) and double click the prefab
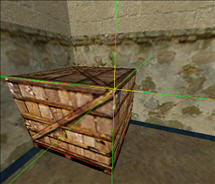
Having it on the ground and directly against the walls will cause T-Junctions, which we dont want. So we will place this crate 1 unit off the ground and away from the walls. Switch your top down grid to 1 unit and move it 1 grid space away from any wall. Do the same from the side/front view to take it off of the floor. This is easiest way around T-Junctions and 1 unit is small enough so that you cant notice that its hovering.
The next thing we need to do to this crate is get rid of the sides that we dont see. The ones almost agains the wall, and the bottom. To do this select your box and go into geometry edit mode (Ctrl+G). Hover over the side you want to delete and press "page down". Do this to all the sides you wont be able to see in game.
Switch back to brush mode (Ctrl+B). Since this is the unity base, I dont want to have red pallets under my box. It just so happens I have the textures they added in the updates but forgot to add to dedit and in these textures is a blue pallet. To make the pallet blue we are going to need to retexture the bottom of the box, but first we need to slice the bottom 8 units off
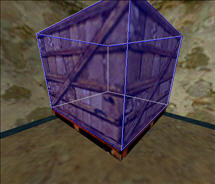
Now select the texure you want to replace it with, in this case (TEX>UPDATE2>CRATE_3 ) and texture it using Ctrl+T. Now I have a matching blue pallet to go with the unity theme base

Now I am going to expand it so that it is twice the size, making two crates from one brush
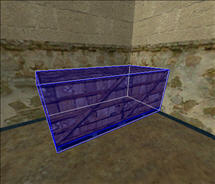
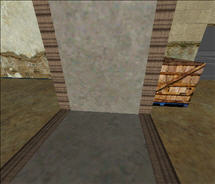
Now I am going to use another prefab that you can get from the downloads section
Note this download is supplied in the files section
It is called Frame-Unity and I will place it 1 unit away from the wall.
For some reason I have the urge to make a hole in the wall going from one room to the other, so thats what we will do. Lets start by slicing our large wall. Select the wall that were are going to drill a hole through and slice it twice, about 128-192 uinits away from each other
Now slice it horizontaly twice to make a gap where we can make our way through.
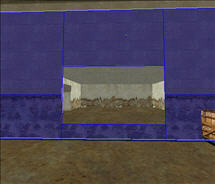
Repeat the process to the other wall in the same spot as you did on the first wall. Make a brush from top down view and flip it so it will fill the gap. Remove the extra sides that are blocking the rooms using Geometry mode and "Page Down"
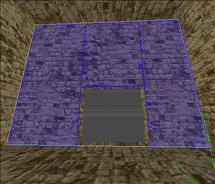
We can now slice 8 unit trim in the block and texture it. Notice how your texture will become rotated on some sides when you apply it
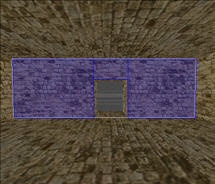
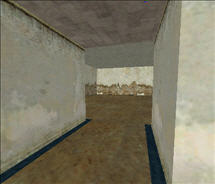
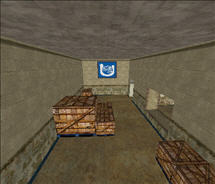
To fix this, select both the trim peices and go into geometry mode. Select all the sides that have been rotated incorrectly and then right click>Map texture coordinates. In the rotation field, print 90 and click ok. It should now be facing the right way. Keep adding detail to your building into you feel you have enough. This is what my building looked like after I was done.
Our Second Exit:
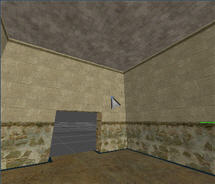
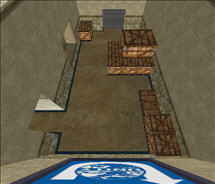
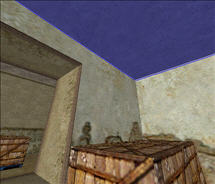
I dont believe any base should have only one exit because I dont think the enemy should be able to just focus everything on one spot. I have decided to have 3 exits for this map: The front door, underground tunnels, and a ladder leading to the roof. Lets start with the ladder to the roof. First we should decide where this ladder will lead to. I have picked the corner above two small boxes.
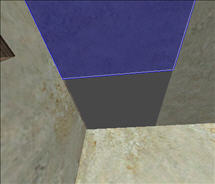
Now just cut a hole in the roof big enough to fit through.
I dont want to use a default ladder for this so I am going to make my own. I am going to use a wood texture (Tex>WOOD>WD01> WD0030). I start by making an 8x8x40 brush and placing it 1 unit away from the wall and around 16 units off of my boxes.
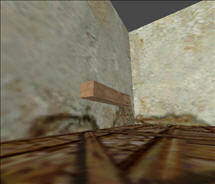
Copy (Ctrl+C) and paste (Ctrl+V) it a few times, placing each 16 units above the other until you have enough to reach the top
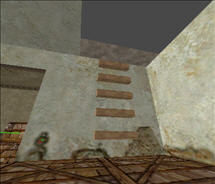
Select all of your brushes and go set your top down grid to 8. Slice the corner of the brushes and delete all the excess. Repeat on the other side.

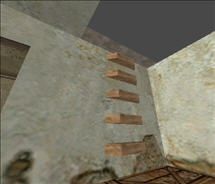
Remove the back side of the brushes and join them and you should have what looks sort of like a ladder.
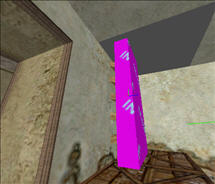
The next step is to add the ladder volume, start by making an invisible brush from the bottom of the ladder to a little above the top. Right click your brush and select "Bind to object...". Scroll down the lis until you get to volume brush> then select ladder.
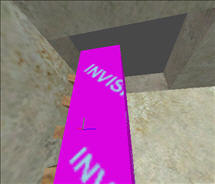
Create a small extrusion to provide the space for the roof
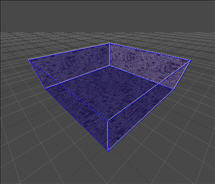
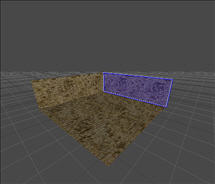
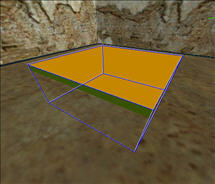
That is all we will do for now, lets start on the underground tunnels. Now because I dont want to get to tough the tunnels wont be very complex.Pick a spot to put your tunnel and build a square around 128x128 and have it sticking out of the ground about 8 units
Flip it and make another square bigger than it by 8 units on all sides and set it at the same level but only 8 units until it hits the ground
Delete the extra faces for both both brushes
Slice 8 units in from the larger brush until you can remove the center and reveal the rest of the tunnel.