In this tutorial we're making a rolling garage door. Instead of the simple garage door that just swings open, this door will have multiple segments which move upwards individually, then turn 90 degrees and move backwards guided by 2 rails.
NOTE: Before you start, I must warn you that this is tricky to make. If you use different sizes or more segments than demonstrated in this tutorial, you will need to tweak certain values. The tutorial also uses tricks to bypass engine bugs or lack of entity features. When you're recreating this an update might have been released to make it work in an easier way. If you're an advanced mapper: use your own insights to improve this sequence.
Step 1
Create a box with a light, info_player and a func_button block. Now create a block (128x128x2) with a garage door texture on it. I'm using "metaldoor030a", which got 4 segments. Make sure the front is facing south. Now use the Clipping Tool to cut it into 4 pieces, each 32 units long. You'll notice it cuts the segments of the texture perfectly.
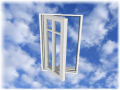
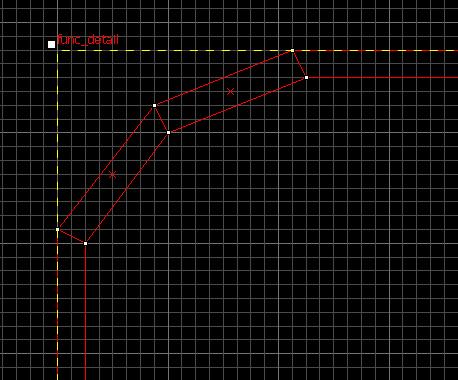 Now make rail next to the door, as high and thick as the door. Now create a 90 degree turn like the example to the left. You can use more sections for higher detail, as long as the turn is 90 degrees and not larger than 18x18 units or you will need to tweak the rotation speed later on. Make it a func_detail and then duplicate it and move it to the other side of the door. Now the door has 2 rails that will seem to guide the segments.
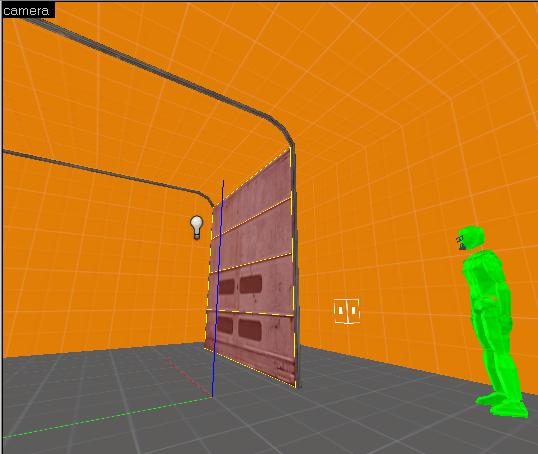
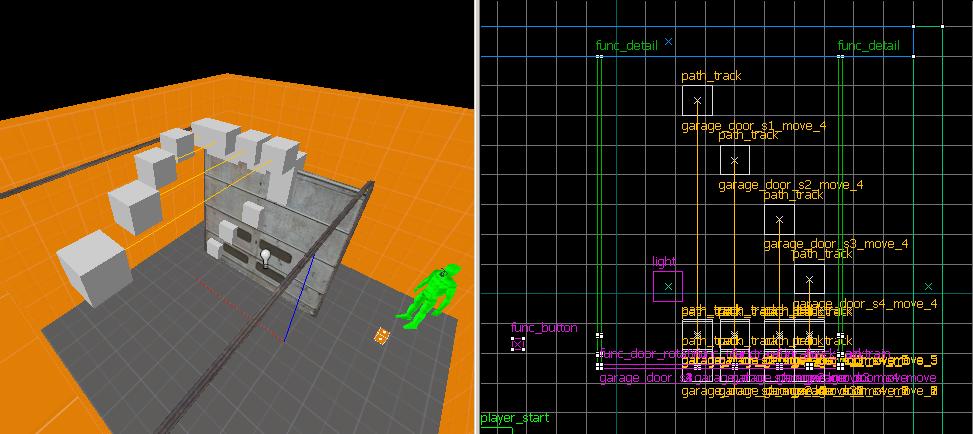
You should have something like this now:
Step 2
Now we're going to make the first segment. Select the top segment and make it into a func_door_rotating. Use the following settings:
Name = garage_door_s1
Parent = garage_door_s1_move
Speed = 75
Delay before Reset = -1
Tag Flags: X-Axis, Reverse Dir.
Make sure you have Helpers on (View -> Show Helpers) and find the origin (small circle) of the func_door_rotating. Create a small box (2x2x2) with the NODRAW texture and center it on that origin. Then turn this block into a func_tracktrain and put the following in its properties:
Name = garage_door_s1_move
First Stop Target = garage_door_s1_move_1
Max Speed = 15
Distance Between Wheels = 0
Height Above Track = 0
Tag Flags: Passable, Fixed Orientation, Is unblockable by Player.
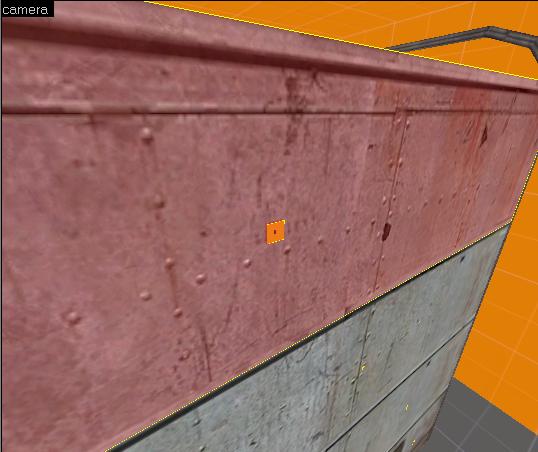
It's essential that you make sure the origin of the door and the tracktrain are on top of eachother in all views. The door is parented to the tracktrain, so the train will drag the door along when it's moving. The NODRAW texture makes the train invisible so the player thinks it's the door that's actually moving. You should have something like this now:
Step 3
Time to set the track for the tracktrain. Create a path_track entity and center it on the tracktrain's origin. Use the following properties:
Name = garage_door_s1_move_1
Next Stop Target = garage_door_s1_move_2
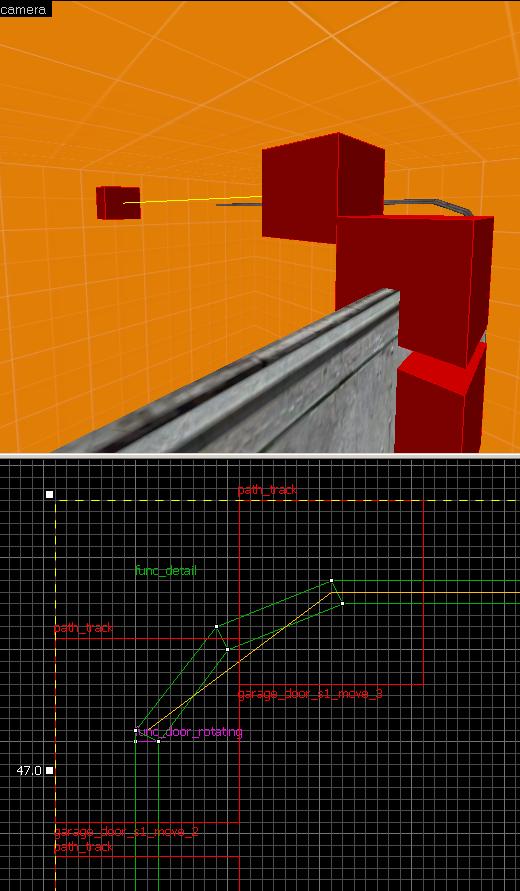 Now duplicate this path_track (hold SHIFT and drag) and put it right where the door will enter the 90 degree curve. Then put another one right where it leaves the curve. Put another one 128 units away from this point, following the rail. Look at the image to the left for reference.
As you can see, dragging it while holding shift will automaticly create a path and change the number of the track. The starting path is "1", entering the curve should be "2", leaving the curve "3" and at the end of the rail "4". Now go into the properties of point 2 and add the following Output: OnPass - garage_door_s1 - Toggle. In point 4 add the Output: OnPass - !activator - Stop.
When the door passes point 2, it'll turn 90 degrees while in motion towards point 3. Then at point 4 it'll stop.
Go to the func_button and set the follow Flags: Don't Move, Use Activates. Then go into Outputs and enter the following: OnPressed - garage_door_s1_move - StartForward. At this point it's wise to save and compile the map and see if you are happy with the speed and the turn in the curve.
Step 4
Now we also want the door to move backwards and close. We could make another button making it go backwards along the same track, but there are a few technical problems and a wierd bug which makes it a little harder. However, with this method you can use the same button to make the door open and close.
Select the path_track at point 4 and copy it (shift + drag), creating point 5. Now move point 5 on top of point 3. You can use VisGroups or QuickHide to hide the underlaying track for easy selection or just move one of the path_tracks 1 unit to the left or right. Continue the track and put point 6 on top of point 2. Finally create point 7 and put it 1 unit below point 1 (note: point 7 is created to fix a bug where the door won't return fully to its original position, leaving small gaps. If this doesn't occur in your setup, you can connect point 6 directly back to point 1. If you do so, make sure to use the properties of point 7, mentioned next, in point 1.) Now go into the properties of point 7 and add:
Next Stop Target = garage_door_s1_move_1
Output: OnPass - !activator - Stop
Go in to point 5 and add:
Output: OnPass - garage_door_s1 - Toggle
The func_tracktrain should go in a circle now in the following fashion: point 1 (spawn) -> point 2 (turn) -> point 3 -> point 4 (stop) -> point 5 (turn) -> point 6 -> point 7 (stop) -> point 1 -> point 2 (turn) -> etc. Compile the map and check if the sequence works.
Step 5
If the sequence works correctly you have to repeat Step 2 to 4 for each door segment. You can simply copy & paste and rename them from "s1" to "s2", "s3" and "s4". Make sure you don't forget any entry. All "!activator" entries are universal and do not have to be changed.
If you're tired of having to hide the path_corners, you can move the origin on the func_door_rotating a few units to the left or right and put the func_tracktrain on top of it. Now you can line up the path_tracks on this origin.
Finally, make sure that the point 4 path_track is in the correct position for the closed door. Since each door segment is 32 units long, you'll need to move point 4 backwards 32 units respectively. If point 4 of segment 1 (s1) is 128 units away from point 3 than point 4 for segment 2 (s2) should be 96 units away from its point 3. segment 3 will stop at 64 units distance and segment 4 at 32 units. Check the image below for reference.
Step 6
Lastly, we want to add some sound effects. With the example map below you'll find a sound called "garage.wav" (put it in ../sound folder). It fits only to this door, so if your door is faster or bigger create your own sound or edit mine. Add an ambient_generic entity near the door and use the following properties:
Name = garage_door_sound
Sound Name = garage.wav
Tag Flags: Start Silent, Is NOT Looped
Go into the func_button's propperties and set the following entry and outputs:
Delay Before Reset = 12
OnPressed - garage_door_s2_move - StartForward
OnPressed - garage_door_s3_move - StartForward
OnPressed - garage_door_s4_move - StartForward
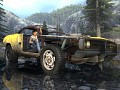
Hit compile, load the map and watch. Here is an example video of a similar setup.
Final Notes
This concludes this tutorial to show you how to make a rolling garage door. You probably want to tweak and add details to make the sequence more realistic. You can download the example map here.
For advanced mappers:
I've tried to do the same in a simpler way with just tracktrains and preset angles, but the entity has some problems with them. It aligns the train right after spawning towards it's final destination. You can force it to ignore orientation info but then it will just stationary move from path to path without turning.
I never managed to find the cause of the gap problems mentioned in Step 4. If anyone has an idea I'd gladly hear it. It would make the sequence simpler if there was a fix for this. I've noticed that the further the door segment travels in a straight line, the smaller the gap will be. In the example map, Segment 4 would even end up in the right place. I think it has something to do with the navigation of the tracktrain and it's stop motion. Maybe even the parenting throws off the origin but that's speculation on my part.
very nice, thx!
great tut, and rather complex to get it working well.
shame though, because in ep2 there is now such a door model that does the same and only needs to be placed as a prop_dynamic.
but, with this door made out of brushes you can add you're own texture to it what makes it probably better usable.
leon