Warning: This Turorial is ADVANCED Level, which means that average-exeptional skill level is required. But it really is Quite Genius.
I'm sorry that this tutorial might not be so high quality one but note that:
- I didn't make a whole new tunnel. Instead I dismantled one that I had already made to make the pictures
- I haven't made absolutely anykind of tutorial before
- The more I have text, the more I'll have grammatical errors and typos in it
- And also: How many functional tunnels have you seen in ZH before?
Step 1: Tunnel's base
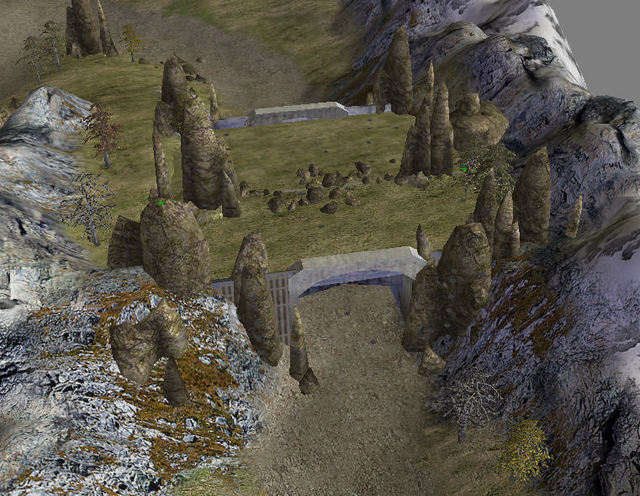
First of all you'll need to make (preferably) a narrow passage where you want your tunnel:

-------------------------
Then you'll have to cover it with a short piece of bridge (I used Tampico cause it is the most widest one)
The bridge is used to prevent things like ammunations and helicopters going through your tunnels roof, which would look retarted:

-------------------------
Next, cover your bridge with the building bibs of your liking. I used AsianApartmentComplexBids which matches with texture GrassMediumType6 (found under Residental textures)[There is also two other grass textures which have matching bibs]
Place the bibs so that the grey line on the other edge is hidden under the bridge railing
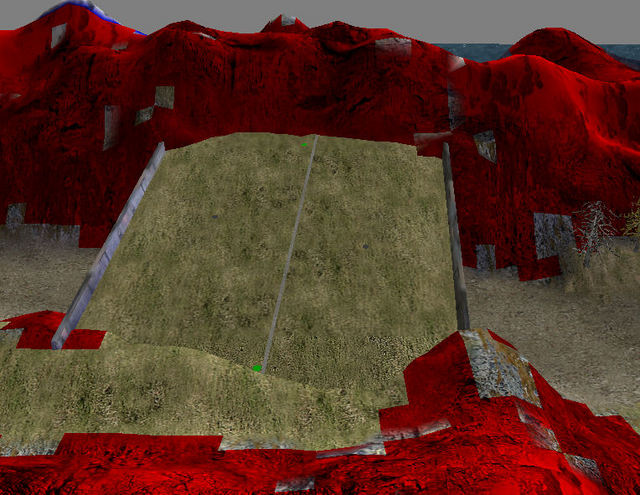
-------------------------
After your placed the bibs, check that the bridge isn't sloped and try to place bibs as close to bridge surface as you can, so that any possible units on the tunnel's roof won't go halfway through the bibs
Step 2: Tunnel's "roof"
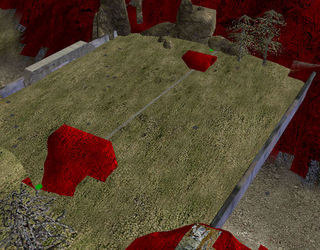
If you use multiple bibs there will also be those grey bib edges left showing which might need a bit of masking.

-------------------------
You can use very small Height brush (with no feather set) to raise some ground to cover the grey line right next to the cliff but obviously you can't use same technique to cover the grey line in the middle.

-------------------------
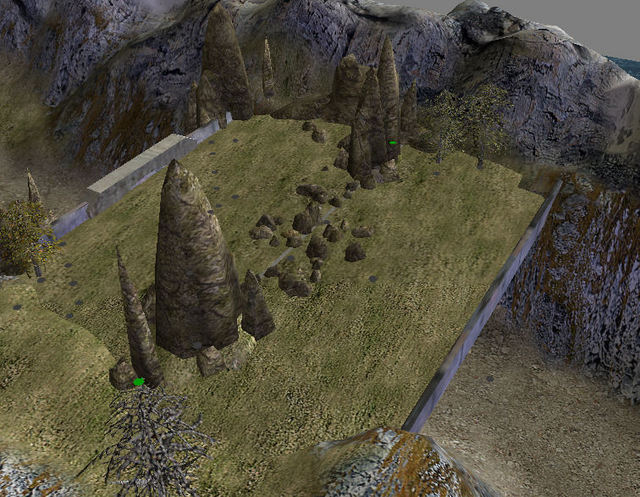
And because those straight edged land columns might not look so good; they can be painted impassable and covered with few rocks:
 -------------------------
But because the area in the middle can't be made impassable (the rocks aren't consired impassable by the game) it's best to just cover it with small stones so it won't look stupid if any units would go through them. (Even though if you wouldn't make any ramps or paths leading to the roof, units can still get there with helis or bikes. But if you consider that very unlikely you can cover the whole top with rocks and you won't actually be needing those ground columns either that I mentioned before)
Step 3: Tunnel's "facade"
Next you should cover the bridge's support columns and any possible holes and make the tunnel's entrance. Most easiest way is to use wall pieces to cover both the sides and the central arc/route into the tunnel. But there is also some objects that may look better when used for the arc; for example the SoccerStadiumEntrance

And if you're going to use the StadiumEntrance you'll need to use this code in the map.ini
QUOTE:
"Object SoccerStadiumEntrance
KindOf = STRUCTURE
GeometryMajorRadius = 0.1
GeometryMinorRadius = 0.1
GeometryHeight = 0.1
End"
Some other structures/objects might also need a bit of editing before they can be used for this role.
-------------------------
Cover the rest of the bridge with wall pieces. Like This:
For final visual touch you can cover the wall pieces with some rocks:
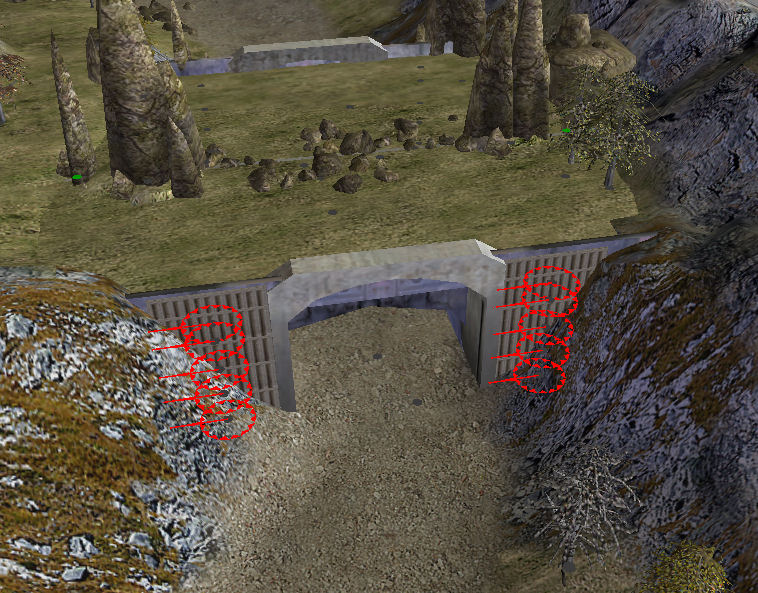
Step 4: Last thing to do
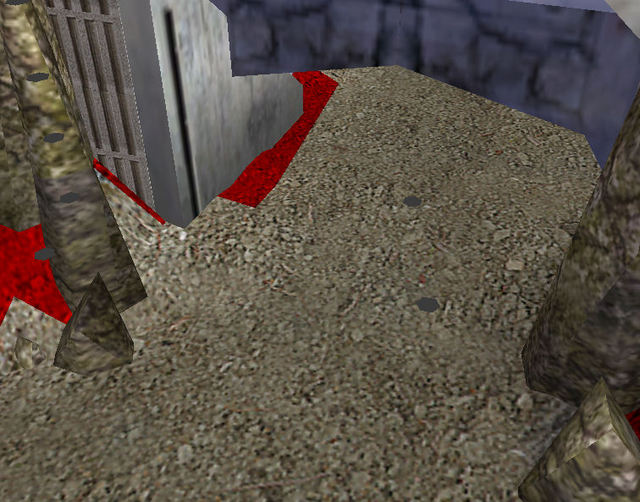
Finally, check that the impassable and passable areas in the tunnel are correctly painted so that the units can move through the tunnel, but that they won't go through the "walls":
Tutorial Credit's go to Teukka.
Not a bad hack, if not perhaps a little unsightly because of that seam. The best technique is probably just to model a tunnel in GMax/Max and import it in. That way you can better control how units can pass through and over it =]
Some images were missing from the original tutorial, so what you are seeing isn't the finished product. I assume the seam was more well hidden, and i'll try and track down the lost images for you.
But your Gmax Idea is great, we would need to code it in using the Map.Ini though, to work with Vanilla Zero Hour. (not an easy feat for me) but We have just the guy to help us out with that. (even if he isn't in the guild any more)
I try the new tunnel it's fantastic I'm making a mission with that tunnel
Sure, it would probably be possible to make better looking and functioning tunnel by modeling it on separate program and importing it to the map,
BUT it has it's own problems. For example the model (& texture) would have to be included in the map folder which would increase the overall size quite a bit and map.ini:s sometimes don't properly transfer via ZH's map transfer system on online multiplayer.
And of course some of the mappers (including me) know how nothing about modeling or adding new objects via map.ini:s.
It's often the case that many can't deal with basic modeling, but there's always a time to learn; each to their own.
As to file size, I doubt that it'd be horrendous. A good ZH map is normally four or five megabytes in size; a 20kb mesh file isn't going to add much to that. I've never however experienced any problems with map.ini not being transferred, although it really wouldn't surprise me.
ambershee we cant all use those modelling programs.
but I guess you can just download a model for such things. ^^
still a good way of doing a custom tunnel etc.
I have updated this with the missing images.
Thanks for reading.
euhm what are bibs actualy? :p
Bibs come with buuldings in worldbuilder, you can get them from Civillian->Structures. They are basically square patches of grass or ground textures with a concrete border and maybe some paths, and are usually placed under large buildings for decoration. The grass section with the concrete in the middle on top of the bridge is the grass bib used in this tutoral.
My computer guys dont move in the skirmish map that i made
HELP
thats pretty clever. I tried something similar to get Red Alert 3 Akula subs go through underwater tunnels but i have never thought of trying it out on zero hour.
its a shame theres only grass coloures bibs... not rocky or desert textures ones
Good Work!!!