[page=Introduction]
This tutorial sets out to explain how to make a weapon dispenser for any deathmatch map. It’s great for learning entities you may not be used to using.
Average time including creating textures:60-90 minutes
Diffculty: Advanced
[page=Creating the Textures, Console, and Toggle Entity]
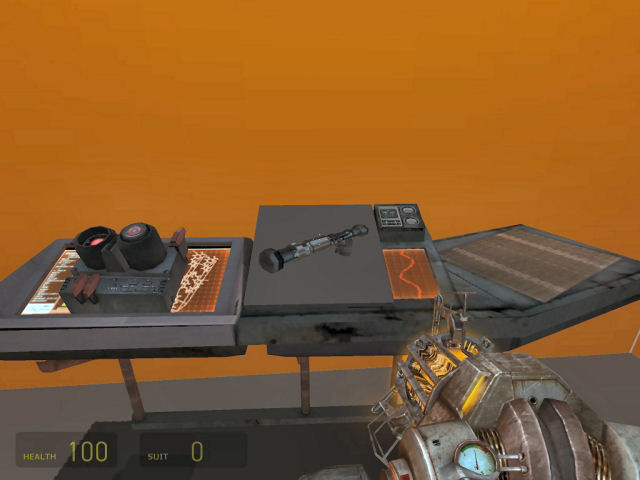
The first thing I did was take the time get a screenshot of every weapon I want to place in the dispenser. Then using this excellent tutorial located here I created an animated texture for all five weapons in my dispenser. Now I am giving you all my textures and the actual TGA files that I used in the download below however I took the time to go through the tutorial and learn how to make animated textures, so you should too in my opinion.
Ok now that we made our animated texture we can start working on how to get them into the map.
1) If you don’t already have some place to use this dispenser create a room.
2) In the room add a prop_dynamic and select the world model: models/props_lab/generatorconsole.mdl
3) Use the Block Tool to create a small brush and place it in the center of the console. Apply the animated texture we created above to the front of the brush. Turn the brush into a func_button and name it “ammodesp”
Click on the OUTPUTS tab set the following parameters
My Output: OnPressed
TargetEntity: ammodesp_tt
TargetInput: IncrementTextureIndex
Under FLAGS select Don’t Move, Toggle, UseActivates
4) Use the Entity Tool to insert an env_texturetoggle somewhere near the brush. Set the keyvalue Name to "ammodesp_tt" (the TT stands for Toggle Texture) set the Target Brush(es) to "ammodesp". Click Apply and close the property window.
[page=Create the Area Where Weapons Spawn]
1) Place a prop dynamic on the left side of the console and set the model to models/props_combine/combinebutton.mdl – You can use any button model you want. I just like this one this best.
[page=Understanding Game_player_equipment]
1) Select your entity tool and place five game_player_equip on your map. You will use one for each weapon in the dispenser. Name each game_player_equipment “give_ammodesp001” “give_ammodesp002” “give_ammodesp003” etc.
Click the “SMART EDIT” button. Set the following parameters….
give_ammodesp001
Key: weapon_rpg
Value: 1
give_ammodesp002
Key: weapon_ar2
Value: 1
give_ammodesp003
Key: weapon_shotgun
Value: 1
give_ammodesp004
Key: weapon_357
Value: 1
give_ammodesp005
Key: item_healthkit
Value: 3
Although what we are doing may not be clear just yet it will all come together as we get to the end of the tutorial.
2) We want to now create our func_buttons that will activate the give_player_equip you just added to the maps. You will need to create one func_button with a nodraw texture for each item on the dispensor.
I named my func_buttons as followed: ammodesp_spawn_weapon001, ammodesp_spawn_weapon002, ammodesp_spawn_weapon003, etc. It’s important to remember that the buttons cannot be directly on top of each other. You have to offset them a little or the player will be unable to use the button.
Set the Delay before reset to 1.
Under FLAGS for each button select toggle, don’t move, use activates.
On buttons 2-5 set the “STARTS LOCK” flag – leave button 1 unlocked.
3) Open the properties tag for each func_button. On the OutPut tab add the following parameters:
MyOutput: OnPressed
TargetEntity: give_ammodesp001 --- replace the 001 with the number of the func_button, 002, 003, etc.
TargetInput: use --- Hammer will tell you this is invalid – ignore the error. It is not invalid.
[page=How to use Math_Counter]
1) Using your entity tool select the MATH COUNTER and add one to the map.

Name it ammodesp_math
Initial Value: 1
Minimal Legal Value: 1
Maximum Legal Value: 6
Click on the OutPut tab and add these two outputs:
MyOutput: OutValue
TargetEntity: ammodesp_logic – We have not made this entity yet
Target Input: InValue
MyOutput: OnHitMax
TargetEntity: ammodesp_math
Target Input: SetValue
Parameter Override: 1
Now go back and click on the property tab of your ammodesp func_button – and add the following output:
MyOutput: OnPressed
TargetEntity: ammodesp_math
Target Input: Add
Parameter Override: 1
Close the properties box
[page=Using a Logic_Case to make it all work]
1) Select the entity tool and add a logic_case to the map.
Name the logic ammodesp_logic – in the keyvalue section add the following values
Case 01 – 1
Case 02 – 2
Case 03 – 3
Case 04 – 4
Case 05 – 5
In the Outputs tab you need to add the following information….
MyOutput: OnCase01
TargetEntity: ammodesp_spawn_weapon001
Input: Unlock
MyOutput: OnCase01
TargetEntity: ammodesp_spawn_weapon002
Input: Lock
MyOutput: OnCase01
TargetEntity: ammodesp_spawn_weapon003
Input: Unlock
MyOutput: OnCase01
TargetEntity: ammodesp_spawn_weapon004
Input: Unlock
MyOutput: OnCase01
TargetEntity: ammodesp_spawn_weapon005
Input: Unlock
This is just for Case01 – you need to go through all 5 cases and Unlock the correct func_button accordingly while locking all the rest. So for Case02 here is how it looks.
MyOutput: OnCase02
TargetEntity: ammodesp_spawn_weapon001
Input: Lock
MyOutput: OnCase02
TargetEntity: ammodesp_spawn_weapon002
Input: Unlock
MyOutput: OnCase02
TargetEntity: ammodesp_spawn_weapon003
Input: Lock
MyOutput: OnCase02
TargetEntity: ammodesp_spawn_weapon004
Input: Lock
MyOutput: OnCase02
TargetEntity: ammodesp_spawn_weapon005
Input: Lock
The Final look:
[page=Tying it all together]
What does all this mean? Well run the map and load it up. As you press USE on the picture of the weapons it cycles through each animated texture. As it cycles through it increases the math counter by 1. It then applies that value to the value of the logic_case. So a count of 1 activates Case01, a count of 2 activates Case02, and so on. Once the math counter reaches 6 it automatically resets itself back to the number 1. The animated textures will also reset back to the first texture screen at the same time.
Each individual Case in the logic unlocks the correct button that activates the give_player_equip while locking all the other buttons, this means that not all five buttons can be activated at once. So when button 01 is unlocked it only activates the player_equipment 01.
You will find in this download the map, the hammer file, all my tga’s, and the texture files to load up in map.
[page=Other Cool Uses]
1: There are so many uses for this it is unreal. Using the example you can have multiple doors in one room but a player has to decide which door he wants to go through and unlocks it accordingly.
2: You can also tie all of this to multiple cameras in several rooms all over the map. You could then kill the players in certain rooms via a trigger using the exact same concept.
3: Tying exploding barrels to groups and using the system to explode certain groups of barrels.


Nice work! :) Very clear and helpful.
WORKS GREAT:p LOL thx
Awesome Tutorial! The power of entities is almost universal.
I wish the coop mods (synergy, obsidian coop etc.) could adapt this system to make the access to weapons a bit more comfortable and sexy!^
AGRREEED!!