This is a blog about expo stands - specifically our latest one - and these cool little lightboxes we made for it!
We've taken Friendship Club to a few events in the past, and they've all ranged dramatically in size; and in terms of the space available for exhibitors. At some we've had 2 screens and 8 controllers on the go, with loads of table space for merch and candy, and at others it's just been the bare minimum - a laptop and 4 controllers. We do actively try to improve our stand with every show (space allowing - occasionally some things have to be left behind!) and add a little something extra that will work in the space we're given.
Rezzed is probably the biggest show we've done so far; but as we can only afford the smallest option in terms of stand space (in amongst a mass of other cool games!) we decided we needed to try and customise it somehow to try and stand out a little bit more.
DESIGN (AND THOUGHT!) PROCESS!
All the main exhibitors have to provide art to be printed on the backboard; so I had a think about what we might be able to do to cut through the inevitable wall of glossy printed paper...Lights?! Let's use lights!It seemed sensible to focus on the characters, as I think they get across the kind of gameplay (MULTIPLAYER and GUNS!) more clearly than any other visuals.
In my previous blog post about the character design in Friendship Club, I mentioned that our main 4 have got quite strong silhouettes; so it seemed fitting to combine this with some nice attention-grabbing (but not distracting!) lights. As the main design 'theme' for the game centers around Timmy's House - a wonky, purple-hued, dream-version of a typical 1950's American home - I thought it might be cool to make our little section of wall slightly mimic this... so; wallpaper and framed pictures!
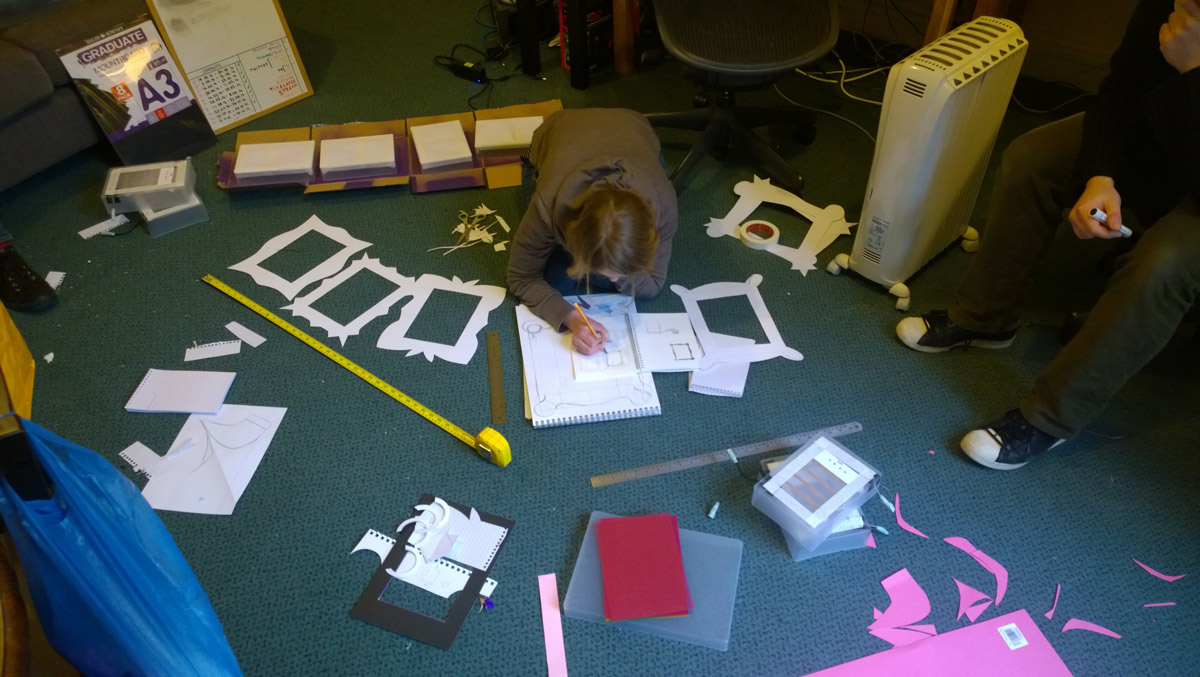
Throw all that together, and you have what was in my head at the time. Glowing coloured light box-pictures, with weird purple frames on a patterned purple wall. Here's some initial sketches and designs of my thoughts!
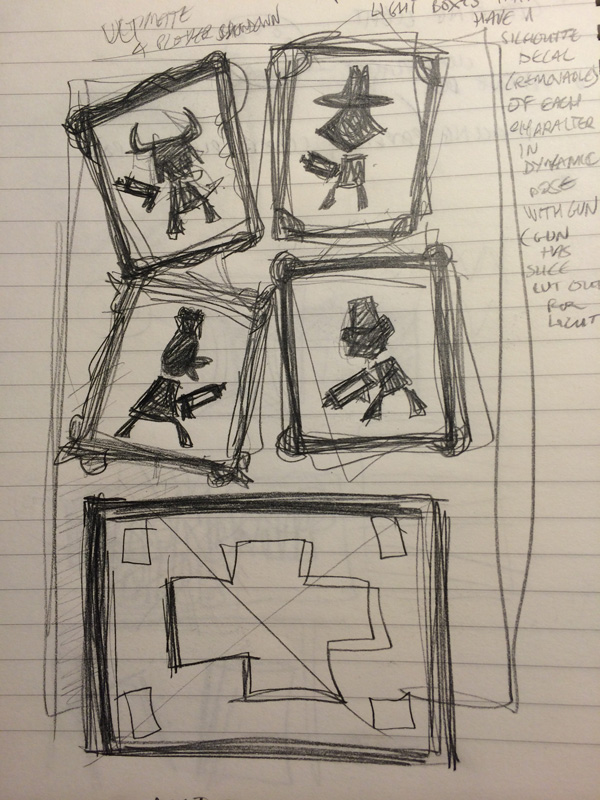
Scruffy sketch!
I refined the idea a few times after taking a proper look at the stand measurements, realising I did actually have to fit our (new!) logo and some useful info on that space too, checking whether this would all be okay with the health and safety regulations, and accomodating for the big screen we're kindly being provided with - a special thank you to Rachel Pike from Gamer Network for all your help!
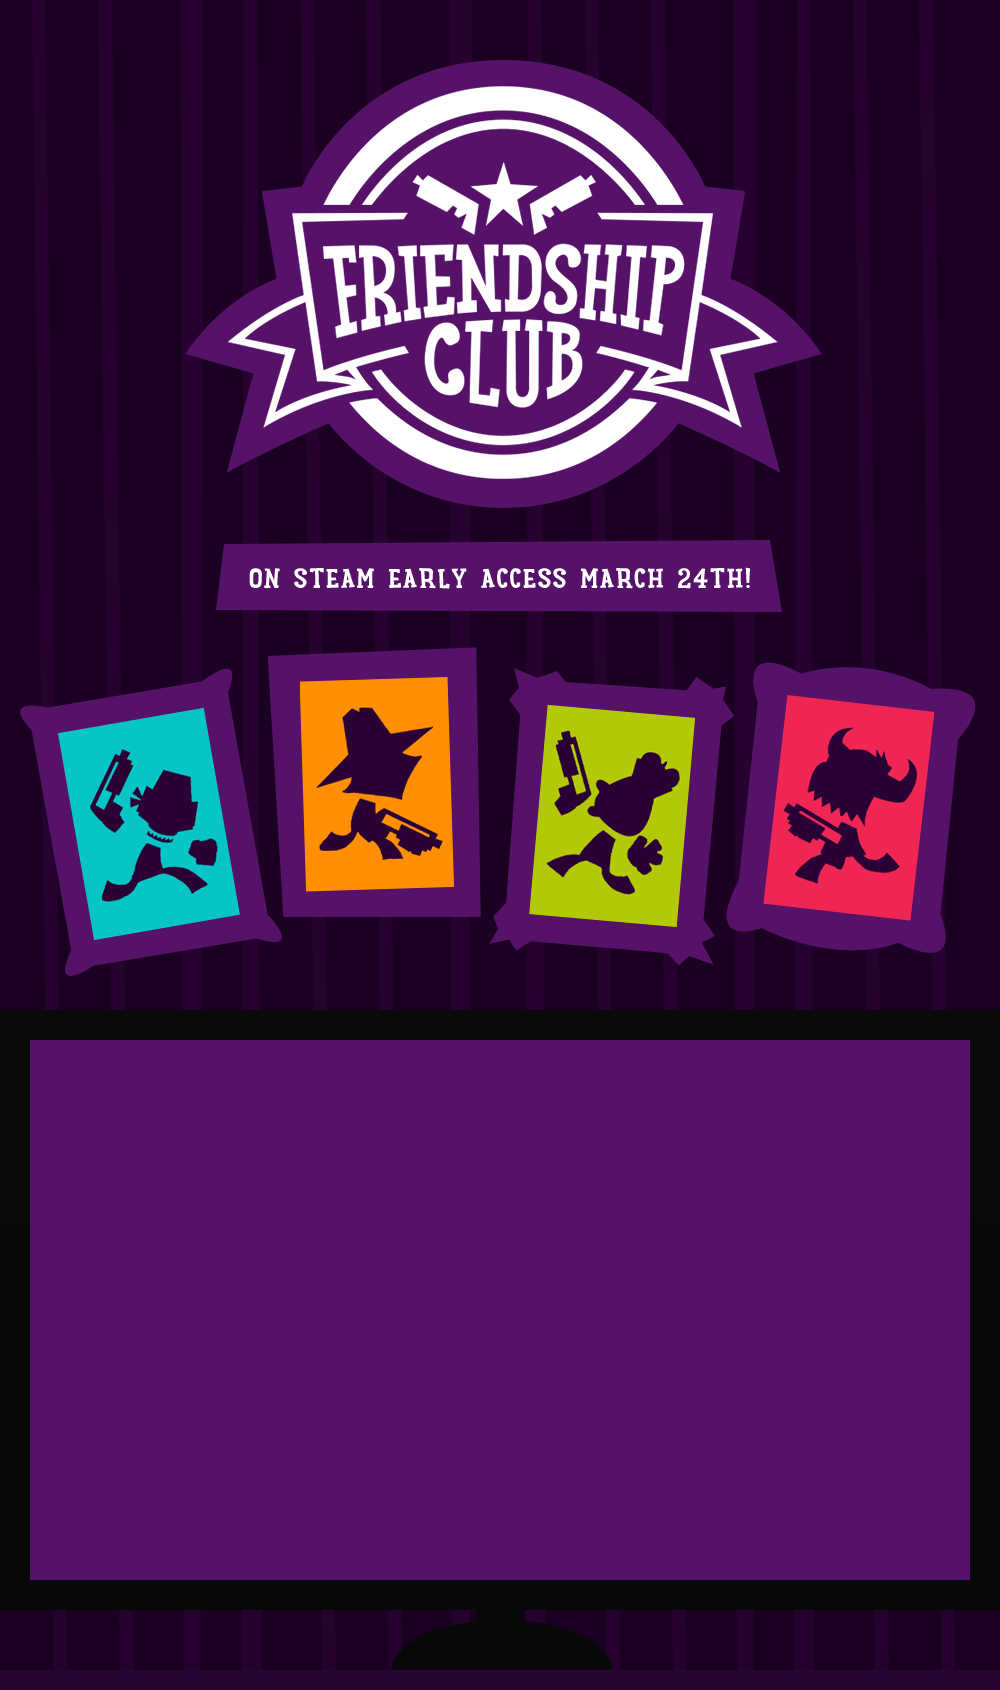
Slightly more coherant mockup...!
BUILDING PROCESS!
The creation of the light box pictures was actually quite a lengthy process! A lot of it was based on intuition and balanced out with careful little tests, so we could avoid wasting money and still end up with something that looked reasonably professional (despite being totally home-made!) Ash assured me that we could only use the lightboxes if they 'didn't look shit and home-made.' Soooo, no pressure...
We all played a part in the construction of the boxes. I handled the silly ideas, direction of the silly ideas, and cutting things with blades. (This doesn't seem like the best combination, but everything was fine and good and noone got hurt!) Tom was in charge of ordering stuff online, general assembly, and accurate template measurements when I got annoyed at the lack of symmetry in my own freehanding. Nick was the handyman, specially soldering the LED lights into the best formation, and whittling holes into plastic boxes. Tom and Nick also tag-teamed the bulk of the spray painting. And Ash provided two finely-tuned eye balls for quality control. (They might actually move independently, like a highly critical chameleon.)
...YEAH, BUT HOW DID YOU ACTUALLY MAKE THEM?!
Okay. Right.
1. The main structure.
First things first: the proof-of-concept test. Put a light in a clear box and see how it looks with a coloured overlay and a dark 'silhouette' cut-out on top.We already had a transparent storage box, a pink acetate folder, some warm white fairy lights and some black card to use for this first test. It seemed to work okay, but all the individual lights were completely visible through the plastic. So we tried adding a sheet of tracing paper to the mix, which diffused the light really well. However; there were still a bunch of things that needed to be rethought - the box was obviously waaaay too deep to be mounted on a wall, and although the randomly distributed clump of fairy lights gave off a nice even glow, they weren't exactly practical to try to contain and power in 4 separate wall-mounted boxes. We also had to make sure we could find the right 'character' colours of acetate, otherwise it would look a bit crap.2. Improving the main structure.Next, we bought a 24 LED battery-powered camping light 'disc' to test as a light source, and some coloured cellophane to use as a gel test for colour combinations. Batteries seemed like a good idea at the time, as we wouldn't need a power supply.
Bad light.
Well. The camping light was a mistake! The light it gave out was really obviously concentrated to the circular shape; and whilst it was quite strong; it had a horrible harsh blue glow to it, which distorted the colour of the cellophane. Plus, about 6 of the lights went out after 10 minutes of being switched on. I'm not sure if it was just badly made (it was quite cheap...) or it was just sucking up batteries; or both. But it was rubbish. And it prompted us to reconsider the battery-powered option; because batteries are EXPENSIVE.
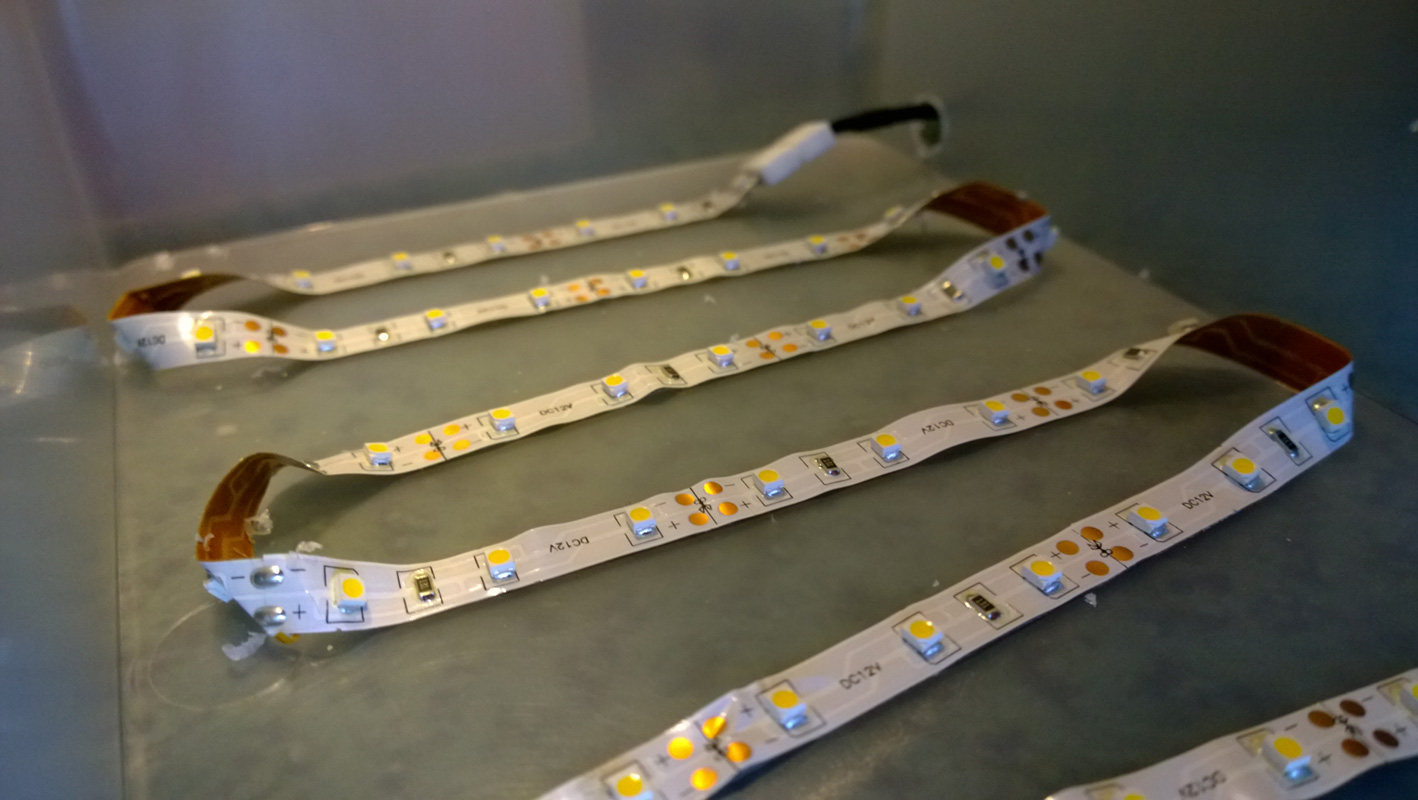
We held off on the lights for a bit to concentrate on the containers. Tom and I went on quest to find the perfect sized transparent boxes. There was a some close competition between a tuppaware and A5 paper storage box for a while, but in the end we went with the storage box. The plastic was ever-so-slightly frosted, which diffused the light even better; so we got 3 more. Back to the lights. We eventually discovered that you can buy white LEDs on long strip reels, which can be cut to size and reconnected. AND they only needed a single power source. So we got them, and they were perfect. The lights were really bright. REALLY BRIGHT. And the colour was a really nice warm white, which was just right behind the coloured gels. Hooray!
The coloured gels were tricky to get right too. We wanted the lights to be as close as possible to our character's signature colours; which involved getting various shades of acetate and cellophane and sandwhiching them together to get the right shade. It was an odd process, kind of like colour mixing... acetate tended to give a slightly desaturated version of a colour, and adding a layer of coloured cellophane increased it's vibrancy. Weird.
In the end the closest we could get to the character colours involved the following combinations:
- Old Man Ricketts - 1 layer of orange acetate and 1 layer of yellow cellophane.
- The Canardinal - 1 layer of blue acetate and 1 layer of yellow cellophane.
- Shakey Jake - 1 layer of green acetate and 1 layer of blue cellophane.
- Chud - 3 layers of pink acetate.
These were all cut to size, along with a piece of tracing paper to diffuse the light.

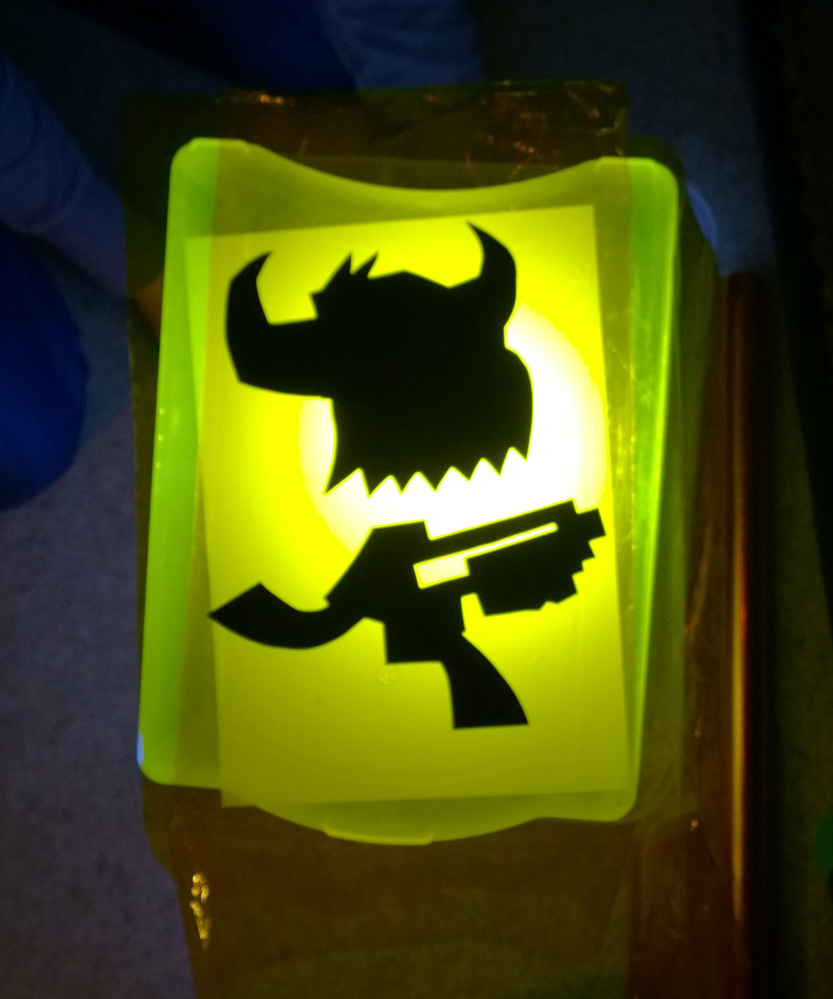
Light and colour tests!
3. ...And the rest!
Then we divided the 5 meter reel of LED lights up into 4 meter long strips, (plus a 1 meter bit that got snipped up for testing earlier!) We wanted the boxes to be modular, which would make them easier to store and fix if any of them broke; so Tom bought a bunch of connectors so that each box could be detached from eachother and plugged into different formations (Although in the end we kept just one formation; as the colours looked the best that way!) To keep everything tidy we had to drill holes in the boxes to feed the cables and connectors through. Though the drill didn't actually work properly, so Nick commandeered Tom's leatherman to hand drill (whittle?!) each hole. The lights were adhered to the inside of the boxes in a zig-zag to ensure even light distribution.
Fancy LEDs!
Then Nick and Tom spray painted the sides of the boxes, and the wires for each connector. Tom
also stuck some mirrored tape around the inside edges of each box too; so any light trying to escape would be reflected back. Once everything was in place, Nick took the boxes home to solder the connectors to the LED strips.I made some templates for the picture frame designs and with the help of Tom (and a few mathematical measuring devices) got them marked up properly on mount board. Then I cut them all out with a badass Stanley knife and spray painted them purple too.I also printed out some templates for the characters, cut them out, traced them onto black card and cut them out again.
...Jeez. Now I'm remembering how long this all took!
General construction...
4. Assembly.
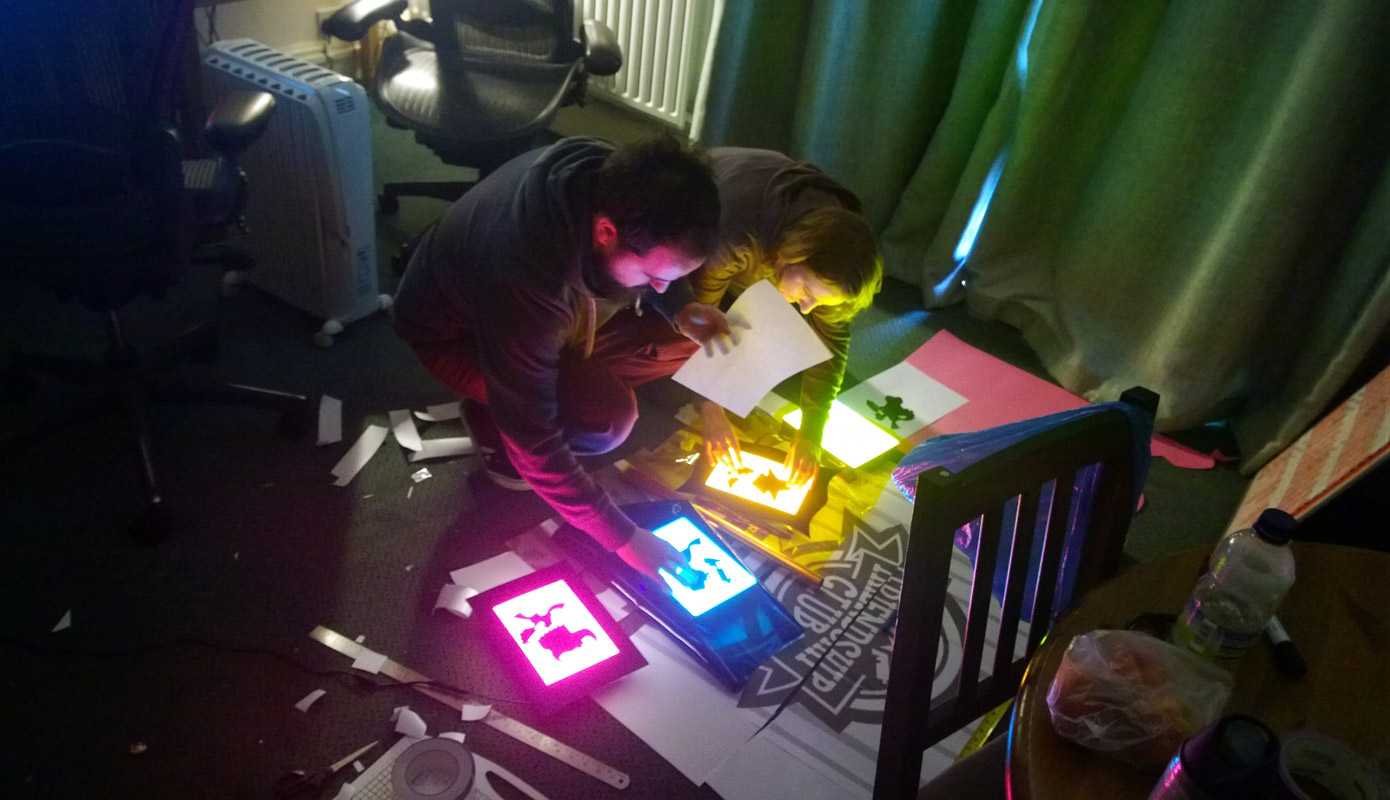
Tom and Nick assembled all the pieces together, because I didn't trust myself not to mess everything up this late in the process. We had a few almost-disasters with sticky tape and the concept of flipped images, but got there in the end!
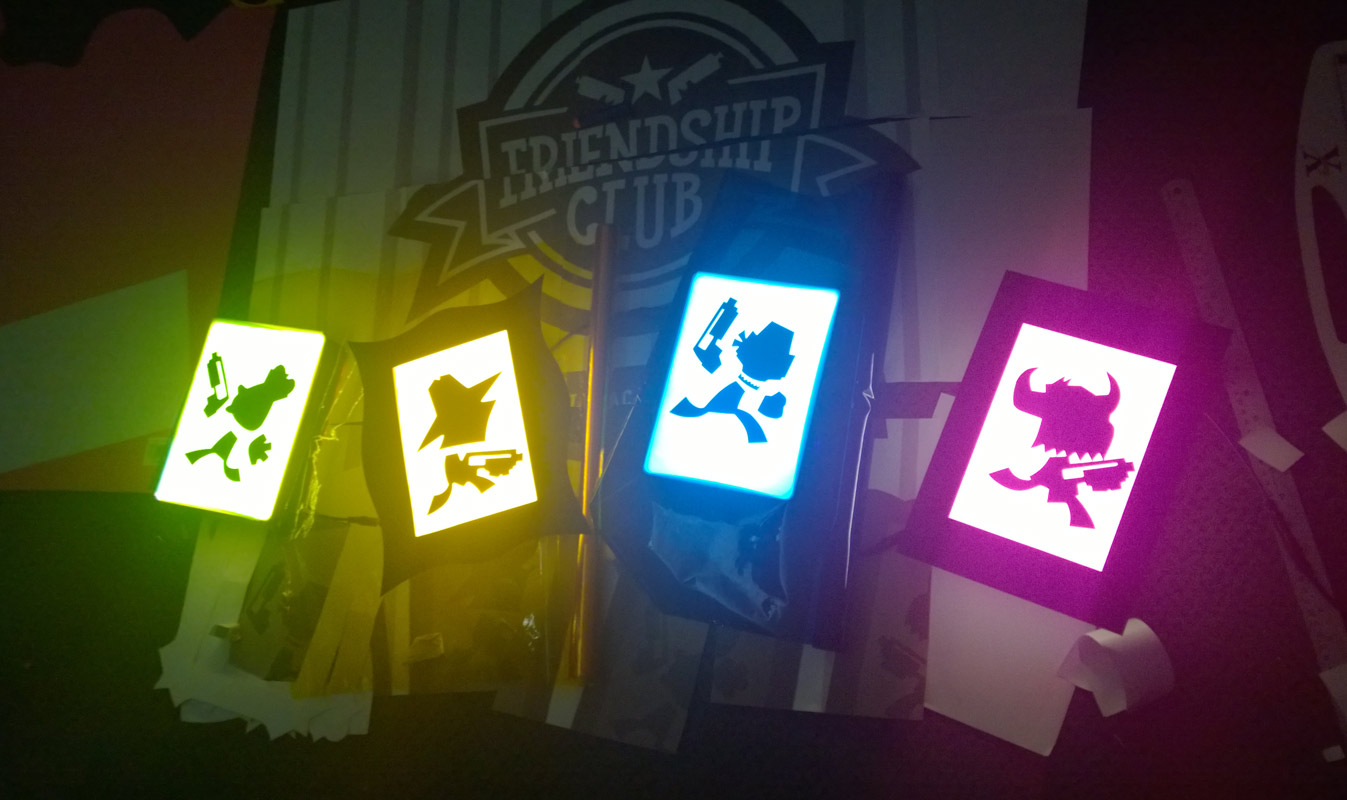
The lightboxes (pretty much) finished and ready for packing!
Huzzah!
THE END RESULT!
Well. We think they look pretty awesome. And they even got the Ashley Gwinnell seal of approval, which counts for a lot!
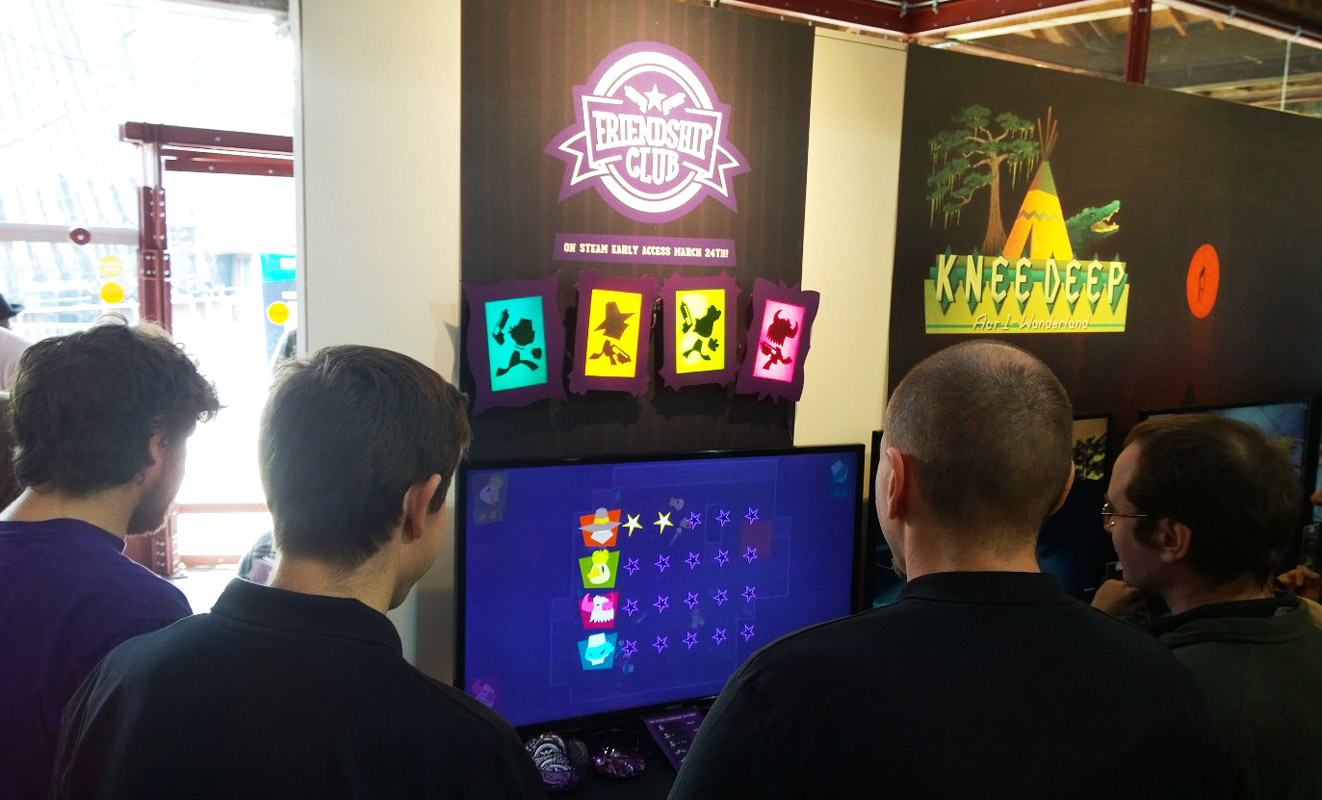
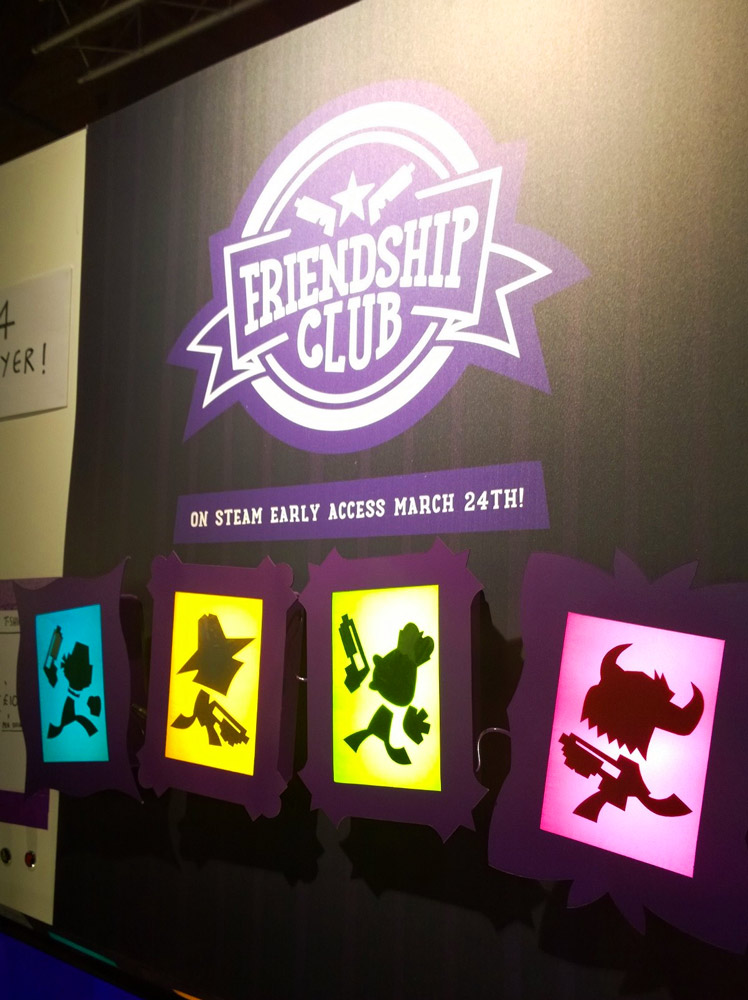
The finished lightboxes on the stand at EGX Rezzed!
They're also completely reusable; as each box is adjustable, fixable, and is attached to the wall with some handy little non-permanent command strips!
We're also eventually hoping to hook the light boxes up to the actual game with Arduinos, which will allow us to switch off an individual character image when that player is defeated ingame, which would super cool for any other events and expos!
Let us know your thoughts, or if you happen to have made anything similar; better or worse!
- Sop

Really cool booth, great idea!