Wrath Redoubled
A Guide to the Beorning Chiefdom
The Beornings are arguably the most ‘barbaric’ of the Northmen factions. (Close runner-up is Rhovanion, with its Wilderman subculture and ability to train Easterling-style axemen.) They’re the only Northmen who formed a chiefdom rather than a kingdom, and their preference for straightforward charge tactics reinforces the perception that these men are rather different, culturally, from the trade-focused Dale-men and the Gondor-sympathizing Rohirrim.
This difference is exemplified in the fact that, whereas Eorl and his kin felt straitened in the upper vales of the Anduin and rode south, never to return, the woodmen who dwelt along the eaves of Mirkwood in the Third Age stayed put despite the constant threat of goblins, wargs, and worse. Beholden to no great lords of Dunedanic descent, these folk remained to work the land and raise their families, living in small villages between the mountains and the dark, forbidding forest.
These woodmen are the real frontiersmen of Middle-earth, and in the Fourth Age the hard work of their forebears has resulted in an independent realm largely free of the great conflicts that trouble the outside world. Beyond the vales and the wood, Easterling invasions have ebbed and flowed across the open lands of Rhovanion; the Reunited Kingdom has expanded and contracted and splintered into civil war; an Empire has arisen in Harad. But in the land of the woodmen, much remains as it ever has been.
The security of the chiefdom is due in part to the strength and wisdom of its leaders, the descendants of Beorn. The origins of the famed shape-shifter are obscure, but his sons have long had alliance with the woodmen and kept the crossings of the Anduin safe for trade. While none now possess the skin-changing ability of Beorn, the men of his line are large and strong, skilled with animals of all kinds – and almost as withdrawn from the world as their famous ancestor.
The isolation of the Beorning Chiefdom is a benefit to the player of this unique faction. Initially, the Beornings command only 3 settlements: Oldford, guarding the crossing of the Great River; Grimhold in the forest-eaves; and on the eastern end of the wood, Holt.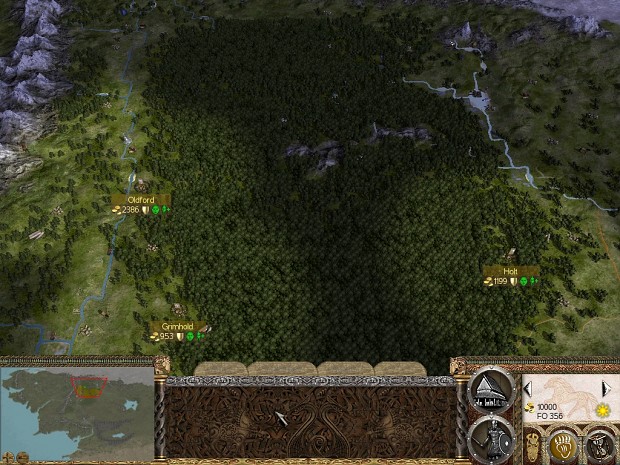
These settlements are fenced in by rivers, impassable forest, and mountains. Any attack must come through only a few predictable routes. This will also be the case after your realm grows to include nearby independent towns and strongholds. The terrain your chiefdom inhabits offers perhaps the most defensible strategic position of any faction.
Your neighbors are the dwindling Elves and the expanding Men of Dale (with whom you share an alliance and military access). As a passive faction, the Elves will shield you somewhat from invasion, as few Mannish armies are willing to enter Elven lands. Secure trade rights with them, stay off their territory, and you need never worry about an attack from that quarter.
Dale, on the other hand, is a threat. Your initial alliance may hold for a time, but Dale is a rising power in the world and will seek to exert its influence. Holt is in particular danger, as it has no walls, is unlikely to be well-manned, and is far from reinforcements. To that end, I like to make its defense an early priority, building walls as soon as possible and recruiting mercenaries to deter invasion. Dale will be fighting North Rhun at first, and will likely attack either Rhovanion or Dorwinion as well – provided you make yourself look like a dangerous target.
Attack may also come from upriver. Dale’s initial presence at Framsburg is not too large, but an attack on Oldford can spell disaster for your small chiefdom. Use Emissaries, Scouts, and towers to keep watch for armies heading in your direction.
As long as you can maintain peace with Dale (and keep a deterring force near your homelands to dissuade attack) you can expand west and south. To the west, the village of Andlang lies north of Lorien. Its people are woodmen, but they may combine forces with the various Orc-holds in the Misty Mountains, making them much more of a threat.
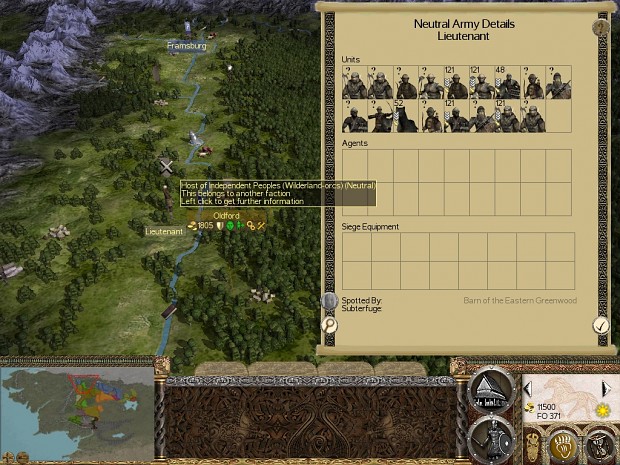
Above: Orcs and Wargs from the mountains sometimes move into your own territory,
complicating your efforts to capture independent settlements.
If you can secure the settlement and clean out the Orc-holds, you will have a relatively safe corner of the world to develop, since Andlang is only bordered by Elves to the south and mountains further west.
Securing the High Pass Stronghold is one of the Beornings’ victory conditions. Some say Beorn came from the mountains himself; his descendants were certainly keen to secure the High Pass for the purpose of trade and tolls. This is the only nearby passage over the Misty Mountains (another is near Framsburg), and re-taking it will allow access into Eriador. Of course, the reverse also applies. The Kingdom of Adunabar, adherents of the Shadow Cult, have strong forces here and may want the High Pass for themselves.
And Adunabar is a dangerous foe indeed. Their troops are well armored and often possess high morale. In addition to attacking you over the mountains, they may come up the Anduin if they manage to conquer the Brown Lands to your south. Be prepared, then, to face a two-pronged attack.
I prefer to make Langwyke, south of Grimhold, my first target. The lands west of the river will not come under attack by other factions for some time, but while you spend lives and coin trying to make them yours, Adunabar may be marching upriver toward your heartlands. Send your armies south to meet the Cultic forces in the Brown Lands, while you develop your homelands safely. When you feel secure enough in your power, send an army west to deal with the Orcs and wild men to your west.
By the time you have expanded your chiefdom by a few settlements, Dale will begin to intervene. You may welcome war with Dale, if only because it allows you an outlet for expansion into some very rich territory well away from Adunabar (whose territory is both distant from your heartlands and difficult to incorporate into your realm).
Assemble at least 2 forces: one near Holt, and another at Oldford. Send forth your scouts to see how Dale has disposed their forces. Around this time they may still be warring with North Rhun, and possibly turning southward to crush Rhovanion.
If Dale’s homelands are lightly guarded, this is no time to be subtle. Send your Holt army north to Dale and lay siege. (Watch out for the nearby Dwarves, who may seek to relieve their allies. Your troops have a difficult enough time tackling Dale’s heavy infantry; Dwarven armor is even more formidable.) Taking the city will cut Dale’s homelands in half: west of the River Running lie Esgaroth, Heorth, and Framsburg; eastward lie the less-crucial Burne and Eodor, as well as the other provinces Dale has managed to gather under its banner.
Such an audacious strike will of course draw Dale’s attention, and you can expect to be besieged yourself very soon. Your Oldford army can march north to Framsburg and then east to reinforce, but you’ll need to be wary of Dale sending punitive expeditions toward your other settlements, such as Holt.
If you can hold on to Dale and incorporate it into your realm, any financial troubles you were experiencing early in the war will soon be over. The city and its surrounding lands are the wealthiest to be found in the North. And Dale’s homelands allow you to raise companies of Retainer Spearmen – defensive and well-armed troops whose versatility and endurance is quite a change from what can be found in your native roster. From here you can make all of the North your own, moving east and south and setting your new borders at easily defensible river crossings.
Even before the war with Dale, money isn’t much of a problem for the Beornings. Your units are cheap to recruit and maintain, and while your buildings are as expensive as any other faction’s, you aren’t nearly as reliant upon higher-tier development. Just 3 tiers of Military Development (MD) will allow you to train your entire roster. The only things you gain by building the 4th tier of provincial development are access to high timber walls and the upper level of industry buildings. These are both great benefits in the long run, but nothing you strictly need.
And the fertile Anduin valley is rich in farmland and trade resources. These financial advantages mean you can field large armies at a very low cost, relative to your neighbors.
That’s a good thing, because you will need lots of troops. The Woodmen units you can train at lower tiers are hardy enough, but lack armor. They will wither under arrow fire and crumble before a cavalry charge. After taking such heavy losses, you can hardly blame them when they turn and run back for the safety of the tree-line. Even your signature Beorning Axemen and bodyguard unit are more suited to attack than defense.
The unfortunate truth is that even a full and balanced army of Beornings may struggle to hold its own against a modest army of Adunabar or Dale. To counter this, a canny chieftain must remember the advantages offered by bows, aggressive tactics, and fear.
Woodmen Bows are your only ranged unit, but these unassuming fellows are critical to your success. Without them, you have no way to protect your lines from the enemy’s deadly hail. While the archers of other nations are often better than yours, take solace in the fact that even the mighty Eagles feared the bows wielded by the Woodmen – and use them to target the Dark Bows and Barding Longbowmen of your foes while they get into position.
The low cost of Woodmen Bows means there’s no reason not to have half a dozen or so in your armies. With so many arrows, you may have enough left over to take aim at other targets, such as enemy cavalry, when all the foe’s archers are dead. And when they’re done with their ranged duties, they can wield small hand axes in melee as flankers. (Yes, in the Beorning Chiefdom even the bowmen are axemen.)
After the skirmish phase is over, you’ll want the general scrum to begin and end quickly. Charge your melee line forward and move your flankers into position. The aim here is to hit everyone in the enemy army and bring the battle to a decisive close before you take too many losses.
Your battle line is likely to be a motley mix of units from all tiers of MD. The Woodmen Axes (unlike almost every other faction, your tier-1 garrison unit is not armed with a spear) will have a role well into the late phase of the campaign, filling out the front line in the early years and gradually moving into a flanking and reserve role as you begin to recruit more Beorning Axemen. You’ll supplement them with Woodmen Spears – a tier-2 unit which you may want to reserve for any enemy riders that try to outflank – and the Beorning units, both the Axemen and the Beorning Guard that accompanies each of your family members. Tie up the enemy line with your Woodmen, then flank with whatever you have left, including your Bows. Aim your Beorning Axemen and Guard units at the toughest enemy troops or the general.
The Woodmen Riders and Beorning War-dogs are a special case. You may want to hold them back while the infantry lines clash, but as soon as possible swiftly send them out to target enemy archers or isolated units. The War-dogs can also be used more aggressively - let them loose to attack charging soldiers if you want that charge stopped in its tracks – but be aware that you’ll lose a lot of hounds this way. Keep the handlers out of the initial fighting, although, being Beornings, they are effective at crashing into the rear of engaged units and giving them a nasty shock.
As for the Riders (yes, in the Beorning Chiefdom even the riders are axemen), don’t be fooled by their rough appearance. Their numbers and hardiness stand them in good stead against many cavalry units, and they can effectively drive off most enemy archers who survived the arrow duel. Otherwise, plan to have them “close the bag” of enemy troops who have been almost surrounded by your own infantry.
But more than any other faction, the Beornings rely upon fear in battle. All the flanking in the world isn’t going to allow your Woodmen to defeat the mail-swathed juggernauts Adunabar sends across the Brown Lands or over the Misty Mountains … but your other troops are big and scary.
Almost half of your units frighten the enemy. These units are all found at tier-3 MD: the Beorning Axemen, Beorning War-dogs, and your bodyguard unit, the Beorning Guard. All of these troops (specifically the handlers, in the case of the hounds) wield large axes that do great damage to armored and unarmored foes alike.
When you put all of these elements together, a successful Beorning battle can resemble the famed Highland charge: you rush your infantry forward, flanking where you can, while your heavy hitters take apart the enemy’s best troops and sow fear through the army. If you’ve timed it right, the hapless foe will soon be running for the hills from your technically inferior forces.
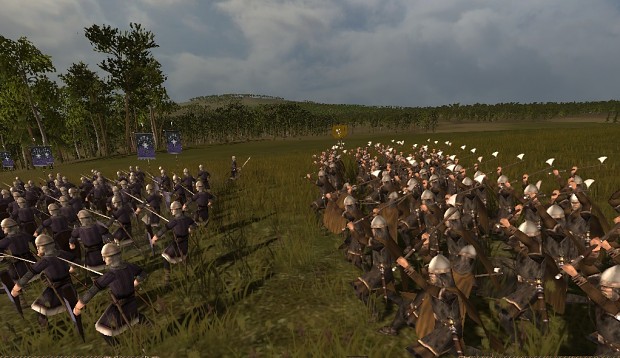
Above: An army of Dale approaches the Beorning line. Woodmen Bows, in the front line, thin out the foe but are charged by cavalry, which Woodmen Spears and Axes rush to intercept. Also in the center, War-dogs are released to sow confusion. On the right, Beorning Axemen charge some isolated riders. 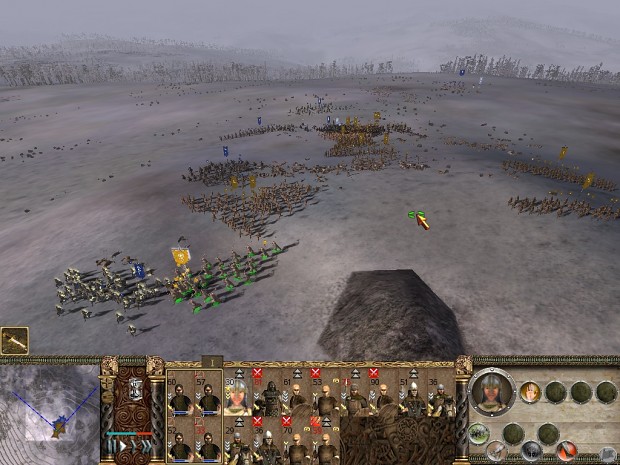
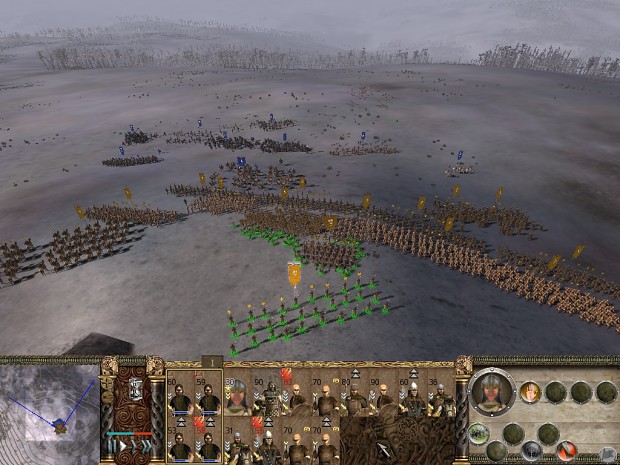
Above: In the foreground, the Beorning Guard charges enemy flankers. In the middle distance, the Beorning Axemen join up with the main infantry line to surround the knot of enemy resistance. Farther back, the enemy general begins to withdraw.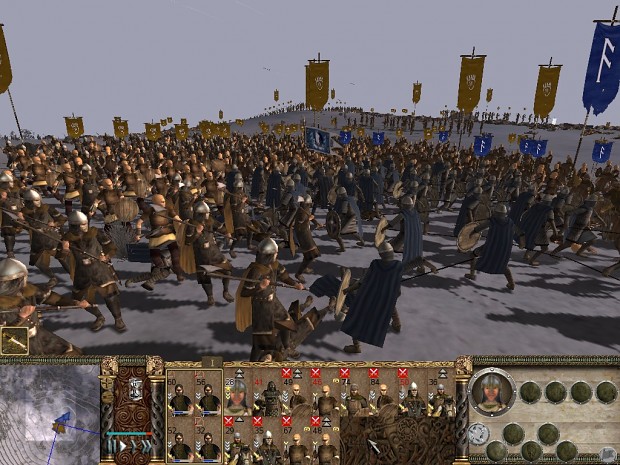
Above: Beorning Axemen and Woodmen Axes cut down enemy Black Spears,
the last resistance on the field.
Watching the tide of battle turn suddenly in your favor is one of the greatest pleasures of playing the Beorning Chiefdom. Your rough and ragged Woodmen may look terribly outmatched against the disciplined armies of your rivals. But with your hounds let loose and your axemen slamming into the enemy flank or cutting down the enemy general, horse and all, the moment will soon come when the foe knows its danger and turns to flee, disgraced banners streaming behind while your howling Beornings pursue to claim their victory.
Are all factions playable? I may test this mod.
Wonderfull review and tips! May play them now that I have installed the mod =)