Part 1 - Introduction
Before you go on, and read this tutorial, there are a few things you need:
- 3DS Max 6/8/9 with Alamo exporter, and importer
- Photoshop with Nvidia tools
- Or other image editing software capable of exporting an image as a .DDS, with alpha channel
Anyways, so this is continuing my little series on modding Empire at War. The first thing that I wrote about, was on how to rig a starship. That included hardpoints, both weapon points, and turret points.
Now, you might want a new turret, that'll go nicely with your model. Today's guide will talk about that.
Part 2 - Readying a game model
So, the same concept as before applies here. You'll need to import the mesh you want to work with, and your base mesh that you'll rig from. If you're reading this, I'll assume you read the other guide. I'll just tell what .ALO mesh to import.
So like before, bring up the Alamo importer through the "Utilities" tab. Then navigate to the turret you want to use as a base. I like to use the YVaW turrets, because they use bones for turret rotation and elevation, instead of pivot points on the mesh (Which can be slightly problematic).
For this tutorial, I'm going to use the DHIL from the KDY Republic pack. Once imported, it should look a little something like that.
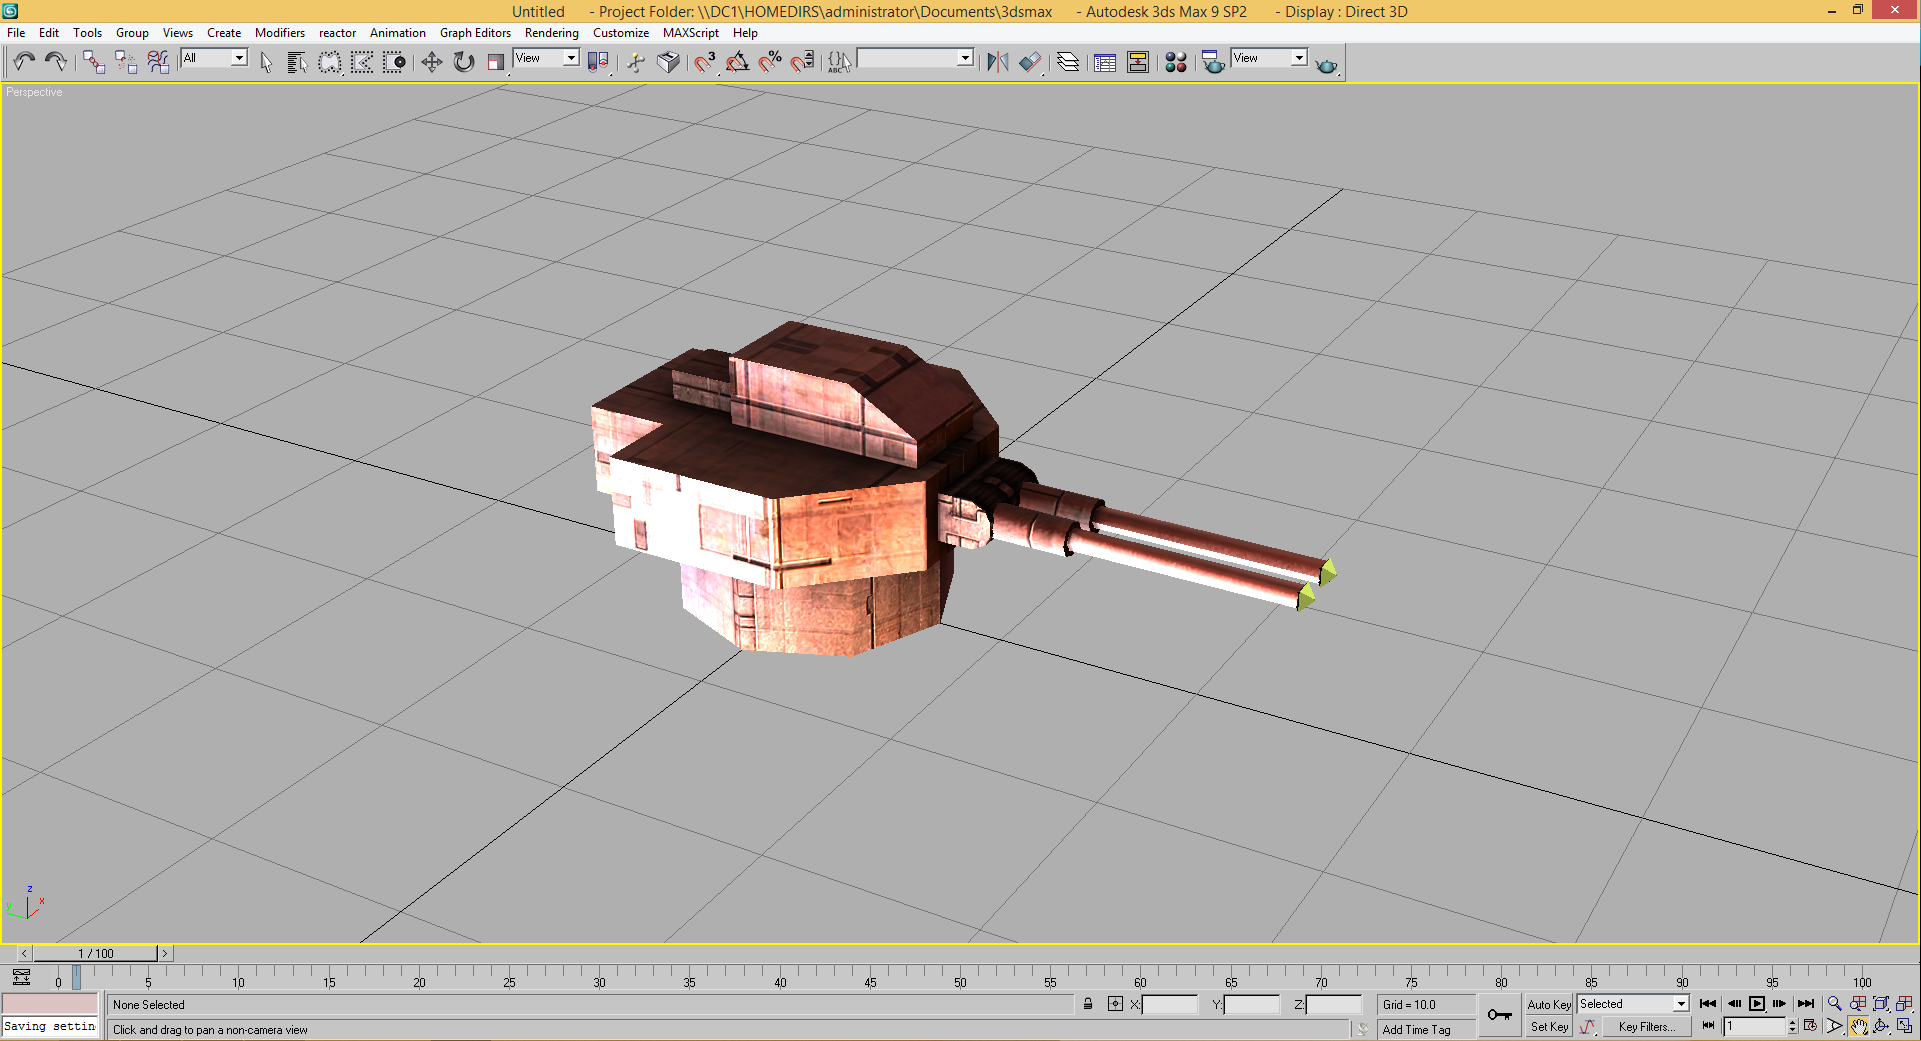
You may need to adjust your scaling on either the imported ALO mesh, or your mesh. Just be sure to scale at the root bone, as to scale everything.
Part 3 - Rigging the turret
So this step is fairly easy, you've got everything ready, but you might come across a small issue. This isn't exclusive to turrets, but it's good to know.
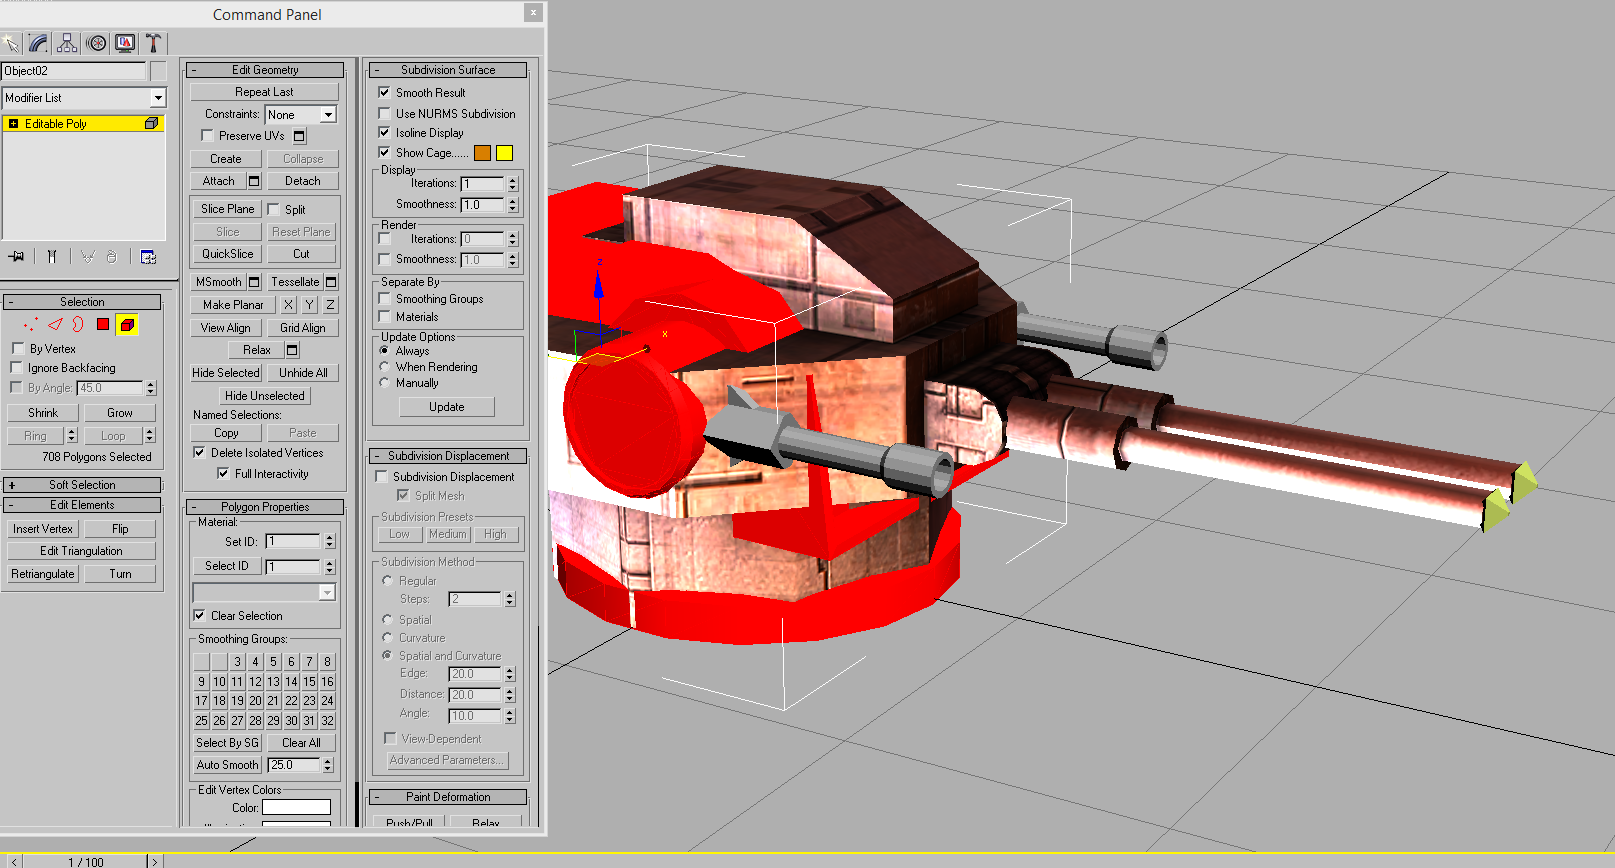
So if your mesh is blocky, (IE: The grey barrels below), you need to add smoothing groups. To do this, click on the mesh, and under modify click "Polygon" (The red square under "selection"), or "Element" (the red box under "selection"), then control+A (ctrl key + A key). This will select all polygons on your mesh. Once that's done, find the 4x8 box of 32 numbers, under "Smoothing Groups".
This is where you can control how smooth the mesh is. Anyways, once you find that, adjust the number under "Clear All" By default, this is at 45.0. 25.0 works the best for me, sometimes you need to take it higher to look good (I needed 30.0 for the barrels). Or you need to take it higher for fabric, or organic matter.
Now, you've got your meshes to smooth selected, and your smooth setting is set. Just click "Auto Smooth". This will automatically smooth the mesh.
Once that's done, you either have two things to do now. Set up your skeleton, or separate your mesh. If your mesh is one piece, you need to separate the barrels from the turret.
To do this, do what we did before, but instead of ctrl-A, just click your pieces to remove. Use ctrl+left click if you need multiple pieces. Or alt-left click to deselect pieces. Then go back to the modify panel, and with polygon selected, click detach. It will be under the "Edit Geometry" tab, and next to attach.
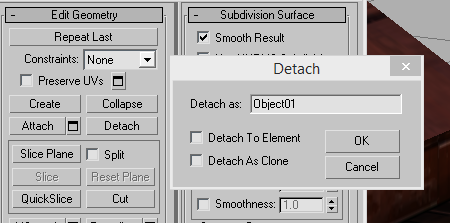
A new window will pop-up, where you can rename the detached mesh, and choose how you want to detach the mesh. I usually leave the two boxes unchecked. You need to make sure your base to the turret is centered on the black line. If not, you'll need to move the mesh so it is.
Now, one final check before we rig. Select all your new meshes, and go into multi view-port view. You should get 4 boxes, 3 with wireframes of your meshes.
Anyways, now you've got your two separate meshes, and the base is centered. Lets rig. First rename your two pieces accordingly. Turret for the rotating piece, and barrel for the elevating piece. That way you know what's what. Then go to "Schematic View" on the top bar, and open it. Find the main skeleton to the original imported turret. It'll look something like this.
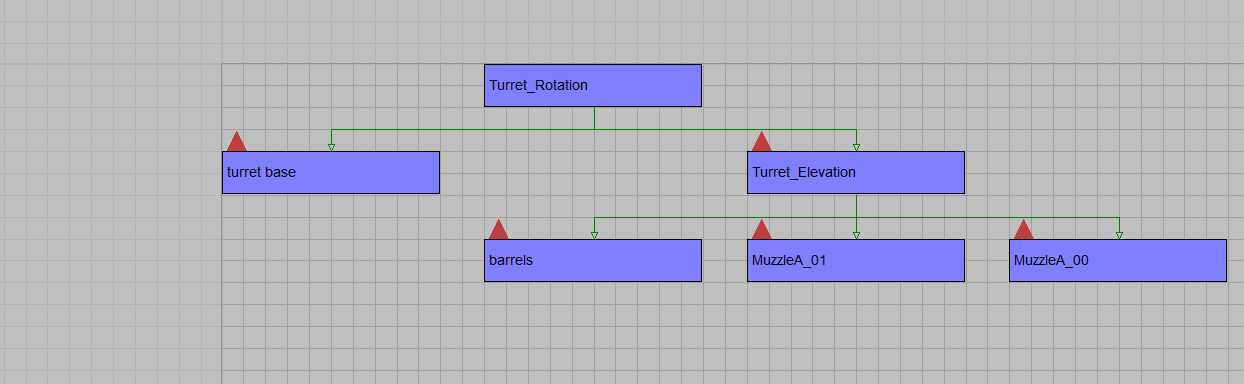
The two pieces we care about here is the mesh called "turret base", and the mesh called "barrels". These are both self explanatory as to what they are, and how to correlate to our meshes. You can delete this, we only need our meshes.
Once complete, well have to adjust the skeleton. If done right, the rotation bone should still be centered, that'll be fine. However, the elevation bone will need to be moved.
If you're not already go into multi-view, and go to the sideways view port. Maximize that, then click the turret elevation bone (It should have a muzzle bone or two, names may vary), and focus on your work area by scrolling, and moving the view port with the "Pan View" tool (Which hand in the bottom left corner).
Now for this turret, we need to move the bone back. This WILL vary for different turrets, but the same concept applies for all. As long as it's X-axis = 0, you'll need to center the bone on where the turret rotates. For this one, it's on the 20 sided cylinder (Note: I do not recommend 20 sided cylinders for turrets, this is just an example)
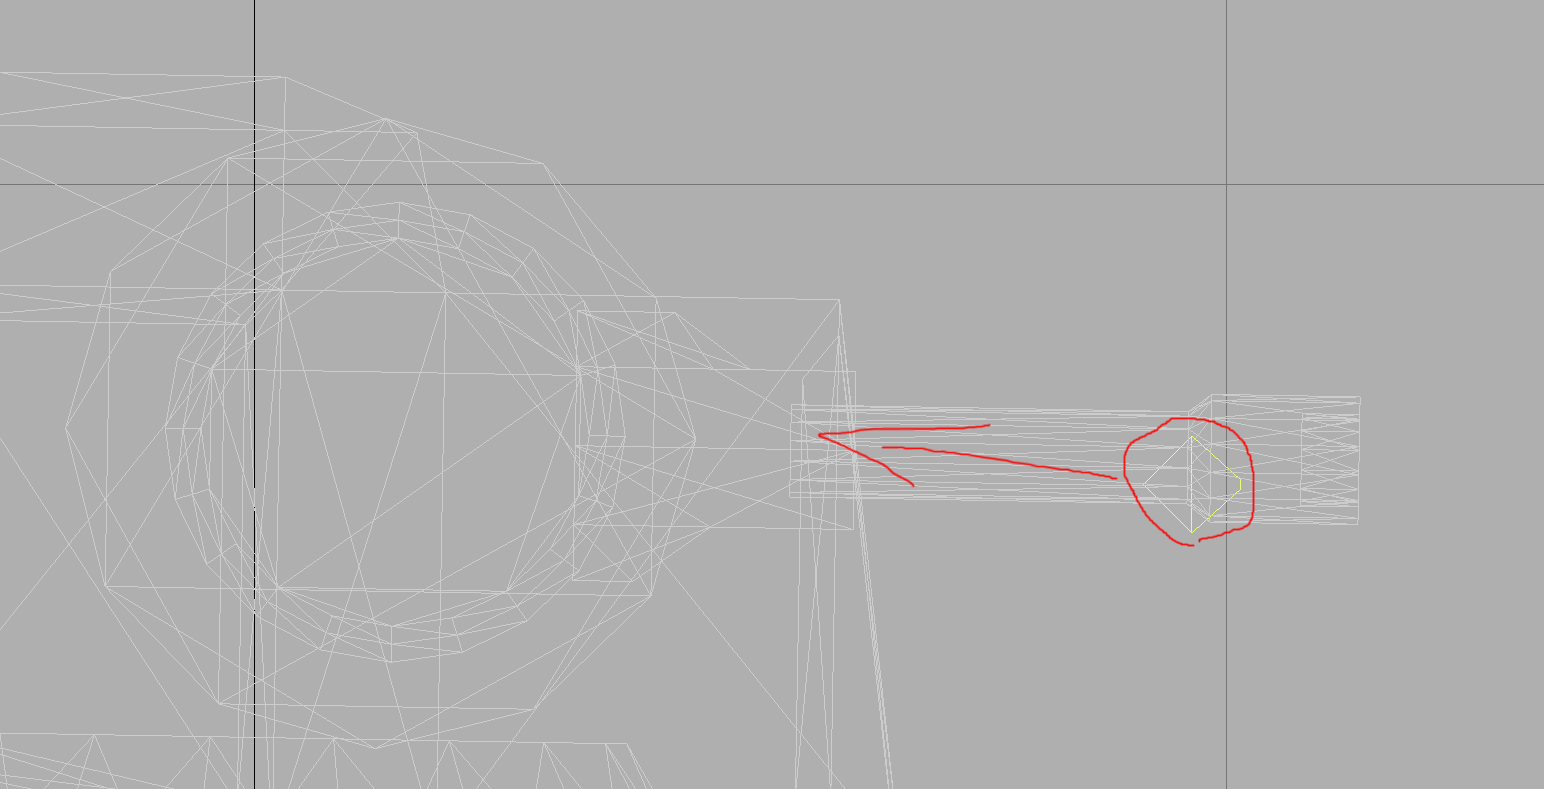
Once complete, you'll likely need to adjust the muzzle bones. In front of the barrels is fine, you don't need to be as accurate. Just don't send it into the middle of the turret though.
Now if your turret set-up is similar (again, every turret will vary), you ready for the final steps.

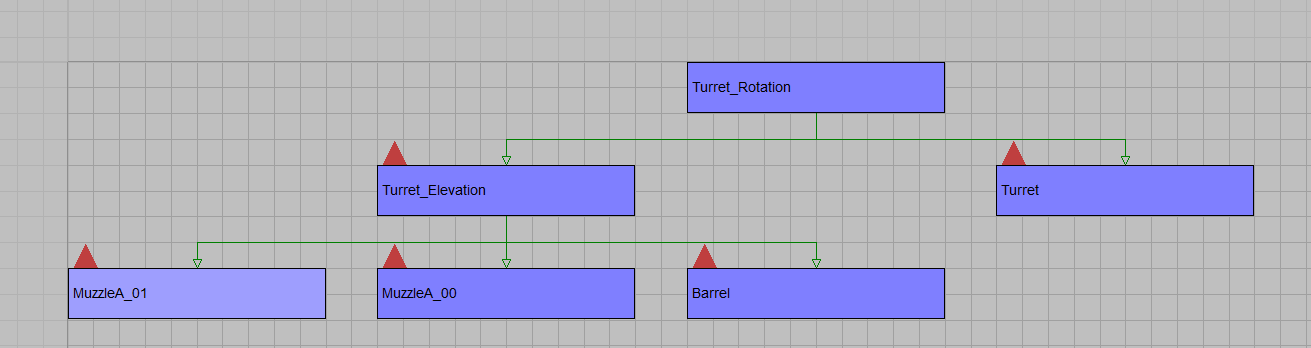
Go back to schematic view, and fine your meshes. If you remember from before, the turret was attached to the turret rotation bone, and the barrels were attached to the turret elevation bone. Do the same.
Go to the top, and find the tool to the left of the black arrow. Select you mesh, and attach it to the appropriate bone. (IE: barrels -> turret elevation). Do the same for the other mesh. You should have something similar.
Now, if this was done correctly, you shouldn't have to worry about bone pivot points. But if not done correctly (IE turret is rotating on the wrong axis), you'll need to fix it.
You'll need to go to the "Hierarchy" tab on the command panel. (Button with 3 tiny boxes trailing away from one large box). Select the broken bone, and enable "Affect Pivot Only", make sure the blue arrow is up, red is forward, and green is where ever. Red and blue are the only ones that matter. This goes for all bones, even the muzzle bones.
In order to move the pivot points, you need to rotate the bone with the rotation tool. For this, I like to enable "Angle Snap Toggle" for 5° intervals. This is at the top in the area with the 4 magnets, it';s the one with the angle and an arc in the middle (To the left of the magnet with the % sign).
Anyways, once this is all finished, it's time to export. It's the same process as before, you'll just need to apply the same material twice.

I'm Pretty glad that you're sharing what Mod Authors use to make great mods. I wish you the best of luck on this mod!
Thanks, and I certainly agree. Guides are really nice to have when your first starting out, always want to grow the community. My next guide, (infantry rigging) is one I wish was better documented.
How would you go about getting 3ds Max 9? Can't find much info about it on google.