This tutorial will show you how to create and set up screen overlays within the Unreal Editor. These can be useful for UI elements, in game tutorials, subtitles during cutscenes etc.
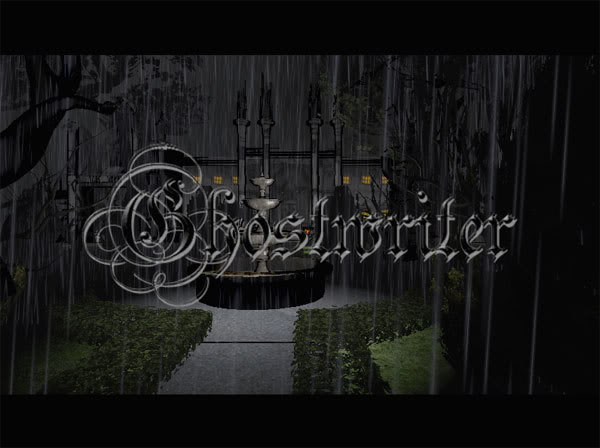
First we'll start by making a simple title screen. Here is the image I want to use for the title screen. Remember to save your file in targa (.tga) format if you want parts of your image to be transparent.

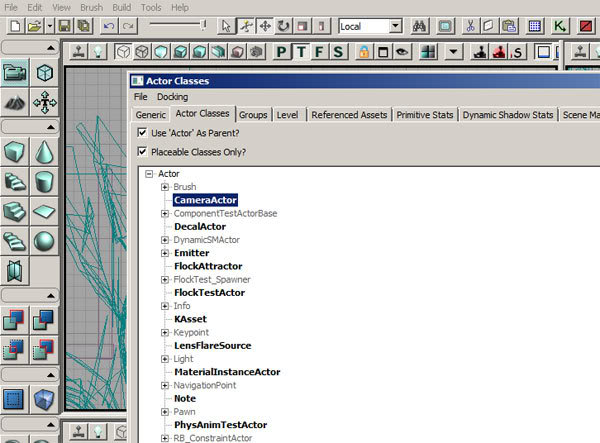
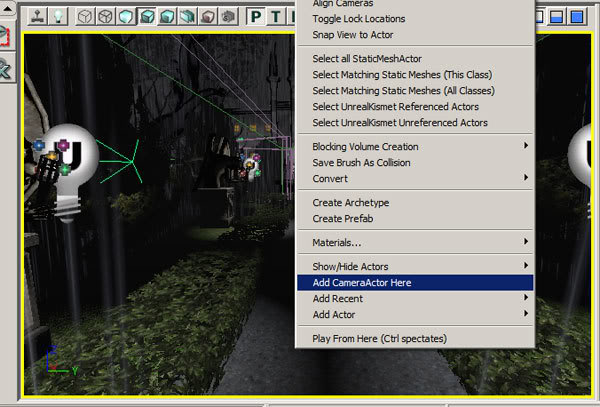
So open your map. First we need to set up a matinee sequence so that the camera pans around the level. To do this, place a camera in your scene by first opening the generic browser [ ]. Go to ‘actor classes' and select ‘camera actor' and then right click in your level ‘ add camera actor here'.
<!--[endif]-->
A camera should now appear in your scene. Position it where you would like the camera animation to start from. If you click on the [![]() ], then click the camera, the view will snap to the camera's view. This makes it easier to set up the positioning of the camera. Don't forget to click the button again when you are finished!
], then click the camera, the view will snap to the camera's view. This makes it easier to set up the positioning of the camera. Don't forget to click the button again when you are finished!
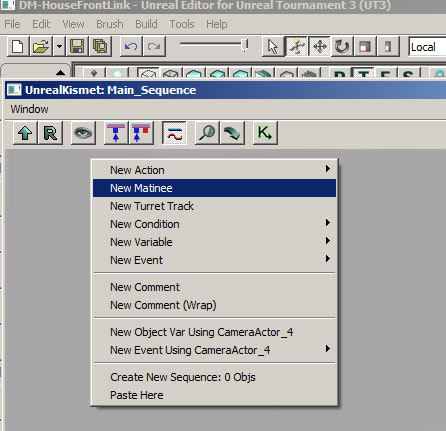
Next open up Kismet [ ], right click in the new window and select ‘New Matinee' (Make sure the camera is selected first!)
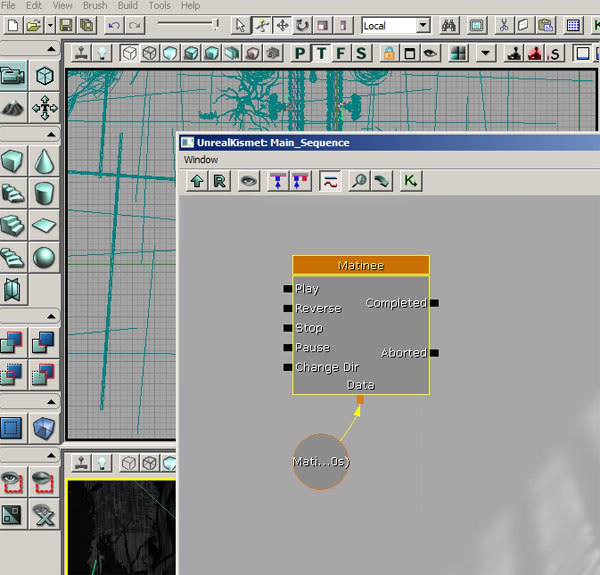
A matinee box should now appear. Double Click the matinee box and a new window should open.
<!--[endif]-->
In the grey box to the left of this window - right click and select ‘New Empty Group'. Name the group appropriately (I named mine TitleShot).

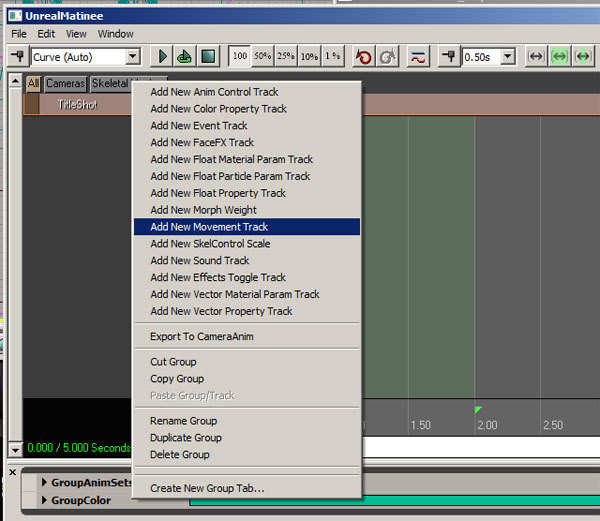
Next right click on your group and select ‘add NewMovementTrack'.
Your movement track should now appear under your group name. You can now animate the camera. I'm just going to do a quick pan of the level for this tutorial. So with the camera selected, click on the movement track. Move the timeline scroller to however long you want the animation to last (mine was 3 seconds).
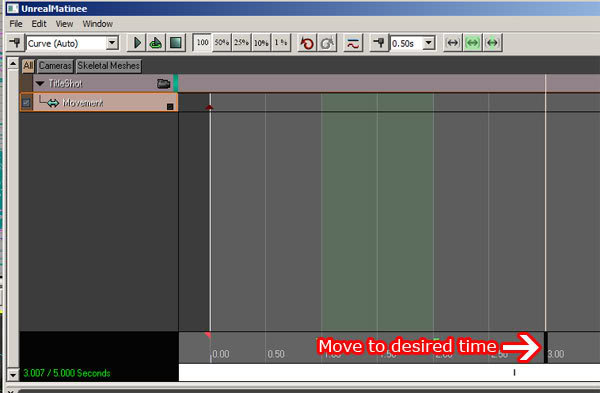
Now move the camera to the position where you want the shot to end. Click on the movement track again and press enter. A key should now pop up on the timeline.

If you move the timeline scroller back and forth you should see the camera moving in the viewport.
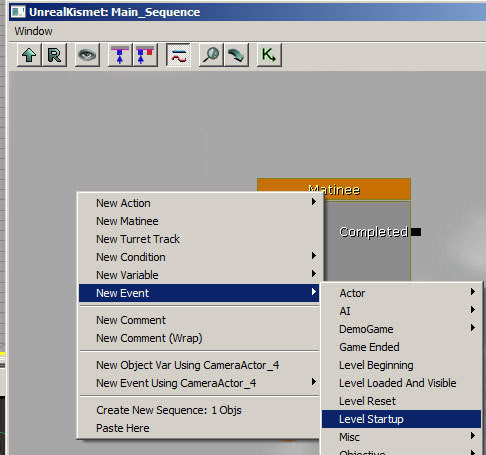
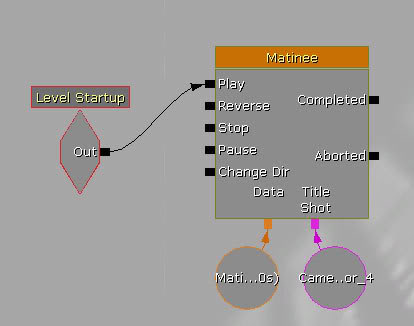
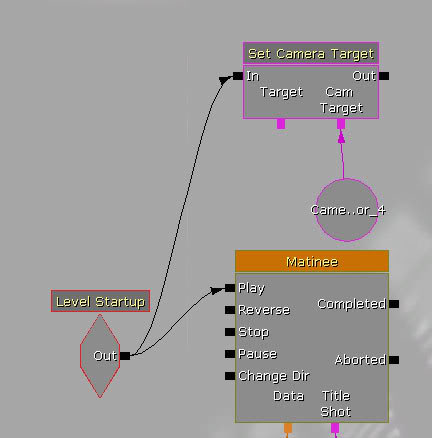
So that's the camera/matinee set up. If you want the title screen to play when the level starts, go to Kismet, right click - new event - level start up. Connect the ‘out' channel to the ‘play' channel.
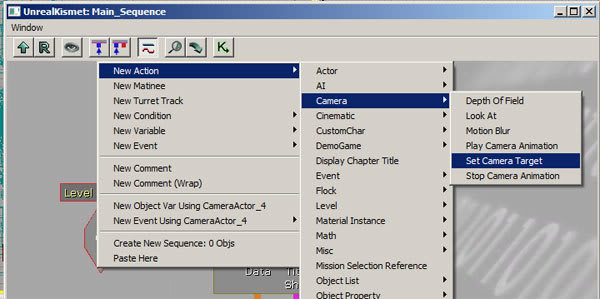
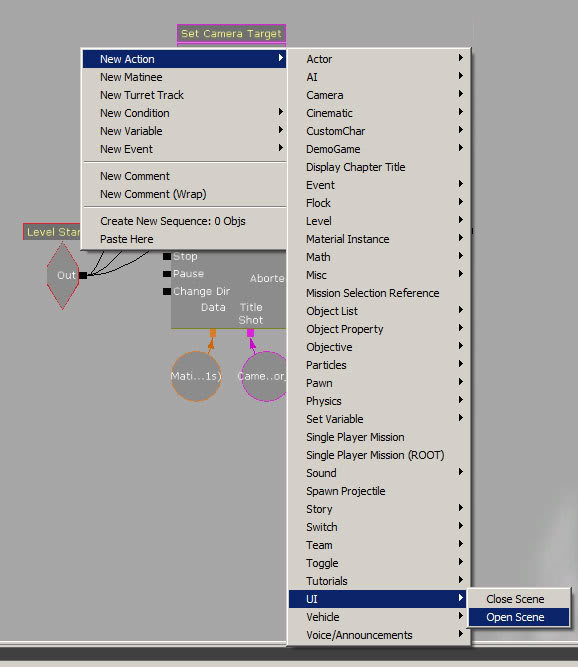
We also need to tell Kismet to switch the camera. So right click in the Kismet window, new action - camera - set camera target.
Select the camera in your level and right click in the Kismet window - ‘new object var using CameraActor_X'.

Link this to the ‘camera target' channel. Link the ‘Level startup' channel to the ‘in' channel of the ‘set camera target' box.
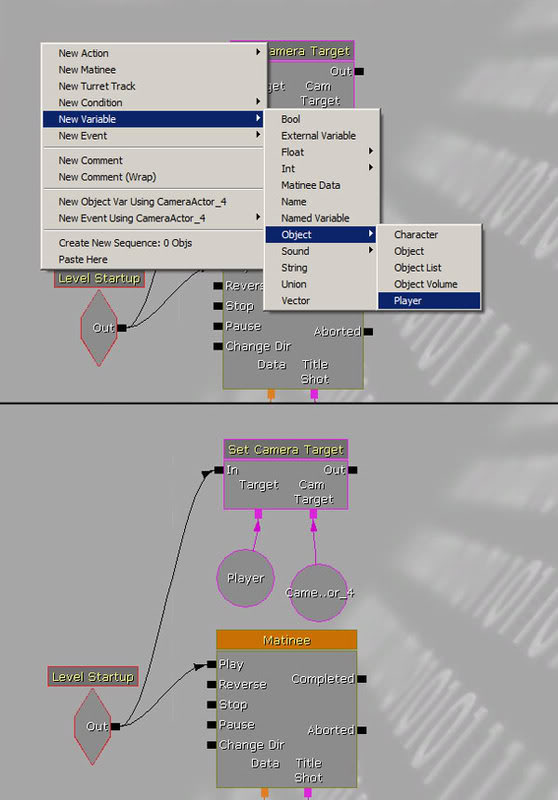
You will also want to add a player variable to the ‘target' channel. Right click - new variable - object - player.
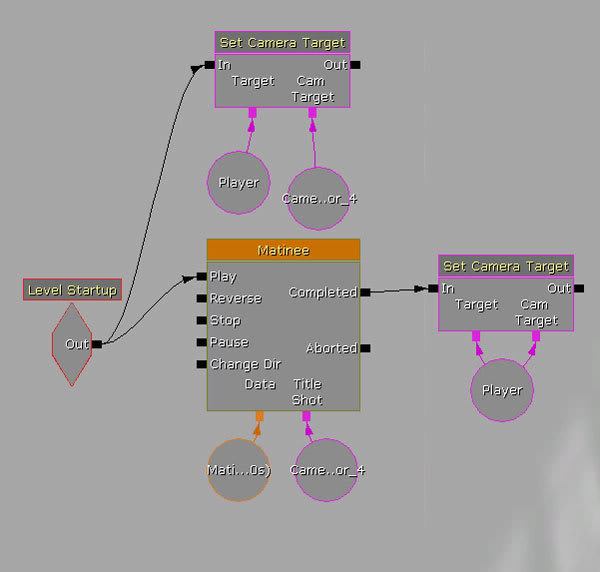
When the animation is finished, we want the camera to set to the player camera so add another ‘set camera target' box and link both target channels to a player variable. Then link the ‘completed' channel of the matinee to the ‘in' channel.
If you play the level now, the animation should play. You will notice that you have the Unreal HUD showing. If you do not want this, right click in Kismet - new action - misc - console command.
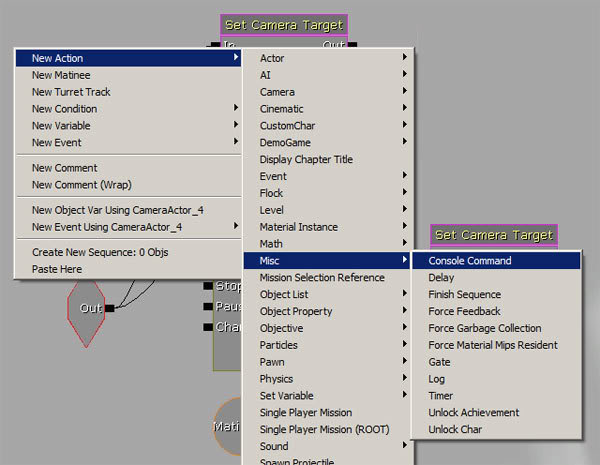
Select the console command box and look at it's properties. In the ‘command' area, type in ‘SHOWHUD'.
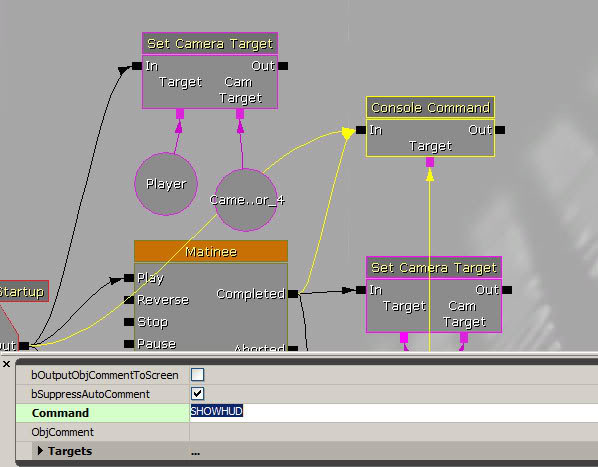
Next link the ‘level startup' and ‘completed' channel of the matinee box to the ‘in' channel of the ‘console command' box. Also, link the target channel to a player variable.

That's the camera animation done.
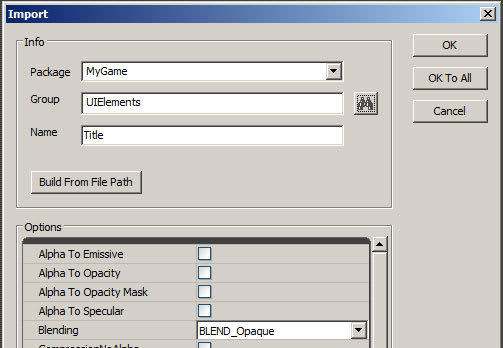
Now it's time to import our screen overlay. So go to the generic browser. If you already have a custom package, import your image there, otherwise go to file - import. Select your image from its location and click ‘open'. Name the package and the files appropriately.
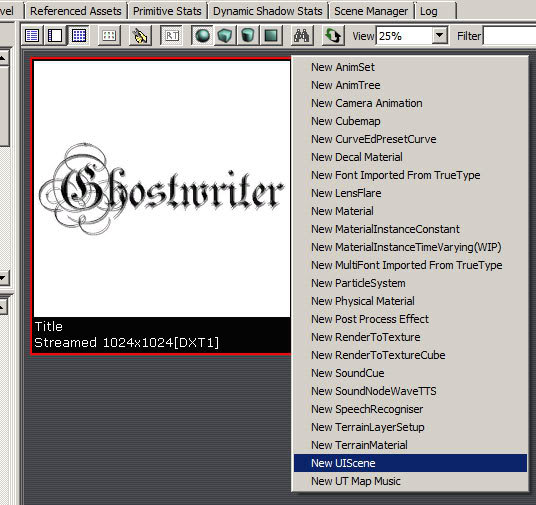
Your image should now appear in your package.
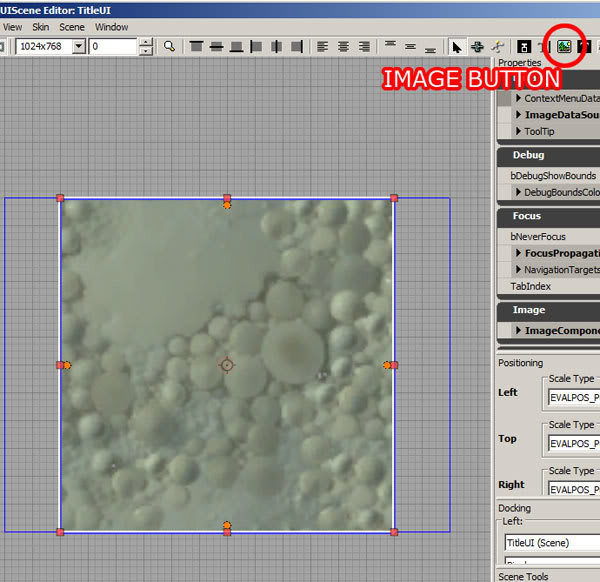
Now we need to set up a UI scene, so right click in the generic browser and select ‘New UI Scene'. Name it appropriately (mine is called TitleUI). A UIEditor window should now open.

Select the image button and draw a square within the blue frame (your title image should be a square).
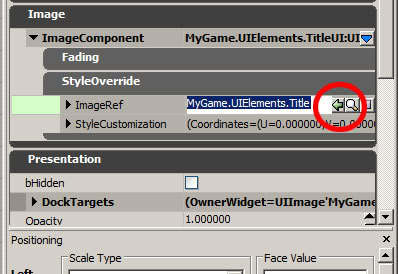
Now go back to your package and make sure your title image is selected - then go back to the UI editor. With the square you just drew selected, go to the ‘image - style override' properties and press the small green arrow next to ‘ImageRef'. Your image should now appear in the square.
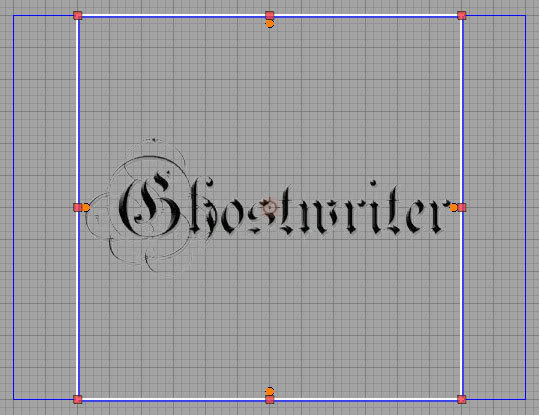
Now we need to make sure that the image scales properly if the screen resolution changes, so with the title image selected go to the positioning properties. Change each drop down menu to the ‘percentage viewport' setting.
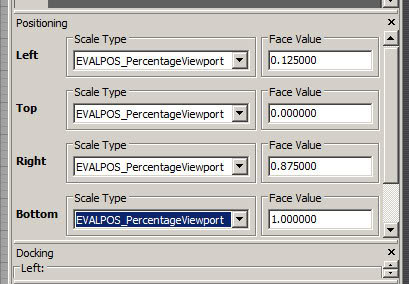
Now de-select the image and change these positioning properties to the same setting as above. With the image de-selected, set up the flag properties like this:

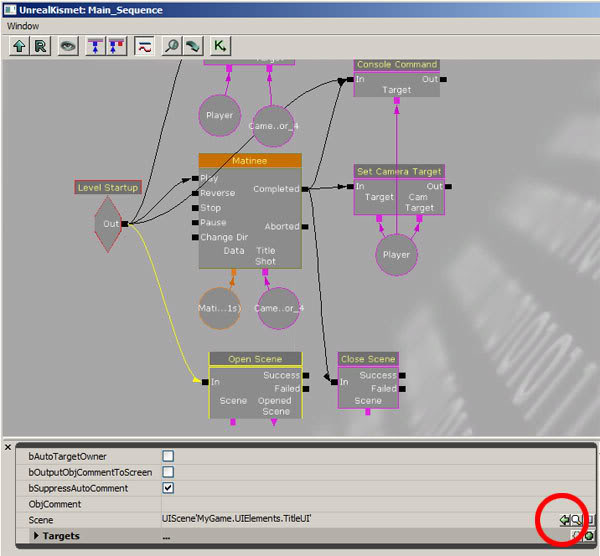
That should be it for the UI editor. Now go back to Kismet. Right click and add - action - UI - ‘open' AND ‘close' scene.
Link the level startup to ‘open scene' and the ‘completed' matinee channel to ‘close scene'. Make sure the UI scene is selected in the generic browser. Click on the ‘open' and ‘close' scene boxes in Kismet, then click the green arrow next to ‘scene' in the properties. You scene should now appear. Do this for both boxes!
Now if you test your level it should work!
Haha mine looks rather ugly! That can be easily changed by replacing the image with a better one :P So that's pretty much it. This only scrapes the surface of the UI editor. There are a number of things that can be achieved with exploration. Here are some other things I've created with it.
I have simply posted this tutorial to share my knowledge of the Unreal Editor and so that the modding community have a resource in this certain area. There may be a million different ways of carrying out the task but this is the way I do it, and it works!

cool
Thanks :)
OH MY JESUS! THANK YOU! ive been looking for a tutorial to do this for a long long long time! THANK YOU!!! you win the internets!
Haha you're welcome. Glad I could help!
Thanks alot, this looks really useful,
I think... "Developers developers developers developers"! should have been.. "Community community community community!"
I really like your tutorials! That's the second useful tutorial I read by you, and the quality of it (with all the reference pics) is outstanding! Helps beginners a lot to get that much detail to attention. Thank you, Matt!
Thank you! It's great to see comments like that - it encourages me to do more tutorials :D
Fantastic tutorial, thanks for sharing *looks out for mods with text overlays*
Thanks :) I wonder how long it will be before we see one!
Gotta seriously love your tutorials and admire ya man! We're already adopting methods from your 'Converting of Vid for use in UT3' Tutorial for our project, and this too looks exceptionally awesome and will more than likely also aid us in the near future!
I'm putting a Watch on you from now on! lol.. Please continue doing what you do! And Thanks again for all of what you've done and provided so far! ;)
Thanks :) really appericate it!
It's great to see people are getting so much out of these - I'm currently writing part 2 of this tutorial. It explains how to create buttons and link them so that menu's can be created for navigation/puzzles etc.
want to see mine? i took a screen shot of it. Moddb.com
Cool :) It's good to literally see what people are doing with my tutorials :D
Good stuff here! I will definitely be using this for my TC. I'll let you know when I've implemented it so you can see your teaching at work, thanks a bunch =D
Excellent, look forward to seeing it :)
Hi this is just what I was looking for. However, I really don't want the game to pause while it is displayed. I'm using a trigger, and when I move over the trigger I make the overlay display. However at the moment it pauses the game until I press escape. I want to still be able to run around with the overlay in front of me! Thanks for your help
could this tutorial be changed to accomodate video not an image, i have a pre set up camera and i dont want it to move so i assume that i can skip the first part ? (well the making the camera move bit) if so how would i go about this, awseome tutorial btw was really usefull :)
Azz
If you make a Material containing your video, you should be able to add that to the UI editor. I haven't tried it though so I'm not sure if it would work.
Thanks for the kind comment!
are you planning on releasing part two of the tutorial soon?
also, when I have my UIScene popping up, it disables player movement (it is not pausing the game)...how do I allow the player to move while the overlay( an objective screen for example) stays displaying
Hey. First of all. Thanks for the amazing tutorial. Everything was clear and concise.
However, I have a little problem. I used photoshop to set up a game title similar to your Ghostwriter one (black text only, no background layer), and saved it out as a targa. I imported it into my package and then dropped it onto a UI scene and the text had a white background. No transparrency! :( (unlike your example).
Is there something wrong with the way I am saving my targa. Or do I need to set up an alpha channel in Photoshop maybe? Any advice you may have would be much appreciated.
Thanks again,
Joe.
You need to setup your texture to have a transparent material.
Try this, this should fix your issue.
Moddb.com
this is a damn good tutorial and demo! thanks matt_barry!
beware the muffin man! lol