The Tutorial
Through some years I've gathered some knowledge on how stalker textures work. I want to state first and foremost that I'm no expert. I do not know industry-standard programs by the book nor use them on a day-to-day base. I am just someone exercising their hobby! So if you want to use some of my findings well then you're at the right address, but for in-depth knowledge, this tutorial wont suffice. It will, however, provide you with the basics for texture-creation in these games.
Just a tip; Mind that 'quality' doesn't always mean bigger textures. There are many ways to optimize your textures for a specific scene, game or environment. This tutorial has been written with this in mind to provide you with both the basics of how I see texturing for any game or cg-work, but also the basics for textures the S.T.A.L.K.E.R. series use, since the Xray engine uses some unique features no other engines these days use.
You will need some things to get started with this tutorial:
- Adobe Photoshop (3.0 or higher) w/ Nvidia NormalMap Plugin
- Latest Paint.Net (Get it here)
*I have a set of plug-and-play plugins (dated June 2016) installed which always come in handy, let me know in the comments if you want it uploaded and ill update the tutorial!
- Any kind of mesh-viewer, preferably with a reload-texture kind of interface which auto-updates the skin in the viewer once upon a save. I advise Blender, MeshView or Milkshape3D.
OR
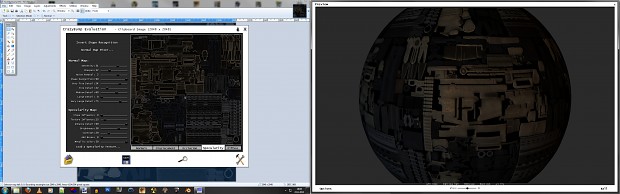
- Any kind of texture-viewer. Preferably one that auto updates in real time, or just when reloading the texture. I advise CrazyBump, it's a magnificent program even with the trial!
See it in action;
Material
Defining the material used in the texture is key to achieving the feel you want the texture to have in your mind or are trying to recreate. You need to learn the difference between raw-surface textures and smooth-surface textures. You should study photo's, learn how various things look, reflect and feel in real life to be able to reproduce this. You can't tell someone to draw a kiwi without having seen one in real life. Simple things like this, just looking at the ground below you, the stones of houses, the garages nearby or any surface, will teach you how things look in real life. You will develop an eye for these kind of things, so you can easily correct artefacts in your textures.
-
Material Settings
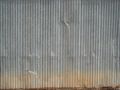
This subchapter will focus on the real life situations some materials are used in and how the 'change' over time, like rust, corrosion, tear, desaturation, biological changes etc. So you can create realistic skins, which will look more realistic than a weapon texture with a rust filter applied to it, or a texture overlay technique (which most beginning texture artist use [I was guilty of this]).
Defining your material is sometimes hard to achieve because of the circumstances you want them to picture in. Creating a metal base for something is not an easy task from scratch, you need to know what kind of metal you want, brushed metal, corroded metal, metal with rust etc. So, you need to read this next article, which will explain most of it in detail as I feel like rephrasing it might inform you in a wrong way.
-
Material Definition
After having read the above article you get the idea of how to define your material. Work on trying to replicate what you're reading as you're reading it. This is a way to test your current skills. Only with trial and error you'll get the result you want. For now, I'll also give you a test:
Objective:
Create a metal texture with corroded and rusted sides. Make it look like it's been exposed to various natural elements, like rain, cold, warmth and make it 512x512. It doesn't have to be tileable, but that's a plus if you know how to do that.
Try and do It in one run. If not, start over again. Just start with a base texture and modify it. Keep going till you have the desired effect. You may always use reference images to get what you want, but dont cut out parts of an external texture. The goal here is that you try to achieve it by yourself and have the knowledge of how to do it.
(You dont have to share the result, but when you do, expect some feedback!)
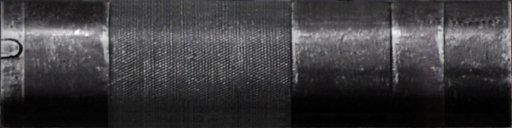
I did it with this particular silencer, you might recognise it from the vanilla VSS skin.
Inspired by the above, I tried to create a base for a next skin. It isn't anything alike, but you don't have to do 1:1 copies. Be creative and try out various methods.
And mine. Mind that this is no where near a finished skin. It's an example of a quick base one can do.
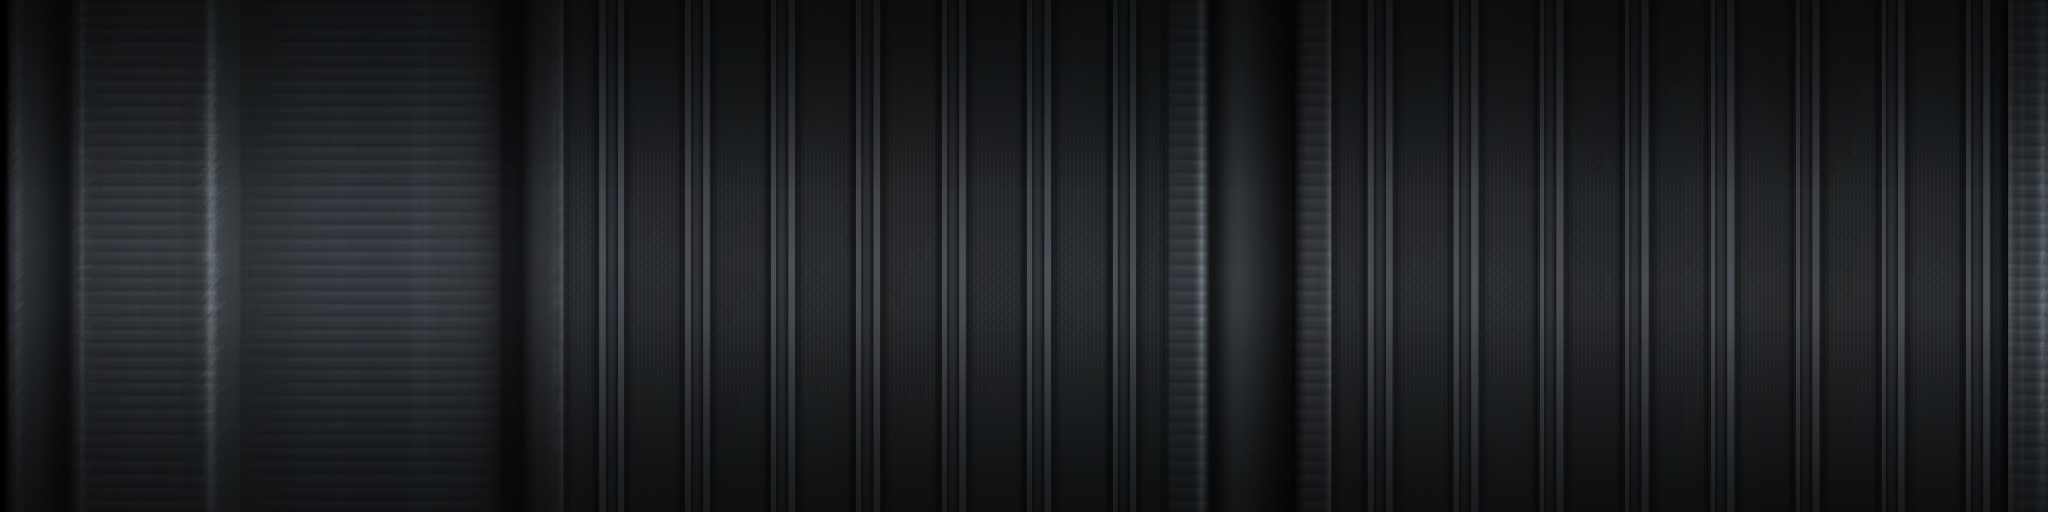
As you can see, it's quite a different texture and base from the one (vanilla STALKER) above it, and this all has been created from the above image! You can upscale the texture, apply a vertical blur filter to it with the distance exceeding the height of your canvas and then fill that layer. The result with some added details is the above.
An example of a project for BF2 I am busy with. Here is a texture for a friend of mine, ProfKiller_LT. You see the rust and corroded metal return in this screen here:
-
Material Details
Adding detail to textures these days is not done solely in the diffuse, but in the various maps used (for stalker the _bump textures). This can be done in any way, from adding external texture overlays to creating scratches by yourself with a 1px/2px brush tool. Adding these in a specular map can be the best way is to highlight details of a texture in a newer engine, but we are going to do something different for the Xray engine as Xray doesn't use conventional specular maps.
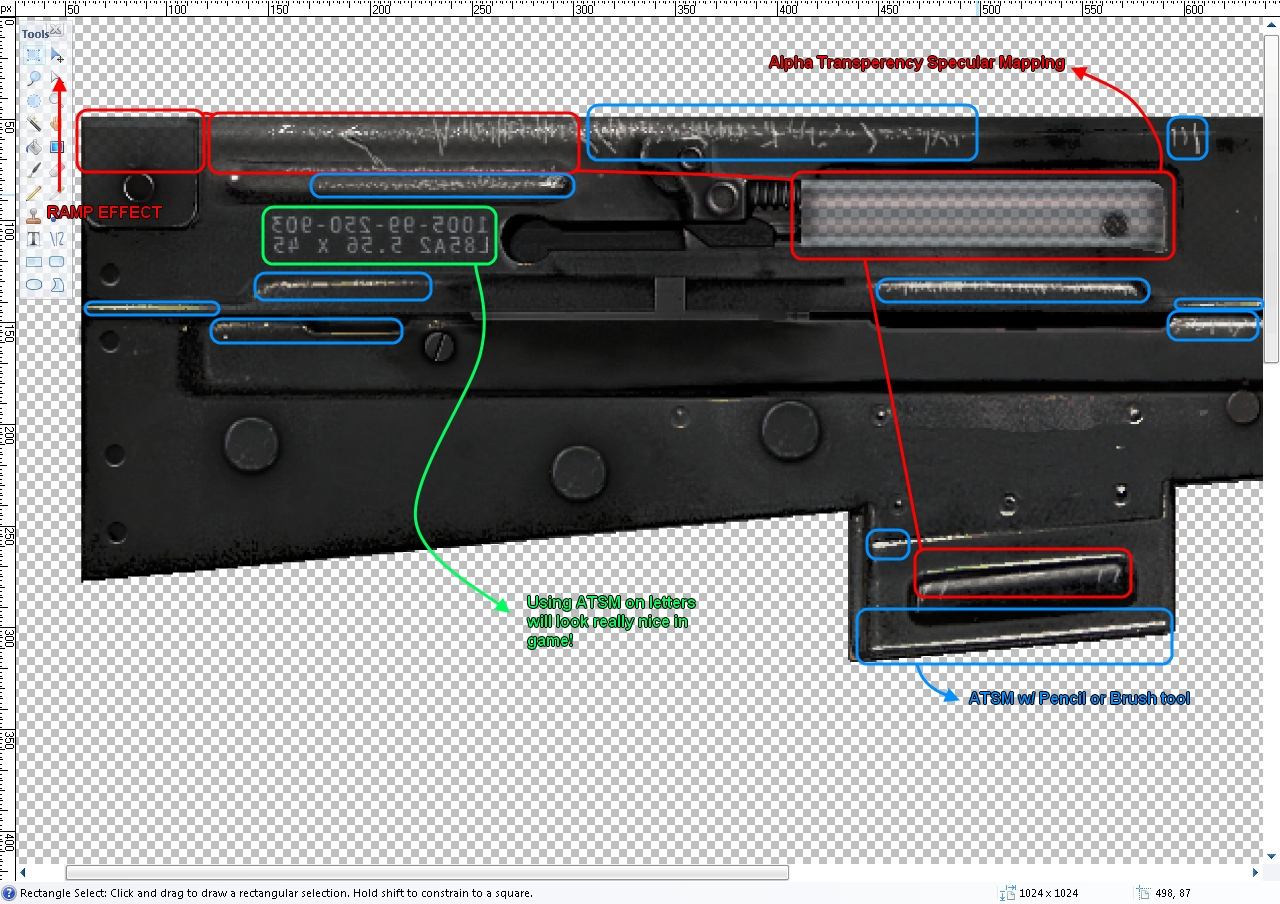
As we don't have a 'real' specular map (since specular data is stored in the red channel of the _bump texture), we are going to practise and try a technique I thought of for the S.T.A.L.K.E.R. series which does what you'd like without having to interfere with the _bump texture. I don't take credit for this, as many people probably have done it before me, but I call it Specular Mapping, to keep things simple.
The Xray engine determines gloss on both the transparency off the diffuse map (alpha in DXT5 saved maps), ranging from 0 (only gloss) to 255 (no gloss) and the red channel in the _bump map, with the height offset X / Y in the green and blue channels. If your height map or specular maps are incorrect and your diffuse is alpha channelled, you better expect some really weird visual artefacts. This could be ranging from your texture not being lit well from anything but direct lighting (for example a flash light going past a wall showing nothing but a black texture, or a weapon not being lit well by omnidirectional lighting combinations (for example: Sun and Flash light)).
How to apply the idea? Well, there are various techniques:
- The magic wand tool;
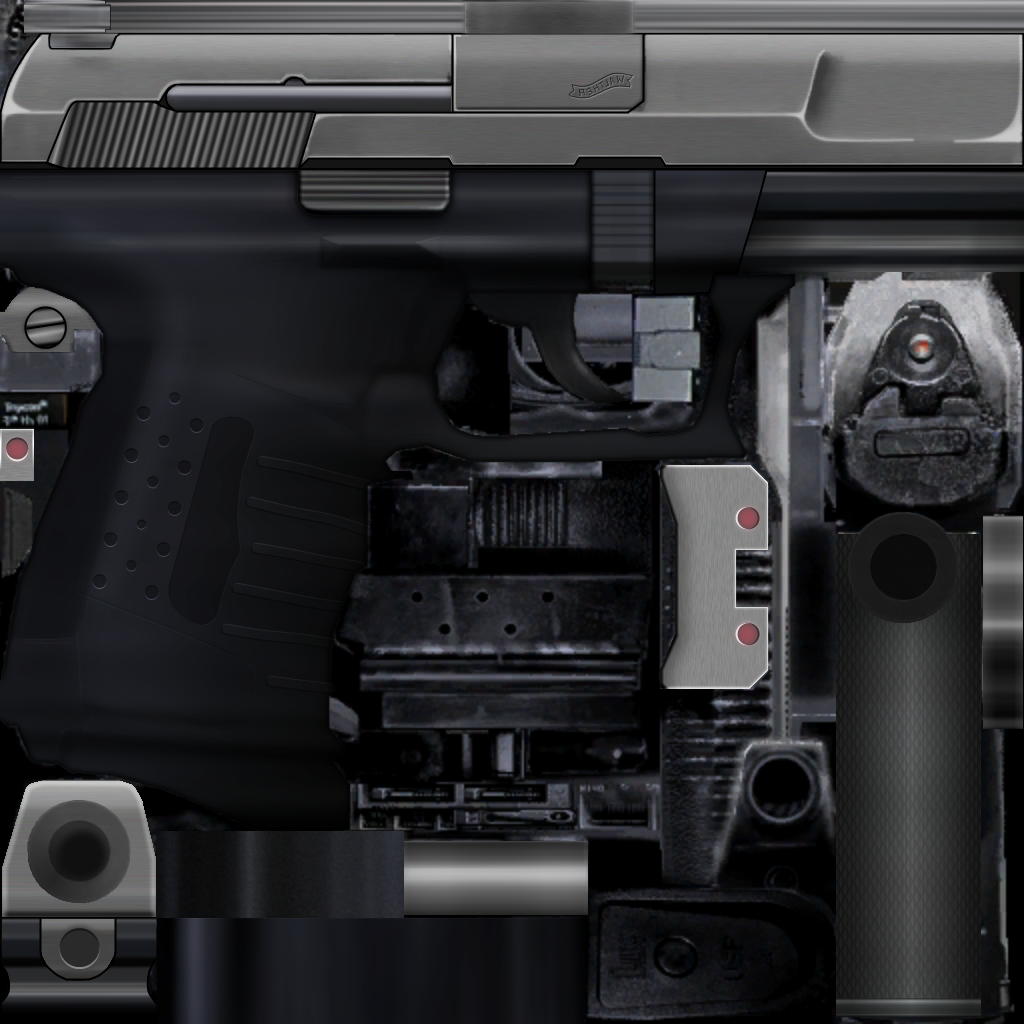
- select the parts you want to have a little bit of gloss in-game (metal parts / scope lenses / screws etc.) and cut them into another layer, and make that layer transparent ranging from 255 to 0, where 0 is totally transparent. DO KNOW that 0 - 128 transparency means a light beam in your hands in-game with a vanilla shadow map. That's really reflective. I'd suggest going from 255 to around 215 for metal parts. I created an image below showing how I layered this technique for a really nice effect. (Yes, it takes some time, but creating a realistic skin will take some time)
- The pencil / brush tool;
- Paint.Net: This one is a bit time consuming, but it will give you almost total control over what you want to be transparent. With this one you use the pencil or brush tool with a white color patch to create scratches, dirt and other kinds of wear on the texture. After you've properly "mapped" your wear, you could use the magic wand tool in combination and select the inner and outer parts of your white layer of wear. Ranging from different transparency values, you can ramp within the layers so the centre of your wear becomes most transparent, or just differentiate in specularity a bit. Flatten your image afterwards and you should be done.
- Photoshop: Demistify your texture. There are several lengthy tutorials for this, so be here is one I picked. Be sure to watch it in full with lots of attention. It's very informative.
(Click to enlarge)
After you're done using any of the above techniques, flatten the image and you're done! Do mind that this is the LAST thing you need to do for skins in S.T.A.L.K.E.R. - NEVER create normals of alpha textured diffuses. This will result in weird normal maps.
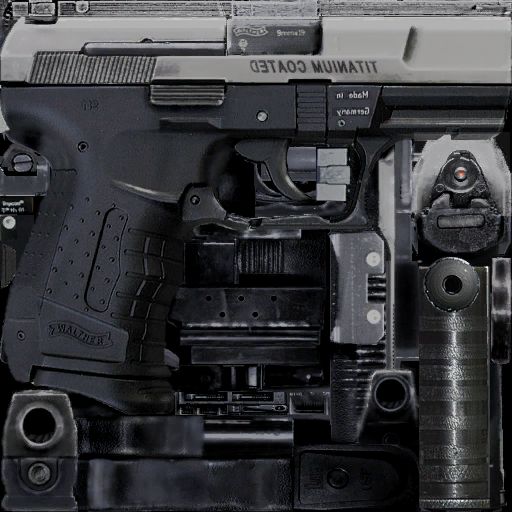
Skin Dimensions
Size is everything (in this category)
- Appropriate Diffuse Weapon skin for S.T.A.L.K.E.R.:
(Pistol texture) 1024x1024 or preferably 512x512
(Full weapon texture) 2048x2048
(Partial weapon texture featuring only things like grips or stocks) 2048x512
(Scopes, as you want less stretching on the scope) 2048x1024
- Appropriate Normal map S.T.A.L.K.E.R.:
(Pistol texture) 1024x1024
(Full weapon texture) 2048x2048
(Partial weapon texture featuring only things like grips or stocks) 1024x512
(Small scopes/reddots) 1024x512 or 1024x1024
(Larger scopes like the PSO) 2048x2048
*Misc. items like the Binocs are also recommended to have 1024x1024 maps, because they're used often. But things like the bolt, vog25 and grenades are recommended to have either 256x256 or 512x512 maps w/ 512/256 normals and shadows.
I suggest you to standardize your size to match these above sizes, as a tip. S.T.A.L.K.E.R. is iirc CPU intensive. You could easily create 2k x 2k normals and _bump# maps, because the new generation GPU's can handle even larger textures sizes, up to 8192x8192 and beyond. Xray 1.0 won't handle these sizes, as it's 1) a waste of processing power and 2) XRcompress demolishes textures above 2048px.
Keep in mind that weapons which won't get shown often can easily have the above mentioned sizes, like the Gauss gun, but giving pistols such a high res. texture is never a wise thing to do. Try to keep pistols at a small size, but give them 1:1 bump maps. AR's could easily be 2:1 OR 1:2. Creating a bigger normal will always compliment the gun, no matter the texture. If it's a difference of 1:2 it wont be that bad. (talking 1024px² diff. and 2048px² normal, not 512px² to 1024px²)
Upsizing Skins
Like we all know, upsizing skins wont ever do the skin good. It will make it 2 times more blurry with every resize. But, upsizing does offer a good base for blocking out the skins.
What I mean:
Normal 512x512 skin: Media.moddb.com
Upsized 1024x1024 skin: Media.moddb.com
*Above was in W.I.P status
See how they look alike, But mine is still higher quality around the edges? That's done by blocking out the various parts of the skin and start building upon them from the blocks. If you've got access to the model file, this goes even quicker than using just the upsize method.
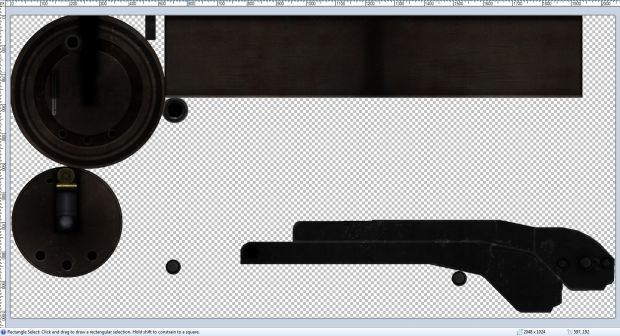
With blocking out a texture, you highlight certain parts of a weapon or object with a color, for instance, the grip with purple and everything attached to the grip or that's part of the grip gets the same color. Same goes for the receiver, everything part of the receiver gets the same color as the receiver itself. That's called blocking out, and you do this in separate layers for each color (for this you want to use a mesh viewer to be totally sure you got everything right). You should also know to name your layers, so when you want to disable something you know what to disable. Trust me, when making my HD G36 skin (136 layers) it was a pain to search for the things i wanted to disable. I didn't name them at all all. Always name your layers. It takes little time and saves you a lot for in the future.
Bad layering:
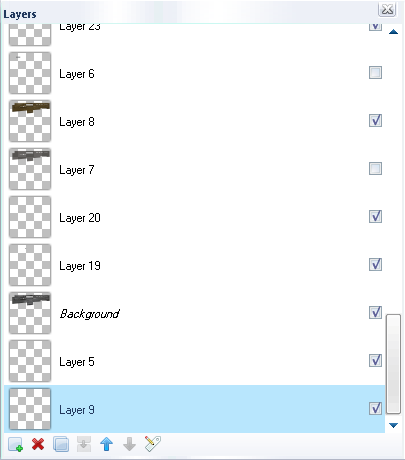
Good layering:

Moving on, next subject:
Normals
When you're totally done with the diffuse, you are going to create a normal map from this skin.
Now, if you're familiar with the normals in stalker, you know they differ from normals used in newer engine's and 3D renders. Here is a very in depth tutorial on how to use your generated normals from either CrazyBump or the Nvidia plugin and put them in order for a normal used in the Xray engine.
Conclusion
Well that was it, the tutorial. Read it through another time and keep expanding upon your skills. Try to go to polycount to get some feedback on your textures etc. don't be surprised if racer445 himself critiques your skins. He and Millenia did so for me at the time, and while they were extremely honest, they helped me a lot. Both of them are really experienced texture artists and anyone can learn a lot from them.
Cheers
External tutorials links:


texturing tutorials are always welcome :)
thanks!
Thanks for sharing this with us LoNer :D
This is great! thanks bro! :D
Definitively a very helpful post! Thanks dude!
This tutorial is definitely worth reading.
Thanks man!
This comment is currently awaiting admin approval, join now to view.