My assumption in this tutorial is you have just opened the hammer editor for the first time and are trying to learn how to make yourself a fully functional room. Part 2 of this tutorial can be found here.
We will be:
- Learning the tools of the hammer editor
- Building a room
- Texturing the room
- Adding in a info_player_start
- Learning how to light our room properly
- Adding in a npc_zombie
- Adding a static prop
- Adding weapon
- Compiling map
- Testing map
Ok first I will go over the most commonly used tools:
The first tool on the bar is the selection tool. The hotkey for this tool is Shift+S. This tool allows you to select object such as brushes or props inside of your editor.

The second tool on the bar is the magnify tool. The hotkey for this tool is Shift+G. This tool allows you to zoom in on the selected view port to where ever you clicked.

The third tool is the Camera tool, this tool is very important if you want a 3D viewport. Select this tool, click and drag in your view port, and you will now have a camera you can navigate with. The hotkey is Shift+C

The fourth tool is the Entity tool, this tool is one of the most important tools you will use, this tool allows you to add important things into your map such as lights, player starts, weapons and the list goes on.

The fifth tool is the most important tool you will use. This tool is the Block tool. Select this tool to add walls/rooms to your level. Just click and drag in your viewport . The hotkey for this tool is Shift+B

The sixth tool is the Toggle Texture Application tool. This tool allows you to add textures to individual walls within your map. This tool has many different features such as texture scaling, texture shifting, rotation, lightmap scale, and even the very handy displacement tool which I will get more into in later tutorials. The hotkey for this tool is Shift+A

The seventh tool is the Apply Current Texture tool. This tool is a fast way to apply one texture to an entire brush or block within your map. If you click this tool it will apply a texture to the brush you have selected. There is no hotkey for this tool.

The eighth tool is the Apply decals tool. This tool allows you to apply certain things like textures but not textures. These are called decals. The sort of things I am talking about is blood trails or spray paint to make your map feel realistic. The hotkey for this tool is Shift+D

The ninth tool is the Apply Overlays tool, I will explain this tool in later tutorials. The hotkey for this tool is Shift+O

The tenth tool is the Clipping tool. This tool is used for clipping parts of brushes off. This tool is used a lot for door ways/windows and also for rounding edges.

Last but not least, the Vertex Manipulation tool, this tool is great for creating interesting architecture in your map. Just click this tool and drag the yellow corners to where ever you desire. The hotkey for this

Ok now that you know about the important tools and hotkeys. We will start building our room.
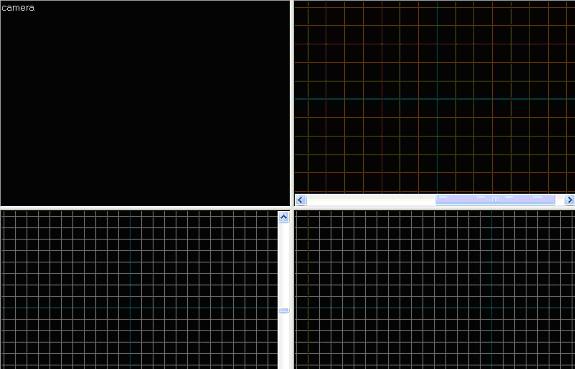
Above you will see 4 screens, those are called view ports. Each viewport is used for something different (Top, Side, Front, Bottom, 3D)
Select the Block tool and drag a box in your top right view port, this view port is called the "Top" view port
I made my brush 256x256. You can make your brush what ever size you want to make it. But I am going to keep mine at 256x256.
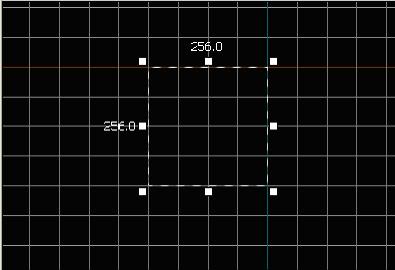
In the "Side" view port please make your height 128 units high. This is the standard height for Half life 2.

Press the enter key on your keyboard when you are happy with the size of your brush and it will now create it.
Now take the Camera too and drag it in the top view port to make a camera. You should now see your brush in the top left view port. This view port is called the 3D view port or "Camera"
To navigate this view port press the "Z" key and use W,A,S,D keys to navigate it.
W- Forward
S- Backwards
A- Left
D- Right
It should now look like this:
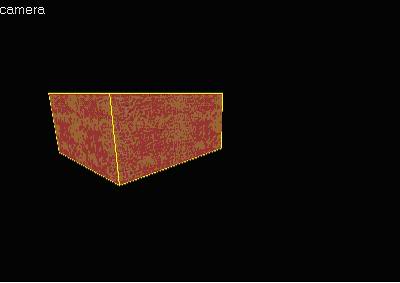
Ok so now you are probably wondering "Well, I got a box... but how is this a room?" Well we are going to change that right now.
Press CTRL+H to bring up the hollow tool. This tool will make your box hollow in the inside so that you can run inside and outside of it. Set your value to something around -4. Negative values make the walls push outwards there for not affecting the size of the inside of your room.
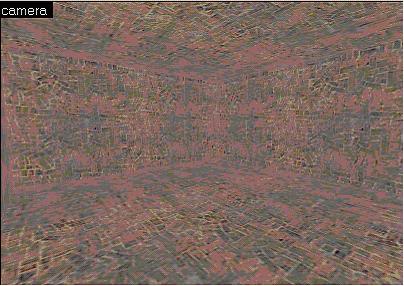
(Sorry for the quality of this picture. I don't know what happened)
You now should have something like this on the inside.
Ok now it is time to put some textures in our room.
Select the Toggle Texture Application too and then click "Browse..."
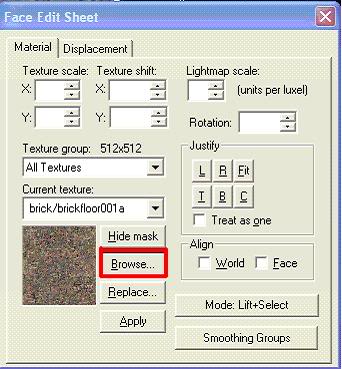
you will now get something like this come up:
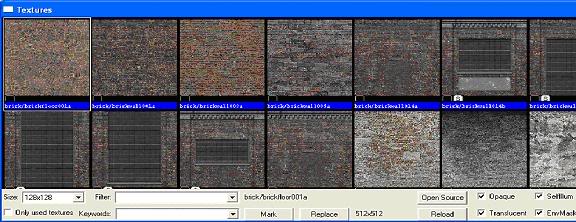
On the bottom where it says "Filter:"
Type in something like "Plaster" scroll through until you find a texture you like and want to use on your walls.
I used the texture called plaster/plasterwall005c (Feel free to copy and paste that into the filter and use same one.)
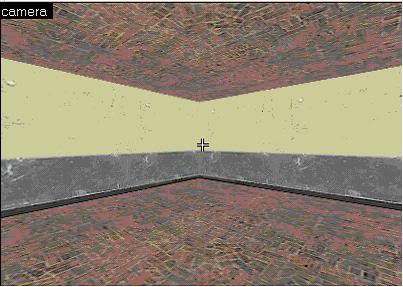
Ok now select the wall you would like to apply it to and click "Apply." To select multiple walls hold down control key (ctrl) and click all 4 walls.
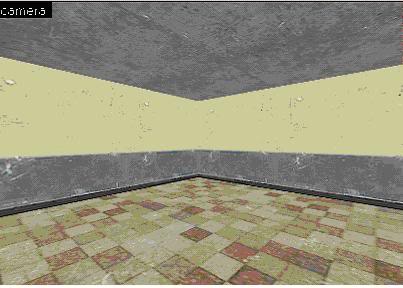
Your room should now look like this:
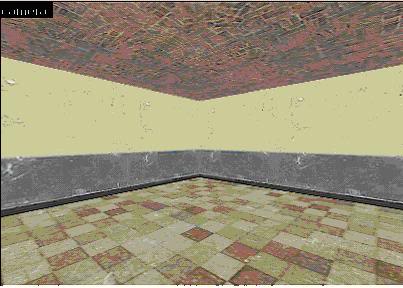
ok now it is time to do the floor. Follow the steps from before except type something different into the filter. I used the tile called brick/brickfloor001a. Your room should now look like this:
Ok it is now time to change the ceiling. Again repeat the steps from above but this time change the search to something like concrete. I used concrete/concretefloor026a. Your room should now look something like this:
Ok so there are 2 things you NEED to have in order to run a map:
- Info-player_start
- Light
So lets add them then. First click your Entity tool and on the right you will see a box which shows you what Entity you have selected and ready to go into your map.
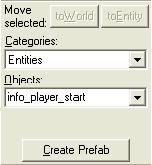
As you can see by default you start with the info_player_start entity selected. So now all you have to do is click on the ground in your room.
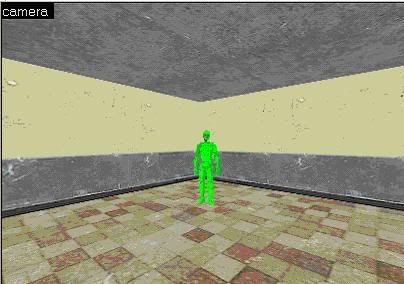
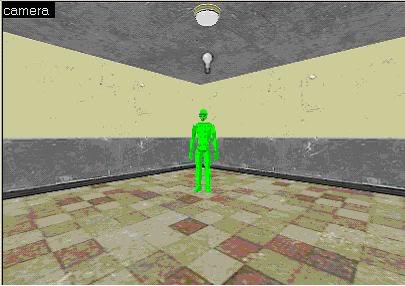
Your room should now look like this.
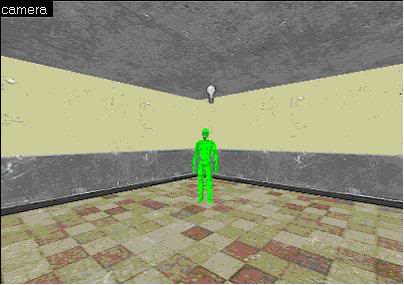
We now need to add a light. So on your Entities box again click Objects and a drop down menu should appear. Press the "L" key on your key board and the first thing that should come up is light. Press enter and now you have your light selected. Again click anywhere on the floor and you will see a light bulb appear. This is actually what is going to light the room. In our other view ports move the light around until it is in the center of the room and closer to the ceiling.
You should now have it looking like this. Ok so now we need to add a light prop so that it appears the light is coming from a source. Go to the entities box again. Open the drop down menu again and type in "prop_static" place this on the map and in the 3D view port and select the selection tool, double click on the static_prop box so that a window pops up.
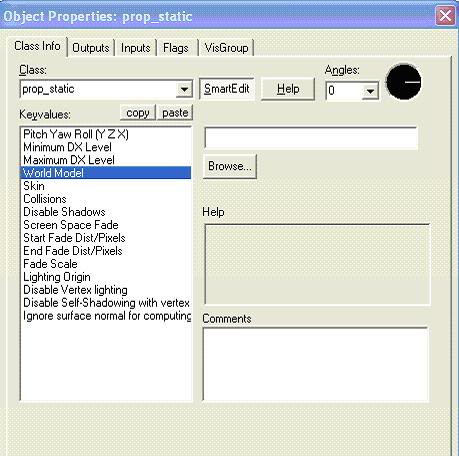
Click on "World Model" like in the picture above and then click "Browse..."

this will pop up. It is called the "Model Browser"
here you can select any prop from HL2 and put it in your map. For now we are going to type "light" into the filter and select the model we want to use.
For this I chose "models/props_c17/light_domelight02_on.mdl"
Put this prop on the ceiling above your light model.
Your room should now look like the picture above. If you need to change your grid size to place your prop in the right size use the "[ ]" keys.
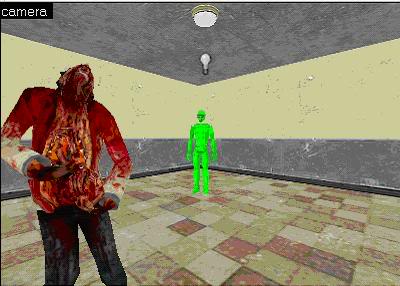
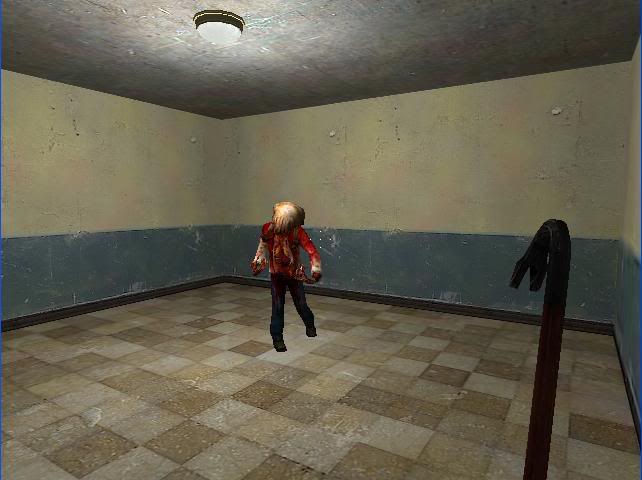
Ok now we are going to add an npc_zombie.
Click the Entity tool and open the drop down list again. Type in npc_zombie and press enter. Click anywhere on the floor in the map and there's your zombie.
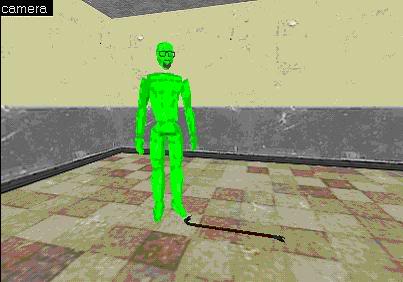
Ok now we need to add a weapon to fight this zombie with. So repeat the same steps as above but instead type in "weapon_crowbar"
And click beside your info_player_start to put it down.
Now we need to compile our map.
Click the "Run Map!" button on the top tool bar (or press hotkey F9)

save your map to whatever you want to call it, I will save mine to mymap1
After you save it a window will pop up:
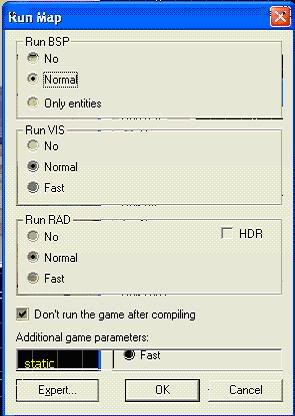
keep everything the same and just click "OK"
your map will compile and when its done you can open halflife 2 press "~" to open your developers console if that dosnt work you must to to option and allow developers console,type in map and then type in your file name for example I would type in:
map mymap1
press enter and your map will load. ENJOY!

Thank you for reading this tutorial, I hope you learned a few things about mapping and the hammer editor. Read on for part 2. This tutorial was written by Intermission (Andy)


Nice tut, but whats wrong with your color?
Just my 2 cents: it's always more attractive to see the result in the end of a tutorial, so maybe, by just adding a screenshot of the room ingame would do it ?
Anyway, like other people making tutorials: thanks for the effort.
Pretty nice, I just have two complaints. There is no "standard height" for Half-Life 2, and you don't need lights to compile and run your map.
Other than that, great tutorial! :-)
The 2nd part is right, but by 'standard height' I suspect he meant the standard TEXTURE height, for painting the walls and such...
Yeah, it's the standard height for wall textures, but you can't really say it's just the standard height
Agreed, its a very good tutorial, but would be a little better if you showed a screenshot of the end product.
Hey guys,
thanks for all the comments. I hope this tutorial helped you in some way.
I posted the in-game pics on the bottom of the tutorial.
There will be more tutorials coming very shortly so if you like this one, keep your eyes open and you will see more :)
-BeginnersMod
Thanks for this, I've never touched hammer before so I'll give you some feedback from a true (but very enthusiastic, don't judge me, I could be brilliant one day :( ) noob.
Maybe this will be the first step toward me starting work on the stellar mod I've been designing (on paper) for the past year now... LOL, well we can all dream can't we. God it's depressing not being talented :'(
Very well written, my friend. I appreciate this tutorial very much.
Maybe I'll slate my mod for Source after all. UT3 frustrates me.
thanks man is great!!
Glad you 2 liked it..
writing an addition to this one as we speak
The images are VERY poor quality....colors are all messed up.
How do you make ladders?
Ive lever had a clue how to do it.
thenzkiwi:
put a ladder beside a wall and then put a func_useableladder 1 unit away from the ladder but infront of it. in one of the side view ports drap the circle in the middle func_useableladder until it is at the top of the ladder and then select the entity tool again and get a info_ladder_dismount put one on the bottom of the ladder and one on the top on the other floor. There we go a useable ladder
Clonemann:
only thing I can think of is use your mouse wheel to scroll out as far as you can until you find your room again. If that dosnt work then im not sure
how do I get the camera in the top view because it dosen't show anything!
I don't care that most of the images are poor quality it's the tut that matters and this tut is great!
i am having a problem where the texture is see through it is just an outlined box
the tutorial is very good . i expect tutorials for character design..
you expect tutorials for character design?
well first of all, thats kind of rude, so you can go be rude somewhere else.. who are you to demand something?
second of all, character design and level design are two different things..
This comment is currently awaiting admin approval, join now to view.
Thanks for the tutorial! Really helped alot! :)!
But i have a problem with the Block tool.
When i press Enter. My box doesn't have any texture.
Just the outline of the box... Help :(
I dont think kathir from India meant to say "expect" :> and as others have pointed out, although you don't NEED light to run your map it's a good idea when you are creating a closed room which would otherwise be pitch black.
I was wondering if a had a block could a rotate it?
This method does not work form me. When i click the room, it selects as one entitiy
Why thanks super 'BeginnersMod' person, I know that many who are entering the HL2 modding world for first time feel a lot safer knowing that a true super hero 'BeginnersMod' is watching over them!
Thanks! whoever you are!
Hello, firstly thanks for going to the effort of explaining for beginners, like myself :] secondly, whats the difference between creating a single brush (box) and hollowing it (negatively) versus creating 6 gap-less brushes (boxes). Does the difference affect the lighting or textures or game-play or further modding in any way?
Thanks a ton. KRiWOLF
This's great. Thank you very much. I'm making my mod too.
A little advise:Never start your map with a hollowed box.It's better you to make a room yourself rather than hollowing a box.Why?You will find out when you become real mappers.
I am following directions and on the texturing part it made my texture flip upside down and etc but I fixed it by hitting the fit button on the right hand side of the textures box if anyone has the same issue.
Also he ment Tile/Tilefloor010a the brick one is the default it comes in.
Nice tutorial!
im sorry but when i start a new file the view ports are black, i cant see anything i try to put on there
Argh, thx! one great tutorial!
but why cant i put an oil drum in? everytime i set it somewhere in the map it's disappears then i run it.
forget it, found out :) had to use physics instead of static :P
Can this guide tell me how to add to the Source Engine? One person added Python Support to the Source Engine and made it a public download, and the person working on Dual Reality, without a commercial license, added Soft Body physics and demonstrated it with the Jelly Cube. I asked this because I wanted to add PhysX to the Source Engine.