To use an existing decal, place a decal brick (think of it as a place for a texture), so that the default image is facing you.
Next, select this with the edit staff (to do this, you may need to refer to F1 or previous tutorials) and press alt+D. You will now be seeing the decals that come with TOB. Once you have chosen one, simply select it and close alt+D and you will find the default decal on your selected brick has become the chosen one.
To make custom decals for use ingame, you need to follow a few steps.
Step 1. Open your favorite image Editing software as long as it supports transparent backgrounds and .PNG exporting (Like Photoshop, the Gimp, Paint.NET, etc.)
Step 2. Open a file with the size of 512 X 512 (Notice the size is pixels). Ensure the background is transparent (Important) and color mode is RGB color. Advanced options are for later.

Step 3. (You don't have to do this one, but just in case you want a perfect decal size instead of messing around with it) Open up a decal from TBM/data/shapes/player/chest or face and copy it to your new decal file, I suggest one of the closed ones.
(if it isn't closed enough, use the brush tool or a couple of lines to close it up as you need.
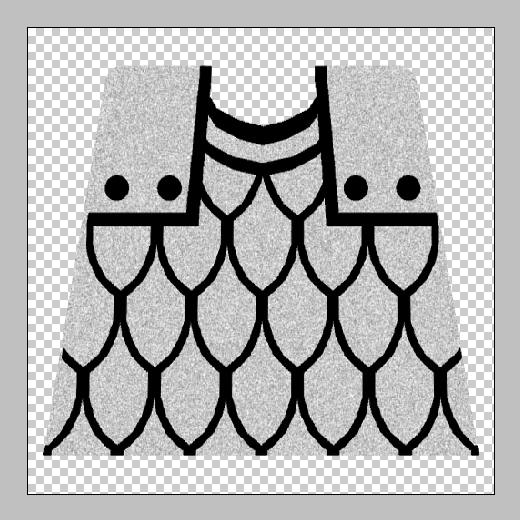
Step 4. Open up the decal you drew/copied/anything else into the file, on a different layer which will be below the first decal.
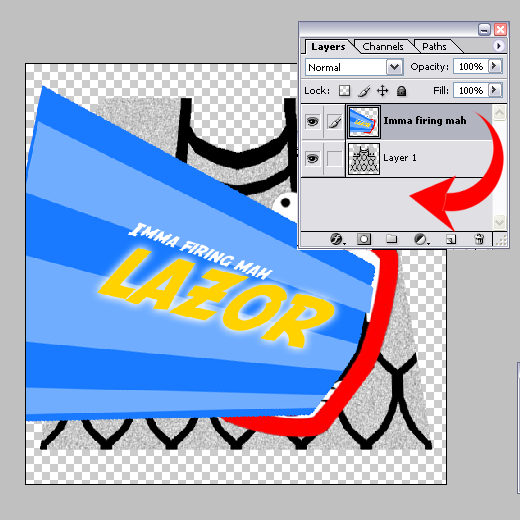
Step 5. You see the stuff coming out of the "Frame"? It will look strange ingame so we need to get rid of them.
Press alt a on the first decal layer and then press the layer again to select only the stuff we need, then press on the second layer, our decal layer WITH the first decal selection box still there, and press the little grey square with the white circle in it that says "Mask".
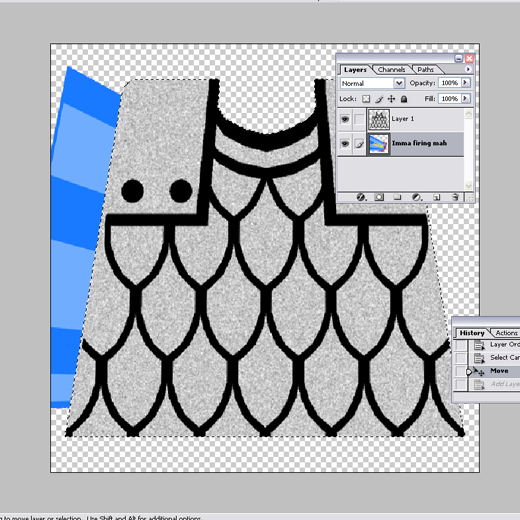
After you did that, you can get rid of the first decal.
Also, when the mask is activated, you might want to press the little chain button between the layer and the mask layer.
Okay now what you have should look like this:

- Note that if you followed my last direction on step 5 you can move it freely around without worrying about it's limits.
Step 6.
Exporting
Now open the File tab, press save as, and select .PNG. remember, it is important that you call your decal [Name Here].decal.png, or else it won't show up ingame.
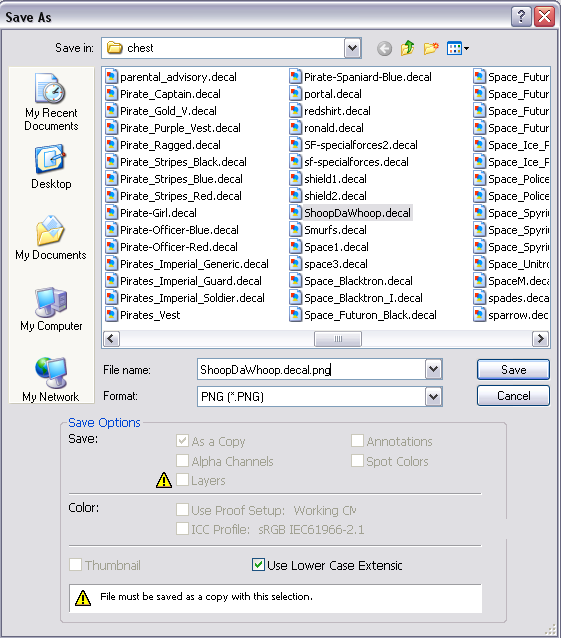
Now, make another file, 64x64 pixels in size, and place this in the "preview" folder inside "chest", so that it will show up in the menu.
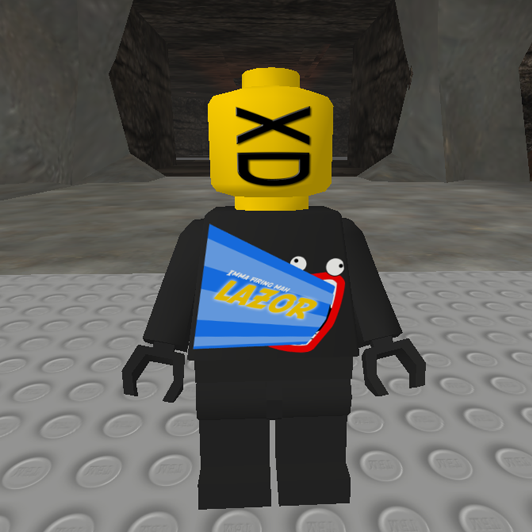
And now you can open the game and enjoy your own decal.
Remember! In case you are making a face decal call it (name).face.png and insert it to tbm/data/shapes/player/face instead of chest. The same applies to regular texture decals.