Ok, I'm gonna post my first tutorial, and I'm gonna explain how to use Milkshape 3D, which is a commonly used program on these forums for modding.
I'm not gonna post a link to Milkshape, because If you can't find one, then obviously this tutorial is NOT for you.
Part 1: Introduction 1) This, is Milkshape.
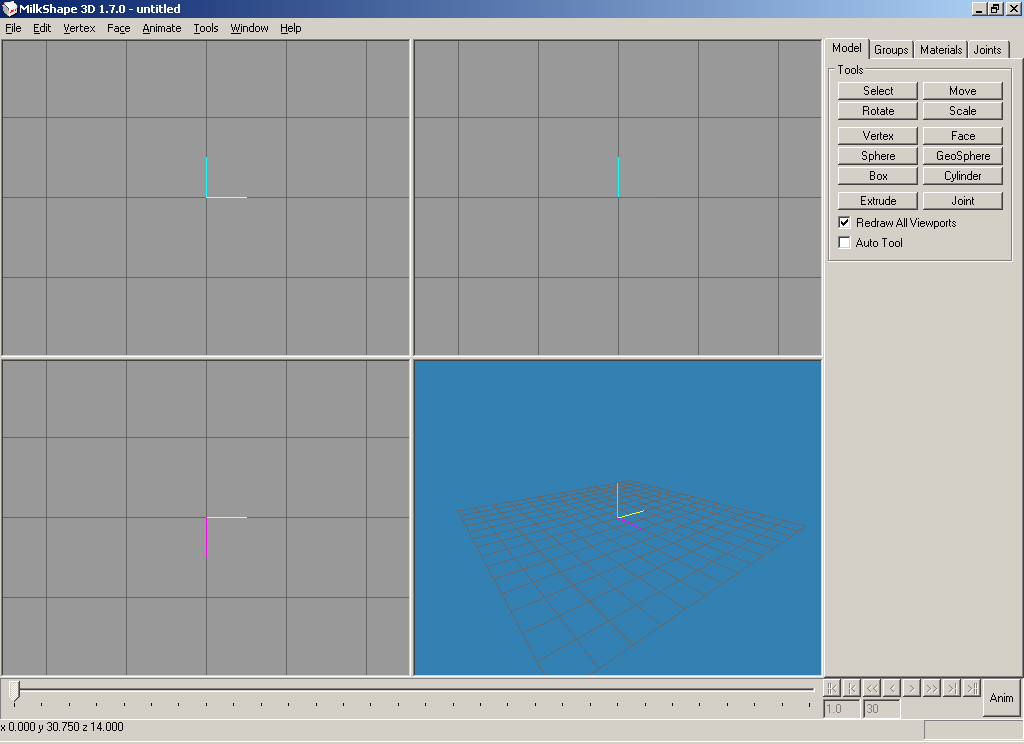
2) In this diagram, you can see the different views, labeled.
And the tool bar

3) Below, is the import feature. Get used to using this. You need this to import RE models.
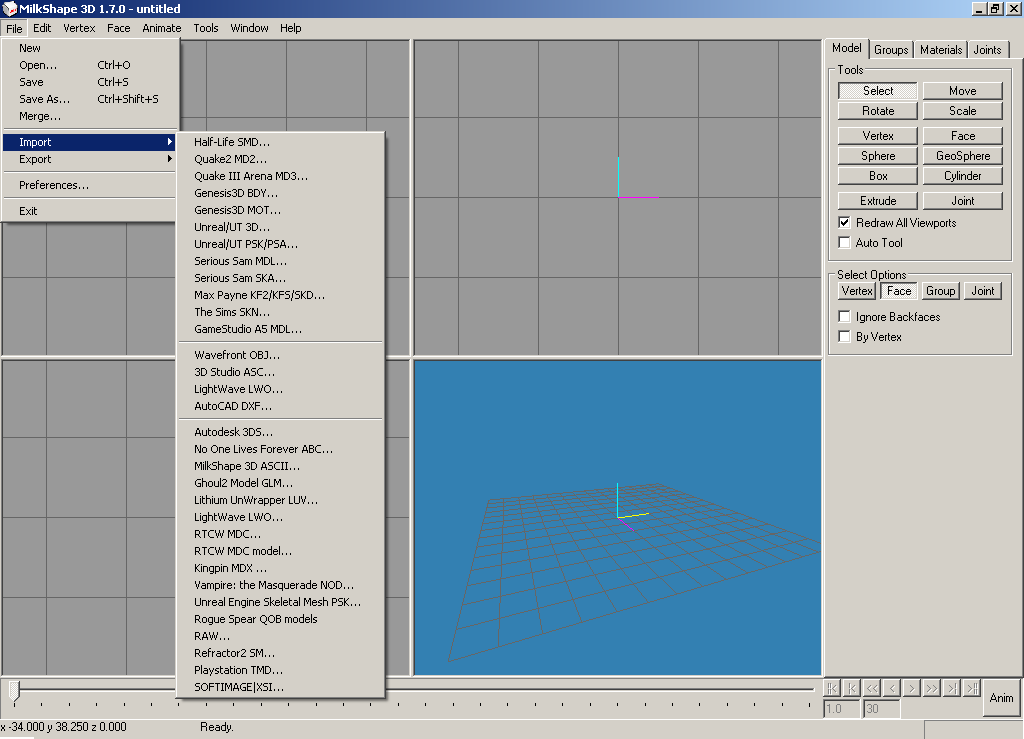
4) Now we're gonna go ahead and import THIS model: *CLICK*
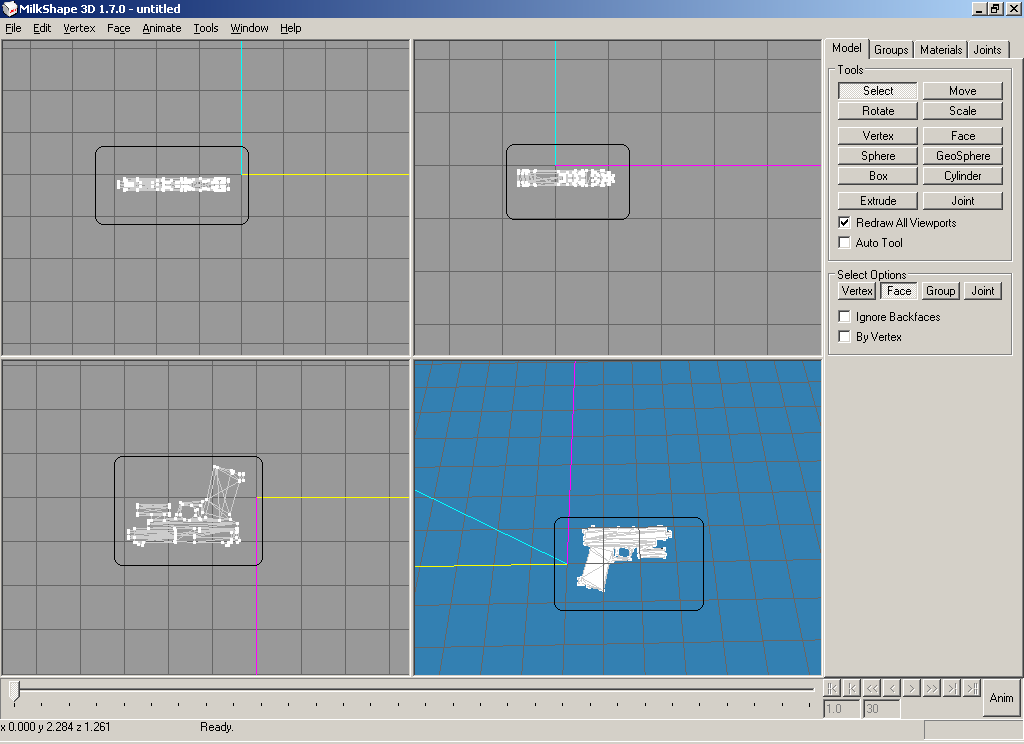
5) Find that file and import it into Milkshape by going to: File>Import>Wavefront OBJ... Find the newly downloaded file and you're ready! The model should look something like this. (Except without the black boxes around them)
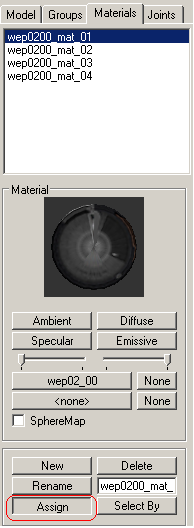
6) Now, if you've extracted your xfile.dat (which you SHOULD have by now) you can go to xfile>em>wep and find wep02_00.tga and efm15.tga. Put them into an easier to find location, and import them into milkshape BUT it's a little different. Take a look here: (Under the MATERIALS tab)
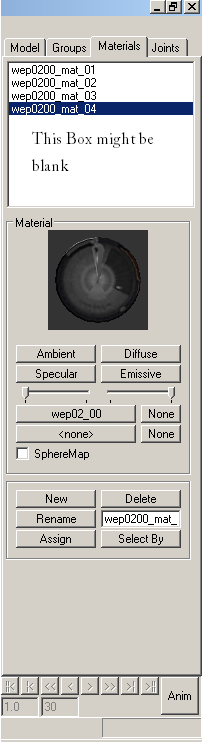
7) If that area is blank for you, simply hit "new" 4 times. BUT... you need to assign each piece to each material. This is good to know for making custom models. If they ARE there, just click where it says "wep02_00" and find that file. (Do whatever said file appears there)
8) So first, we are going to assign each of those materials to each piece. Switch to the "GROUPS" tab. Highlight the first piece (by clicking on it) and then hit the "SELECT" button (as shown below)
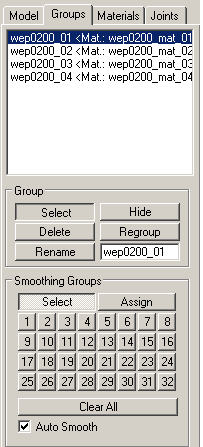
9) Then go back to the materials tab and highlight the FIRST material and hit "ASSIGN" (as shown below)
10) Repeat steps 8 & 9 until you've assigned all pieces.
11) After all pieces are assigned, go to the materials tab and hit the first box that SHOULD say "none". Now, this step requires you to find each texture you want. Now each material piece has 2 boxes, both should say "none" now, but we don't need that second one. So for EACH material, you have to find the texture for the FIRST box that says "none". These (for this model) are: wep02_00.tga wep02_00.tga efm15.tga wep02_00.tga Three of them are the same and one is different. I told you to find those earlier, cause now you have to assign them.
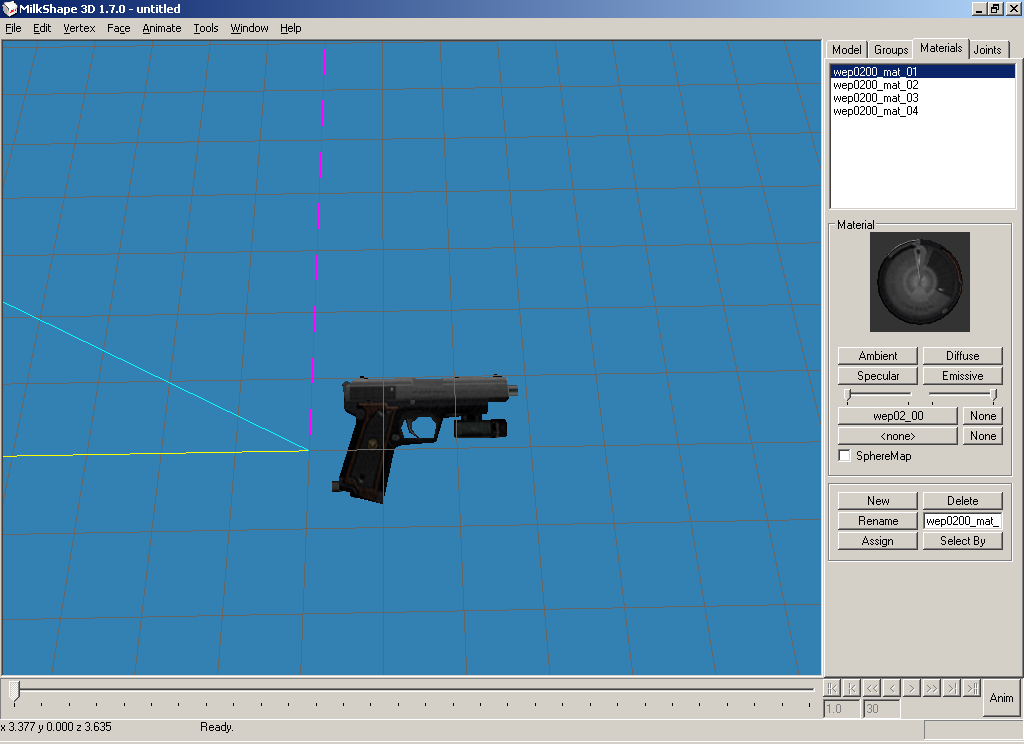
12) Before the textures show up, we have to change an option. In your 3D view, right click, change where it says "Smooth Shaded" to "Textured" and unselect "Wireframe overlay". Now that ALL your textures are assigned, your gun should look like this:
 (If you want your screen big like that, go to the view you want, right click and select maximize)
13) Now, the model is COMPLETELY imported and ready to go. In the next part, I will show you how to edit the file.
PART 2
Because of the issues of modding re4, we can't actually move the model. It'll mess up it's offset.
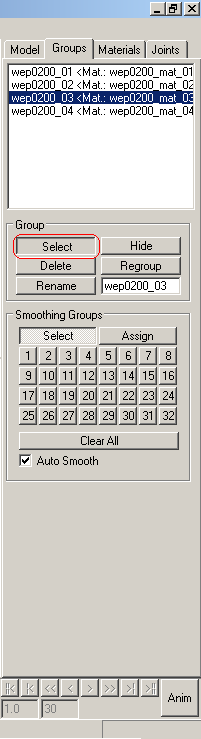
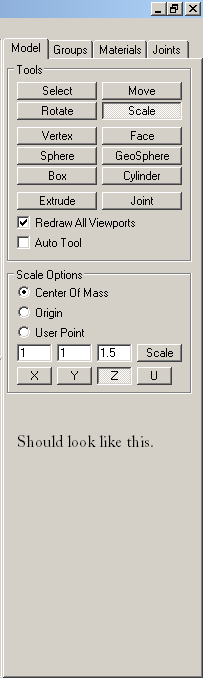
1) Anyways, We are going to create a longer clip, it won't be actually longer, it'll just appear longer. The gun's ammo count will remain unchanged. wep0200_03 (under the groups tab) is the clip.
2) Highlight that and hit "select".
3) Now, go to the "Scale" button. Above where it says "Z" change the value to "1.5". Where it says "X" and "Y" hit the X and Y button to deselect them. (not your X and Y keys on your keyboard).
4) Hit the "Scale" button near the bottom half.
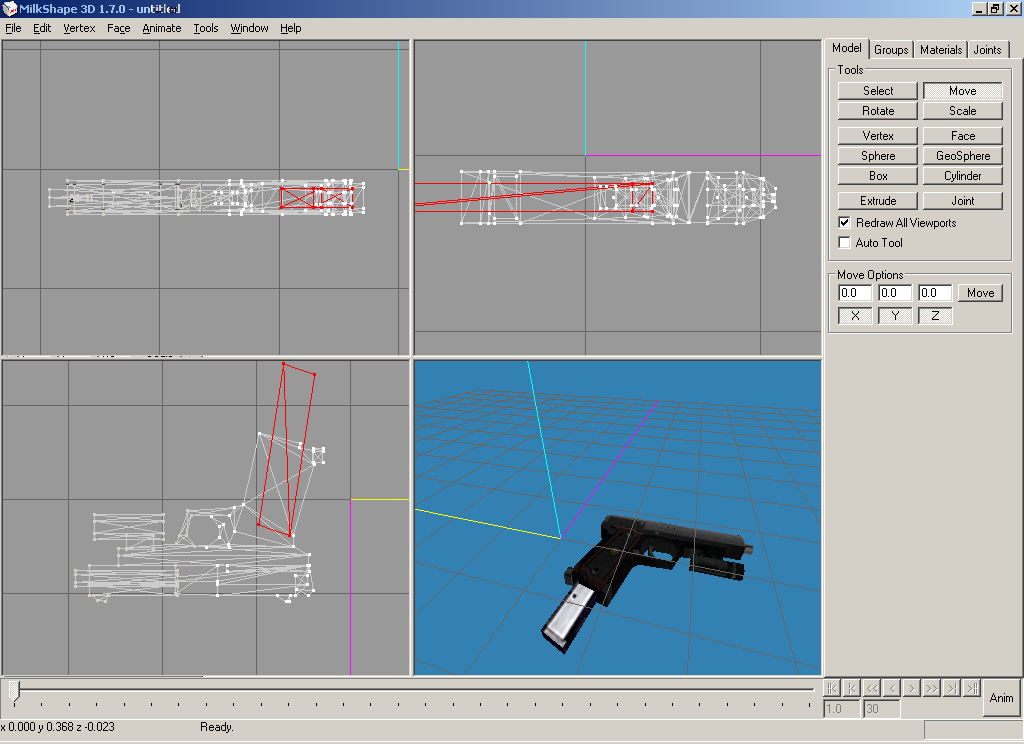
5) Now, you're going to have to move the clip down a little. The clip will now appear larger than before.
try and get it to look like the one below:
Now, there are other tutorials you need to know to get it into the game. If you can read, you can succeed. Thus ends part 2, part 3 will be about making custom based models... it will be very open ended because I am not very good at those. Maybe someone else *coughsatyrcough* could say something about custom models...
Part 3
This is Part 3. It's very basic, so you have to do some self-exploration. I myself am Not that good at it. But we will be making a mod today. he final product should look something like this. (No, you cannot release this as your own, I'm walking you through it) :
1) Now, making textures is a huge part of modding. But for this tutorial, I'm supplying you with the textures. consider yourself lucky!
Download those and we'll begin!
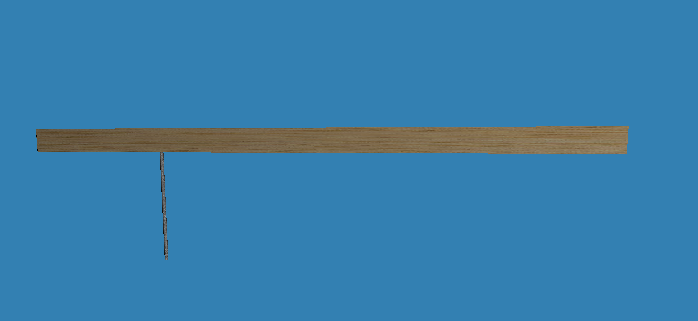
2) First, you need a reference. (I'm using my previously made Plank) We're going to create this mod to replace the knife. Download the knife here:
3) Import into Milkshape. Don't worry about this knife. it'll be deleted later.
4) select the "Box" tool and draw a long plank like object in any of the views
(besides 3D). We're going to need to adjust it. So select it (you can do so in Groups) and go to scale. You should probably want to test it on your own.
Play around with it until you get a good looking size. It should also be as skinny as the knife so it fits in Leon's Hand.
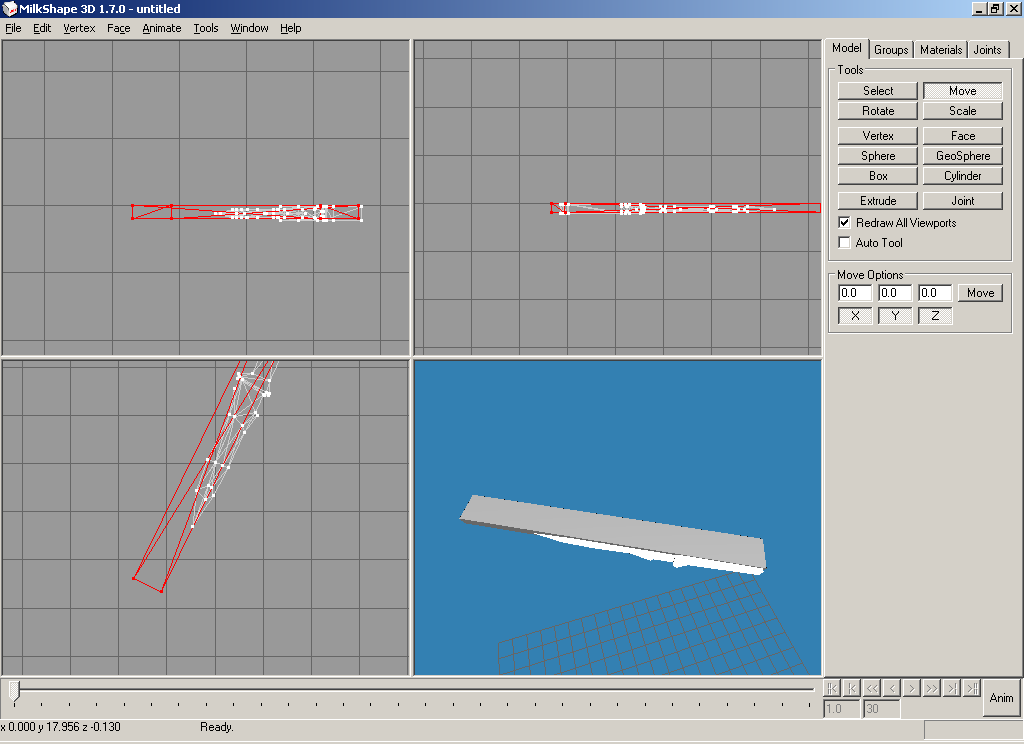
5) My actual Demensions are: X - 0.2, Y - 0.5, Z - 2. I hit scale once. And I get a fairly good looking sized plank.

6) Now, you're going to want to adjust the plank to fit EXACTLY over the knife.
The bottom of the knife should be in the same place as the bottom of the plank.
You can use the move and rotate tool to move and rotate the object. To move or rotate it, all you have to do is click and drag!
It should look like this when it's done (switched to knife for a better picture)
7) Now, we're gonna make the nail. It's really just a small cylinder. So, select the cylinder tool. In your front projection view, draw a vertical cylinder. It can be any size you want.
8) go to your top projection view and move the nail to line up near the end of the board, not too far though. It should be on the side where the point of the knife is. But it can be farther. On all views, make sure the nail goes into the board.
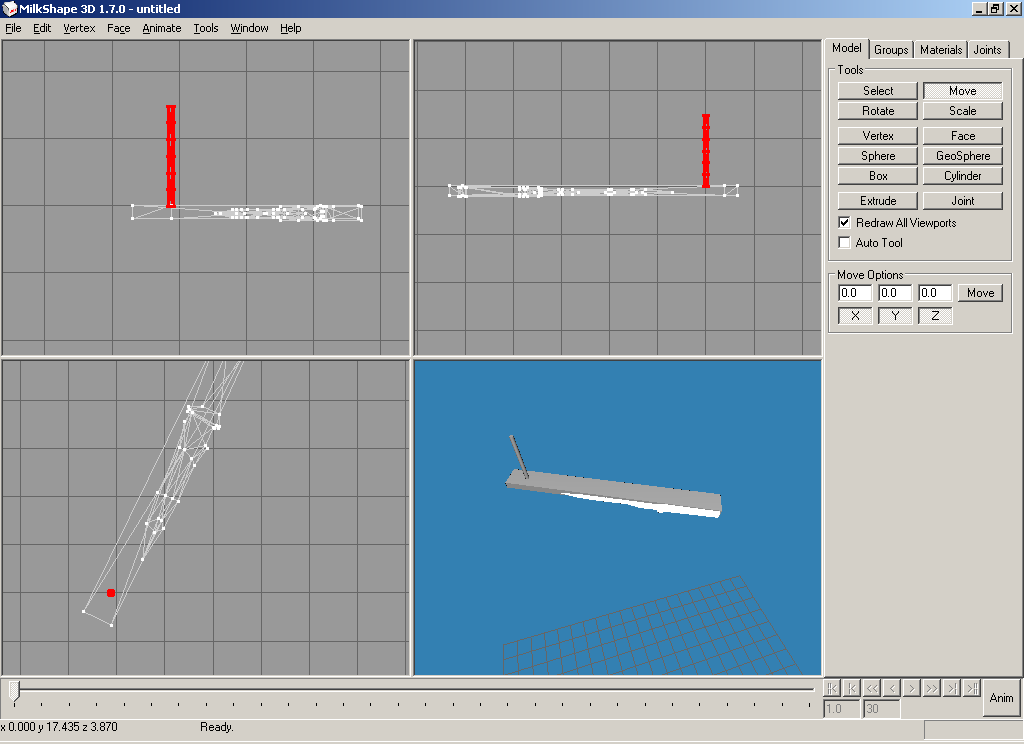
9) Now that the model is completely lined up, we can select the knife in "GROUPS" and delete it. (You can delete it's Materials too if they are there)
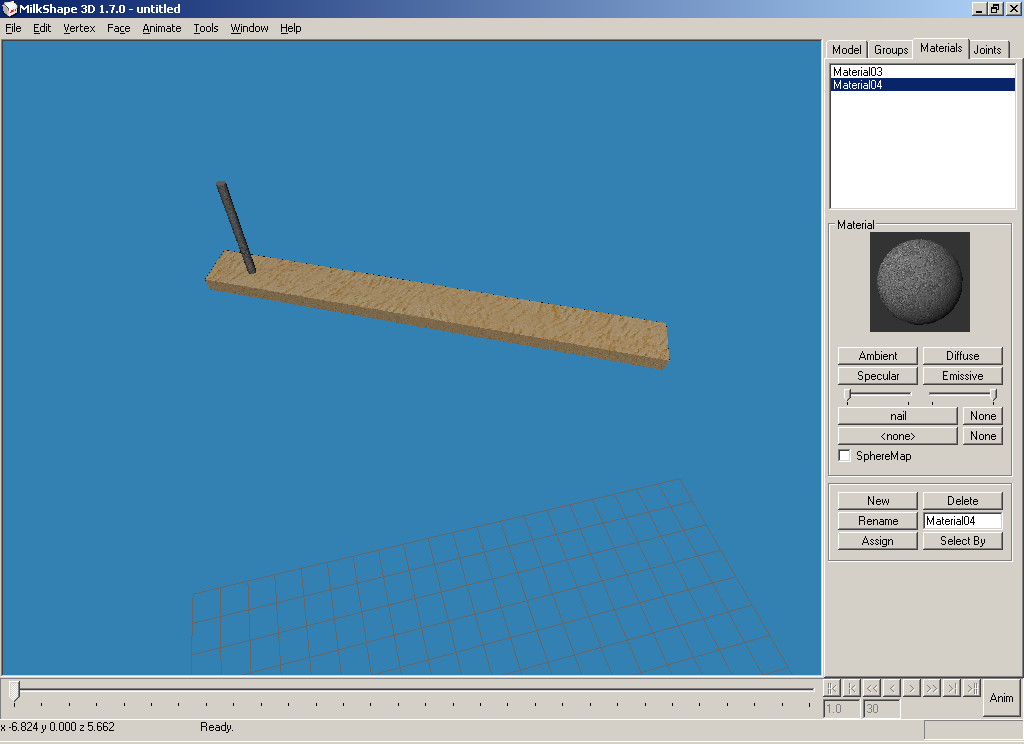
10) Now, create 2 materials in the "MATERIALS" tab. Assign each one to one part in the "GROUPS" tab. Find the downloaded textures, and assign them like before. It should look like this:
CONGRATULATIONS!!! You just made your own first mod for re4! If you want to know how to get it in game, you will need to read some other tutorials.
Part 4, the last part, will be on Advanced techniques. These will improve your modding skills.
PART 4 COMING SOON!
If you made a successful mod, post a picture below so I can see how you did. If it didn't turn out, post a picture as well. I can possibly tell you what you did wrong.


Hey man the links are broken can you reupload to another site thanks