
[page=Introduction]
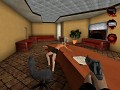
In my tutorial I'm going to show you how to create a square box map. It is really easy in Postal 2, unlike many games which can take quite a bit of time to make a map.
[page=Getting ready]
First of all, you'll need Postal 2 Editor, it comes with POSTAL 2: SHARE THE PAIN or you can download it from a Postal 2 site. If your new to postal mapping, then I've put the instructions in a list so you can go step by step. You don't need to know the important controls and buttons, I'll show you what they do.
[page=Creating a square box map]
Ok, you've loaded up the editor, now:
- Go to cube builder, its a button showing a square. Now right click.
- Once you've right clicked on the cube button, change the height, breadth and width to a good size, something like: Height= 2056 Breadth= 4056 Width= 4056.
- Once you clicked build, a box should appear on the bottom left screen. Now click subtract, its a button showing two squares joined. Now you've got default textures.
- Click on a wall, the roof or the floor then go to your texture browser. In the texture browser, click open and choose one of the texture packages. Josh textures are the best.
- For more textures, in the texture browser click all and more textures will come up. You can choose from them. You can now add the textures anywhere in the square.
- Now that you've created a good textured square, in the next part I'll show you how to add buildings to your map.
[page= Adding buildings to your map]
- In your map, click on cube builder. If you created a map with: height= 2056 width= 4056 breadth= 4056 then make this cube about height= 2056 width= 2056 breadth= 2056.
- Don't click on anything else yet, but click on you cube and then press shift, and hold in the two mouse buttons. Move your mouse down to move it to the ground.
- Now click on intersect, add. You should have a textured cube now. You can change its textures outside.
- Now you must create a cube slightly smaller inside the cube you just created. If its 2056 each, then make it 2000.
- Now click intersect, and then subtract. Your building should be textured inside now. Decorate the insides with new textures.
- Now you'll want a door. Create a cube: height= 300 width= 200 breadth= 200, and move it to the ground.
- Now that its on the ground, look at the top left screen and click on the cube, move it by pressing shift and holding the left mouse key in. Move the door until the little + is in the middle of the blue line and the red line.
- Now click intersect and add. Now you have a door!
- In the next tutorial I'll show you how to add objects to your map.
[page= Adding objects to your map]
- First, at the very top of the screen, click view and choose static mesh viewer.
- In the static mesh viewer window click open.
- Choose from a list of packages, the package named: STUFF has it all.
- Theres now a list of objects you can choose to put on your map.
- Click on an object once, go back to your map and on the floor, right click and choose: add static mesh: (meshname).
- It may end up in a position you don't want it, so on your top view, click on the object (it should be a small or big blue thing on the top view) and press shift, hold the left mouse button and move your mouse to move the object.
- In the next part, I'll show you how to add pickups, powerups and other things to your map.
[page= Adding weapons and powerups to your map.]
- On the top of the screen, click view and choose actor class browser.
- In the actor class browser, click on the plus sign beside actors, and look for: PICKUP
- Click on the plus sign beside pickup and there is a whole list of things to choose including ammo, armor, powerups and weapons. Click on one once, minimize the browser and right click on the floor.
- Choose: add actor: (actor name) and you'll have that object there.
- Next, I'll show you how to add teleporters.
[page= Adding teleporters]
- Go to actor classes, click on the + beside navigation point, then click on the plus beside small navigation point.
- Click on teleporter, then right click on your map.
- Choose: add teleporter here.
- Add another teleporter to where you want it.
- Now on your first teleporter, right click it and choose teleporter properties.
- Click on events and name it teleporter1.
- Now do the same with the other teleporter but name it teleporter2.
- Go back to teleporter 1 and right click it, choose teleporter properties.
- Now click on: TELEPORTER and click on url. Change the url to Teleporter2.
- Do the same with the other teleporter but change the url to teleporter1.
- Add teleporters in areas where players wont really go in your map, and teleporters that lead to powerful weapons or special objects.
- In the final part, i'll show you how to add lighting to your map. Without light bulbs. Which is very simple.
[page= Adding lighting to your map without light bulbs.]
- Click on view at the top of the screen.
- Click on level properties and choose zone light.
- Click on ambient brightness and a scroller should come up beside it. Move it up if you want your map very bright, or down if you want it dark.
- If you want your map to be dull, with some light, the right click on walls and choose: add light here.
- NOW ADD PLAYER STARTS, BY RIGHT CLICKING AND CHOOSING: ADD PLAYER START HERE.
- RIGHT CLICK ON ALL PLAYER STARTS AND CHOOSE: PROSCRIBE PATHS BETWEEN: (PLAYER START NAME)
- NOW ON THE TOP OF THE SCREEN CHOOSE BUILD, THEN BUILD ALL.
- EVERYTHING SHOULD COMPILE, IF AN ERROR MESSAGE COMES UP, THEN YOU'VE EITHER PROSCRIBED NO PATHS BETWEEN PLAYER STARTS, OR YOU'VE DONE SOMETHING ELSE EASILY WRONG.
- ONCE YOU'VE CORRECTED EVERYTHING, IF YOU HAD ANY MISTAKES, CLICK SAVE AND SAVE YOUR MAP. THEN CLICK ON: BUILD, AT THE TOP OF THE SCREEN.
- THEN CHOOSE "PLAY MAP". EVERYTHING LOADS AND YOU CAN TEST YOUR MAP!
Thanks for reading my tutorial patiently, now you've became a postal 2 map builder! Congrats!


how do you set the starting point???
I can help, go to veiw at the top then go to view actor class. Then look for +navagation point and open +small navagation point then if u look in teleport it should say start point. Tell me if i helped or just wasted ur time.
Hey how to add Bystanders??? PLS SAY