
Hello, Today I will be showing You how to Create a Particle-Based Waterfall for Half-Life 2 Without any annoying, Difficult, Frustrating Texture Creation and Coding.
You Need To Have Episodes 1 + 2 For This To Work
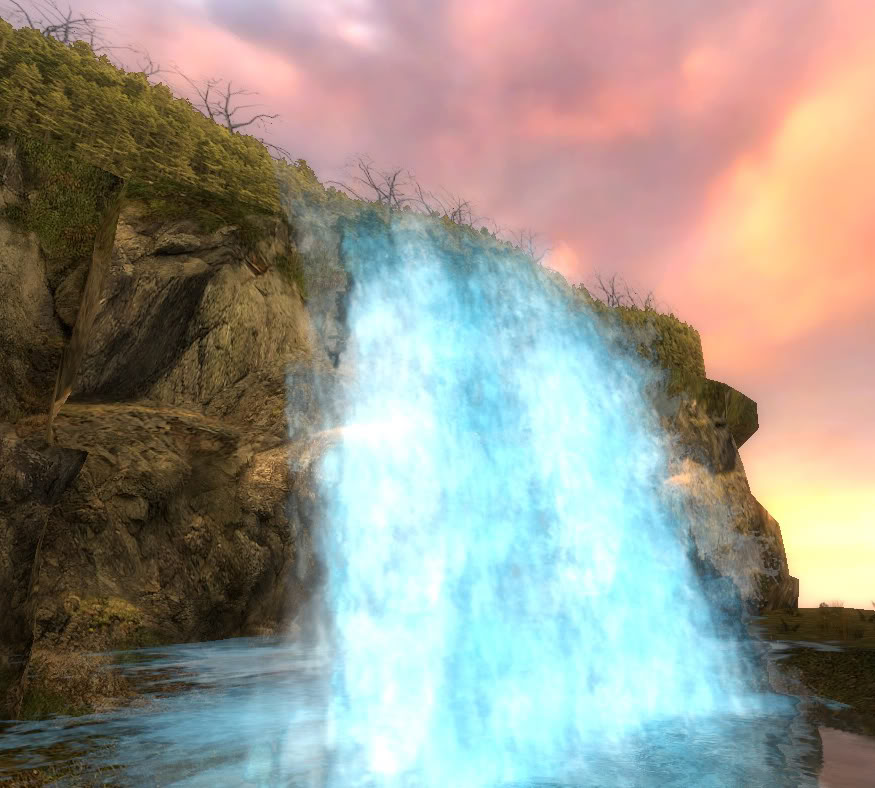
This Is an Example Of What we will be creating today:
Just Follow these simple Steps And You Will Be Well on your Way;
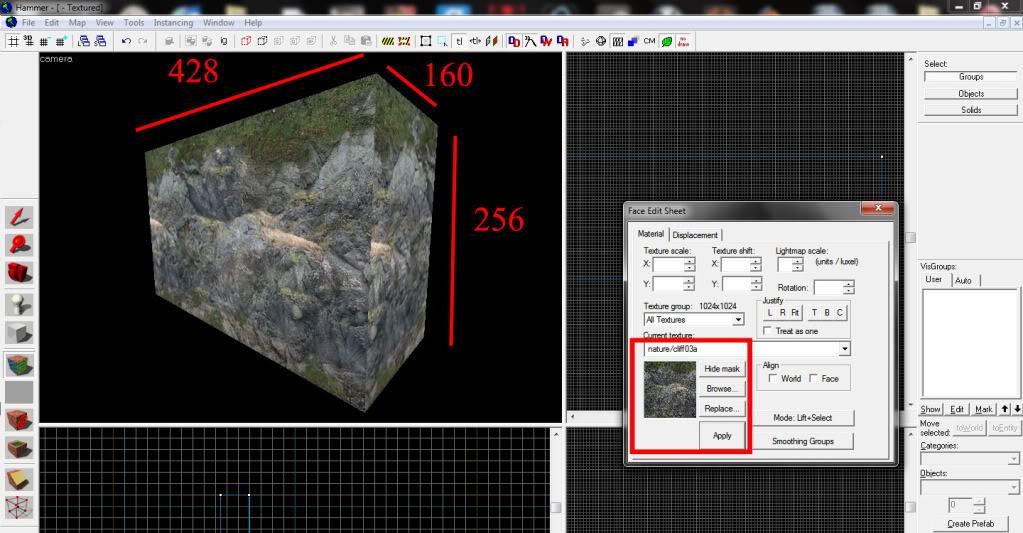
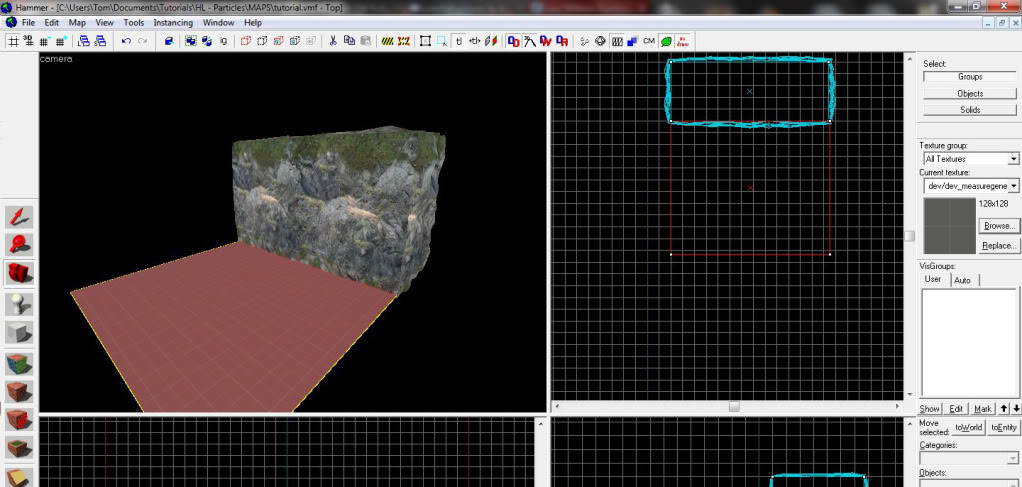
Step 1, Create a Brush That is 428 Units Wide, 160 Units Long and 256 Units High and Texture it With the Texture "Nature/Cliff03a" For Best Results the Texture Scale Should Be X=0.22 and Y=0.25
Step 2, Now we Will Give The Cliff a Little Detail By Adding Noise to The surface [Making it Rough].
To do this. Click the texture application tool On the Side Menu. Then Select The Tab named "Displacements" Now Ensure that The block you Just Created is Selected and Click "Create"
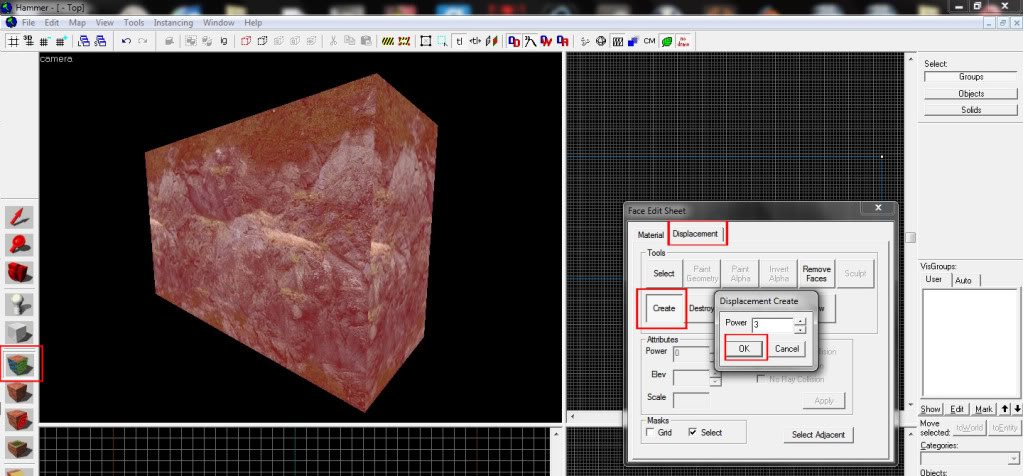
Step 3, Still Under the "Displacement" Tab. You Should Now Click The Button Named "Noise" Set The Max Amount of Noise To 20.00, You Can Leave The Min at 0.00.
Your Block Should Now Look Like This:
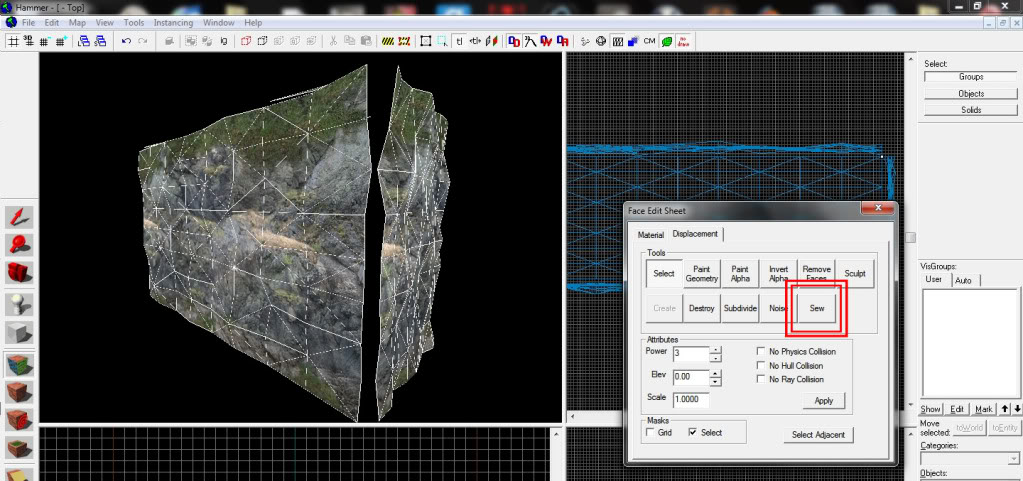
DON'T PANIC!!! To Fix This, Just Press The "SEW" Button
DON'T PANIC!!! To Fix This, Just Press The "SEW" Button
Step 4, Now Create A brush At the Foot of Your Cliff, Make it Approximately Double The Length of the wall, But keep It about The Same Width as the wall, try to Keep The Height Less Than 5 Units
Step 5, Now, At the Top Of Your Cliff, Close to The Edge, Create a "info_particle_system" with The Following Properties
- Name: WF
- Particle System Name: Waterfall_Cascade_01
- Start Activated: Yes
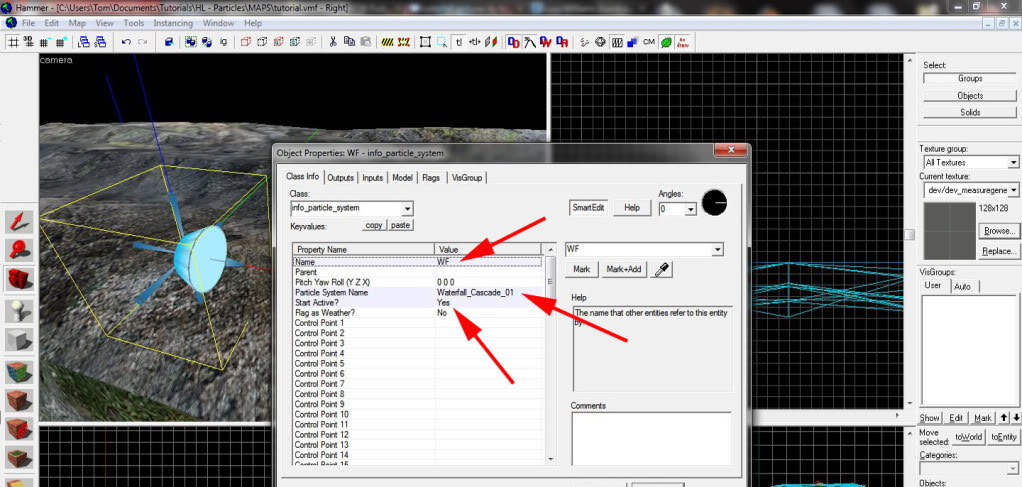
It Is Very Important That You Copy The Particle Names Correctly, Or Else It Won't Work. For a Full List Of Particles, Please See here: Developer.valvesoftware.com
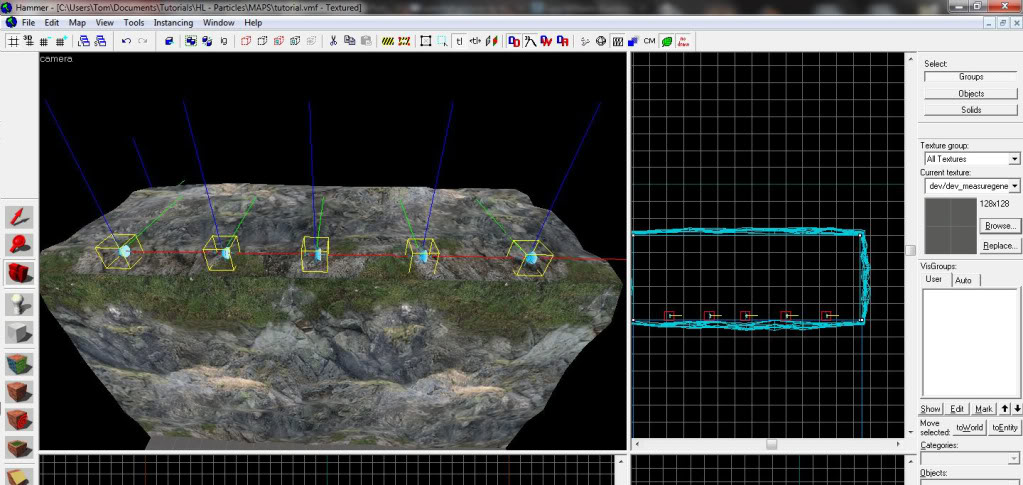
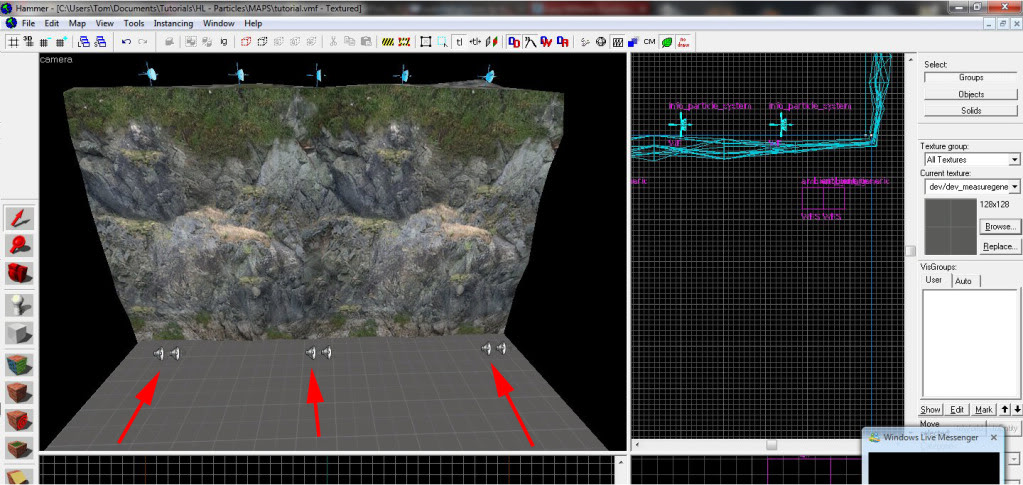
Step 6, Copy The "info_particle_system" you Just Created about 5 Times, And place Them very Close To The Edge Of The Cliff as Shown:
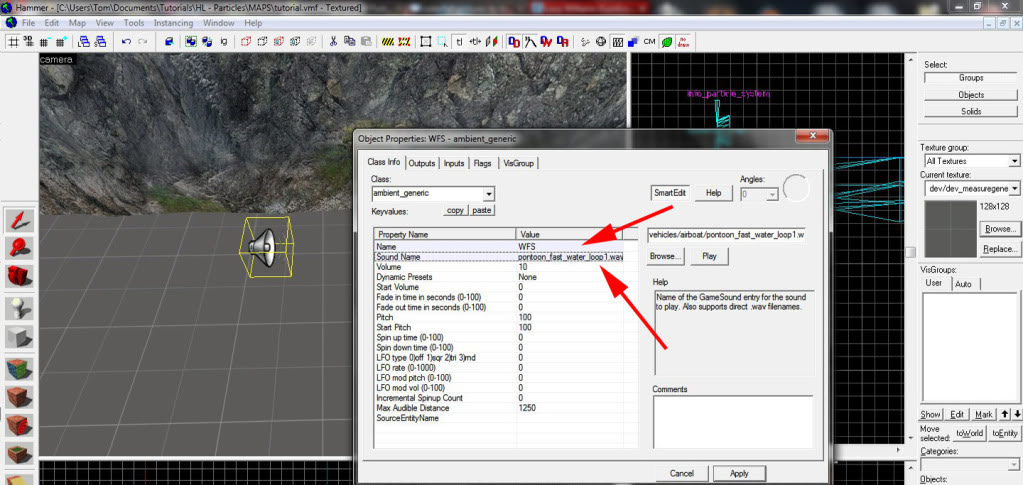
Step 7, Now We Need to Add The Sound Of The Waterfall, Create an "Ambient_Generic" At The Base of The Waterfall and Give It The Following Settings:
- Name: WFS
- Sound Name: vehicles/airboat/pontoon_fast_water_loop1.wav
- "UNCHECK ALL FLAGS!!"
Then Copy and Paste It about 7 Times and Place The Evenly Spread Out at The Base of The Cliff
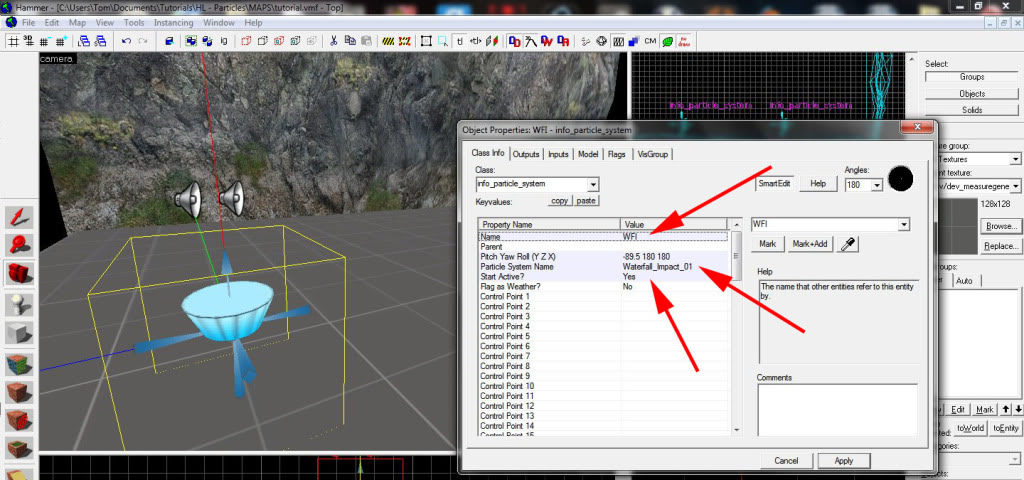
Step 8, Now To Create The Impact Effects. Create another "Info_particle_system" at The base Of the Cliff, This Time, Move it approximately 128 Units Away From The Base and Give it The Following Settings:
- Name: WFI
- Particle System Name: Waterfall_Impact_01
- Start Activated: Yes
- "Make Sure The Arrow On The Model Is Facing Upwards"
Step 9, Make a Further 2 Of These and Place The evenly Apart, 128 Units Away From The Base of The Cliff
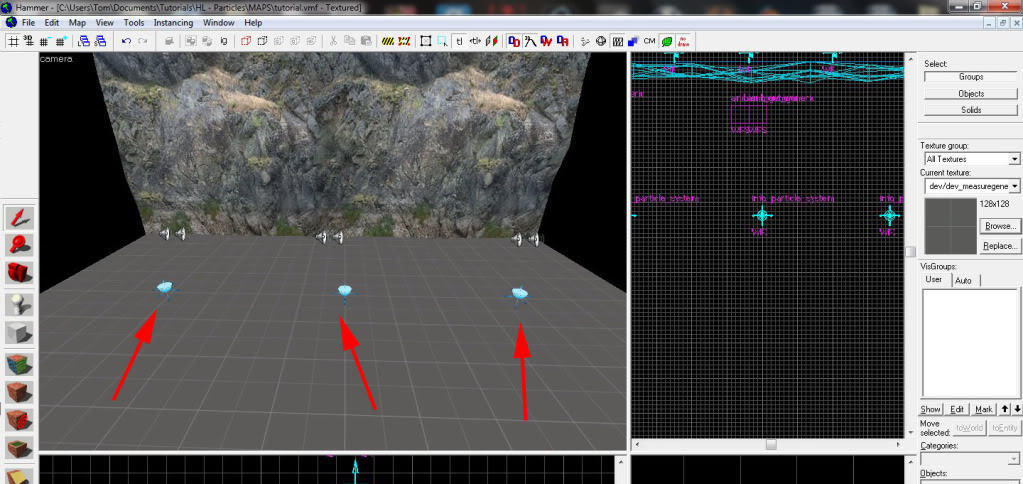
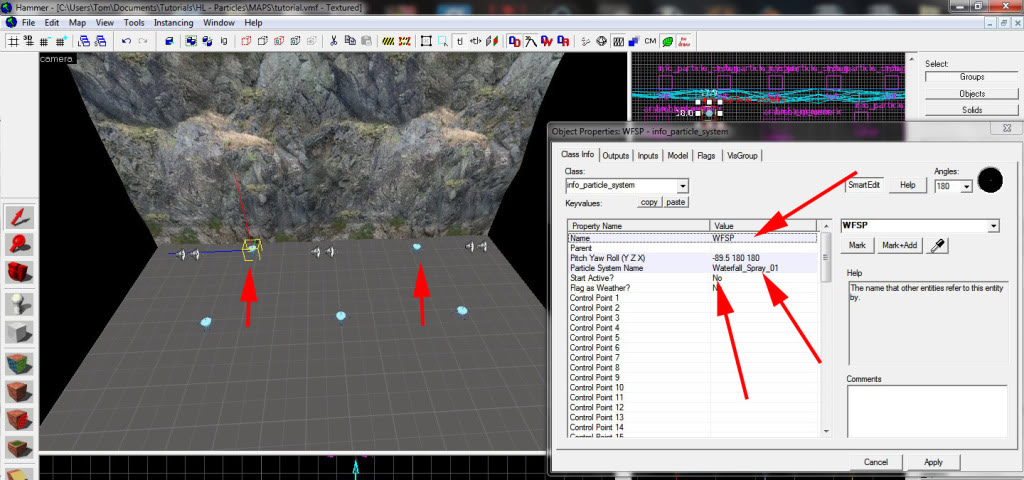
Step 10, Now Create another 2 "Info_particle_system" at The Base of The Cliff, Between The several "Ambient_Generic" we Created Earlier. Give The Particle Systems you've just created the Following Information
- Name: WFSP
- Particle System Name: Waterfall_Impact_01
- Start Activated: Yes
- "Make Sure These Particle Systems Face upwards as Well"
CONGRATULATIONS!! You Have Successfully Created a Professional Particle-Based Water Fall. All That Is Left To Do Is Put in A Sky Box, a "info_player_start" and You Are ready For Action!!
If you Would Like To Download My example Map to See it In Action, [Or Just copy The Files Because You Are too Lazy To Make One Yourself, The Download Link Is Here: Opendrive.com
Please Leave Your Comments !!! To View More Tutorials, Visit My Profile: Moddb.com


very nicely done, I'll probably try this out. Thanks...
thanks !
Thanks man this is great
This answers so many questions. Genius!
Glad You Liked It. :)
Thanks man
up until the half this is actually a displacement tutorial XD
Well, If I'm gonna do something, I'm gonna do it properly XD
Link is down for the prefab.