
[page=Introduction]
In this tutorial, you will learn how to build a small room for css, it does so the simplest way possible. This is for n00bs only as when you are more advanced, using 'make hollow' is not to be recommended...
[page=Let's get to it!]
1. Let Hammer load up (this takes a while), then select File> New or CTRL + N to start your first project.
2. Lets have a look at the tools you will be using in this tutorial shall we.
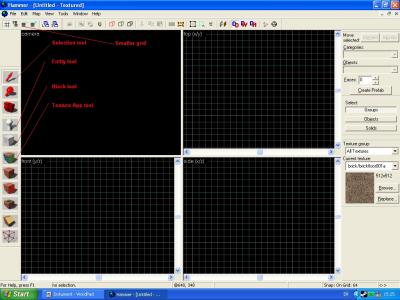
the names are pretty much self-explanatory, the block tool makes a block, the texture tool applies a texture to selected block etc...
3. Normally I wouldnt recommend hollowing, but as this is a first room I suppose it's justified, first of all select the block tool, in top view draw a cube that is lets say 256*128. In front or side view make it 128 high instead of 64... Always make your normal sized rooms 128 in height as this is how big standard size textures are (128*128) When you have your block at the right size either press enter or righ click it and choose "create object" to make the block (also known as brush) a solid object.
4. Choose your block (it will turn red if you have selected it) and choose Tools> Make hollow or press CTRL + H A neat little box should appear. We want to hollow our block outwards therefor we set a - infront of the number wich shows how thick our walls, ceiling and floor will be. Lets make them 16 thick
5. Now, as you can see the grid size is set to a much higher number than 16 this is why the wall is merely a 4th of our grid. To lower our gridsize (making it easier to work on details and well everything as 64 is a size not to be recommended!) click the "smaller grid" tool which I showed you earlier. Personally I prefer working with gridsize 8 when im making basic structures so click the "smaller grid" tool another two times..
[page=The room]
6. Texturing: You dont really want your walls and ceiling (or even your floor) to be the default texture (brickfloor001a) do you? I didn't think so!
first pick a texture by clicking browse, this button is to the right of "side view" pick whatever texture you want (use the filter feature if needed wich it often is, by typing in plasterwall if you are looking for a plasterwall etc..) then click the texture app tool (shown in previous image) wich will bring up the Face edit sheet. click the wall you want to texture while the sheet is up, this will change the texture you want to have there to second in the drop down list. choose the texture you wanted and click apply. do this to all the sides of your room. As the textures normally arent aligned when you have applied them, press the button "bottom" in the part of the face edit sheet called justify.
7. Putting in a spawn point, simple enough I'd say, press the entity tool and choose either "info_player_terrorist" or "info_player_counterterrorist", in 3d view, place the player model where you want him. NOTE: the spawn point must NOT be inside a block or prop, this will render the spawn point unusable.
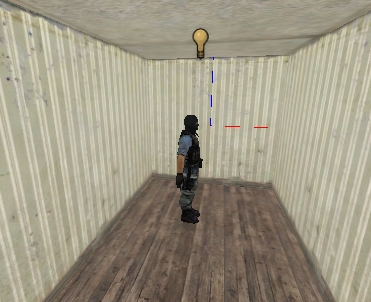
8. A light, now this is easy stuff here... in the entity list, choose "light" place it where you want it, double click it with the selection tool to set its properties. Once there, change "brightness" to whatever color of light you want by pressing pick color, then press apply.
You should now have something like this:
11. Going in-game, File> Run map> Type -dev -console +sv_lan 1 in the box> Ok
Thanks for taking your time to read my very first tutorial, see you next time!
/Mikey


Hey ur tutorialis easy but when i try to run map after i type -dev -console +sv_lan 1, it said c/program files/valve/steam/steamapps/username/counterstrike source/bin/filesystem_steam.dll it sais that it is unable to load it. plz help
I believe you need to run CS:S and the the file will be there next time you try to run the map.
i click the wall press apply when ive chosen my texture but nothing happens .. HELP ?!?!
i went into view and clicked Texture polygons :) ty
i cant join terrorist or Counter terrorist and in console it says that Terrorist Spawnpoint is invalid or somthing :S
yup i worked it out ^_^
While I think the effort is great, this isn't the best tutorial in the world. I'm a beginner, and I found myself scouring the internet for information like "info_player_start". You should tell people it's under "entities" and include where that can be found. You're running through it, so to speak.
Thanks though, it did get me off the ground, but I had to pretty much lead myself through the steps.
Why do people teach others to use the hollow tool! I don't care if it's the easiest way to do something, it's not the right way and shouldn't be taught.
Can you help me on how i could make one room then a hallway then another room??? Cause i've been tryin to figure it out, but i cant!!!! plz help!
Seriously very basic tutorial, too basic.
Hi! Whitch program is it a good mapping program for CS:S and for HL2????
Valve Hammer