Get fuelled up and prepare to race and explore a post-apocalyptic world ravaged by global warming, with players experiencing varying weather effects such as tornadoes and sandstorms, as well as a full day-night cycle. The game-world is over 5,560 mi² (14,400 km²) in size and completely free to roam both offline and online with up to 16 players. In FUEL, if you can see it, you can drive to it.

Post tutorial Report RSS POI's - "Points Of Interest"

In this tutorial I will be discussing Points Of Interest, which are abbreviated as POI's. A POI is a marker in the game-world such as a vista-point or a heliport.

Posted by on - Intermediate Client Side Coding

WHERE TO BEGIN?
Firstly open the file 'poi.tsc' with Notepad++. The file is located within the 'Story' folder, see one of my other guides detailing the file structure and formats for FUEL.


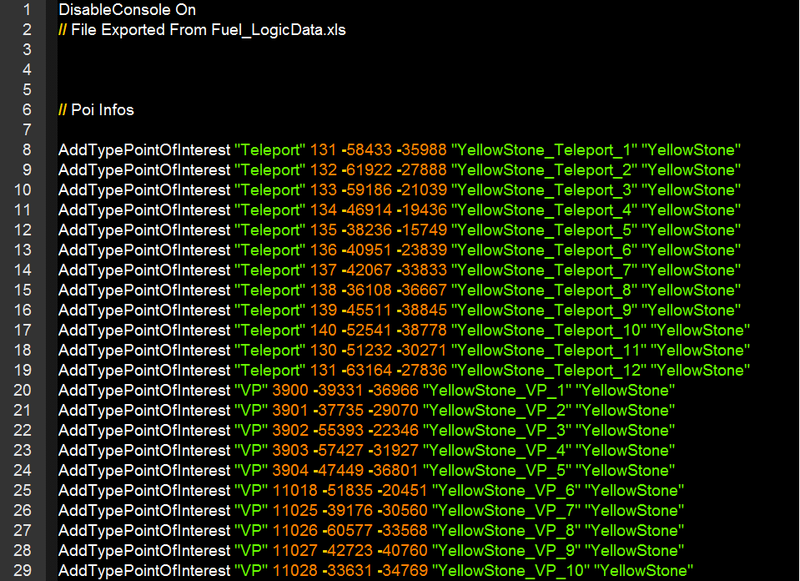
To get the text displayed as above, I selected the closest resembling language - javascript.

-------------------------------------------------

WHAT DOES THIS ALL MEAN?

Within this file are main values that aid in the creation of POI's. Here is an example POI:

code:
AddTypePointOfInterest "Teleport" 131 -58433 -35988 "YellowStone_Teleport_1" "YellowStone"

code:
AddTypePointOfInterest

calls for a new POI to be created.

code:
"Teleport"

set's the POI as a Heliport.

code:
131

set's the text string that displays in-game. E.g. "Heliport".

code:
-58433 -35988

are the two co-ordinates of the POI.

code:
"YellowStone_Teleport_1"

is the internal name of the POI

code:
"YellowStone"

is the zone it corresponds to.[/ul]

-------------------------------------------------

CREATE YOUR FIRST POI!
This example will allow you to create a heliport that spawns you at the helipad right outside offshore shack camp.

First things first, obtain the co-ordinates for your POI. For this you will simply be using debug mode, I will be assuming you are using an XBOX 360 Gamepad - for control variations please see an alternate guide.

Launch FUEL with debug mode installed. Then when in-game bring up the teleportation map by pressing the Left Thumbstick button. Alternatively you could bring up "SHOW INFOS FRAMERATE" on the main debug menu, by pressing the LB button. The end result is displayed in the image below.


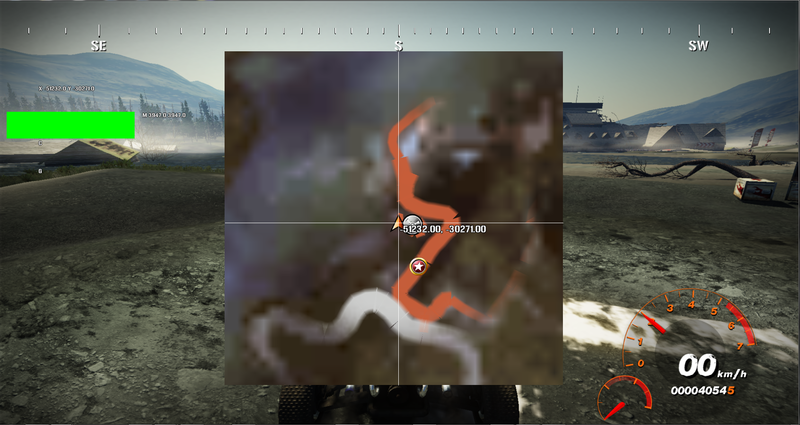
The first value is the X co-ordinate and the second being the Y value, like any standard co-ordinate system.

Now that we have this value we need to plug it in to the standard POI string for Heliports.

code:
AddTypePointOfInterest "Teleport" 131 <strong>-51232 -30271 </strong><strong>"YellowStone_Teleport_11"</strong> "YellowStone"

You should now have a string as show above. The co-ordinate value has been changed and so has the internal name - in this case I called it

code:
"YellowStone_Teleport_11"

.

Thats it - you've made your first POI!

BUT WHAT ABOUT VISTA POINTS?
Vista points require an extra step, because each one requires an in-game text string.

code:
AddTypePointOfInterest "VP" 3900 -39331 -36966 "YellowStone_VP_1" "YellowStone"

code:
"VP"

- identify's the POI as a vista point.

code:
3900

- is the link to the text string in the trtext files.

Post a comment

Your comment will be anonymous unless you join the community. Or sign in with your social account: