[page=Setting up good map lighting]
For DS2Toolkit 1.1 (v2.00.03931)
First, I want to acknowledge I am passing along knowledge I learned from Mcarp (much credit to him) for good map lighting.
Now, to see the changes you're going to make in Siege Editor 2 (SE2), you need to unselect the Ignore Vertex Lighting button in the toolbar (it is On/depressed, by default).

When unselected, everything in the main view window will now be darker (or black), but don't worry.
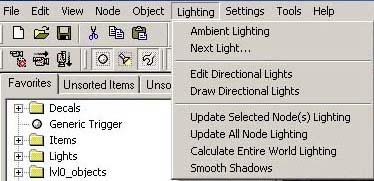
Now, select Lighting from SE2's main menu, then choose Ambient Lighting.
This brings up the Region Ambient Light Settings window.

Alter the settings to the Ambient Intensity section to look like the screenshot:
General: 0.200000 (note: you do not need to type in the 0s)
Object: 0.220000
Actor: 0.250000
Keep the Ambient Color settings the way they are.
Click on OK.
Again, click on the Lighting main menu item and this time select Edit Directional Lights.
It'll probably be blank (the screenshot below already has some created list items, from a DS2 map).
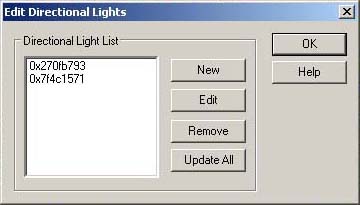
Click the New button to create a new item in the list, then select the item and click on Edit to bring up the Directional Light Properties window. If not already on the top, click on the Colortab.
Use the default color - the default color should be white RGB (i.e. red, green, blue) equaling 1.0,1.0,1.0. Changing these values changes how much of each color is used - with each at 1.0, they're all at normal intensity and you get a white color. Set Green and Blue to 0 and you get a vibrant red color.
Now, click on the Lighting tab.
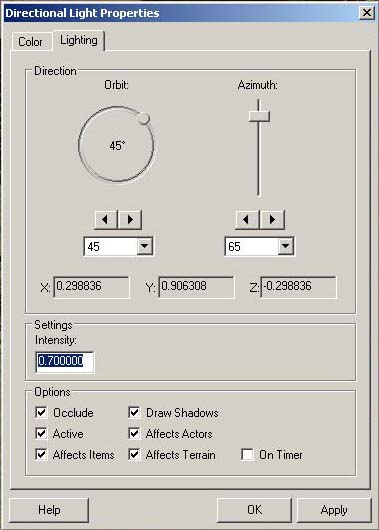
Use the controls below the circle to set the orbit to 45 (degrees), and the slider next to it (Azimuth) to 65. Change the Settings Intensity to 0.700000. Finally, make all the boxes in the Options section checked - except On Timer, which should be unchecked.
Now click OK to save these changes and return to the Edit Directional Lights window.
[page=Tweaking]
Click the New button again, select the new number you've created in the list window and click on the Edit button again.
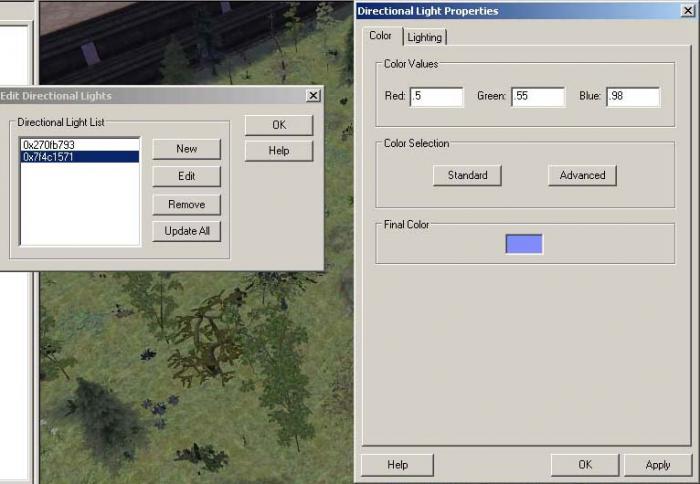
If it isn't on top, click on the Color tab on the Directional Light Properties window, then change the Color Values to these values:
Red: 0.5
Green: 0.55
Blue: 0.98
and you should have the blue-ish color shown in the Final Color square in the screenshot above.
Now click on the Lighting tab.
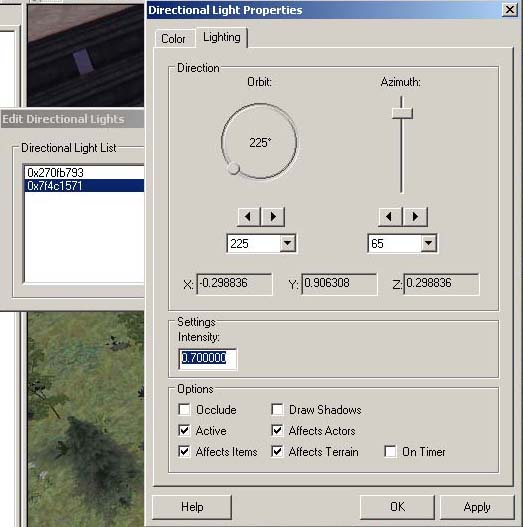
Active, Affects Items, Affects Actors and Affect Terrain checkboxes should be left on default.
Occlude, Draw Shadows and On Timer should be unchecked.
Now, set the orbit to 255 and the azimuth to 65.
Finally, alter the Settings Intensity to 0.700000
Click on OK and then on the OK button again to get back to the main view.
Ok. You are done; congratulations! These are good default settings and will look great. Toy around with them if you want something different.