This tutorial will guide you through the making of a simple map with two rooms, a door and a keypad.
When you enter the correct code the door will unlock.
---Shortcut Setup
Before you start you will need a shortcut to the Doom 3 Editor.
To do this copy your original doom 3 shortcut.
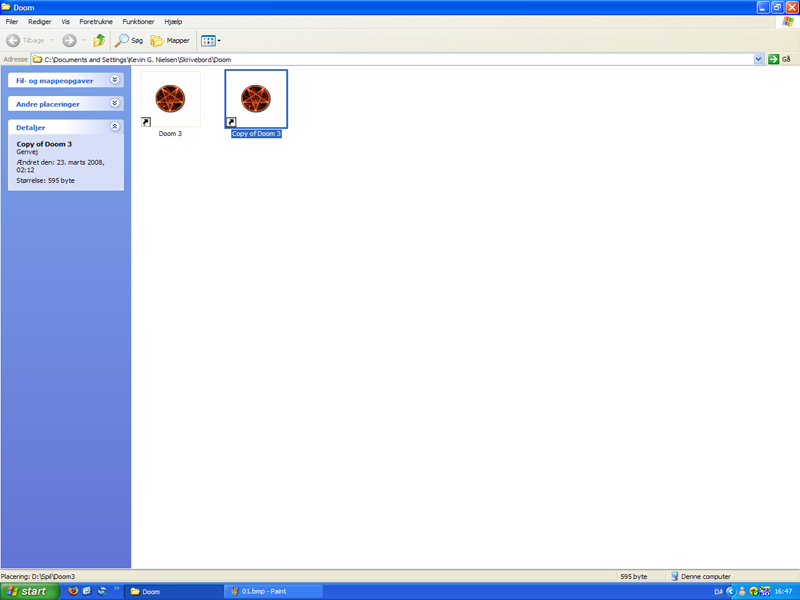
Right-click on the Copy and click properties.
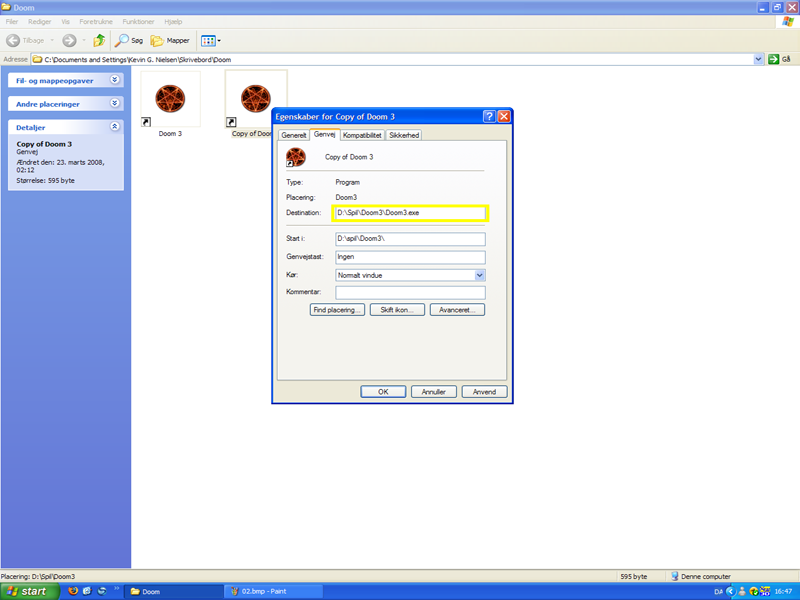
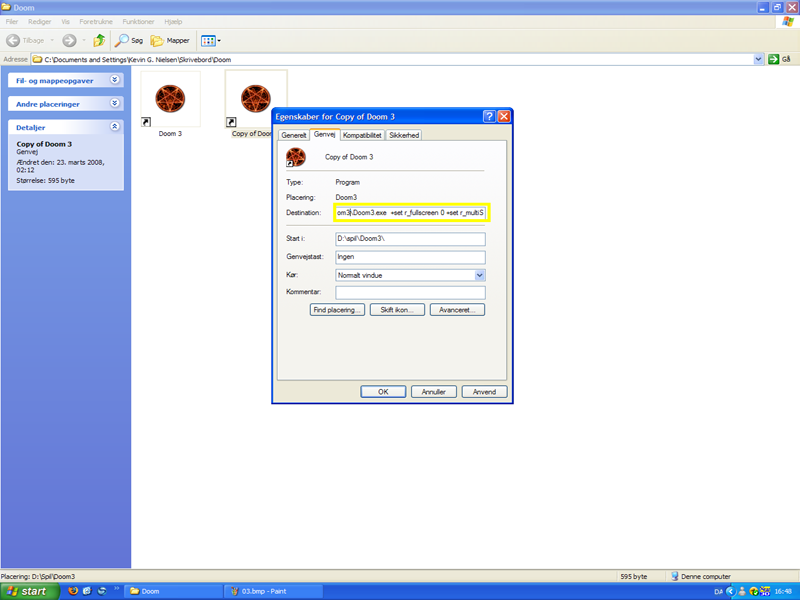
In the destination field enter this after the path to the doom 3 executable file:
+set r_fullscreen 0 +set r_multiSamples 0 +wait +wait +wait +editor
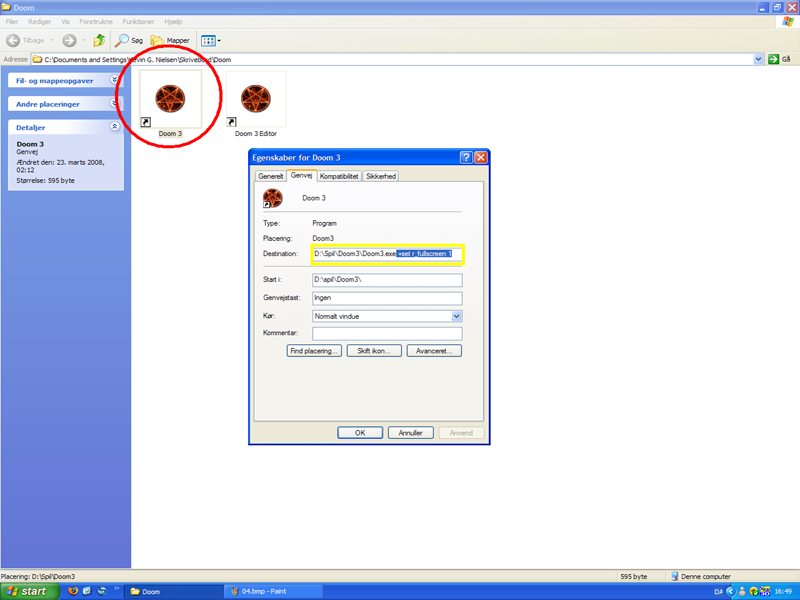
Now to make the game run in fullscreen again when you run it.
Right-click on the original shortcut and click properties then add this:
+set r_fullscreen 1
---Making the two rooms
Now run the Editor.
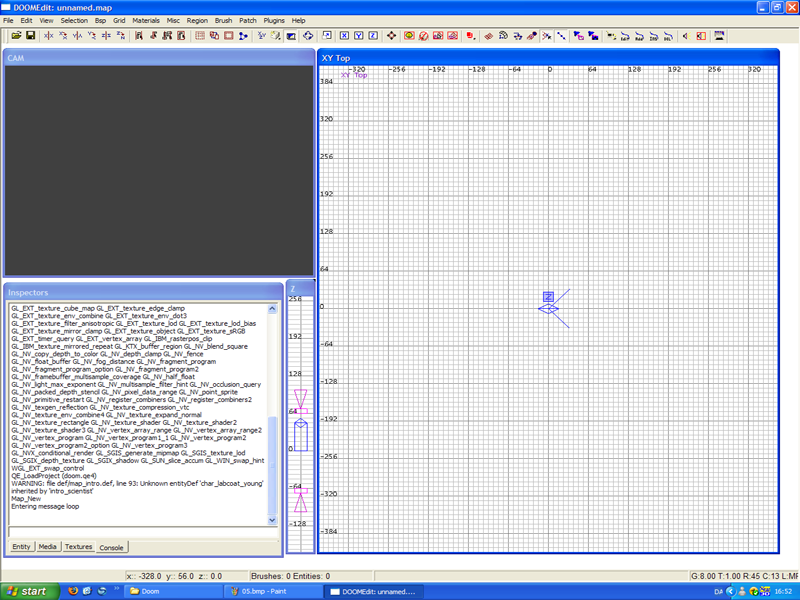
Now click on Media>Textures>textures>base_floor>a_diafloor_1b_fin
This is the texture we will use (I will only use one texture for the floor and walls)
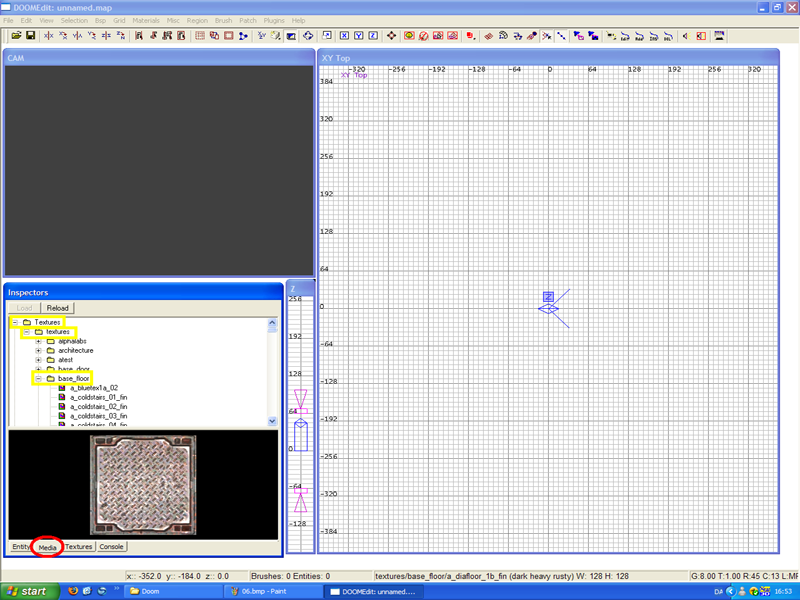
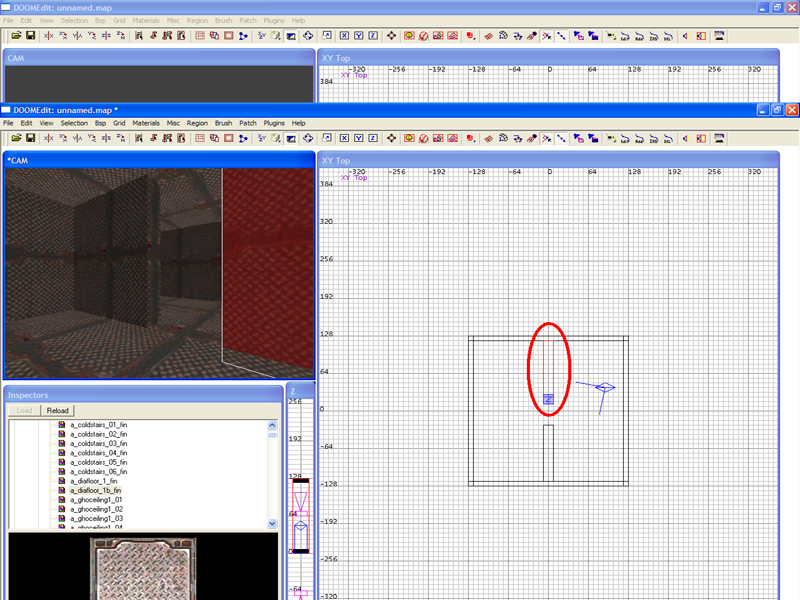
Now draw a box in the top view and in the small windows (The caption is "Z") adjust the height of the box you just made.
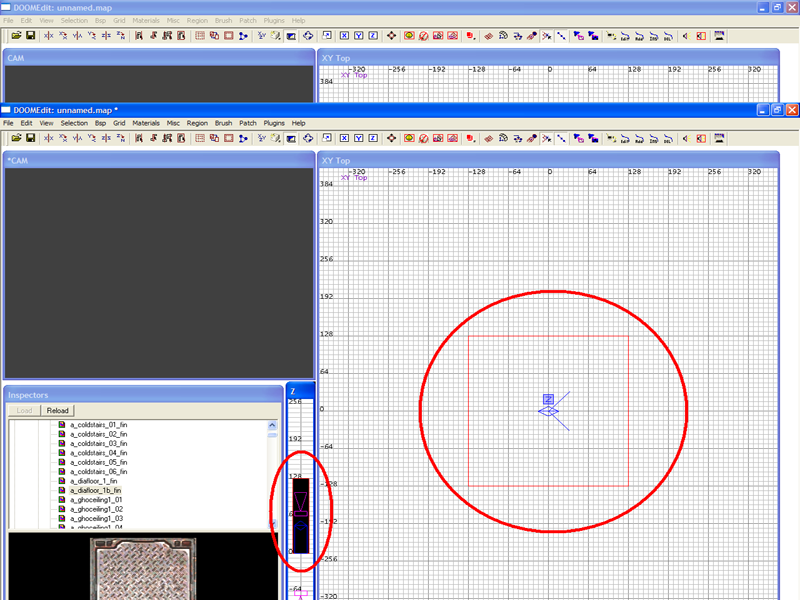
Now click on the "hollow tool"

Press Escape (ESC) to deselect everything.
Draw a small box for a wall to seperate the two rooms.
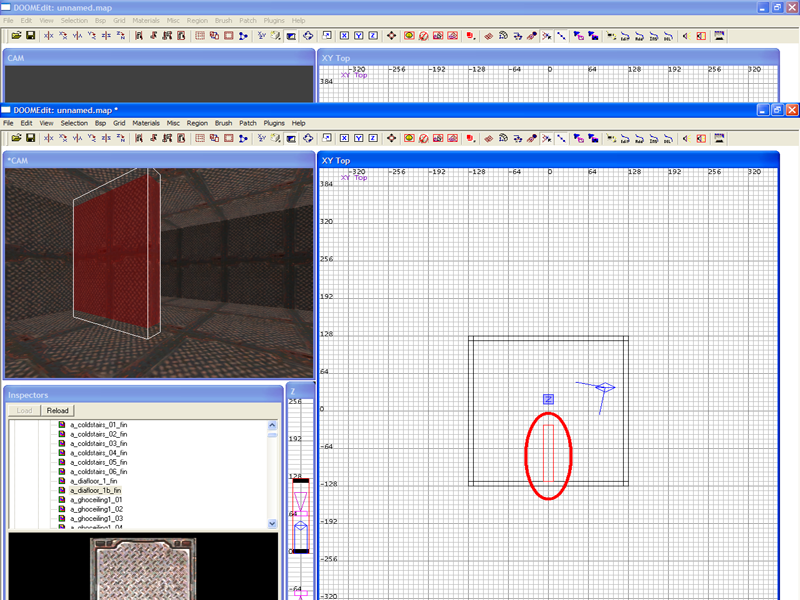
Press the Spacebar to duplicate the wall.
Now click in it and drag it to the other side.
---Make and setup the door.
Press Escape.
Now select a new texture.
I use: Media>Textures>textures>base_door/airdoor
Now draw a box between our two walls.
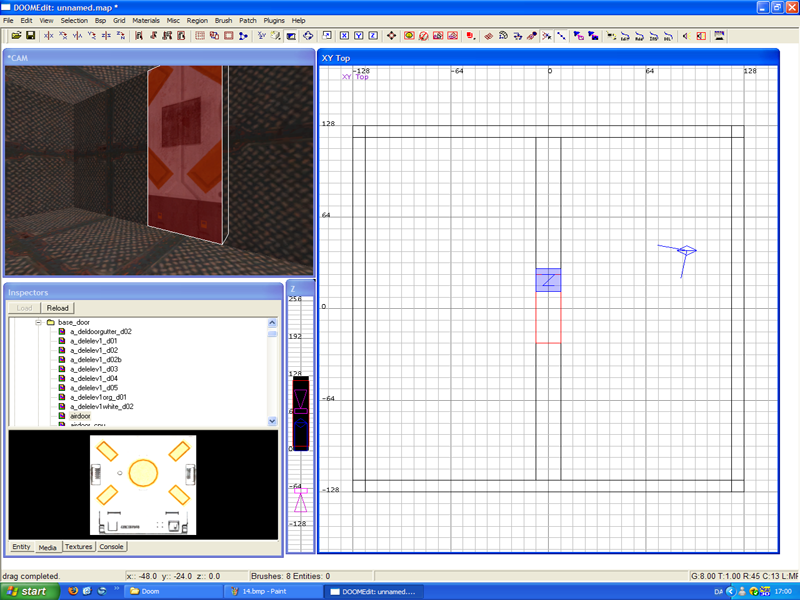
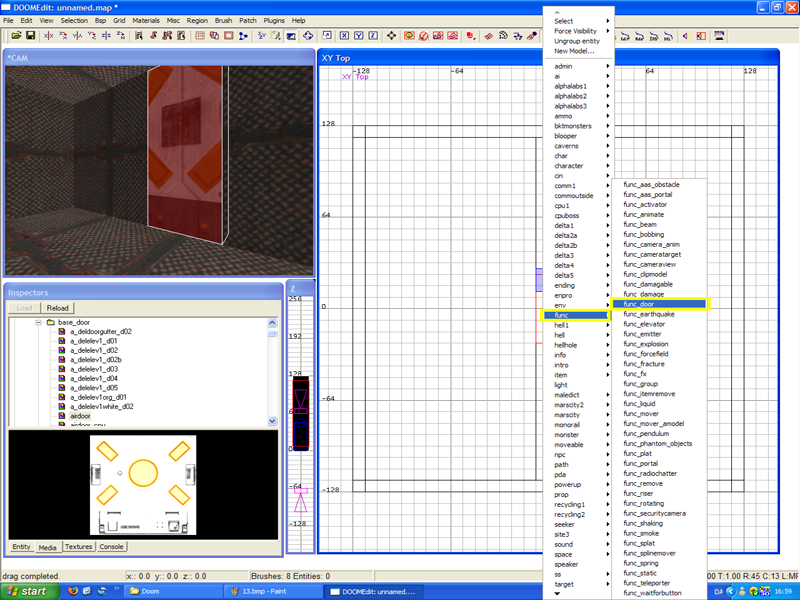
Right-click inside the new box (Our Door) and select.
func>func_door
This will make it a door and name it func_door_1 as default.
Now click on the "Entity" button.
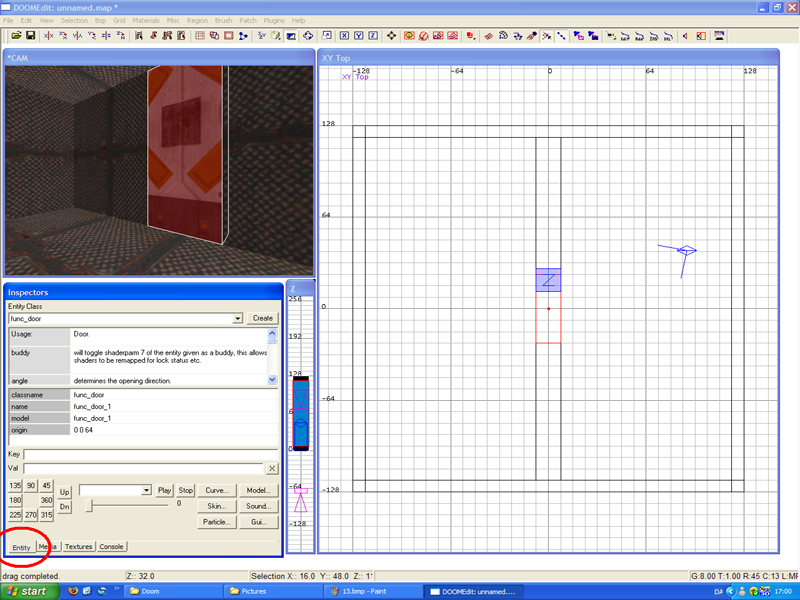
I want my door to move up.
Click on the "Up" button.
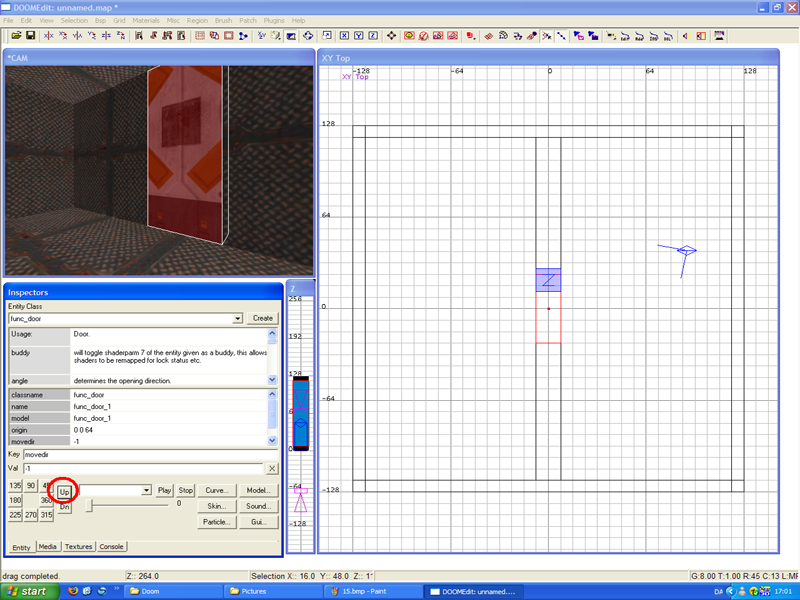
Here is the more tricky part.
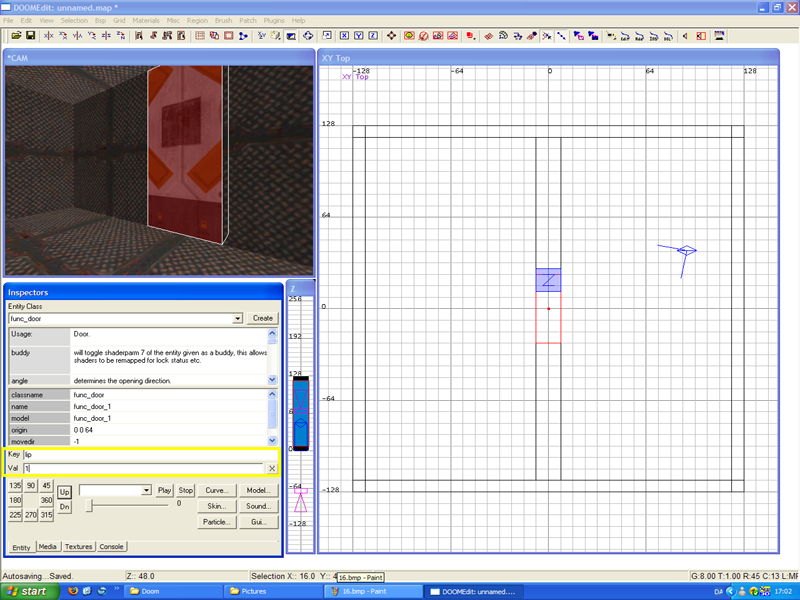
In the "Key" field type: lip
In the "Val" field type: 1
Press Enter.
That will leave 1 unit of the door visible when the door is open.
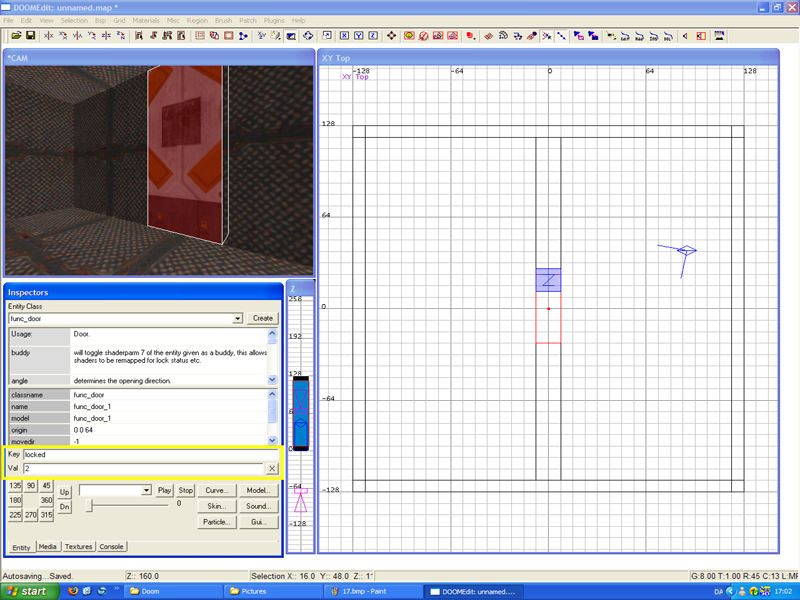
Now in the "Key" field type: locked
In the "Val" field type: 2
Press Enter.
This will lock the door when the maps starts.
If you type 2 the door will not open when it is unlocked.
If you type 1 the door will open when it is unlocked.
---Make the keypad
Press Escape.
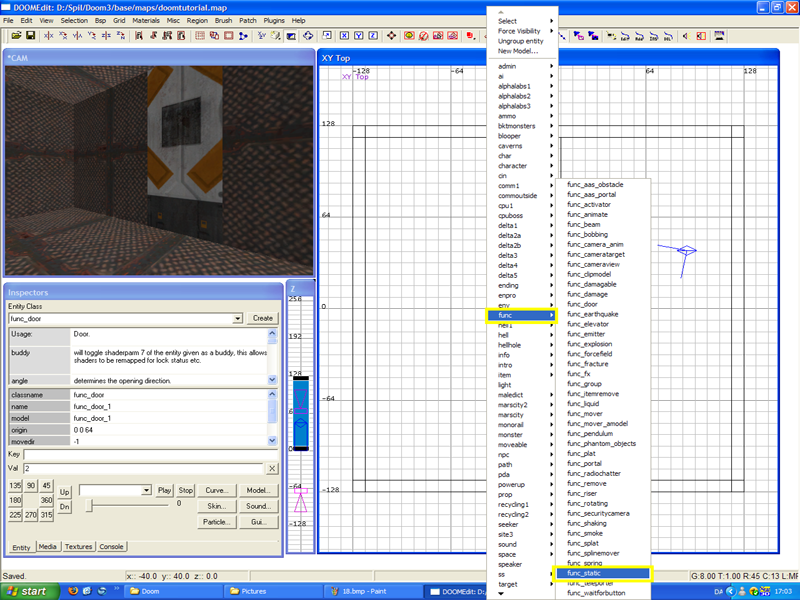
Right anywhere and select: func>func_static
This will create a box.
Goto the "Entity" tab.
Click "Model"

A window will pop up.
Select a (gui)model to use.
I will use: base/models/mapobjects/guiobjects/techdrpanel.lwo
click "OK"
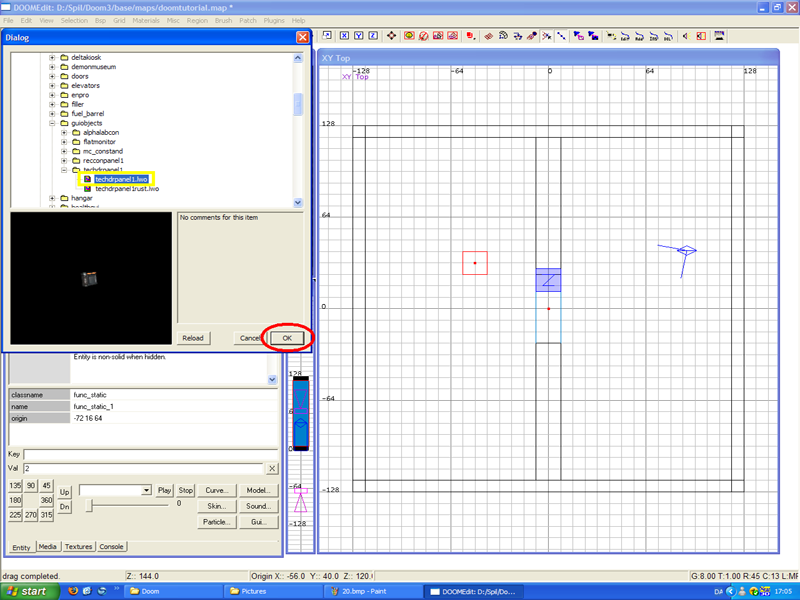
You can see the model in the 3d view and top view.
Note: If you can't see it just press the Spacebar to duplicate the object
then just delete the old one.
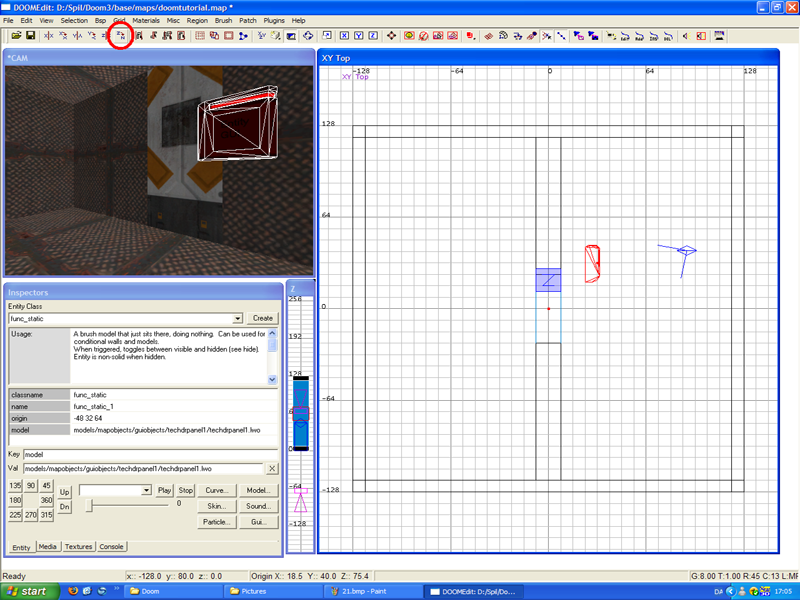
Move the panel into place just like the walls.
Rotate it by pressing the rotate Z button.(See screenshot below)
You can also move it up and down in the "Z" window.
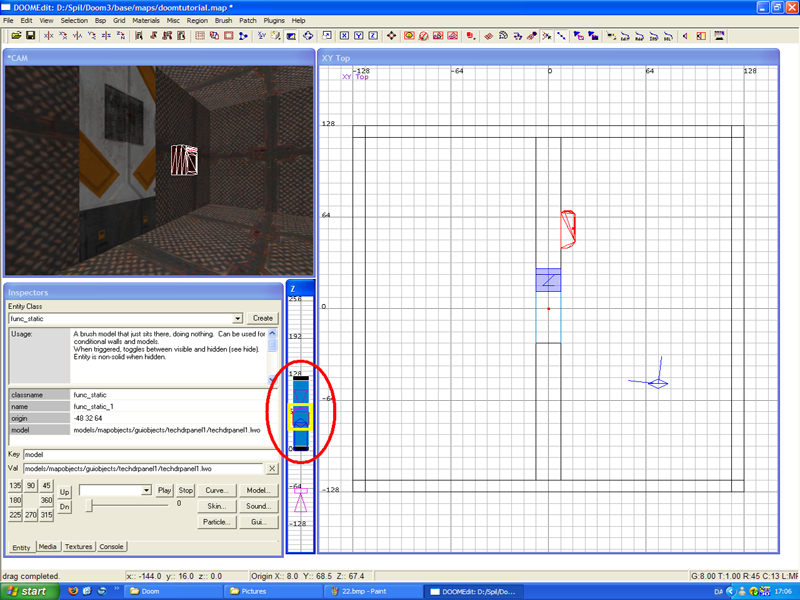
Now click "Gui"
And select the gui you want to use, in this case we will use this:
base/guis/doors/areakeypad.gui
click "OK"
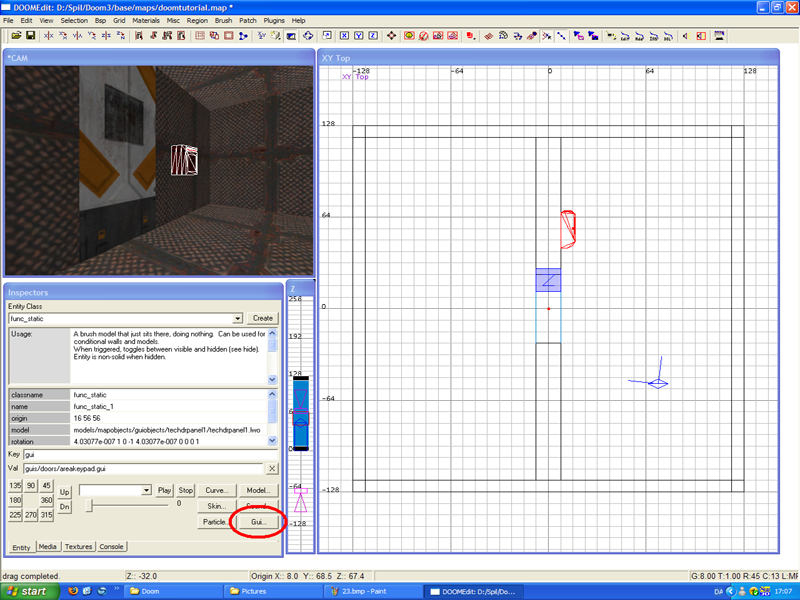
Every gui have some "keys" that will control them. Those "keys" is called "gui_parm1", "gui_parm2", "gui_parm3" etc.
This gui have the "keys" 1 to 4.
1 to 3 is the code for the keypad and 4 is the location name.
So in the "Key" field type: gui_parm1
In the "Val" field type: 2
Press Enter.
In the "Key" field type: gui_parm2
In the "Val" field type: 5
Press Enter.
In the "Key" field type: gui_parm3
In the "Val" field type: 3
Press Enter.
So now the code for the door is 253.
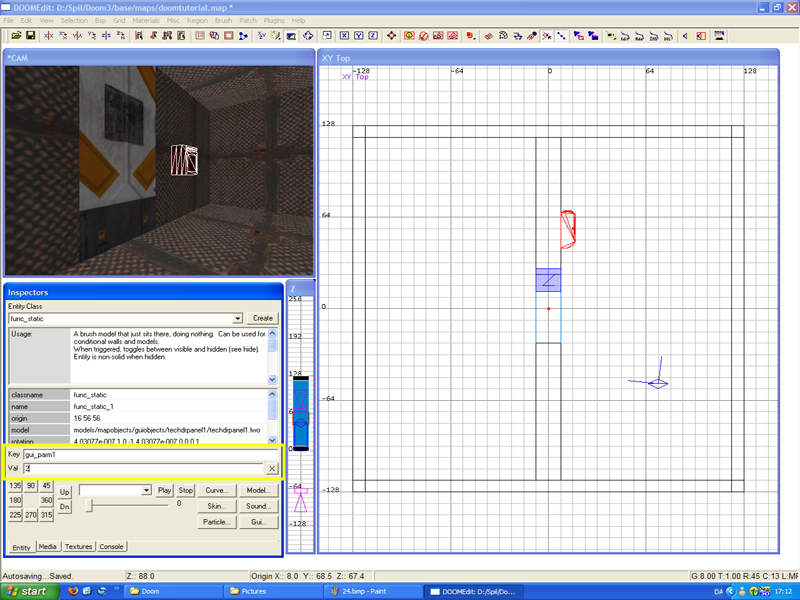
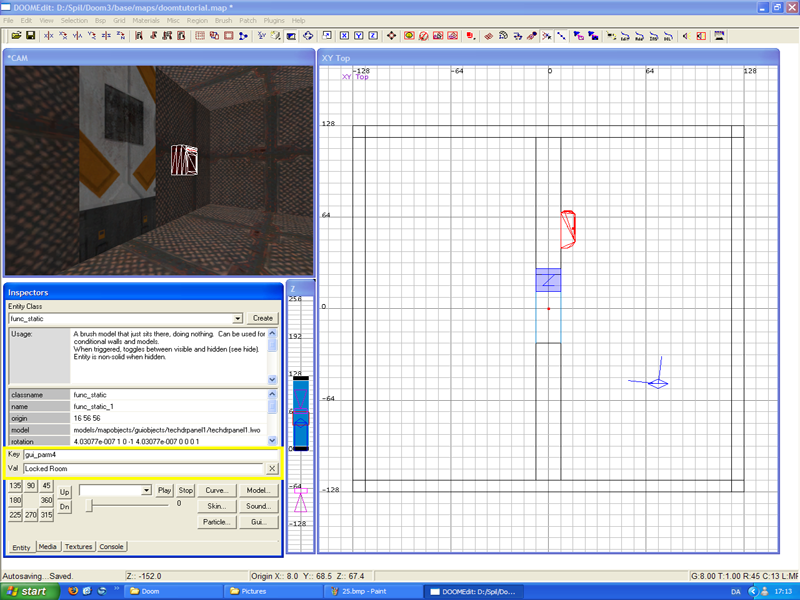
Now in the "Key" field type: gui_parm4
And in the "Val" field type: Locked Room
Press Enter.
Now the keypad will display "Locked Room"
---Link the door to the keypad
This is simple just select the keypad(Hold shift and left-click on it)
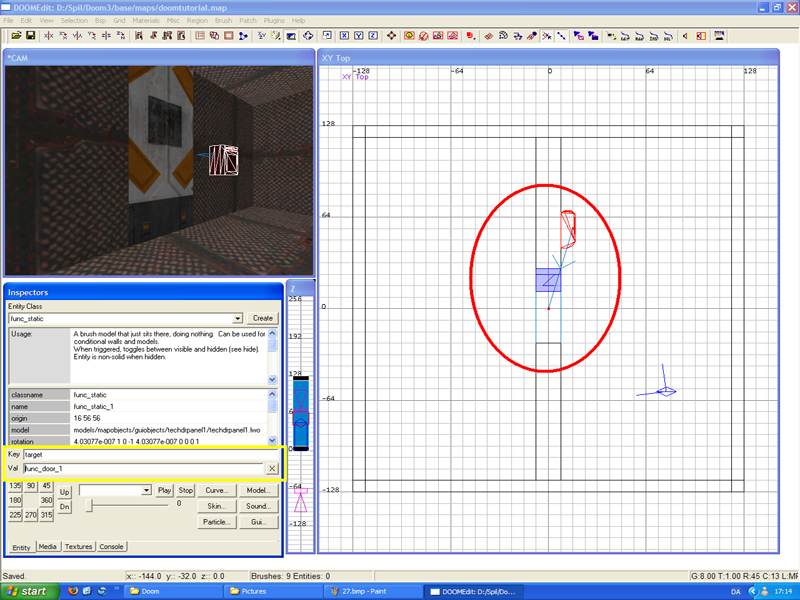
Goto "Entity" and in the "Key" field type: target
In the "Val" field type: func_door_1
Press Enter.
You will see a blue line between the Keypad and the door.
---Light and player
Press Escape.
Right click in one of the rooms.
Select Light.
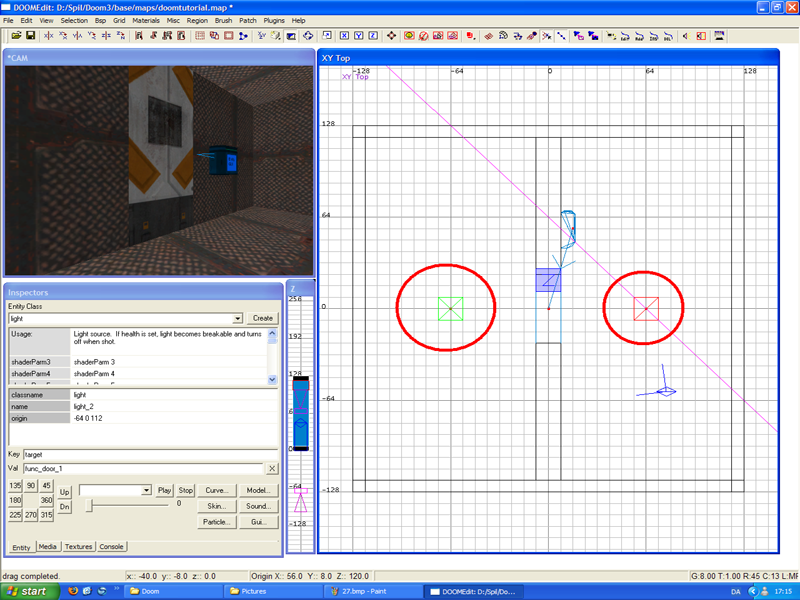
This will create a light move it to where you want it and move it up and down by using the "Z" window.
Press the Spacebar to duplicate it and move the new light to the other room.
Press Escape.
Right-Click in the room with the keypad.
Select: info>info_player_start
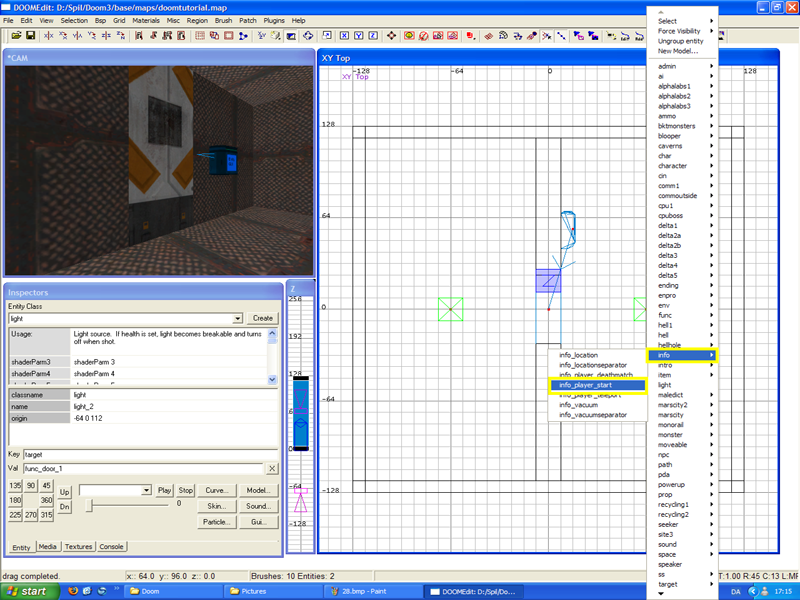
Move the info_player_start down to the floor using the "Z" window.
---Compile
Now lets compile our map for use ingame.
Goto File>Save As.
THIS IS IMPORTENT!
Save the file to you doom3>base>maps folder and give it a name.
I called mine: doomtutorial.
If the maps folder doens't exist just create it.
Now you click "Bsp" and then "bsp"
The map will now compile.
---Testing
Now start Doom 3.
In the main menu press: ctrl + alt + ~
(~ = the button left to 1 on your keyboard)
The console will pop up.
Type: map "the name of the map"
Example: map doomtutorial
Your map will load up and if you done everything right you will have a locked door.
Try to enter the code and your door will unlock.
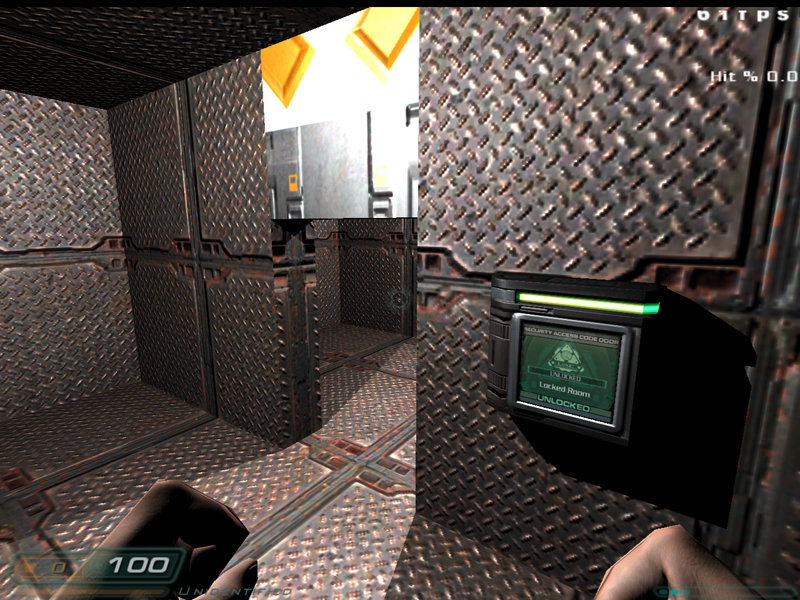
Hope this helped someone out.
In the next tutorial I will cover the making of your own custom PDA.
Please leave a comment.


cool
great work, custom PDA W00T!
Yeah I will make a tutorial on that soon :)
on my map it says every single entitie is leakt!!!!
ty for door tut :)
what to put a pda
i speled wrong. how to put a pda?
Nice tutorial, in fact it is not much different of Quake engines way to add a door so we can "convert" our old knowledge to new engine :)