In this article by Alex Shaw, author of Android 3-0 Animations Beginners Guide, we will build on the tweening techniques we've already learned, and also apply some new techniques that were introduced in Android 3.0.
In this article, we shall:
- Use a ViewFlipper for animating a book-like application
- Use Java to define a new tween animation and apply it to a view
- Use an ObjectAnimator to apply an animation to a view, a bit like a tween
- Use a ValueAnimator to generate values, which we will use for a more complex animation
- Compare the Animator classes to the tween classes.
Note for developers using versions of Android before 3.0 So far, everything we have learned has been backwards-compatible with previous versions of Android. This will hold true for the first part of this article, but not the second. That is to say that ViewFlippers are backwards-compatible with previous versions of Android, but ValueAnimators and ObjectAnimators are new in version 3.0.
At the time of writing (mid-2011), the Android Compatibility Package does not help with this problem.
Turning pages with a ViewFlipper ViewFlipper is a neat little wrapper class for applying a page-turning animation to a set of pages. It makes use of the tween animation classes, and extends them with an XML interface.
The ViewFlipper is actually a subclass of something called a ViewAnimator. Do not get confused! A ViewAnimator is a completely different class to a ValueAnimator or an ObjectAnimator, and they are not interchangeable.
Let's see more.
Time for action – making an interactive book
You have been hired by a children's book publisher to make an interactive book. The book will teach kindergarten children about different sorts of motion by showing them small animations on the pages.
First up, we will use a ViewFlipper widget to make an animated page-turning interface. What better way to learn about a page-turning widget than by using it to make a book? We will also add some simple pages to test the ViewFlipper, which we can add animations to in some later examples.
- Create a new Android project with the following settings:
- Project name: Interactive Book
- Build target: Android 3.0
- Application name: Interactive Book
- Package name: com.packt.animation.interactivebook
- Activity: InteractiveBook
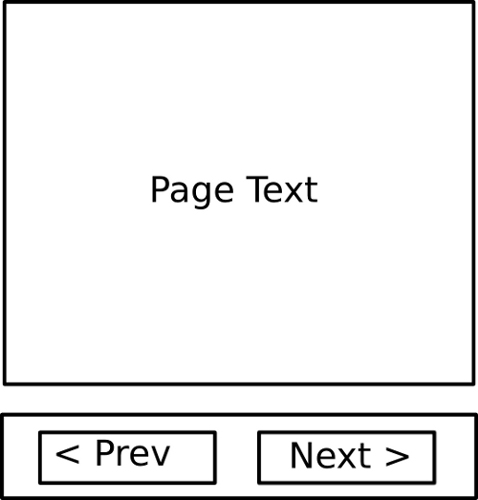
- The first thing we will do is to define a layout for our book. We want it to look a little bit like the following screenshot:
- So let's begin! Open res/layout/main.xml and create the following layout:
<!--?xml version="1.0" encoding="utf-8"?-->
- Here we have set up the layout of the application, but we have not yet added any pages. In XML, the pages of the ViewFlipper are created by adding child layouts to ViewFlipper.
- Firstly, we will want a Drawable, which we can animate. Create a new file in res/drawable called res/drawable/ball.xml and give it the following contents:
<!--?xml version="1.0" encoding="utf-8"?-->
- This is just an ordinary ShapeDrawable; there's no special animation and stuff here! We will just use it as a simple ball graphic while we are writing the book. Later on, we will add animation.
- In main.xml, between the and tags, add the following new elements: I will intersperse the code with pictures, so that you can see what we are adding as we go along. You should add the XML in order, and use the pictures as a quick guide to get what you want? First, take a look at the following screenshot. This should give you an idea of the structure of the page that we are going to make:
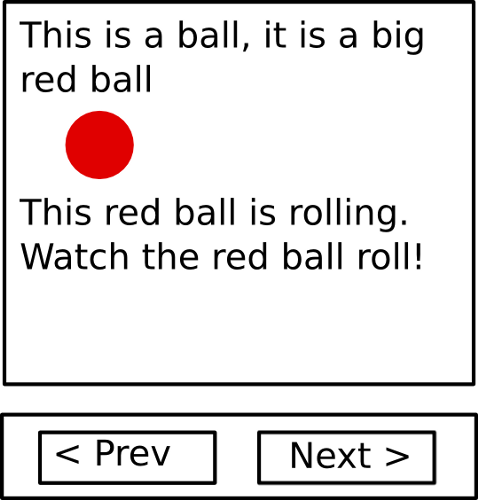
- Looks simple enough? Let's write the layout code for it. Remember that this is going between the and tags.
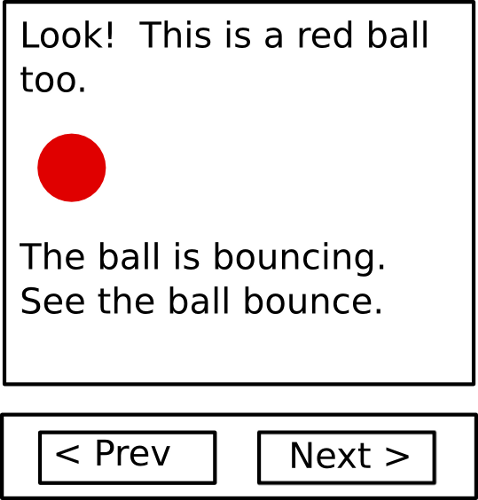
- That was page 1, now let us make page 2. It will be laid out like the next screenshot:
- The layout text that follows should go between the for page 1 and the tag.
- Finally, this is what the last page will look like:

- As you might suppose, the layout that follows goes between page 2 and the tag.
- Our content pages are defined in XML. Our ViewFlipper is going to treat each of the highest-level elements (the LinearLayout and the TextView) as pages in its layout. In this sense, it works exactly as a FrameLayout would work.
- Okay, great. If you ran this now, you would be able to see the first page, but we've still not connected the page-turning buttons. Let's do that now. Open up InteractiveBook.java and add the following import declarations:
import android.view.View; import android.widget.Button; import android.widget.ViewAnimator;
- The last one is the most important. As I mentioned earlier, the ViewFlipper is a subclass of ViewAnimator. Seeing, as we don't need to use any of the methods of the subclass, we are only going to work with its superclass.
- Now, add the following block of code at the end of onCreate().
final ViewAnimator pages = (ViewAnimator) findViewById(R.id.pages); Button prev = (Button) findViewById (R.id.prev); Button next = (Button) findViewById (R.id.next); prev.setOnClickListener(new View.OnClickListener() { public void onClick (View v) { pages.showPrevious(); } }); next.setOnClickListener(new View.OnClickListener() { public void onClick(View v) { pages.showNext(); } });
- Here we can see exactly how to write a page-turning control in a ViewFlipper. Simply call pages.showPrevious() or pages.showNext().
- Build and run your application. You should see that the ViewFlipper turns pages perfectly well now.

- There's something missing from this interactive book—the animation between the pages is not very smooth. In fact, all it does is switch between one page and the next. Let's give it a more natural feel with a page turning animation. In res/anim, create a new XML file called slidein.xml. This will be an ordinary tween animation. We will use this animation to introduce new pages to the screen. Add the following block of code to it:
<!--?xml version="1.0" encoding="utf-8"?-->
- This means that when the user turns a page, the new page comes across from the right-hand side of the screen, as if they were turning pages in a book (sort of).
- Now let's add the opposite effect, by removing the old page from the screen. In res/anim, create another XML file called – you guessed it – slideout.xml. In it, add the following XML:
<!--?xml version="1.0" encoding="utf-8"?-->
- As the pages arrive from the right, they also move off to the left.
- Now we need to add this animation to the ViewFlipper. Open up main.xml again, and add these attributes to our declaration of the ViewFlipper.
- Now build and run the interactive book. You will see that your pages now transition smoothly from one to the next.
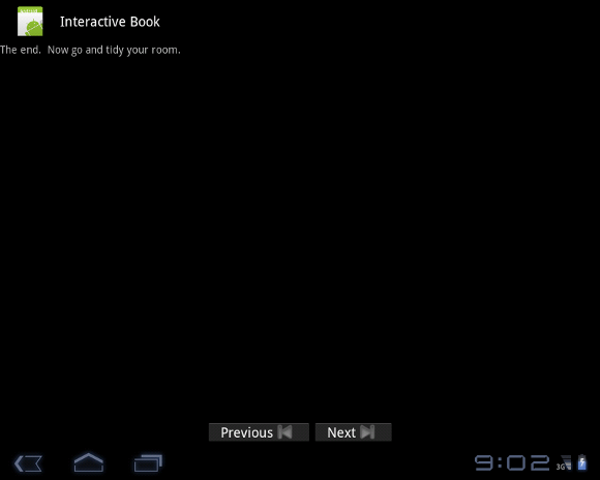
What just happened?
We created a book-like application that displays several pages of information. We created a new ViewFlipper widget and applied a page-turning animation to it to give it a natural, book-like feel.
For convenience, the animations applied to ViewFlipper will apply to every single page that is contained within it. Remember, you do not need to apply an individual tween to each page in your book. Just adding the inAnimation and outAnimation in your ViewFlipper will be sufficient.
(For more resources on Android, see here.)
Have a go hero – improving the ViewFlipper
Think about how you would like to turn pages in a book. Perhaps the motion that we created above could be improved in some way.
Edit the slidein.xml and slideout.xml tween animations, and create a new animation of your own invention.
Creating tween animations in Java So far, all of the tween animations we made have been created in XML, and there is good reason for this. Why should you want to clutter up your logical code with a load of presentation code?
But sometimes you want to create your tweens programmatically, perhaps because they rely on some computed values or it makes sense to describe them computationally.
Whatever the reason, we can use Java to create tween animations just as easily as we can create them in XML.
Time for action – creating a tween in Java
We want to make a new animation to replace slidein.xml. This time, we want our pages to come in from the right, as before, but we will add a scale animation too, to make it look more exciting. It will be as if the page is being pulled from a tall stack of pages, just out of view.
But we're bored of XML. Don't ask me why, perhaps it's because of all those pointy brackets. Give us the round parentheses of Java, we say! We will use the Java equivalent of the XML tags for , , and animations.
- Open up InteractiveBook.java and add the following import lines:
import android.view.animation.Animation; import android.view.animation.AnimationSet; import android.view.animation.ScaleAnimation; import android.view.animation.TranslateAnimation;
- All these classes describe animations like the ones we made use of in XML.
- becomes AnimationSet
- becomes ScaleAnimation
- becomes TranslateAnimation
- 2. Next, let's construct an AnimationSet, into which we can build a compound animation. Navigate to the bottom of the onCreate() method and add the following code:
AnimationSet slideAndScale = new AnimationSet(true);
- This creates an AnimationSet. The Boolean true means that we want a shared interpolator. It's the Java equivalent of writing the following in XML (don't add this to your code!):
- Now to create a translate animation, go into the . Add the following code below our AnimationSet.
TranslateAnimation slide = new TranslateAnimation( Animation.RELATIVE_TO_PARENT, 1f, Animation.RELATIVE_TO_PARENT, 0, Animation.RELATIVE_TO_SELF, 0, Animation.RELATIVE_TO_SELF, 0 );
- The Java constructor for a TranslateAnimation lets you specify the fromX, toX, fromY, and toY components of the translation. The enumeration values are the equivalent of the different value types that you can input in XML.
- The options that you can specify are RELATIVE_TO_PARENT, RELATIVE_TO_SELF, and ABSOLUTE.
- Now to make a scaling animation.
ScaleAnimation scale = new ScaleAnimation( 10, 1, 10, 1 );
- Similar to the TranslateAnimation constructor, the arguments are fromX, toX, fromY, and toY, except that this time they are all floating-point multiplier values.
- 5. Now we add them in to the main
- AnimationSet
as follows:
slideAndScale.addAnimation(slide); slideAndScale.addAnimation(scale);
- Next, we want to specify the duration of the animation. As everything has been already added to the AnimationSet, all we need to do is add the following line:
slideAndScale.setDuration(1000);
- As you probably expect, by now, 1000 is the duration in milliseconds to show the animation.
- This concludes the construction of the AnimationSet. So all we need to do now is to set it as the inAnimation on our ViewFlipper. We've already got access to the ViewFlipper object as pages, so we can simply add this:
pages.setInAnimation(slideAndScale);
- There! Build and run your activity and observe the new animation.
- As you can see, the image now scales as the page is turned.
What just happened?
We've created a new page-turning animation, which is an AnimationSet, containing a ScaleAnimation and a TranslateAnimation. Now the page looks like it is being lifted into view, as it is turned.
We've created tween animations before, but this one was in Java. We have seen that it is possible to create a tween animation in Java that provides the same sort of functionality, which you would expect from a tween animation created in Java. By comparing the source against its equivalent in XML, you can see where the differences lie.
Writing the SlideAndScale animation in Java In Java, we instantiate the AnimationSet, ScaleAnimation, and TranslateAnimation. The animation objects are parameterized in their respective constructors.
We then add the ScaleAnimation and TranslateAnimation to the AnimationSet.
AnimationSet slideAndScale = new AnimationSet(true); TranslateAnimation slide = new TranslateAnimation( Animation.RELATIVE_TO_PARENT, 1f, Animation.RELATIVE_TO_PARENT, 0, Animation.RELATIVE_TO_SELF, 0, Animation.RELATIVE_TO_SELF, 0 ); ScaleAnimation scale = new ScaleAnimation( 10, 1, 10, 1 ); slideAndScale.addAnimation(slide); slideAndScale.addAnimation(scale); slideAndScale.setDuration(1000); Writing the SlideAndScale animation In XML In XML, the tween animation is created by declaring a tag that contains the translate and scale operations as child nodes. The animations are parameterized by giving them attributes.
<!--?xml version="1.0" encoding="utf-8"?--> As you can see, the advantage of the XML version is that it is more clearly laid-out. This is not just a matter of personal taste; by writing each attribute name as you assign it, there is never any ambiguity as to which value you are assigning. Look at the Java version and see if you can remember what order the constructor arguments are constructed in. It's hard, isn't it?
In conclusion, programmatic tween creation should only be used when you can think of a clear advantage.
(For more resources on Android, see here.)
Have a go hero – tweening using Java
Okay, now that we've made a tween that scales and slides in the graphic, have a go at making a similar tween for the outAnimation part of the interactive book.
Look at the code you've already written, and make a new animation in Java with the following properties:
- As the page leaves the screen, it moves to the left
- As the page leaves the screen, it gets larger
Animating with ObjectAnimator ObjectAnimators are the first animations you will learn about, which are new in Android 3.0. Recall that tweens are all about moving views from one place to another, and that they describe different kinds of motion. Unlike tweens, animators work by updating values on an object in a much more programmatic way.
Animators just change numeric parameters on an object that they know nothing about, for instance, translating a view from one place to another. But by applying an animator to the X and Y coordinates of a view, an Animator can be used to perform the same task that a tween would do.
Which one you choose is up to you. Animators give you more flexibility, but they might not be as clear to read.
Time for action – animating the rolling ball
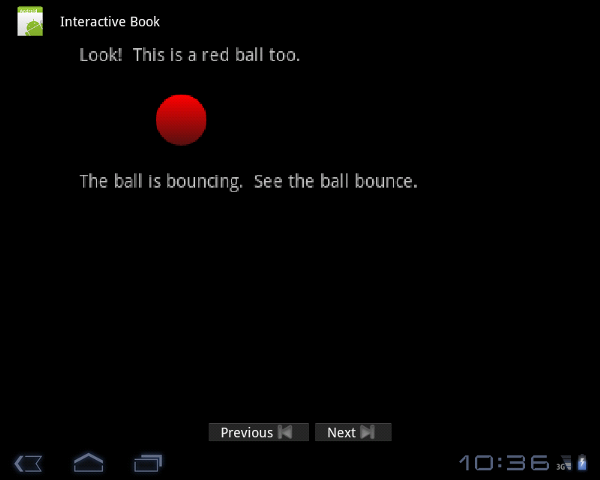
The children's book company has got back to us and they're not happy with the first page of our interactive book. It says that the ball is rolling, but it isn't! We're going to fix this by using an ObjectAnimator to move the ball backwards and forwards across the screen.
- Open up InteractiveBook.java and add a new import declaration: import android.animation.ObjectAnimator; This should come as no surprise! I already told you that we would be using the ObjectAnimator class.
- Next, go to the end of the onCreate() method, and add the following lines:
View rollingBall = findViewById(R.id.rollingball); ObjectAnimator ballRoller = ObjectAnimator.ofFloat( rollingBall, "TranslationX", 0, 400 );
- Underneath the code you just added, add the following.
ballRoller.setDuration(2000); ballRoller.setRepeatMode(ValueAnimator.REVERSE); ballRoller.setRepeatCount(ValueAnimator.INFINITE);
- These terms should look familiar to the XML we wrote in the previous chapter, although the Java form will seem unfamiliar.
- setDuration sets the duration of the animation in milliseconds
- setRepeatMode can be either REPEAT or REVERSE
- setRepeatCount can be an integer number of repeats or (as it is here) INFINITE
- One last line you need to add after all of this, is to tell Android to begin the animation immediately. ballRoller.start();
- And that's it! Couldn't be simpler. Build and run your activity and you will see that the ball on the first page now rolls backwards and forwards.

- This red ball is rolling, because we animated it!
What just happened?
Here we used our first Animator, and it is an ObjectAnimator. The ObjectAnimator provides a simple way to animate a scene by continuously updating a parameter of that scene.
In this article, we have made an interactive animation using the Android ViewFlipper class to make a page-turning interface. We also learned about the ValueAnimator and ObjectAnimator classes, which are new animation techniques in Android 3.0.
Summary In this article, we learnt about the ViewFlipper class, ValueAnimator and the ObjectAnimator classes.
(For more resources on Android, see here.)
-
Android 3.0 Animations: Beginner’s Guide
-
Bring your Android applications to life with stunning animations.