Please note, that this is an early draft of the tutorial, and may be prone to some errors. Please give feedback!
There are a great many people involved in the computer games industry today, each fulfilling an important role in the development of a game, whether it be a triple-A blockbuster with a budget to rival its Hollywood counterparts, a lightweight and efficient application for a mobile device such as a phone, or even a simple flash based game for deployment on the internet. These people may be artists, producing identifiable, and often beautiful characters, environments and objects for use within the game world. They may be audio engineers or musicians, producing sound effects that bring the world to life, musical scores that enthrall and capture the mind, or the voices that we hear that make a story real. They may be managers, overseeing the structure of the project, it's development and it's finances, keeping the team itself operating and from falling apart into chaos. They may be designers or testers, or any number of other supporting staff, who each do their part to keep the project on track and ensure the software develops on schedule and as functional as it should be.
But there is one part of that team that is undeniably more important than any of the others - the software engineer, the programmer or the coder. Whilst each of the former may play a fairly critical role in the development of a game, without the programmer, there can be no game at all. It is the programmer who crafts the software, ties the assets together and makes the game behave in the manner in which it is intended. Without that, all of the art assets, the audio and everything else is useless.
Thus, this tutorial series will help take your first steps into becoming that essential lynch-pin in the development of the computer game - Be the Man (or Woman), and take your first steps into becoming the Games Programmer.
These tutorials are for anyone who wants to begin programming games. They're aimed at the absolute beginner, and should be followed in sequential order. Each will introduce and develop a basic concept that will improve one's skills as a programmer - and will be demonstrated in three different programming languages that are commonly used in the games industry (and other software industries) today; C++, C# and Java (J2SE). The series will later branch off into various specialty forms of programming, touching on development of graphical applications, networking, specific technologies and more. But every person takes the same first baby steps - the simple, console application.
Notably, these tutorials won't teach you everything. The only way to become a competant programmer is to simply write code and learn from doing. You'll want to follow the tutorials to help you grasp core concepts, but go out and write your own code of your own devising, in order to solidify that understanding. Over time, many concepts will become second nature, and things may get less confusing - but there is always more to learn and more to understand; knowing that is the first step in the battle. No matter how experienced you are, you will never know everything there is to know about developing software.
Now let's take a look at what this 'programming' lark is all about...
When we write code, we're essentially writing a series of instructions. In all the code we will write, the computer will follow these instructions sequentially; it follows them in the order in which they are presented. Consider that you may give someone directions to the library from the train station you are currently at; you may tell them to continue down the road until they reach the second left turning, then follow that until they find the library on the right. This is a set of instructions not entirely unlike something you could write as code. It could look something like this;
>IF WE HAVE REACHED THE SECOND ROAD ON THE LEFT
>>TURN LEFT
>IF THE LIBRARY IS ON THE RIGHT
>>WE HAVE ARRIVED
Our instructions aren't infallible - but this is just another part of the software development process. Every programmer will make mistakes, and chances are, the code will not work as intended the first, second or even third or more times around. Sometimes we make small mistakes that are easily corrected, sometimes we make bigger mistakes, through misunderstanding or simply design flaw. Sometimes the software will behave in ways that we didn't originally intend. This is all perfectly normal and not something to necessarily worry about. Programming is an iterative process; we write code, check that it works, and if not, we fix any mistakes we may have made. If it does work as we intended, then fantastic, we can move on to the next task (and there is always a next task).
Unfortunately, actual code doesn't look like this - what we have written is a form of 'pseudocode'; a set of instructions in an easily human readable form that could later be interpreted into functional code. The code we write instead has a number of strict conventions applied to it. We adopt these conventions in the form of a 'programming language', not entirely unlike learning and using a foreign language, but this time around aimed at communicating with your computer.
Unsurprisingly, when you write code in a programming language, you'll be writing an awful lot of algebra. Computers, and subsequently programming languages were invented for this purpose - and you'll find that you'll be making awfully good use of it when programming games too - they are no exception and there's an painful quantity of complex maths involved. Fortunately, we won't be (and don't need to be) worrying about anything like that just yet.
Since the easiest way to learn to program is by doing - let's quickly dispense with all this theory and chit-chat, and get ourselves started right away...
We can write code in practically any text editor, and there exist numerous different compilers that can interpet the code that we write, and turn it into an executable program that we can use and run on the computer. Feel free to explore all your different options, but for the purposes of our exercises, we'll be using versions of the most popular text editors and compilers. These come helpfully packaged with a vast array of tools that we can deploy in order to develop, test and distribute our code - and are commonly referred to as an 'Integrated Development Environment', or IDE.
Our IDEs of choice are Microsoft Visual Studio for C++ and C# (aka MSVC++ / MSVC#), and Eclipse for Java (J2SE aka Java Standard Edition). Although Visual Studio itself is generally quite expensive, we are lucky that Microsoft provides us with cut-down free versions of it's tools, that have all the features that we may need - we'll be wanting Visual C++ Express and Visual C# Express.
So let's get started, and let's download and install our tools.
Microsoft Visual C++ 2008 Express can be downloaded from this address;
Microsoft.com
Microsoft Visual C# 2008 Express can be downloaded from this address;
Microsoft.com
Lastly, Eclipse Galileo can be downloaded from this address;
Eclipse.org
It's important to note that these are the current versions as of writing these tutorials. Newer versions may come out in future that will replace these, but the fundamental concepts of each should be the same.
Now that we've downloaded and installed our tools, let's open them up and see what makes them tick....
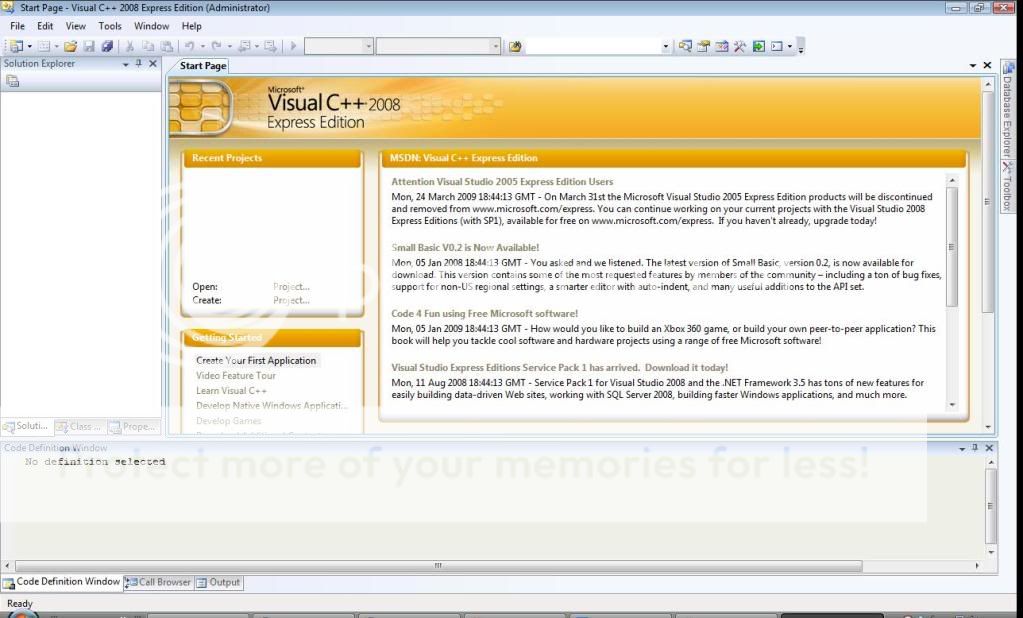
We'll start with the most common programming language in use in games at present - C++. Open up MSVC++ (note that you may need to register it), and you should see a screen that looks somewhat like this:
Close the Start Page, and we'll create our first project. We can do this by simply opening the file menu located in the top left hand corner of the window (just like every other windows application), and choosing New, then Project. We should be faced with a window that looks like this:
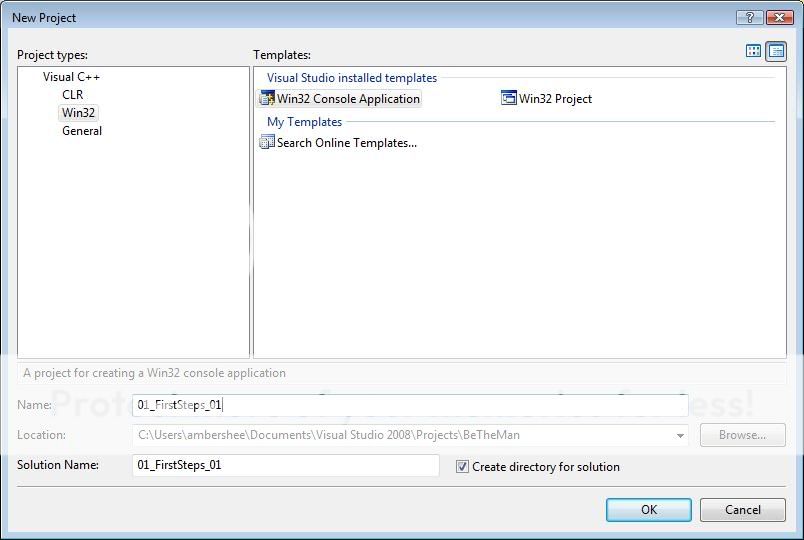
Ensure that you're project type is a Visual C++ Win32 project (left hand side), and that you are using the Win32 Console Application template (right hand side). Name your project (bottom) '01_FirstSteps_01' and press the OK button, then on the next window that pops up, simply press the Finish button. Visual Studio will take care of the rest. We could have easily named our project anything we liked, but for the purposes of organisation, I've have chosen to name the project using the tutorial number, name and exercise number - thus the first 01 is the first tutorial in the series, then it is followed by a descriptive name that you can recognise in Windows Explorer, and finally, this is the first exercise in this tutorial. Keeping your projects organised is certainly helpful - especially when you'll likely later be coming back to and looking at your old code; you'll want to be able to find it.
We're now staring at a blank project in Visual Studio - there's a lot on our screen, so let's try understanding what we're seeing;
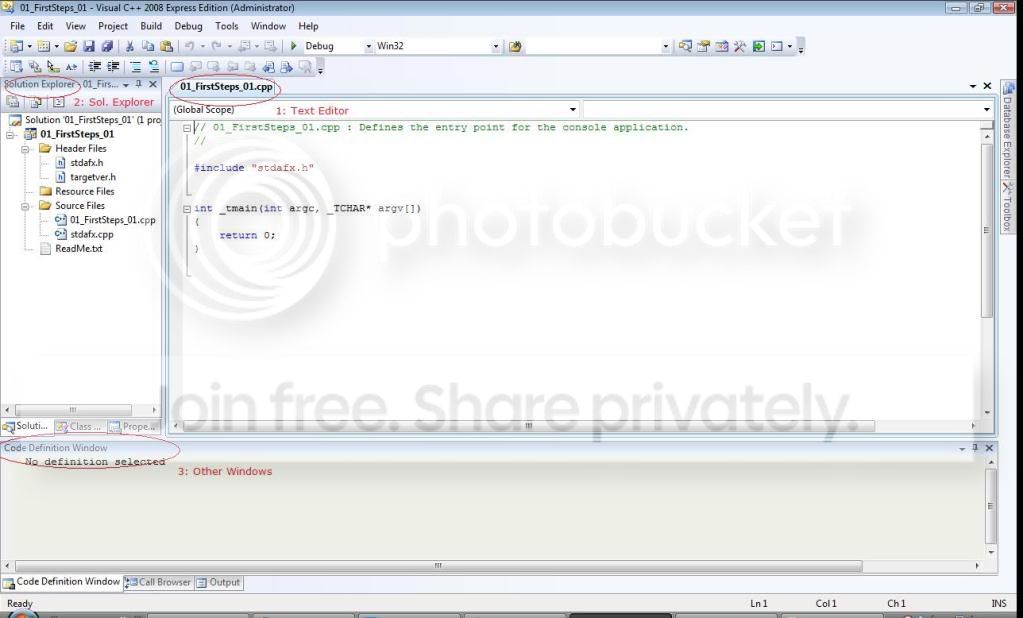
The most important part of the IDE, is the text editor (1). Here we can see the current file we have open; a C++ code file called 01_FirstSteps_01.cpp. It is here that we edit and write our code. Directly left of this is the Solution Explorer (2). We won't be bothering with this just yet, but it allows us to view and organise all of the files in our current project. We can also take a look at the individual Class (our current C++ code file) by using the Class view tab, and the properties of our current project using the properties tab. Neither of these are particularily useful to us right now, so we can merrily ignore them. We'll also see at the bottom (3) a Code Definition Window. Various different windows can appear down here, many of which can be useful. We'll learn more about these as time goes by.
Now, let's write our first program! The same program that, by tradition, every good programmer begins with...
Let's write some code into our text editor, then let's pull it apart and understand it. Fortunately, Visual Studio has already written most of our code for us, so we only have a couple of lines to add in;
//
#include "stdafx.h"
#include <iostream>
using namespace std;
int _tmain(int argc, _TCHAR* argv[])
{
//This writes 'Hello World!' to the screen
cout << "Hello World!" << endl;
//This waits for a keypress before continuing
cin.ignore(cin.rdbuf()->in_avail()+1);
//This ends the current function (main) and closes the program
return 0;
}
The first two lines of code, which should appear in green, are comments. These lines of are completely ignored by the compiler, and can be written into your code to help you, or another programmer, understand what is happening within it. Commenting code is very useful, and it's a good habit to get into. Fortunately, this particular piece of code is pretty simple, so we don't have to worry too much about this. I've added more comments in below to help you. We can add comments by using two forward slashes before a line of text, and that line will be ignored. We can also block out a whole section of text if we need to, using a forward slash and asteris, as shown below;
/* This is also a comment
But this one is a whole block of text!
It's useful when comments don't fit in one line*/
We also have some includes - here we are telling the compiler that we need to look in some other, additional files for it to understand what we have written. Visual Studio has included stdafx.h for us automatically; this is perfectly normal for the vast majority of applications, and it contains a set of fairly common and standard definitions that most people use. We have also elected to include . This is also a file just like stdafx.h, but this one includes input and output functions so that we can write things to the screen, and potentially read input from the user. We'll use this ability later to write our message to the screen. We'll better understand what these are later in this series, but can take them as given for the time being.
We've also decided to use a namespace - std. This is the standard namespace, and it contains a large number of items with unique names. We don't have to include this - but by doing so, when we print our message, we can use a shorter 'local' name for the function we call, instead of a longer 'qualified' name. Note that if we don't use the namespace, we have to specify exactly where we find our functions - the two extracts below are essentially the same thing, using the namespace std, or explicitly calling functions by their fully qualified names;
cout << "Hello World!" << endl;
Finally, we tell the computer to do two things - firstly we tell it to write a message to the screen, and for this we use cout. After that, we tell it the message we want to print, then we end the line and move the cursor onto a new line using endl. We'll look at this, and understand in more detail in a future tutorial. Note that our message is contained between speech marks. This tells the compiler that this is a string; a specific type of data, rather than something else that it may confuse with other code.
We've also got a shifty extra piece of code in there, that's considerably more complicated. Don't worry about what it all means - just know what it does. Without that line of code, when you compile and run your application, you'll see a console window flash very quickly in front of your eyes, and you won't be able to read the text in the display window. This line of code tells the computer to wait for the user to press a key - any key - and then continue with the program. This is handy, as placing it at the end of the code we write, means that the window will sit in front of our face, and let us read what we have output to the screen.
Now it's time to compile our code...
In the menu at the top, we should find a drop-down called Build. From there, we can choose to Build Solution. When we do so, we should see our window at the bottom change to the Output window, and we can see that (hopefully) our code is being interpreted, and compiled by the compiler into a useable application that will run on Windows. When it is finished, it should tell us that it has succeeded. If it hasn't, you may want to go back to the previous page, and check your code matches what has been given, fix it up, then come back and try this again.
========== Build: 1 succeeded, 0 failed, 0 up-to-date, 0 skipped ==========
There's an awful lot more going on behind the scenes than we know about, and we won't touch on it in any huge detail just yet. Our code isn't literally given to the computer, and it doesn't directly get dumped into a runnable program. Instead, our code is interpreted, and turned into something called Object Code, which in turn is linked together by the Linker and subsequently turned into an Executable file - you'll know one when you see one, because it has the file extension '.exe'. We'll look at the compilation process in detail in a later tutorial, but you may read up on it now, if you so wish.
As our code has compiled without error, we can now try to run our new executable. From the top, we should be able to find another drop-down called Debug. From there, we can choose to Start Debugging. This will run our application (and has a whole host of other features we'll talk about in future that help us when things have gone wrong). We should see something like this;

Fantastic, we've written our first program! Press any key, and the window should close and you'll be back in Visual Studio. Save your work and quit. It's time to look at how we'll do this in C#...
We're about to discover that working with C# isn't all that different to working with C++ - in fact we're going to be using an almost identical tool. Start up MSVC#, and you'll once more be faced with a Start Page that you can close. We're going to create a new project again - although this time things are named a little different - but don't worry, they're still the same. You want to be sure the type of project is a Visual C# project, and you want to create a Console Application. Name your project 01_FirstSteps_02 and press the OK button. We're now faced with a blank C# project, and it's not entirely unlike our blank C++ project;

There are a few differences - the Solution Explorer has jumped to the right hand side, and there's a Toolbox on the left. We can ignore the Toolbox for now. Our window at the bottom is now, by default, the Error List. This actually also exists in MSVC++ too - it's just not enabled by default and we did not use it before, as we did not make any mistakes. We have also been given some slightly different code to work with - but this should be expected! This is a different programming language.
The most important difference we'll observe in C#, is that it is tied to the .NET framework, allowing us a broad range of functions at our disposal. C++ .NET also exists, and is very similar to C# .NET in that the functions all have the same names, and all work the same way. We won't be using C++ .NET, but feel free to look into it if you are interested.
Now let's write the previous program, this time, the C# way;
using System.Collections.Generic;
using System.Linq;
using System.Text;
namespace _01_FirstSteps_02
{
class Program
{
static void Main(string[] args)
{
Console.WriteLine("Hello World!");
Console.ReadLine();
}
}
}
The first thing you'll notice, is that we did not need to include any additional files. This is all handled for us by the .NET framework - which already has input and output functions within it (WriteLine / ReadLine). It's also created a namespace, and a class for us. Note that the Main function also exists in C#, but in this instance, it does not return 0 - it does not return anything and instead will end when the code reaches the curly bracket. This is simply a matter of differences in convention, and has no real effect on the program itself.
Instead of using cout, we now have access to a specific function of the Console - we can use Console.WriteLine to output the same string. We've also used Console.ReadLine, which will wait for the user to press the enter (return) key to prevent our window from disappearing instead of the more complex technique we used in C++. Nothing here is admittedly, very different from what we saw before, and the end product is exactly the same.
Try building and debugging your C# code, in the same manner as you did with the C++ code. Note that when building, you'll simply see 'build succeeded' at the bottom of the screen instead of the whole output window (this can be enabled by choosing the View drop-down, then selecting Output).
Our application looks exactly the same as before;
Excellent, we've now seen C#. Save your project and quit Visual Studio, and let's move on to trying some Java...
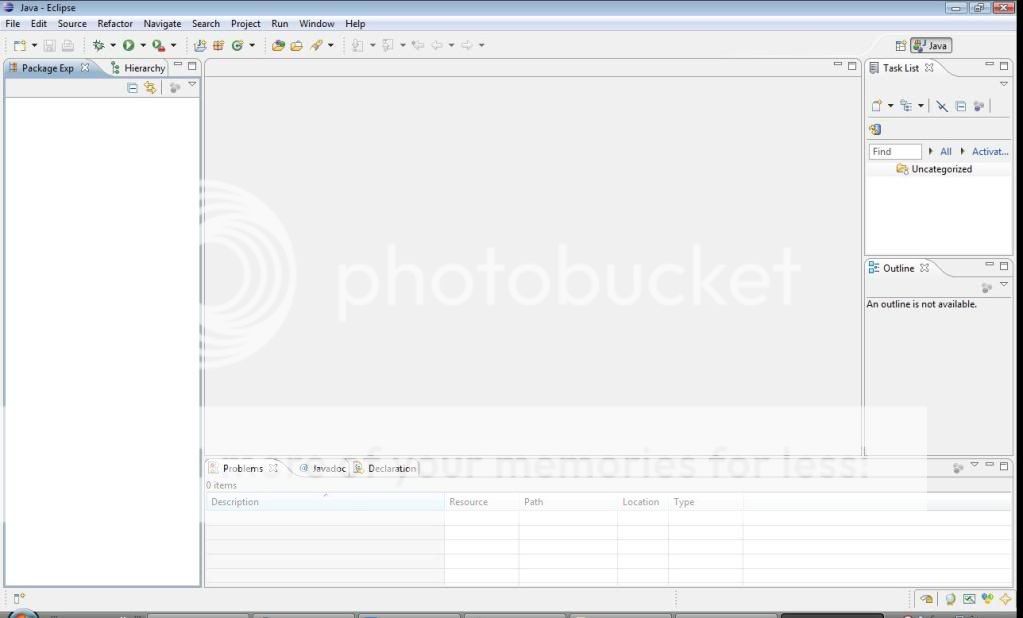
Eclipse is a little different to Visual Studio, and you've probably just had to unzip it somewhere. You can launch Eclipse by starting Eclipse.exe. You may want to create a shortcut and place it somewhere handy, instead of having to go to your install directory every time you want to use it - we'll be using it a lot. When you run it, give it somewhere to create it's workspace (where it stores it's project files), and let it load. You should be faced with the following screen;
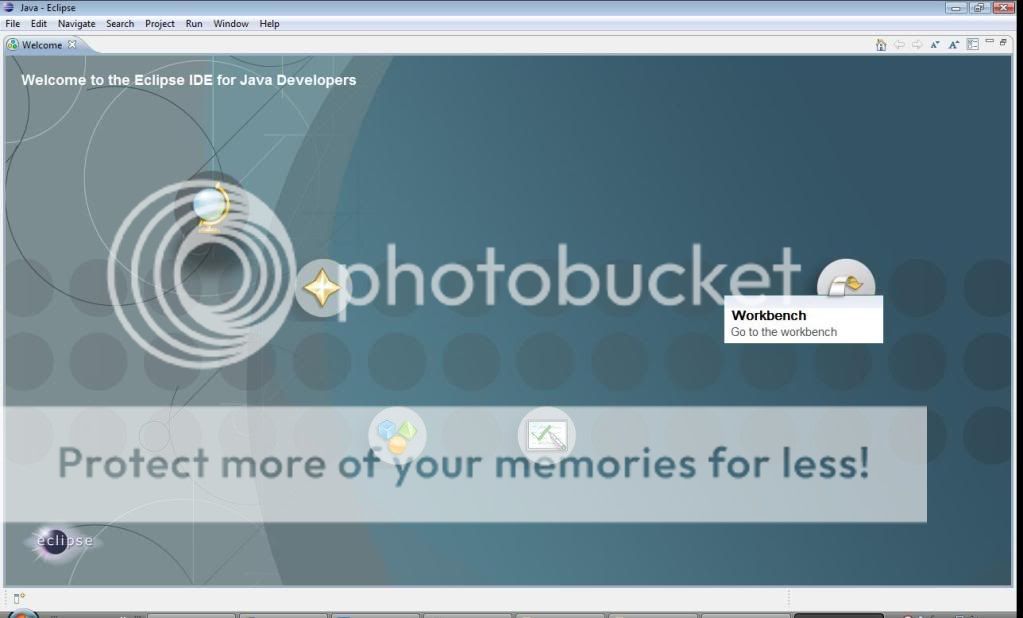
This is similar to Visual Studio's start up screens. It handily also has a series of tutorials you can choose to follow if you so desired, as well as having samples you can look at, and documentation you can read. We'll however, be going straight to the Workbench. Click the Workbench icon on the far right. We're now faced with the IDE - and it's not dissimilar to Visual Studio.
We'll go to the File menu once more, and create a New Java Project. We'll name our new project 01_FirstSteps_03, and not worry about any of the other settings. Press the Finish button, and Eclipse will create a new Java project for you.

Unlike Visual Studio, we have not been faced with a code file, ready for use to write into, and compile. Instead, we'll need to go back into the File menu, and we'll want to create a new Class. Name the class FirstSteps_3 (Java class names cannot begin with a number in Eclipse), and ensure you check the box further down that will create the public static void Main() function for you. When you're done, press the Finish button.

We should now be faced with a text editor window that looks a little like the ones we've seen in Visual Studio. The code is also very similar, but this time we do not need to include any other additional files. You might also notice that in this automatically generated code, Eclipse has chosen to put the curly bracket that opens a section of code on the same line as the class and Main functions. This is a matter of convention, and is also completely acceptable in both C++ and C#. I personally prefer to keep all my curly brackets on new lines, as I believe this makes it much more readable. I would also suggest you stick to the same conventions as in your C++ and C# programs to keep things healthily standardised. Let's now write in our new code;
{
public static void main(String[] args)
{
System.out.println("Hello World");
}
}
Just like before, we're calling a function to write our message to the screen. This time around, we're using the System.out.println function; the print line function that is located in the system output functions. This works in very much the same manner as cout, and Console.WriteLine. This time around, we have not included an additional line to keep the console window open, for reasons that will soon become apparent.
Now this is where things get a little more different in Eclipse. We do not need to build our code this time around, as by default, Eclipse will automatically try to build you code when you try to debug it. Instead, we can choose the Run drop-down and find the Debug (or Debug Last Launched) option.
If you were expecting to see a console window pop up - be disappointed, you're not going to see one. Instead, you'll find that there is a console window at the bottom of the IDE, where the Error window is by default in C#, and where the Code Definition window was in C++. It is down here that we should see our message printed.

And that's it - your first C++, C# and Java programs. Whilst we haven't learnt a great deal of programming in this tutorial, we have got ourselves a little familiar with some new tools. In the next tutorial, we'll start some proper programming, by looking at doing some simple algebra.
Happy Programming!

Prehaps on page 5 use cin.get(); instead of that long line. It has a very similar effect (waits for enter key to be pressed) before letting the program continue.
It's far less intimidating on newbies =]
Yeah, I could probably do that. Out of habit, I usually do use the more complex 'any keypress'. It's just what I learnt when I first started programming.
I love articles like this! Keep it up.
This looks like it will shape up into a nice series for tutorials.
At the moment I'm a mapper and modeller but I would like to learn how to program for games.
So thanks for the tuts and good luck.
From the land of managed game programming, you should start out by teaching C#. It's easy to pick up, and XNA is extremely easy to use in comparison with SDL and Allegro for new game programmers. I'll make managed game programming popular even if it kills me!
The aim here, is instead of introducing only one way of doing things, is to go for a broader perspective from the start. Whilst I'm running the risk of confusing people with multiple languages, I'm hoping that an approach that covers the different perspectives from the beginning shouldn't work out that way; all three languages are fundamentally very similar (and in the case of the next tutorial (variables, operators, arithmetic), practically identical...), they're almost identical. Where they'll diverge, comes a little bit later - but it's not a bad selection - where C# is managed, unmanaged C++ is the main industry standard - and then Java and Eclipse is a whole different perspective all together, and still widely used.
thanks for the feedback :)
Yeah, great tutorials! I just had to add my two cents in because I believe managed code game programming has it's place in the market. (Xbox live arcade for one)
Managed? Blech!
Native please.
OMG WIN! Thank you so much for this article, this is exactly what I need right now!
I love where your going with this, but as a intermediate C# programmer, I don't think I quite fit this article. Yet, I'm sure by the middle of this series I'll be thanking you so much for providing me with such great information. By the way, I think it's funny how the differences in length of the different languages vary so much. I think C# is just perfect where it stands on length and complexity.
umm can you go any further with this in c++ because the basics is easy enough i want to go to the next step after classes and functions
The series will go further, but it will take a lot of time. A simple tutorial like this takes around four to five hours to prepare and to write, and there's a lot of ground to cover in the mean time.
for the csharp code, you only need "using System;" :3 the rest is not used and can be left out :)
You can do that, but I just left in what was automatically generated by Visual Studio.
ah like that :3 well you could do that to, i prefer to only have the usings in there when i actualy use them xP
general comment tho: i saw you liked the complex solutions more (out of habbit) but this is a beginners tutorial :p so i would advise not to use those solutions and keep it simple xP (but i think your well aware of that)
Hey, Awesome Work :D.
I know that you said making these tuts is a time consuming process but is there any laid out timeline for there release. Eg Once a month or so forth.
Thanks for the awesome tut
It's literally a case of when I can do it. I'm aiming for one a week or so, but whether I stick to that schedule is another matter - the next tutorial for example is quite a long one, since it covers a fairly broad spectra (variables, operators, input and arithmetic.)
Sweet cant wait.
Thanks for the reply.
I don't see a point of another hello world tutorial, there are thousands of them on internet. I advise you to talk more about structure of modern game code, rather than general programming introduction. Like how do you get camera working, models showing up, animations playing, some intro into shaders and don't try to cover each and every topic completely but point to learning resources instead.
The point is that this is a series of tutorials; not and individual tutorial. It's aimed to start at the absolute beginning and specifically is not aimed at any specific API - and couldn't really be given that it covers three different languages. The purpose is to do something that other tutorials do not do - and that's cover an object orientated approach, and multiple languages from the absolute beginning. The series will then later branch into more specific topics; one of which is being written simultaneously and considers game scripting in Unreal Tournament 3. Other branches will later cover mathematics and rendering, and another both OpenGL and DirectX simultaneously.
edit: ignore me, missed a step :P thanks for this
Now that I've done it and got it working, are you still planning on released more parts? I know it takes work, but you said you planned for a week and it's a month later. I'm having a helluva time learning how to really get started.. All I can find are articles like this that overview the basic codes and give a basic idea, but nothing more advanced. That and people offering to tell you how for cash. So yeah, are you planning on releasing more? or does anyone have a good site I can check out that's on this tutorials level of knowledge, to learn the next steps? Thanks
I do plan on releasing more - although I have actually been extremely busy over the past few weeks or so (and have also had to replace one machine due to a raid 0 failure). I've revised a large part of the original unreal programming tutorial series that I also have (which aims to be incorporated as an extension of this series in future), but I haven't been able to get back up to speed with this series yet.
The next tutorial is an incredibly long one and has taken an awful lot of time to get it as complete as it presently is. I may have to split it into multiple tutorials, although I really did want to get the content into a single tutorial as it is all related. It's presently effectively a heavy book chapter.
I guess this died out or something?
Thanks! What's next?
I enjoyed the freak out of this. Though I noticed you didn't have any more of the series posted in your tutotials section. Probably busy, but I'll pretend to rage anyway.