View my original article here
This tutorial will instruct you as a moddeler to create cell shaded models. It does not, however cover the modeling process.
NOTE: THIS TUTORIAL WAS MADE FOR 3DS MAX 8 / 2008….HOWEVER IT SHOULD WORK WITH ANY PROGRAM THAT SUPPORTS THE SAME FUNCTIONS.
POLYCOUNT WARNING! THIS TECHNIQUE WILL LIKELY BOOST YOUR POLYCOUNT THROUGH THE ROOF…SO WHILE IT CAN BE USED ON WEAPONS AS WELL…IT IS NOT ADVISED.
I originally developed this tutorial for use with the Software Development Kit used to make new models for the Jedi Academy game. However this technique can still work for other game engines and
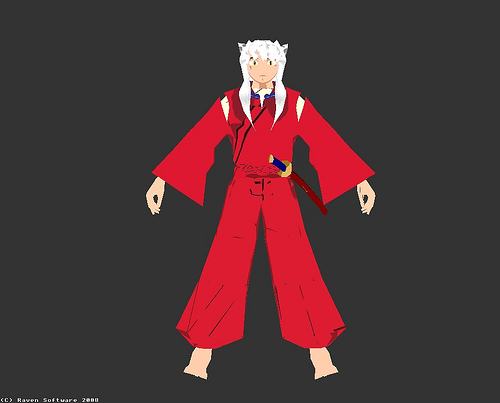
STEP 1: The model Cell shading does not merely involve a shader file…in order to create the thick outline seen on cell shaded models…you will need to modify the model it’s self. I will be using my InuYasha model as an example throughout this tutorial. We will be changing him from this:
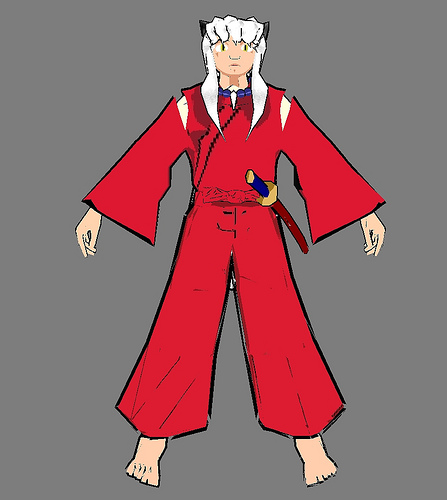
Into this:
Notice the black outline? … That’s what we need to make. Lets assume you already have your model segmented properly…(in case you don’t)…you can do this even if you don’t have it ready but its a lot easy this way. I’m going to take a segment of my model and only work with it to avoid confusion.
(Take note that we won’t outline the eyes or eyelids…as this isn’t needed and looks rather odd)…Also you should go ahead and create a solid black texture image the same proportion as your other textures… (256 x 256 or 512 x 512 works nicely)…this will be used to color your outline…naturally you could always use a different color if you wanted to be fancy…but I don’t personally like the idea.
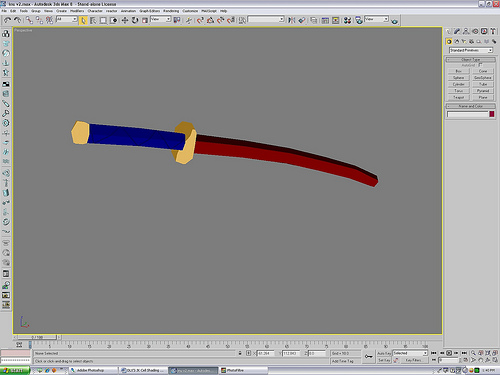
Ok…I’ve chosen to work with the sword on his hip first…this is nothing more than the swords model…make sure you have it selected…if it helps hide everything but the part your working with as I did here….(right-click - hide unselected in max)….once its selected…do the following:
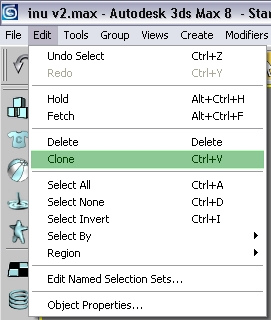
Go to EDIT > Clone
Or just select it and hit Ctrl + V
DO NOT MOVE THE CLONE FROM IT’S LOCATION OR DO ANYTHING TO IT YET!
Now you shouldn’t see much of a difference…make sure the clone is selected….go ahead and rename it “_outline” based on what part of the model it is… for example: “hips_sword_outline” later when linking the model be sure to link it to the part it’s an outline of….in this case “hips_sword”
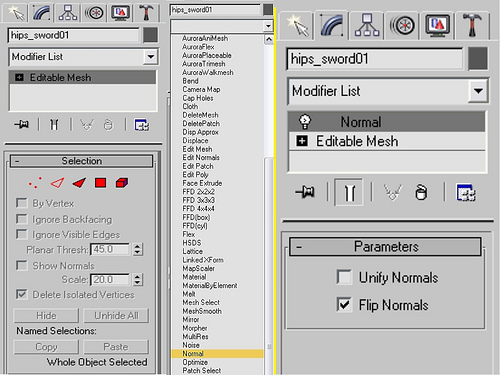
Now that you have selected the clone…you need to add a normals modifier on it..
Make sure that the flip normals box is checked…
Go ahead and apply the outline texture to the outline model…even if you haven’t textured anything else…it makes it easier to see how thick we are making the outline later…
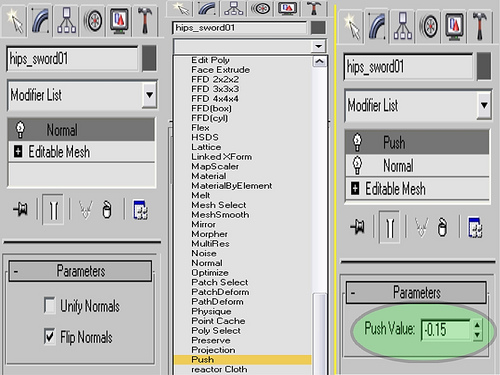
Now…we add a push modifier to the outline as well…
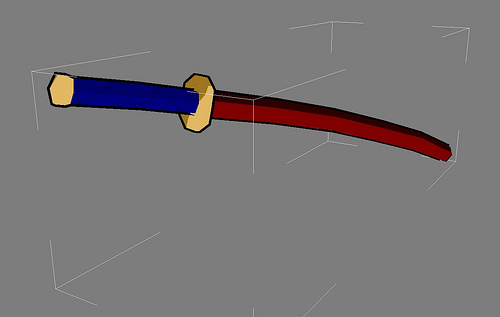
Set the push value for about -0.14 or -0.15 should give a decent outline…feel free to experiment…however it needs to be a negative value for the line to stick out…It should look somewhat like this now….
And that’s it for the model…when you weight it…you can just copy and paste the finished weights from the object…to its outline.
STEP 2: SKINNING Ok this will be short, sweet, and to the point…cell shaded models do not need to have a ton of detail…not to say you cant put detail…but try to stay simple…not MS Paint simple mind you.
The shadows you see on my model…are part of the texture…to do this...simply take the color you used…darken it…and skin part of the area with it based on how you think shadows would cast on it…
See I said it would be simple.
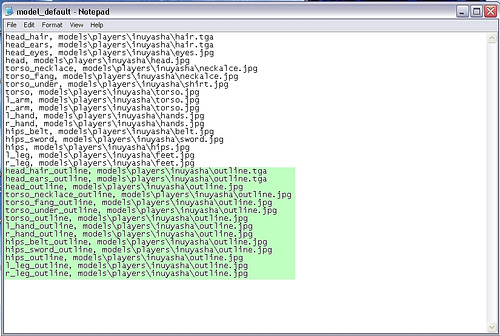
STEP 3: .SKIN FILES (these only apply when using the tutorial to work for Jedi Academy's Engine, for max search "For MAX") Now here comes the not so fun part…as with every other part of your model the outlines must be setup within your .skin file…not so hard…just time consuming…..to put it simple….you should end up with something along these lines…(I highlighted all the rows for the outlines).
STEP 4: SHADERS Ok…now this is the final step…you have to create a shader file…first you will want a shade image…I used something like this on InuYasha…
Now open ShaderEd2….
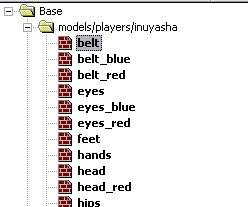
In it…add all your texture files....
Now…you will need to repeat the following process on all your textures…
Select the texture..
And open its shader by double clicking on it….
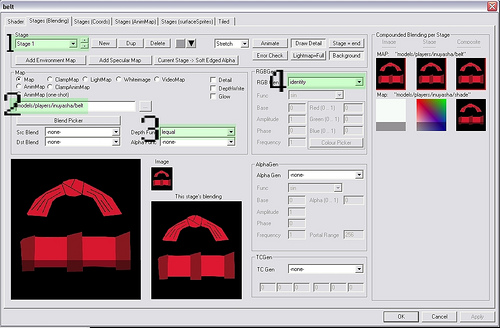
1.Create a new stage
2.select the texture file for the object
3.set Depth Func to “lequal”
4.set RGB Gen to “identity”
The Error Check will likely flash throughout this just ignore it…as it will stop once you have done all four steps…
Now for part 2.
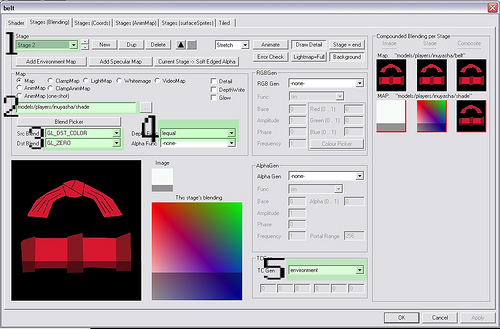
Again the Error check will freak out and start flashing…but once you have done the steps it will stop.
1.Create a 2nd stage
2. select the shade texture
3.set Src Blend to GL_DST_COLOR and Dst Blend to GL_ZERO
4.set Depth Func to lequal
5. set TC Gen to environment
Repeat this for each texture and VIOLA! Your done…and you have a nice cell shaded model to boot!
For MAX
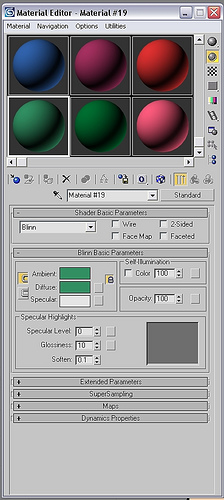
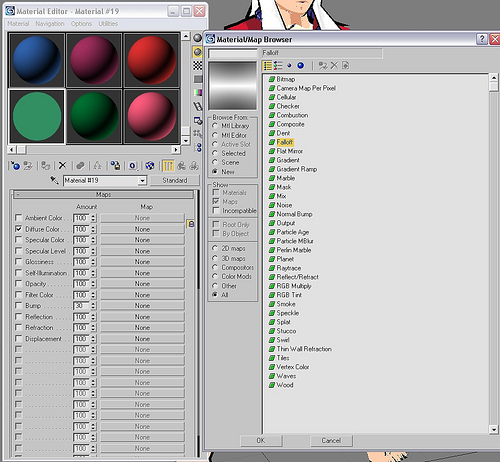
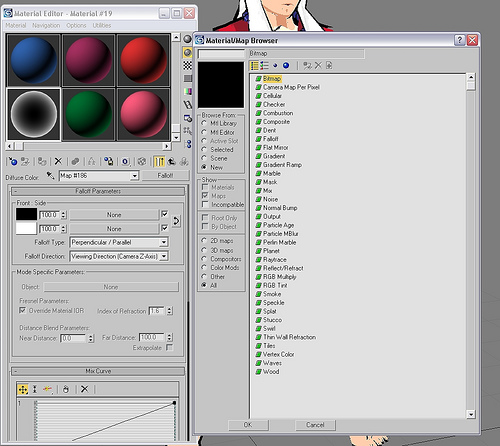
if you want to see in 3ds max they way the shader effects it....when your making a material set the diffuse map as a falloff...and the self illumination to 100...then in the falloff menu...make the white texture your texture file....dont do this on the outline though.
just select bitmap..and then your texture.
